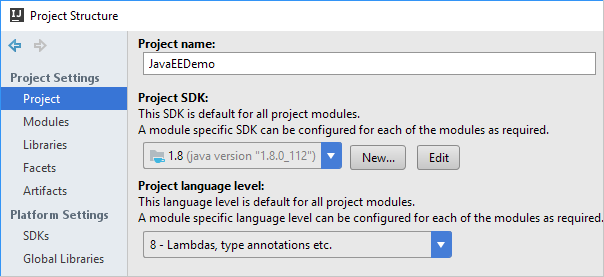
Project Page

Specify the project name, SDK, language level, and the compiler output path.
| Item | Description |
|---|---|
| Project name | Use this field to edit the project name. |
| Project SDK | Select the project SDK. If the desired SDK is not present in the list, click New and select the necessary SDK type. Then, in the dialog that opens, select the SDK home directory and click OK. To view or edit the name and contents of the selected SDK, click Edit. (The SDK page will open.) |
| Project language level | Select the Java language level to be supported. The selected level will be used as the project default. The available options correspond to JDK versions:
An individual language level may be set for any of your modules. Note that if the target level is not explicitly defined (the compiler option Thus, if |
| Project compiler output | Specify the path to the directory in which IntelliJ IDEA will store the compilation results. Click Two subdirectories in the specified directory will be created: In these subdirectories, individual output directories will be created for each of your modules. The output paths may be redefined at the module level. |