Working with Grails Plugins
This feature is supported in the Ultimate edition only.
You can extend the functionality of your Grails application with the Grails plugins downloaded from the Grails repository. Once downloaded, the plugins reside under the plugins directory of your Grails application. Each plugin has the same directory structure as the entire Grails application. The source directories of the installed plugins are included in the source routes and are marked in the module tree view with the ![]() icon.
icon.
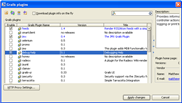
For the sake of better communication with the Grails repository, IntelliJ IDEA provides the plugin manager that enables viewing, installing and uninstalling plugins.
For Grails versions 2.3.0 and later, refer to the Grails documentation.
To open the Grails plugin manager, do one of the following
To view the available plugins
To install or uninstall Grails plugins
- Open the Grails plugin manager. In the Enable column, select the check boxes of the plugins to be installed, and clear the check boxes of the plugins to be uninstalled. Then click Apply Changes.
- In the Install/Uninstall Grails plugins dialog box, review the list of plugins. If necessary, select the plugin version. Click OK.

