Encoding
To display and edit files correctly, WebStorm needs to know which encoding to use. Source code files are usually encoded in UTF-8. This is the recommended encoding unless you have other requirements.
To determine the encoding of a file, WebStorm uses the following steps:
If the byte order mark (BOM) is present, WebStorm will use the corresponding Unicode encoding regardless of all other settings. For more information, refer to Byte order mark.
If the file declares the encoding explicitly, WebStorm will use the specified encoding. For example, this can apply to XML or HTML files. The explicit declaration also overrides all other settings, but you can change it in the editor.
If there is no BOM and no explicit encoding declaration in the file, WebStorm will use the encoding configured for the file or directory in the file encoding settings. If encoding is not configured for the file or directory, WebStorm will use the encoding of the parent directory. If the parent directory encoding is also not configured, WebStorm will fall back to the Project Encoding, and if there is no project, to Global Encoding.
Change encoding of a file that contains explicit encoding
Open the desired file in the editor.
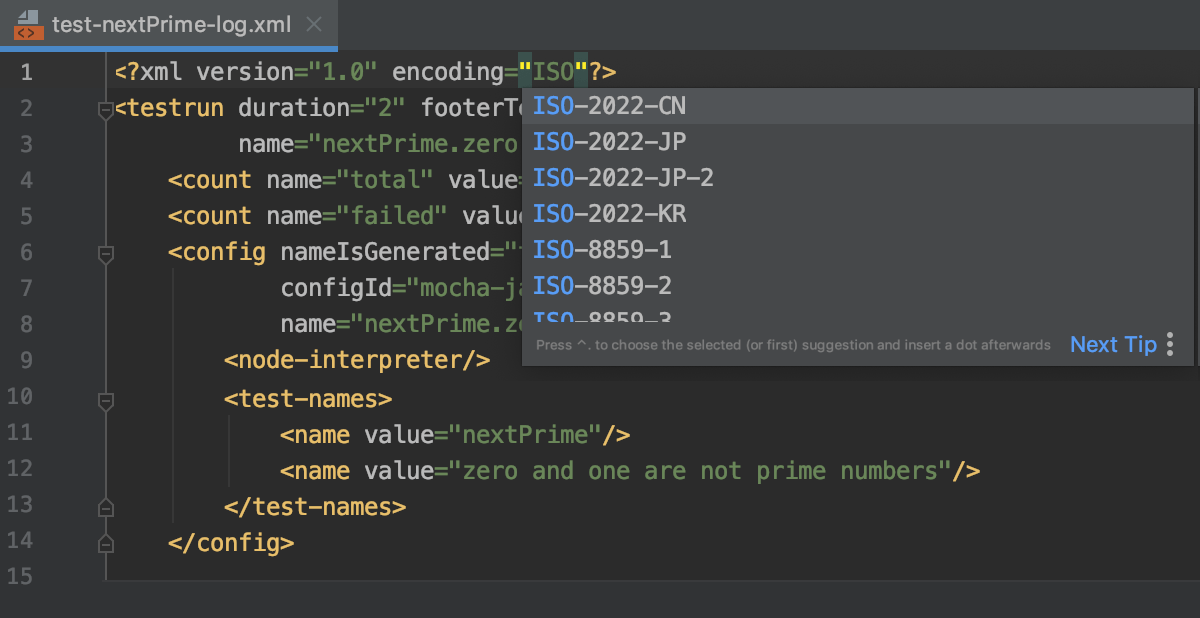
Change explicit encoding information. Use error highlighting to recognize wrong encoding and press Ctrl+Space to have a list of available encodings displayed:

Change the encoding used to view a file
If WebStorm displays characters in a file incorrectly, it probably couldn't detect the file encoding. In this case, you need to specify the correct encoding to be used for viewing and editing this file.
Open the file in the editor.
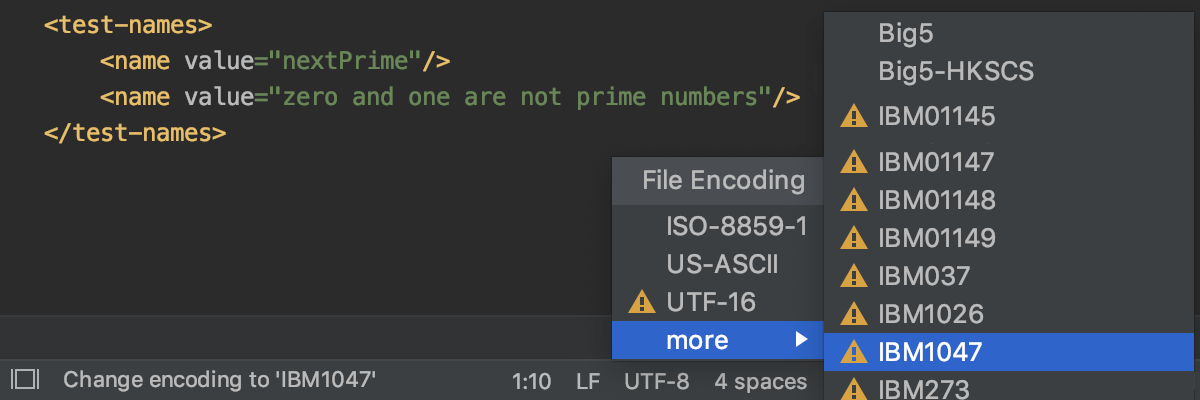
Click the File Encoding widget on the status bar.
Alternatively, select from the main menu.
Select the correct encoding.

Encodings marked with
or
might change the file contents. In this case, WebStorm opens a dialog where you can choose what to do with the file:
Reload: load the file in the editor from disk and apply encoding changes to the editor only. You will see the content changes related to the chosen encoding, but the actual file will not change.
Convert: overwrite the file with the chosen encoding.
This will add an association for the file to the file encoding settings. WebStorm will use the specified encoding to view and edit this file.
Configure default encoding for properties files
WebStorm applies system default encoding to .properties files. To use other encodings, feed them as escape sequences and Unicode. Alternatively, define the default encoding for .properties files on the project level and use different API that can read .properties files in the encoding you have defined.
In the Settings dialog (Ctrl+Alt+S) , select .
Do one of the following:
To have the special mode turned on when symbols are stored in a properties file as escape sequences but displayed as normal letters, check the option Transparent native-to-ascii conversion. This option is helpful when the properties files are encoded in ISO 8859-1. It is recommended that you use this approach if you don't have any special reasons to change encoding.
In the Default encoding for properties files list, select the encoding that will be used for all properties files in the project.
Configure file encoding settings
Press Ctrl+Alt+S to open the IDE settings and then select .
WebStorm uses these settings to view and edit files for which it was unable to detect the encoding and uses the specified encodings for new files. For more information, refer to File Encodings.
Select console output encoding
By default, WebStorm uses the system encoding to view console output.
In the Settings dialog (Ctrl+Alt+S) , select .
Select the default encoding from the Default Encoding list.
Click OK to apply the changes.
For more information about console output settings, refer to Console.