Manage the Project Team
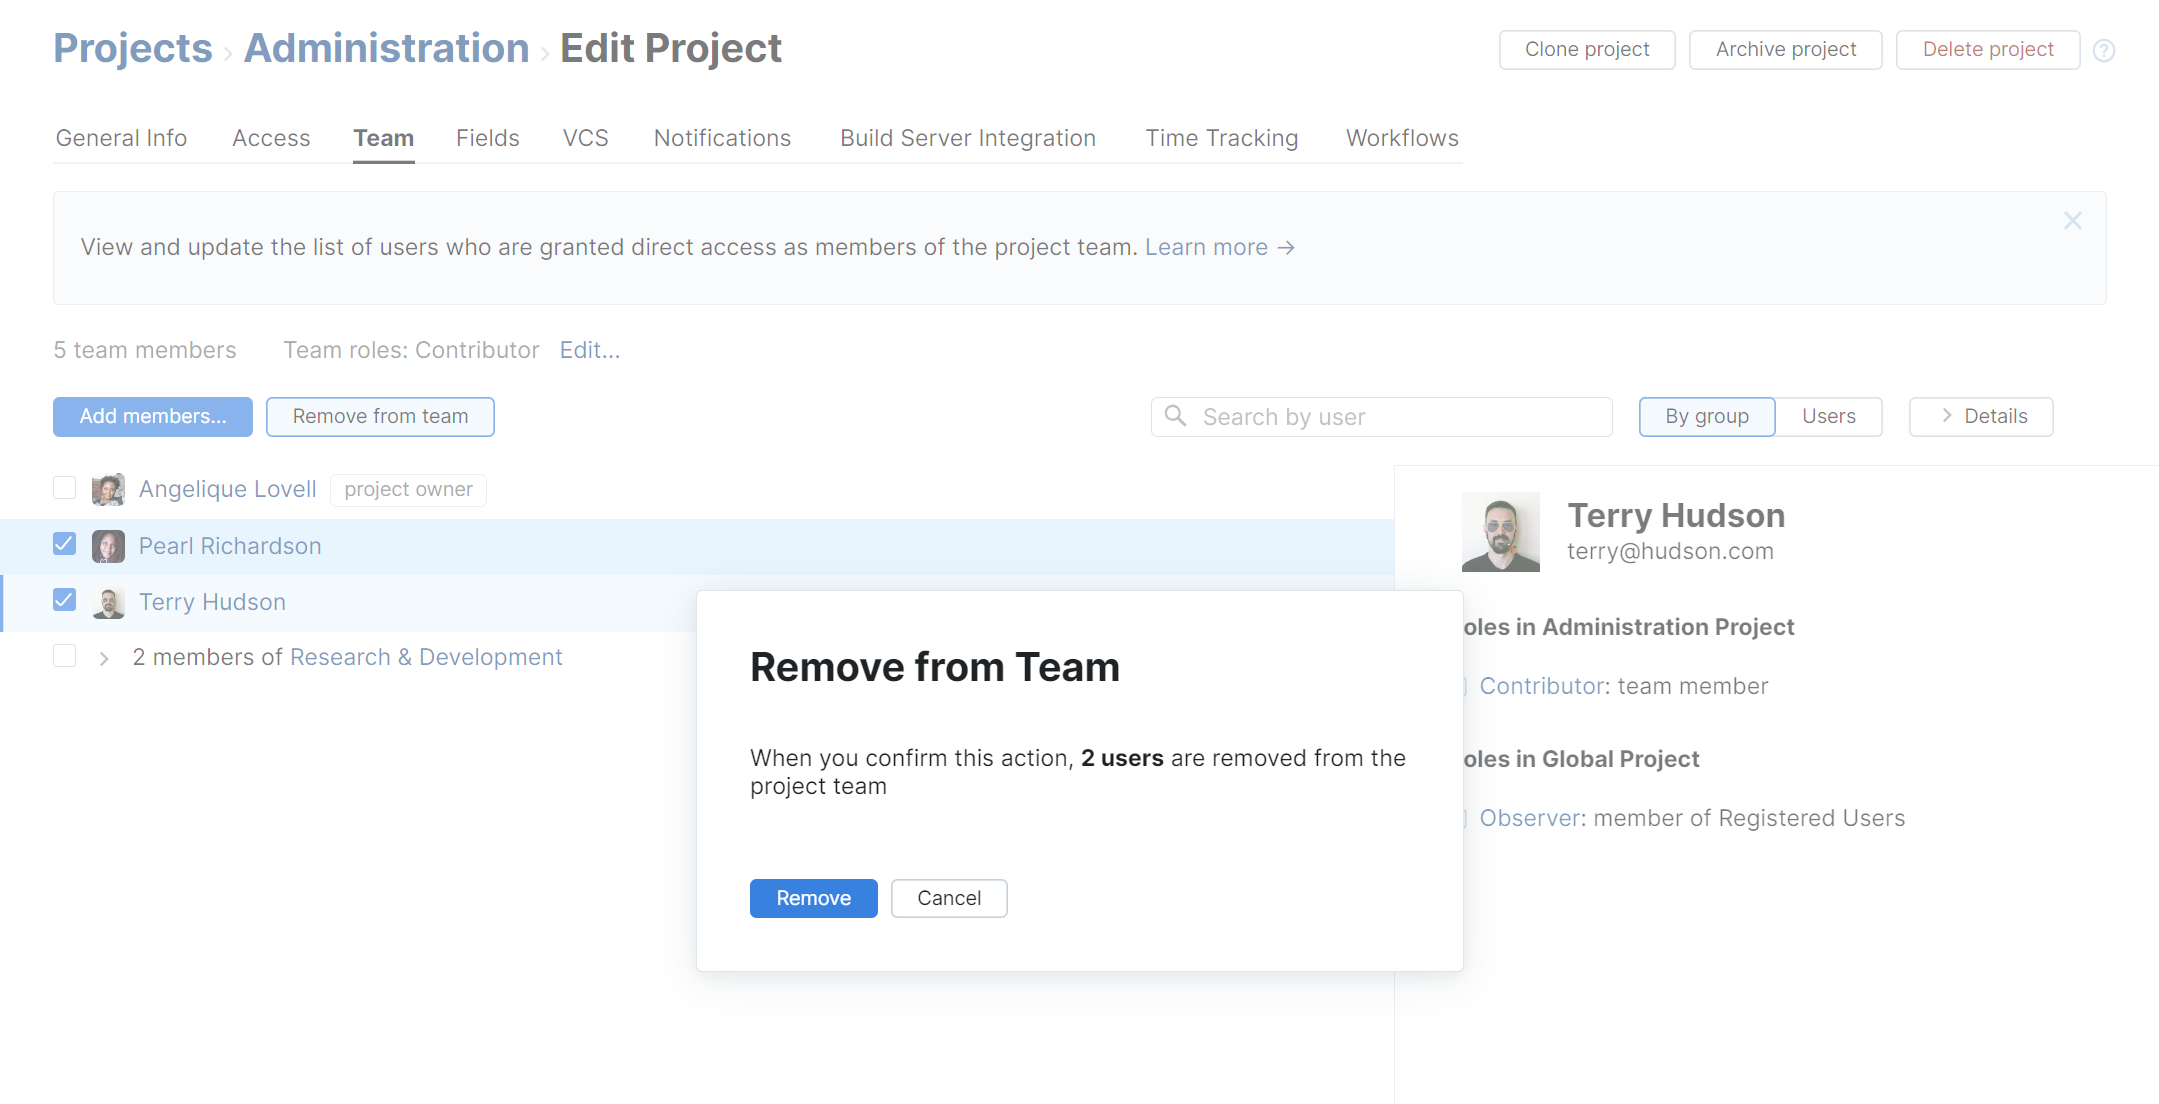
The Team tab on the Edit Project page displays a list of users who are members of the project team. Membership in the project team grants users access to the project based on the role or roles that are assigned to the project team. The project team is designed to represent a collection of users who actually work together on a project.
The project team does not include other users, like administrators or supervisors, who have access to the project but do not take part in day-to-day development efforts. Users and groups who have different levels of access to the project from the project team are shown on the Access tab. For more information, see Manage Project Access.
What is a Project Team?
The project team is a collection of users and groups who are assigned to a specific project. Each user has access to the project. The level of access is determined by the roles that are assigned directly to the team.
The project team also displays the project owner. The control for selecting the project owner is available on the General Info tab of the Edit Project page. When you set the project owner, the selected user is assigned the Project Admin role directly in the project. This user also inherits any role that is assigned to the project team. Note that you can remove the project owner from the project team and revoke the Project Admin role from this user without affecting the Project owner setting.
The project team doesn't show every user who has access to the project. The following users are not shown on the list:
Users and members of groups who are granted roles in the Global project.
Users and members of groups who are granted roles in the project, but were not added to the project team.
A complete list of users and groups who have access to the project is shown on the Access tab. For more information, see Manage Project Access.
Project Team vs Assignees
The project team is separate from the list of assignees for issues in the project. There are operations that help synchronize the list of assignees with the project team, however, these two sets of users can be managed independently. This means that your project team can include users who are not assigned issues and your issues can be assigned to users who are not members of the project team.
In YouTrack, assignees are taken from the set of values for the Assignee field. This field references a list of users who can be assigned an issue in the project. When you add users and groups to the project team, they are also added to the set of values for the Assignee field. It is also possible to add users to the list of assignees without adding them as a member to the project team. For more information, see Manage Assignees.
Add Users to the Project Team
You can manage the project team on the Team tab of the Edit Project page. You can open this tab directly from the Projects list and the project overview page.
From the Projects list, open the action menu and select Team.
On the project overview page, click the Team link in the sidebar.
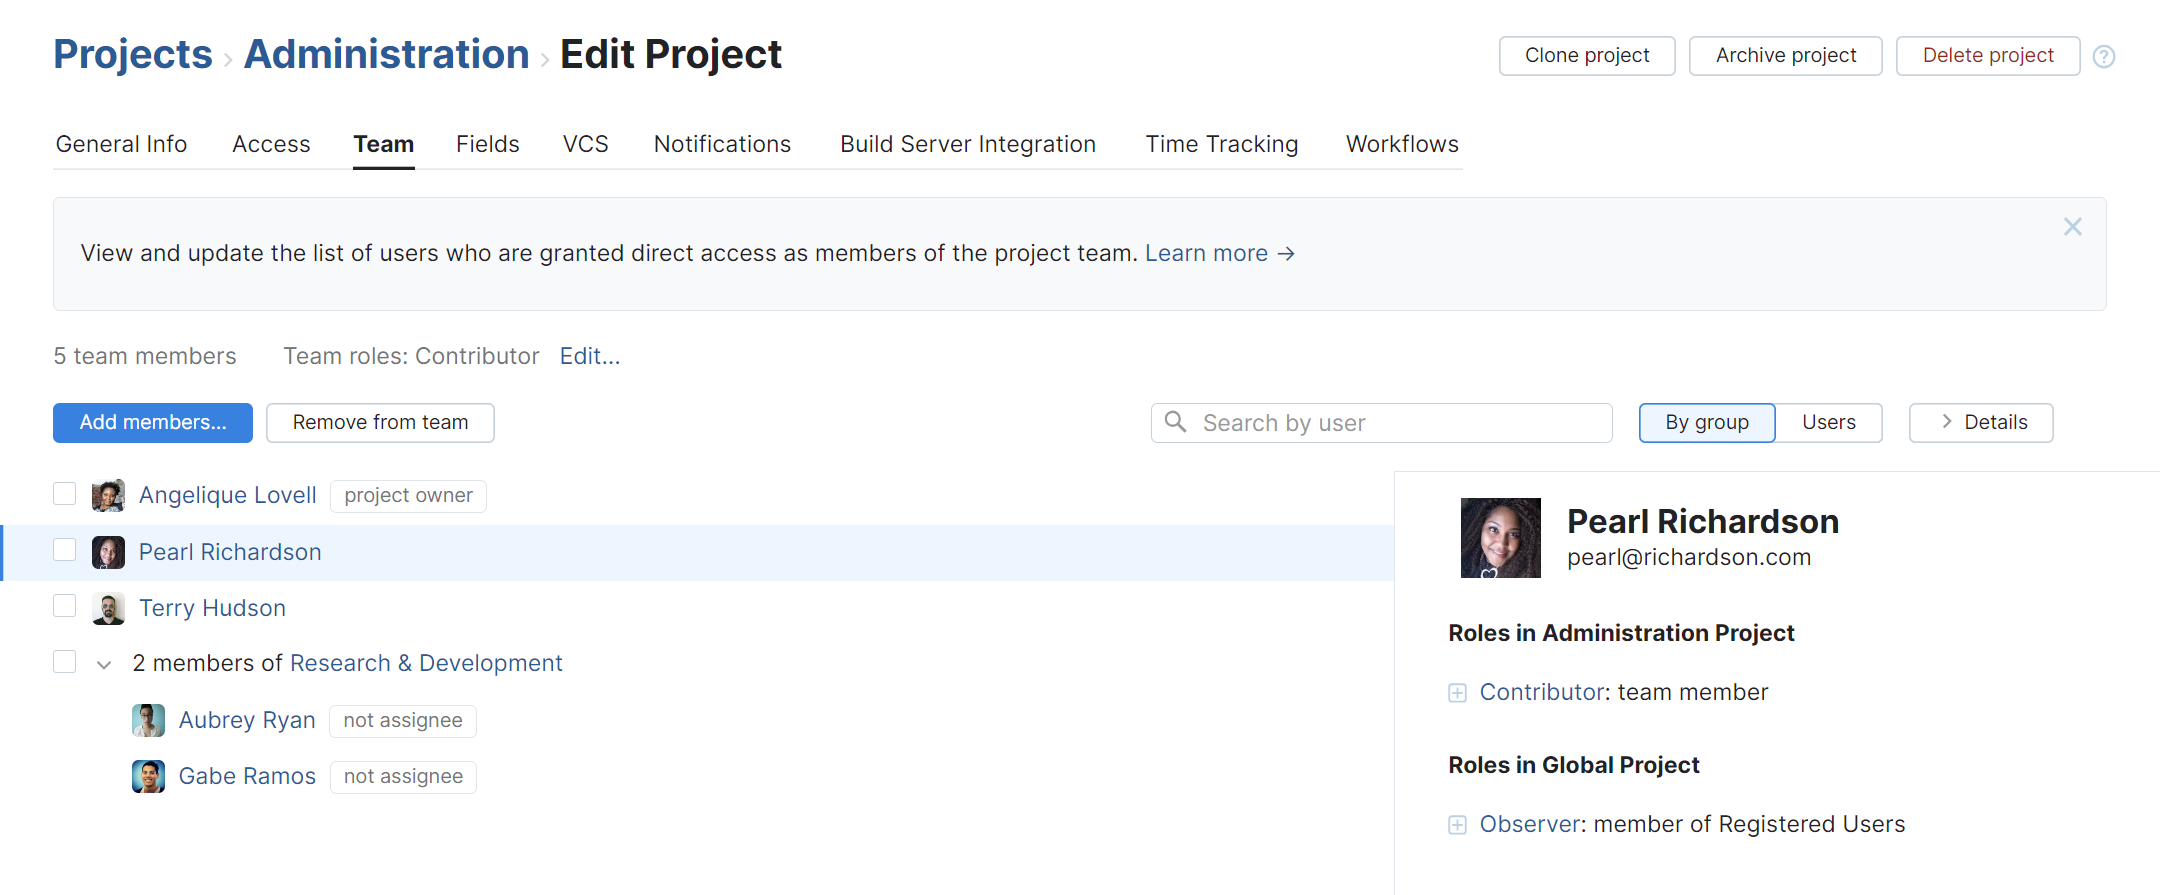
On the Team tab, you have access to two view modes.
When viewed by group, users who have been added to the project team as members of a group are listed under their respective groups. Users who have been added to the team with a direct assignment are shown at the top of the list.
When viewed by users, team members are shown as a simple list. The reason for membership in the project team is shown for each user. Users with direct assignments that duplicate a group membership are marked with the duplicated badge. The project owner is assigned the Project Admin role directly in the project. This assignment is indicated by the project owner badge.
When you add users to the project team, they inherit the roles that are assigned directly to the team. To perform this task, your permissions must be equal to or higher than those that are granted directly to the team in the project.
To add users to the project team:
On the Team tab of project profile, click the Add members button.
In the Add Members dialog, select one or more users or groups. The list of items is filtered as you type.
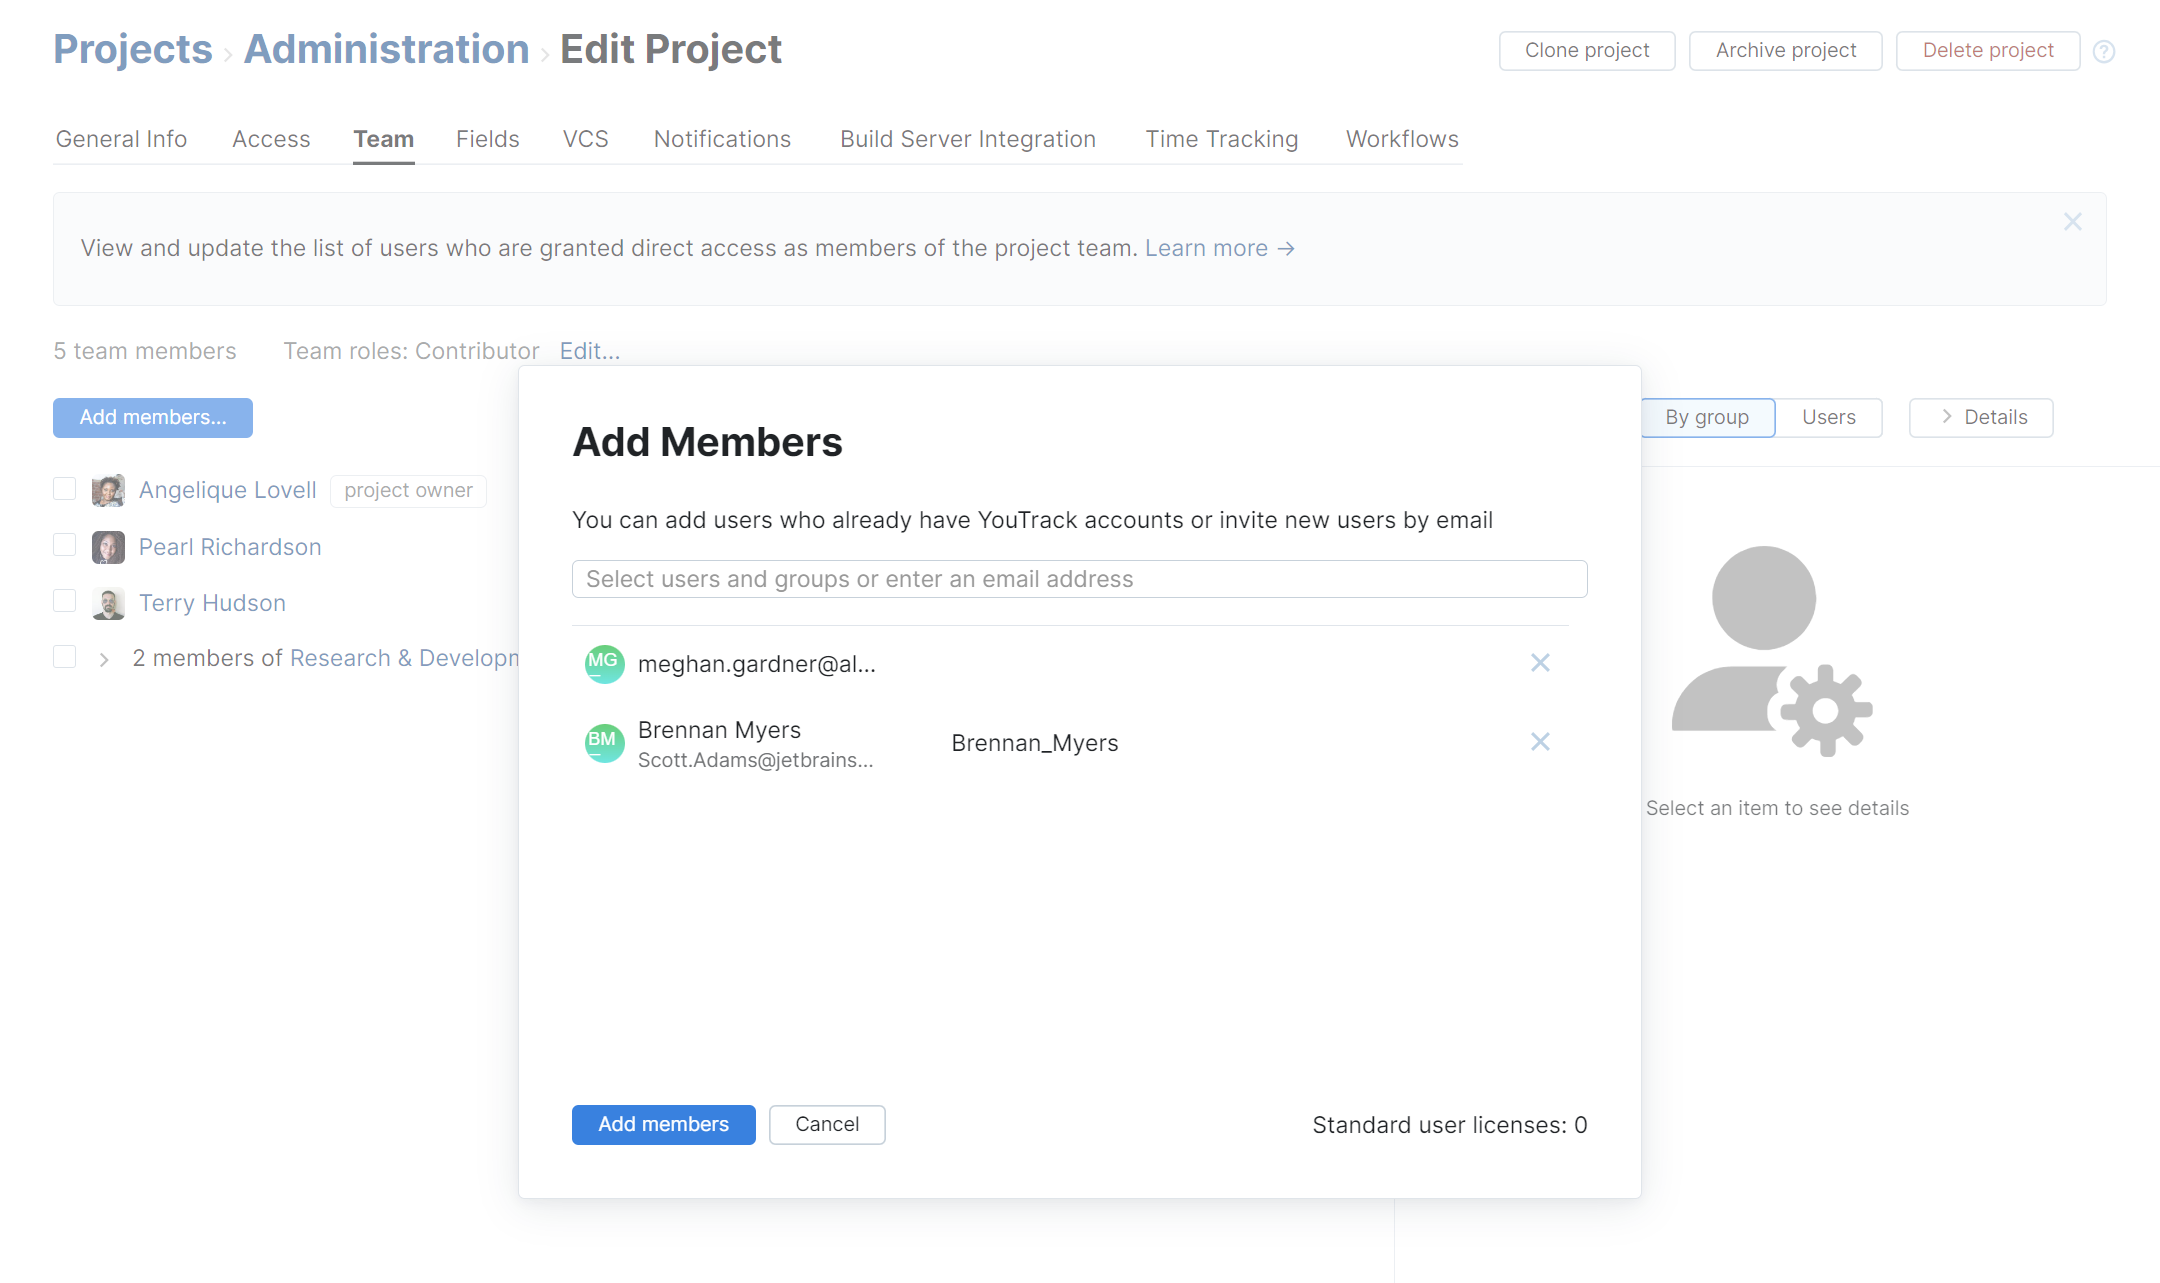
Click the Add members button.
The selected users are added to the project team.
Users inherit any role that is assigned to the project team in the current project.
YouTrack sends an invitation email to any user who doesn't already have an account.
Note that you can add any combination of users and groups to the project team at any time. The Add Members dialog lets you select one or more users, groups, or a combination of both users and groups.
Add Groups to the Project Team
There are two advantages to using groups to add its members to a project team:
You can add multiple users to your project at once.
By using a group to manage membership, new users who are added to the group are automatically added to all the project teams that include the group. Conversely, removing a user from a group removes the user from all project teams that include the group.
There is, however, a limitation. You cannot exclude single group members from the project team. If the group contains any members that you want to exclude from the project, you should either create a new group that contains the desired subset of users or add group members to the project team as single users.
As when you add users to the project team, this operation requires that your permissions are equal to or higher than those that are granted directly to the team in the project.
To add groups to the project team:
On the Team tab of the project administration page, click the Add members button.
In the Add Team Members dialog, select one or more groups.
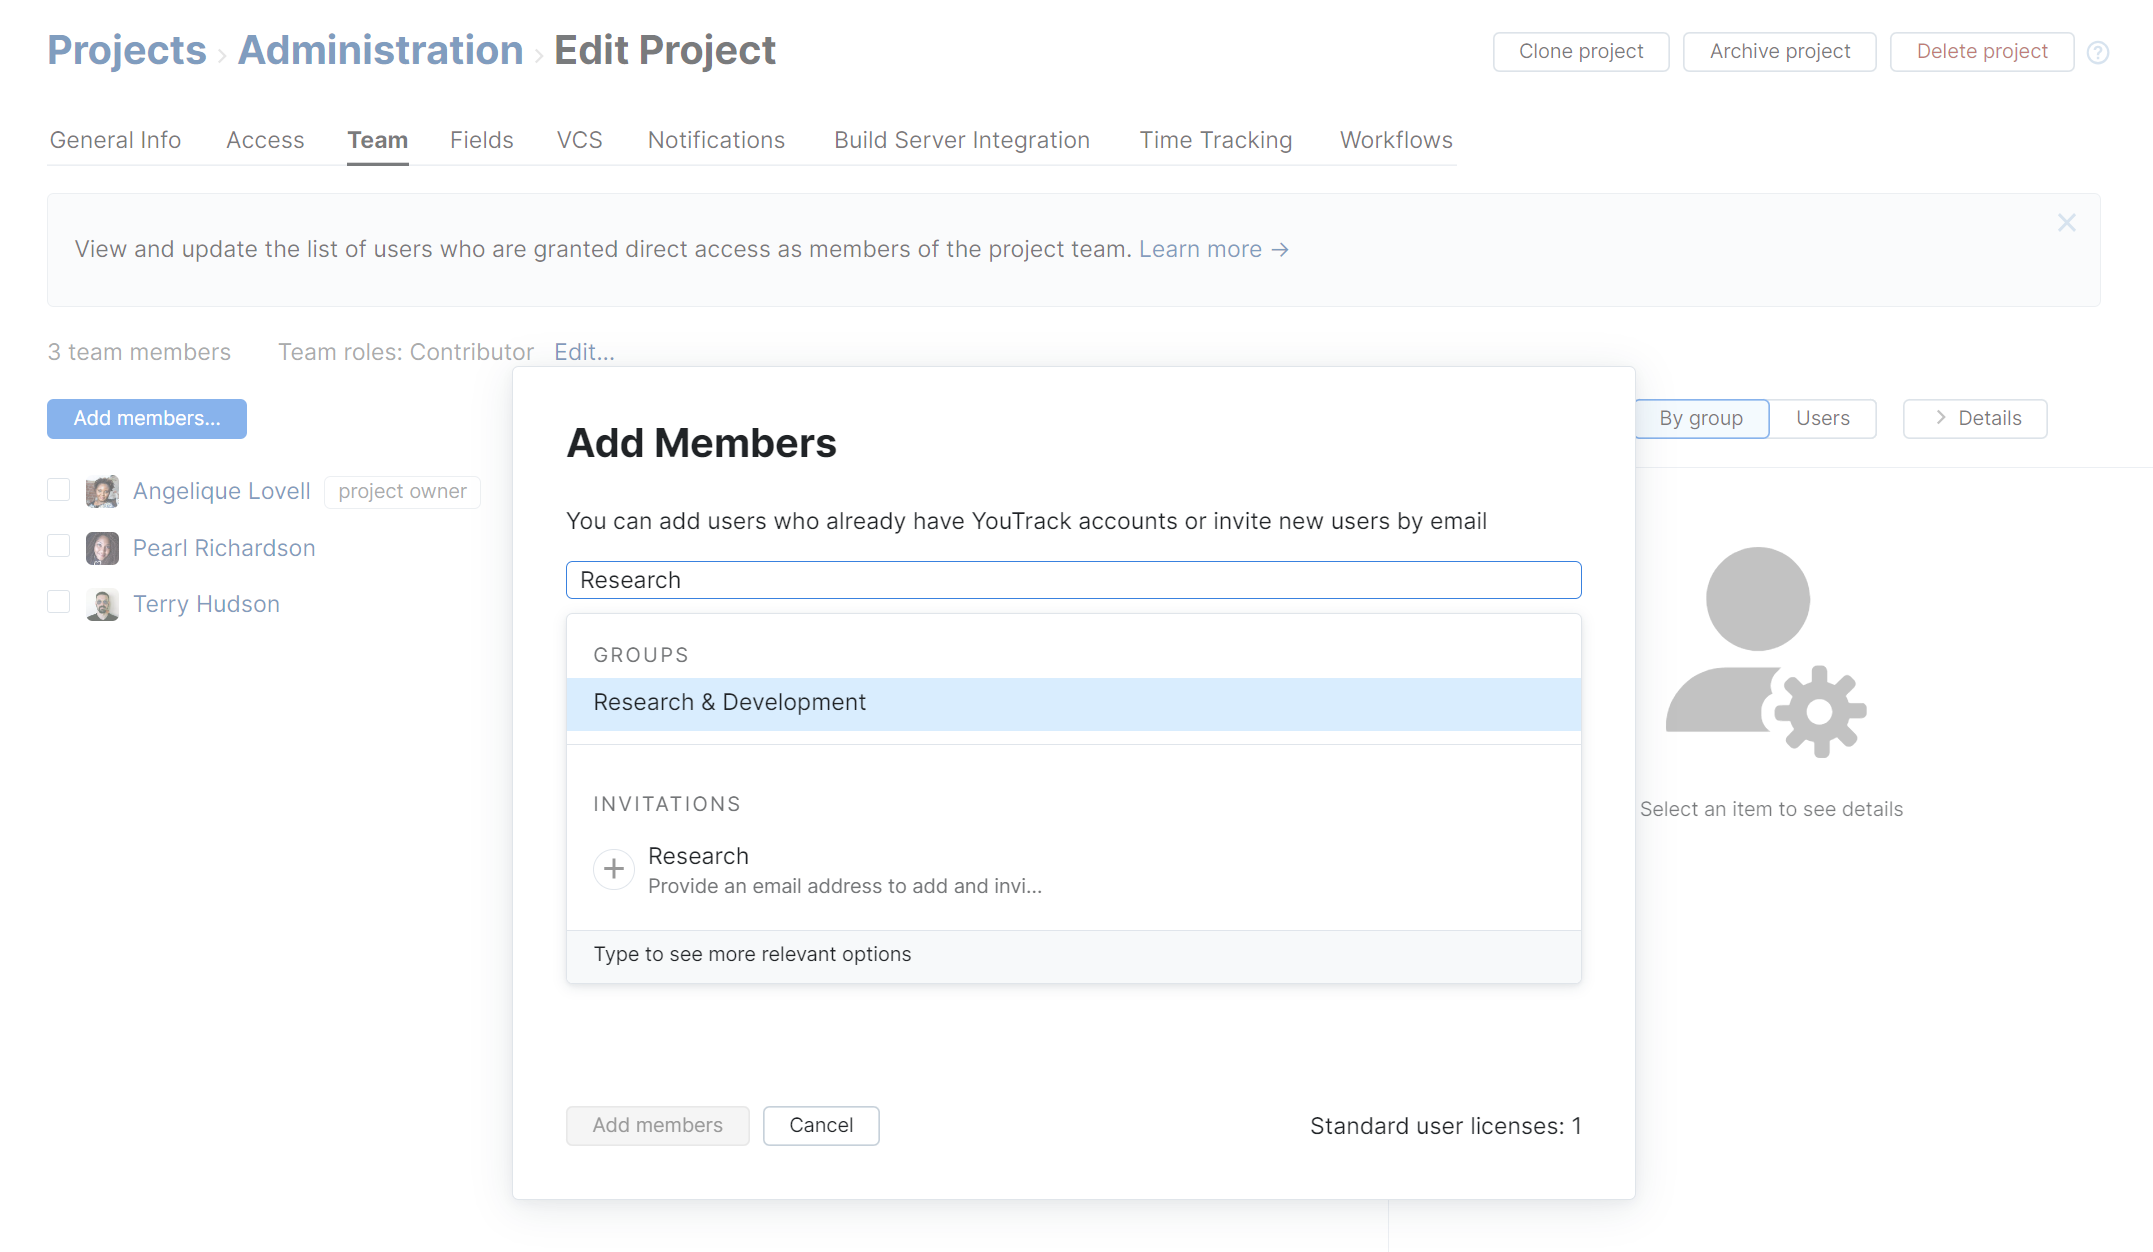
The items in the drop-down list are filtered to show users. To find and select a group, start typing its name in the input field.
Click the Add members button.
The group inherits any role that is assigned to the project team in the current project. Members of this group inherit access to the project based on their membership in the group.
Remove Users from the Project Team
Removing users from the project team can be tricky. Each member of the project team can have access to a project directly, indirectly, or both. You can only remove users from the project team when they were added to the project directly. Otherwise, you must either remove the user from any group that has been added to the project or remove the groups from the project team.
When you remove users from the project team, they lose access that is defined by the roles that are granted to the project team. If the user is not a member of any groups that are assigned to the project team, you may need to restore vital permissions by assigning the user another role.
To remove a user from the group:
If the user still appears in the project team, you have two options. You can:
Remove the user from any groups that have been added to the project.
Remove any groups that include this user as a member from the project. This action removes all members of the selected groups from the project team.
Remove Groups from the Project Team
If a group of users does not require access to your project, you can remove the whole group from the project team. This situation arises when you add a large group, like the All Users group, that contains some users who should have access to your project, but also contains users who should not have access. You can also have organizational changes where the members of a group are no longer assigned to your project.
You may also want to remove a group from the project team to disable the feature that adds new members to the project team or removes users from the project team automatically when they are removed from the group.
When you remove groups from the project team, group members lose access that is granted to the Contributor in the project. You may need to restore vital permissions by assigning the group another role.
To remove a group from the project team:
On the Team tab of the project administration page, select one or more users from the list.
Click the Remove from team button.
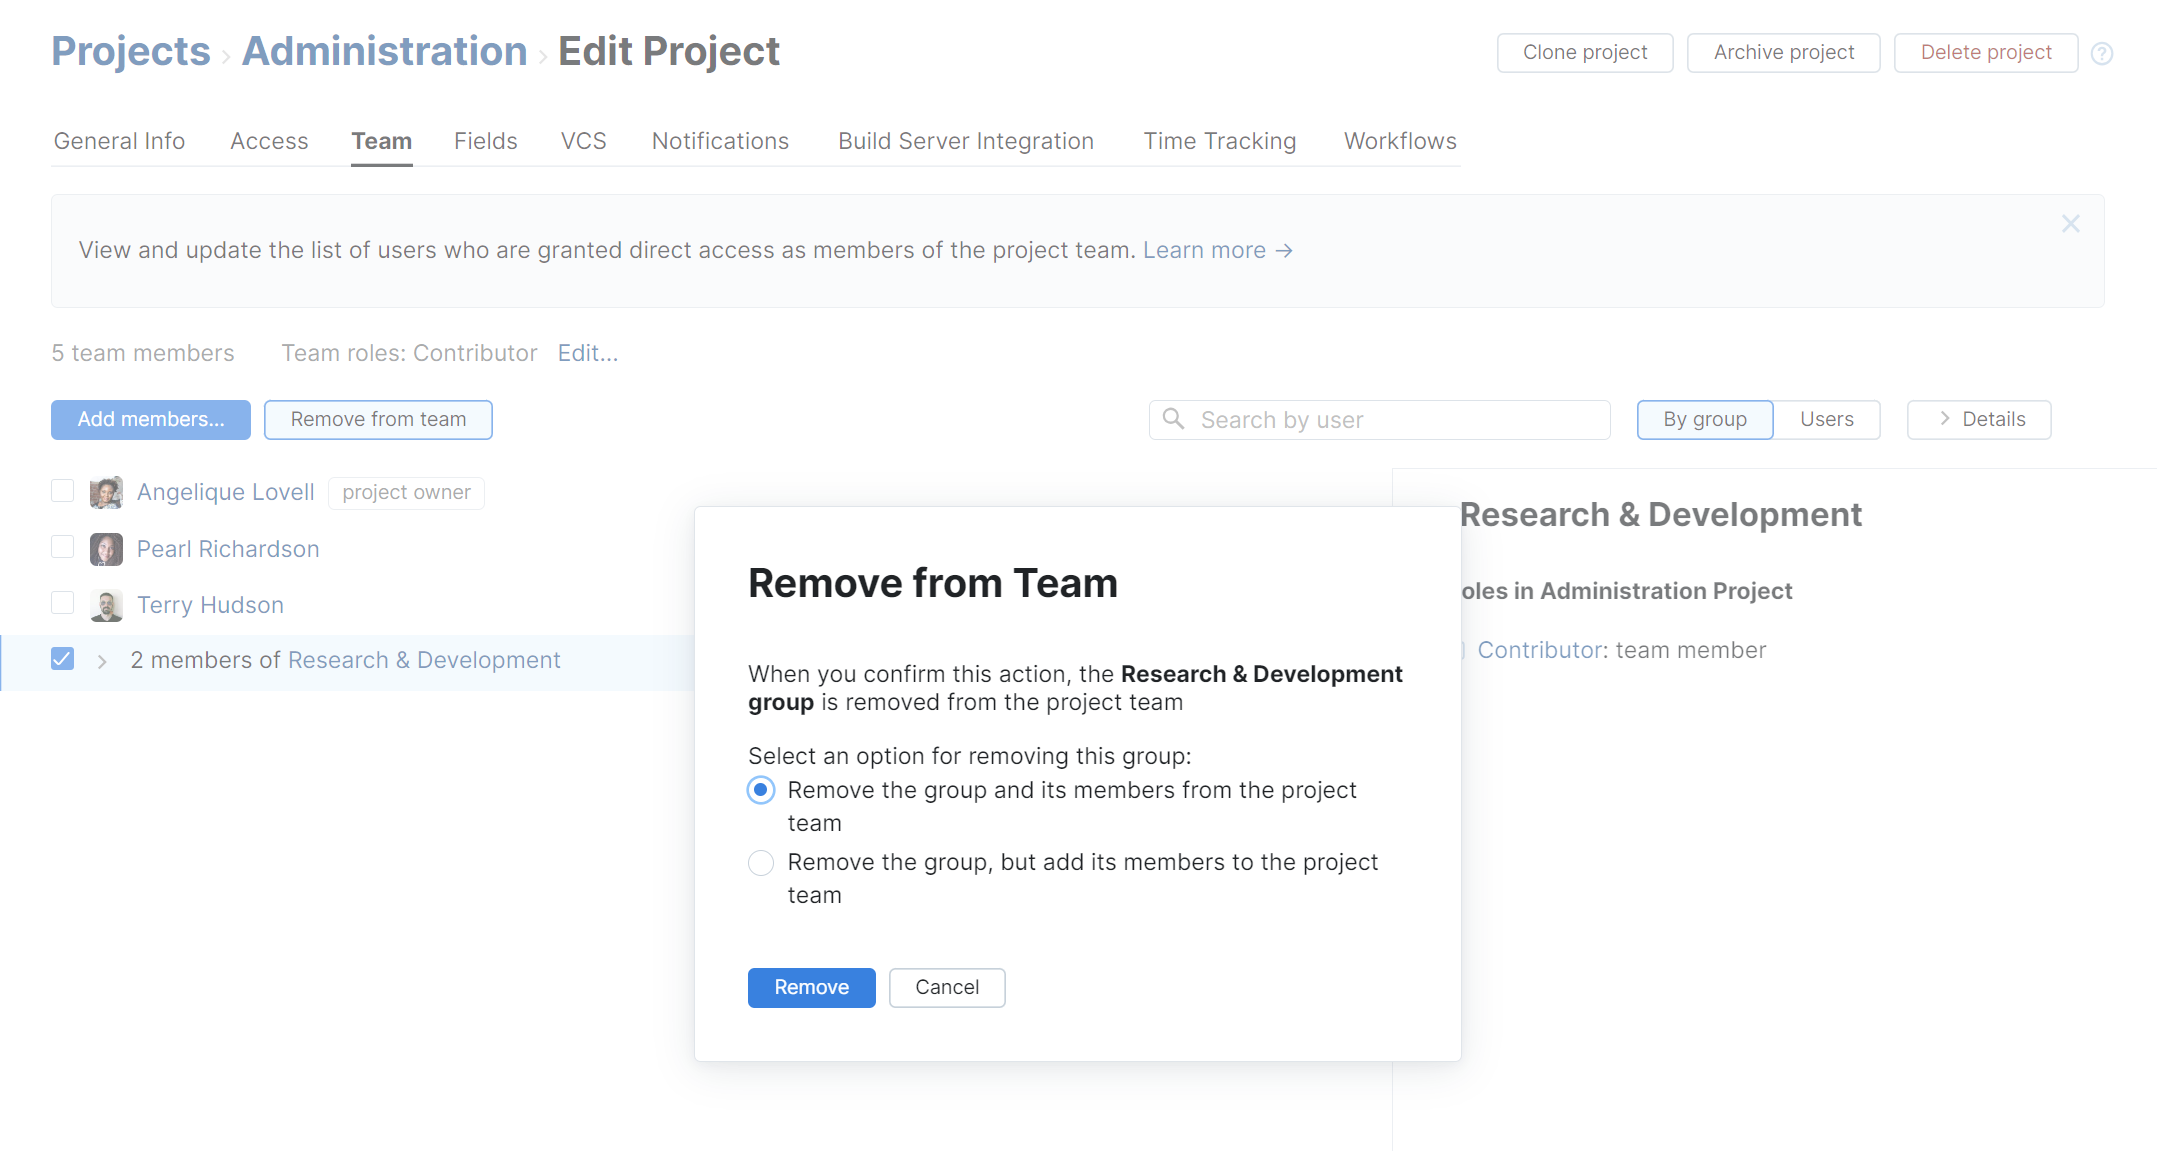
In the Remove from Team dialog, select one of the following options:
Remove the group and its members from the project team
Remove the group, but add its members to the project team
Click the Remove button.
The group is removed from the project team.
If you selected the option to remove the group and its members from the project team, members of the group who do not belong to the project team for any other reason are removed from the project team.
If you selected the option to remove the group, but add its members to the project team, group members are assigned to the project team directly.
