Manage Workflows for Multiple Projects
As a system administrator, you can manage workflows in all the projects for your YouTrack instance. Users who have a project administrator role can only manage workflows in the projects for which they have permission to view and update the project. For more information, see Manage Workflows.
Attach a Workflow to a Project
To use a workflow, you need to attach it to one or more projects. From the Administration menu, you have access to all the projects in YouTrack.
To attach a workflow:
From the Administration menu, select Workflows.
Select the workflow from the list.
If the sidebar is hidden, click the Show Details button.
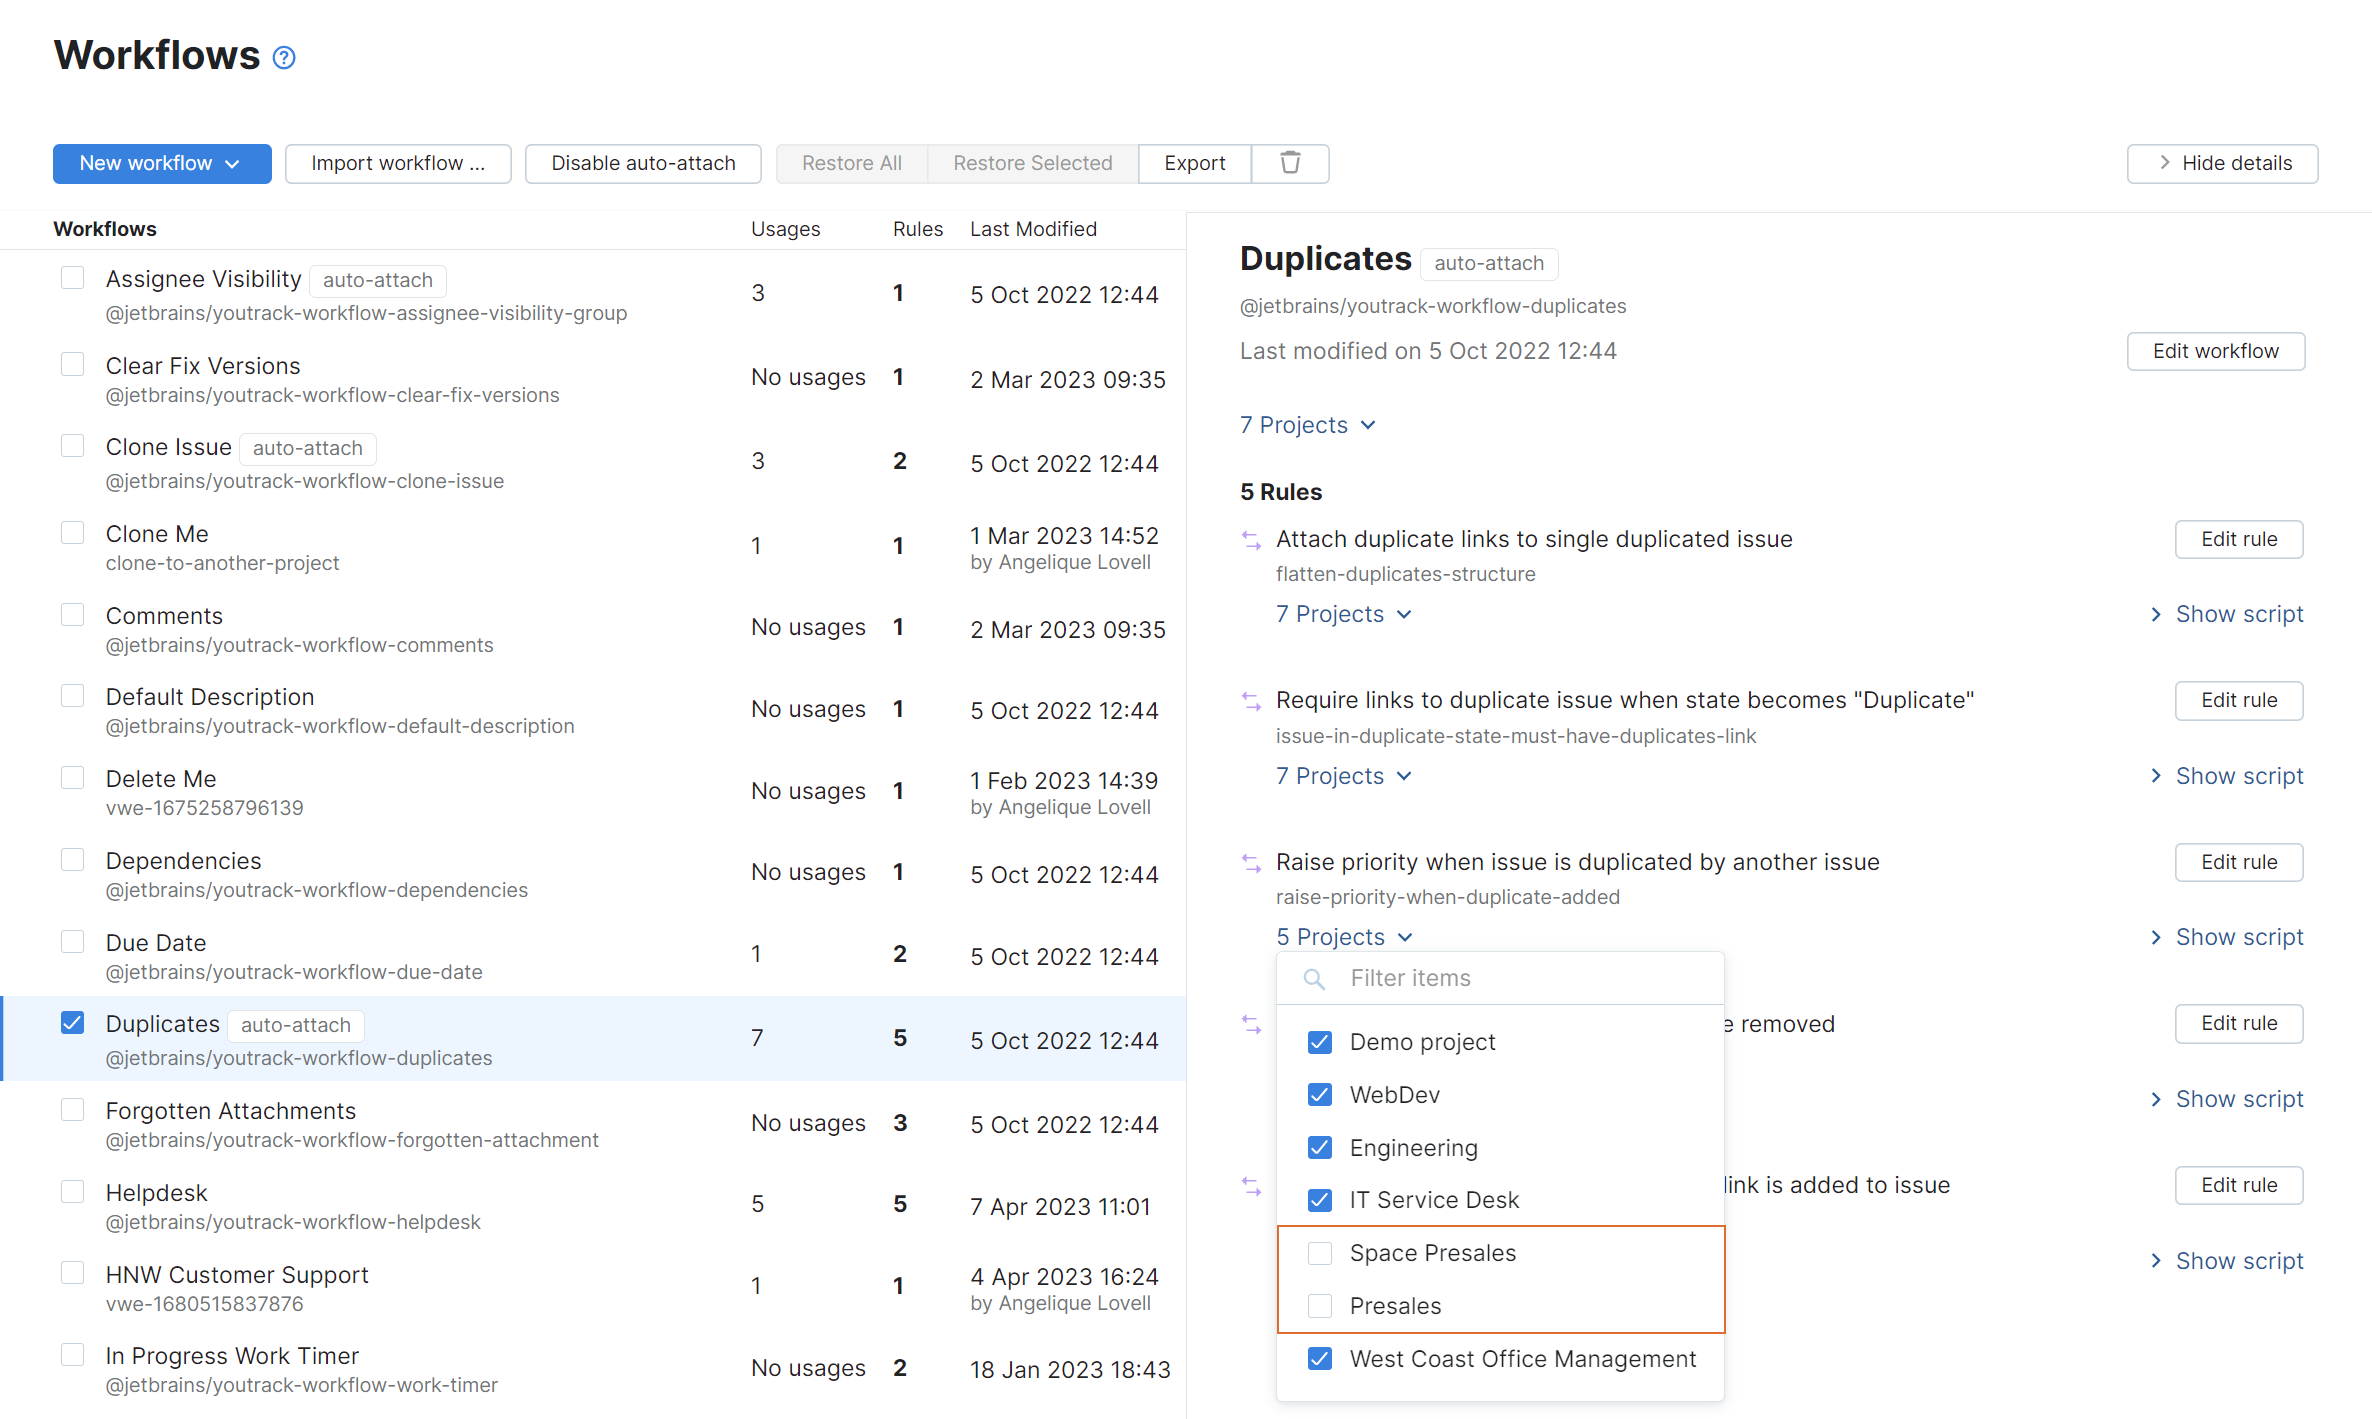
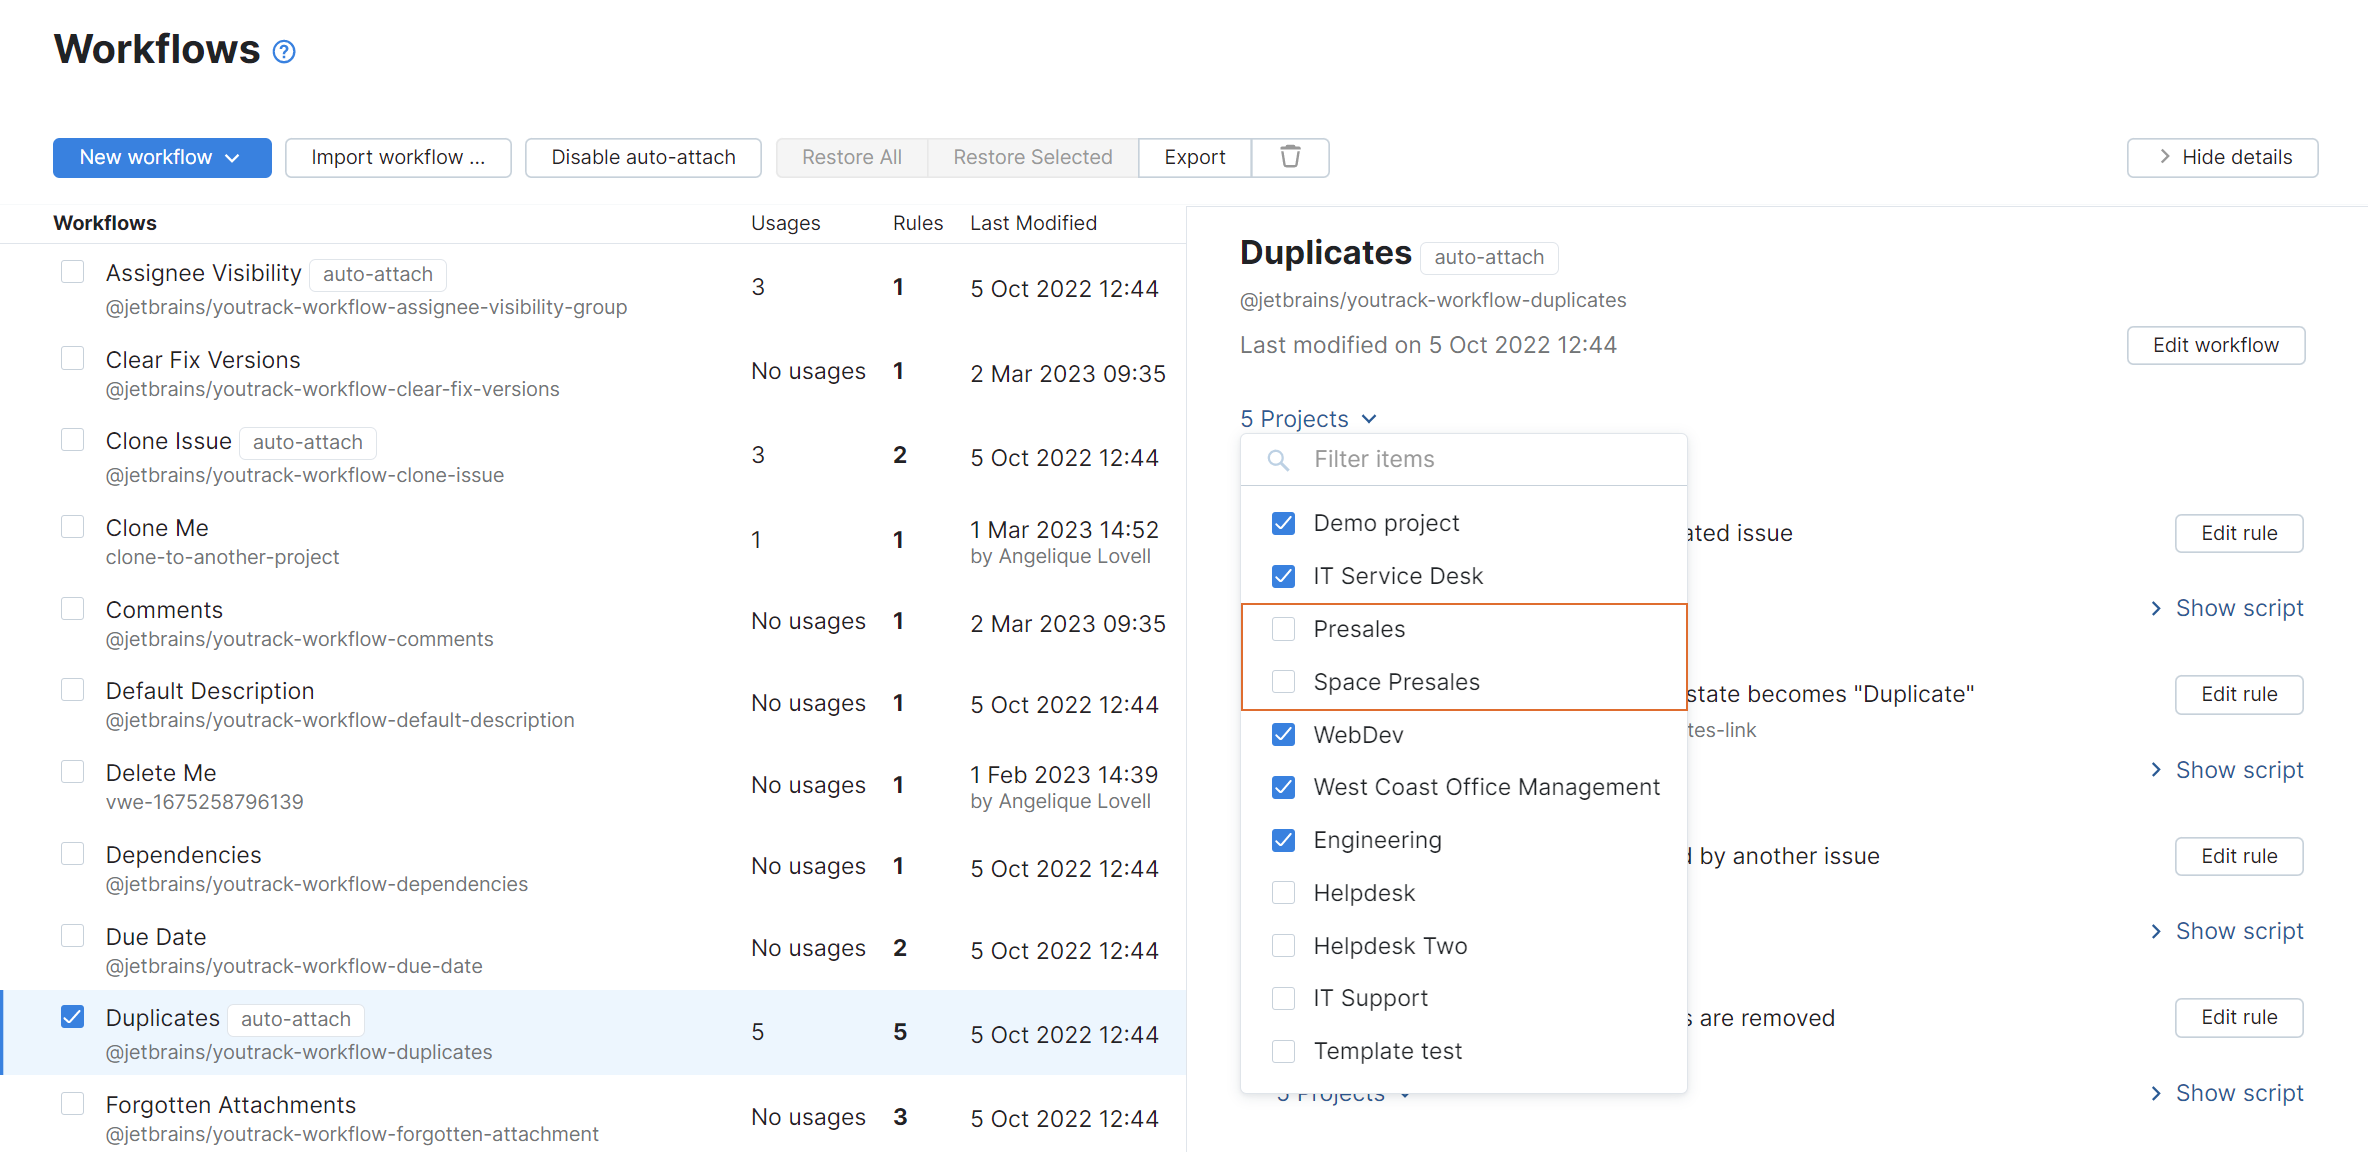
In the sidebar, click the Projects list and select the projects where you want to apply the workflow.
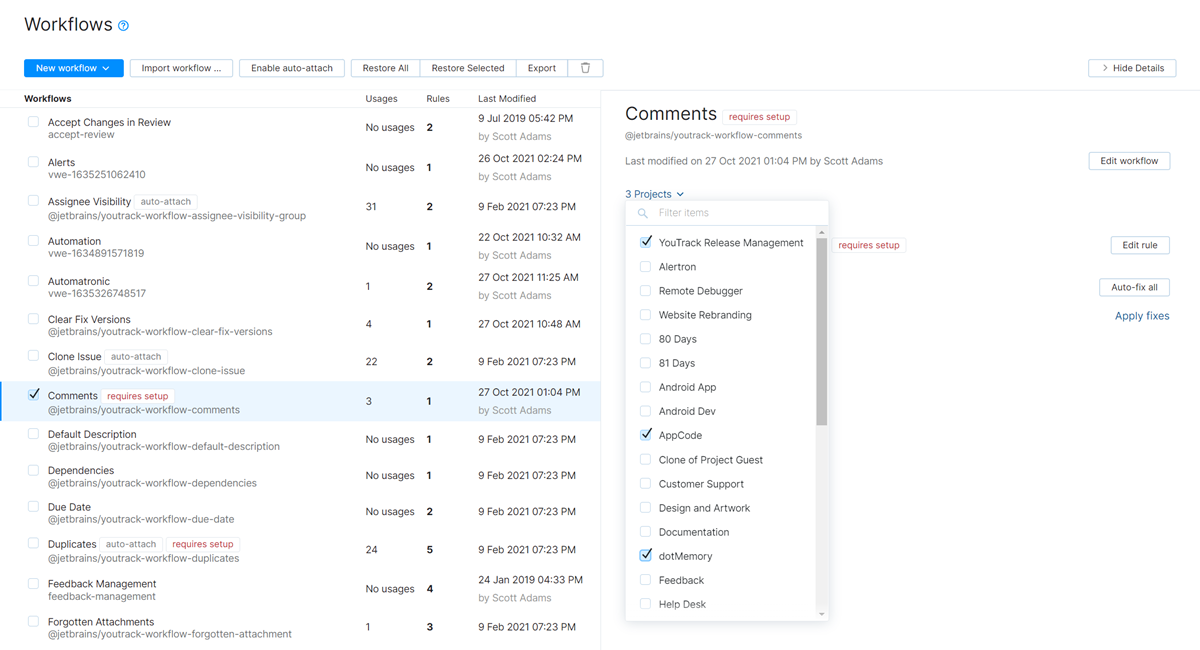
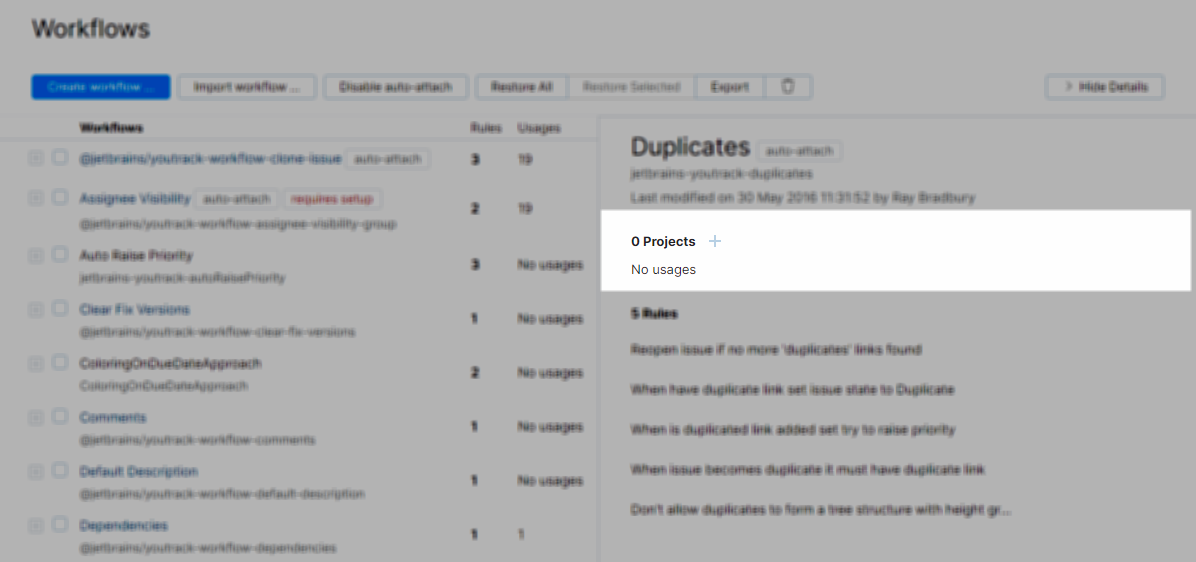
If the workflow isn't attached to any projects, this control shows No usages.
The workflow is attached to all the selected projects.
If there are projects that do not meet the workflow requirements, the requires setup flag is shown.
The requires setup flag indicates that there are requirements that are specified in the workflow that are not available in one or more projects to which the workflow is currently attached. This can mean that the project does not use the required custom fields, values are missing from the set of values in a custom field, or there are issue link types that have not been created in YouTrack. The name of each project that requires setup is displayed in red in the Details sidebar.
In most cases, these fixes can be applied without leaving the workflow administration page.
To fix setup problems with workflows:
Select the workflow in the list.
If the sidebar is hidden, click the Show details button.
Move the pointer over any of the projects that are displayed in red text.
A tooltip displays the changes that are required to activate the workflow in each project.
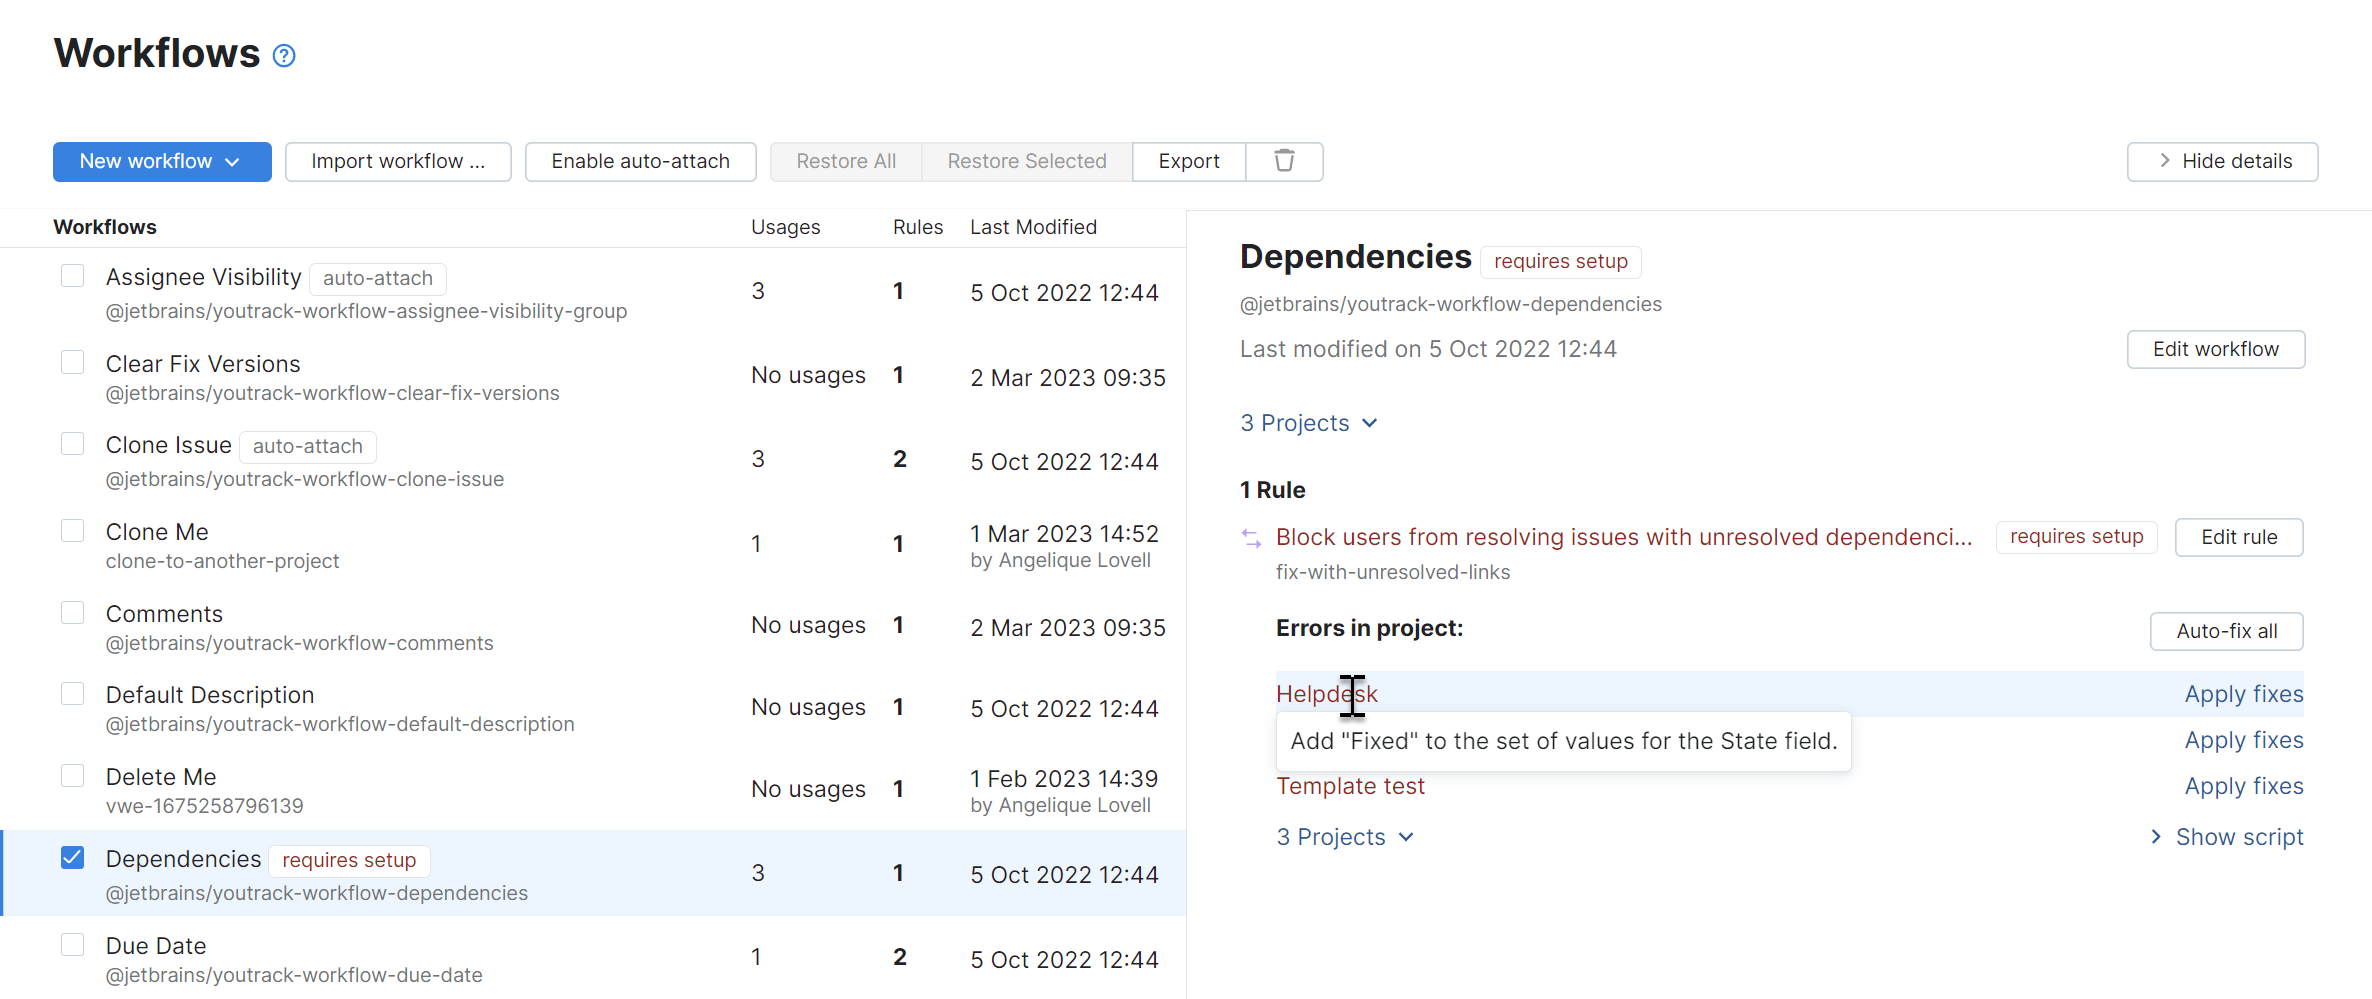
If you want to fix the problems in all projects at once, click the Auto-fix all button. This opens the Workflow Auto-fixes dialog.
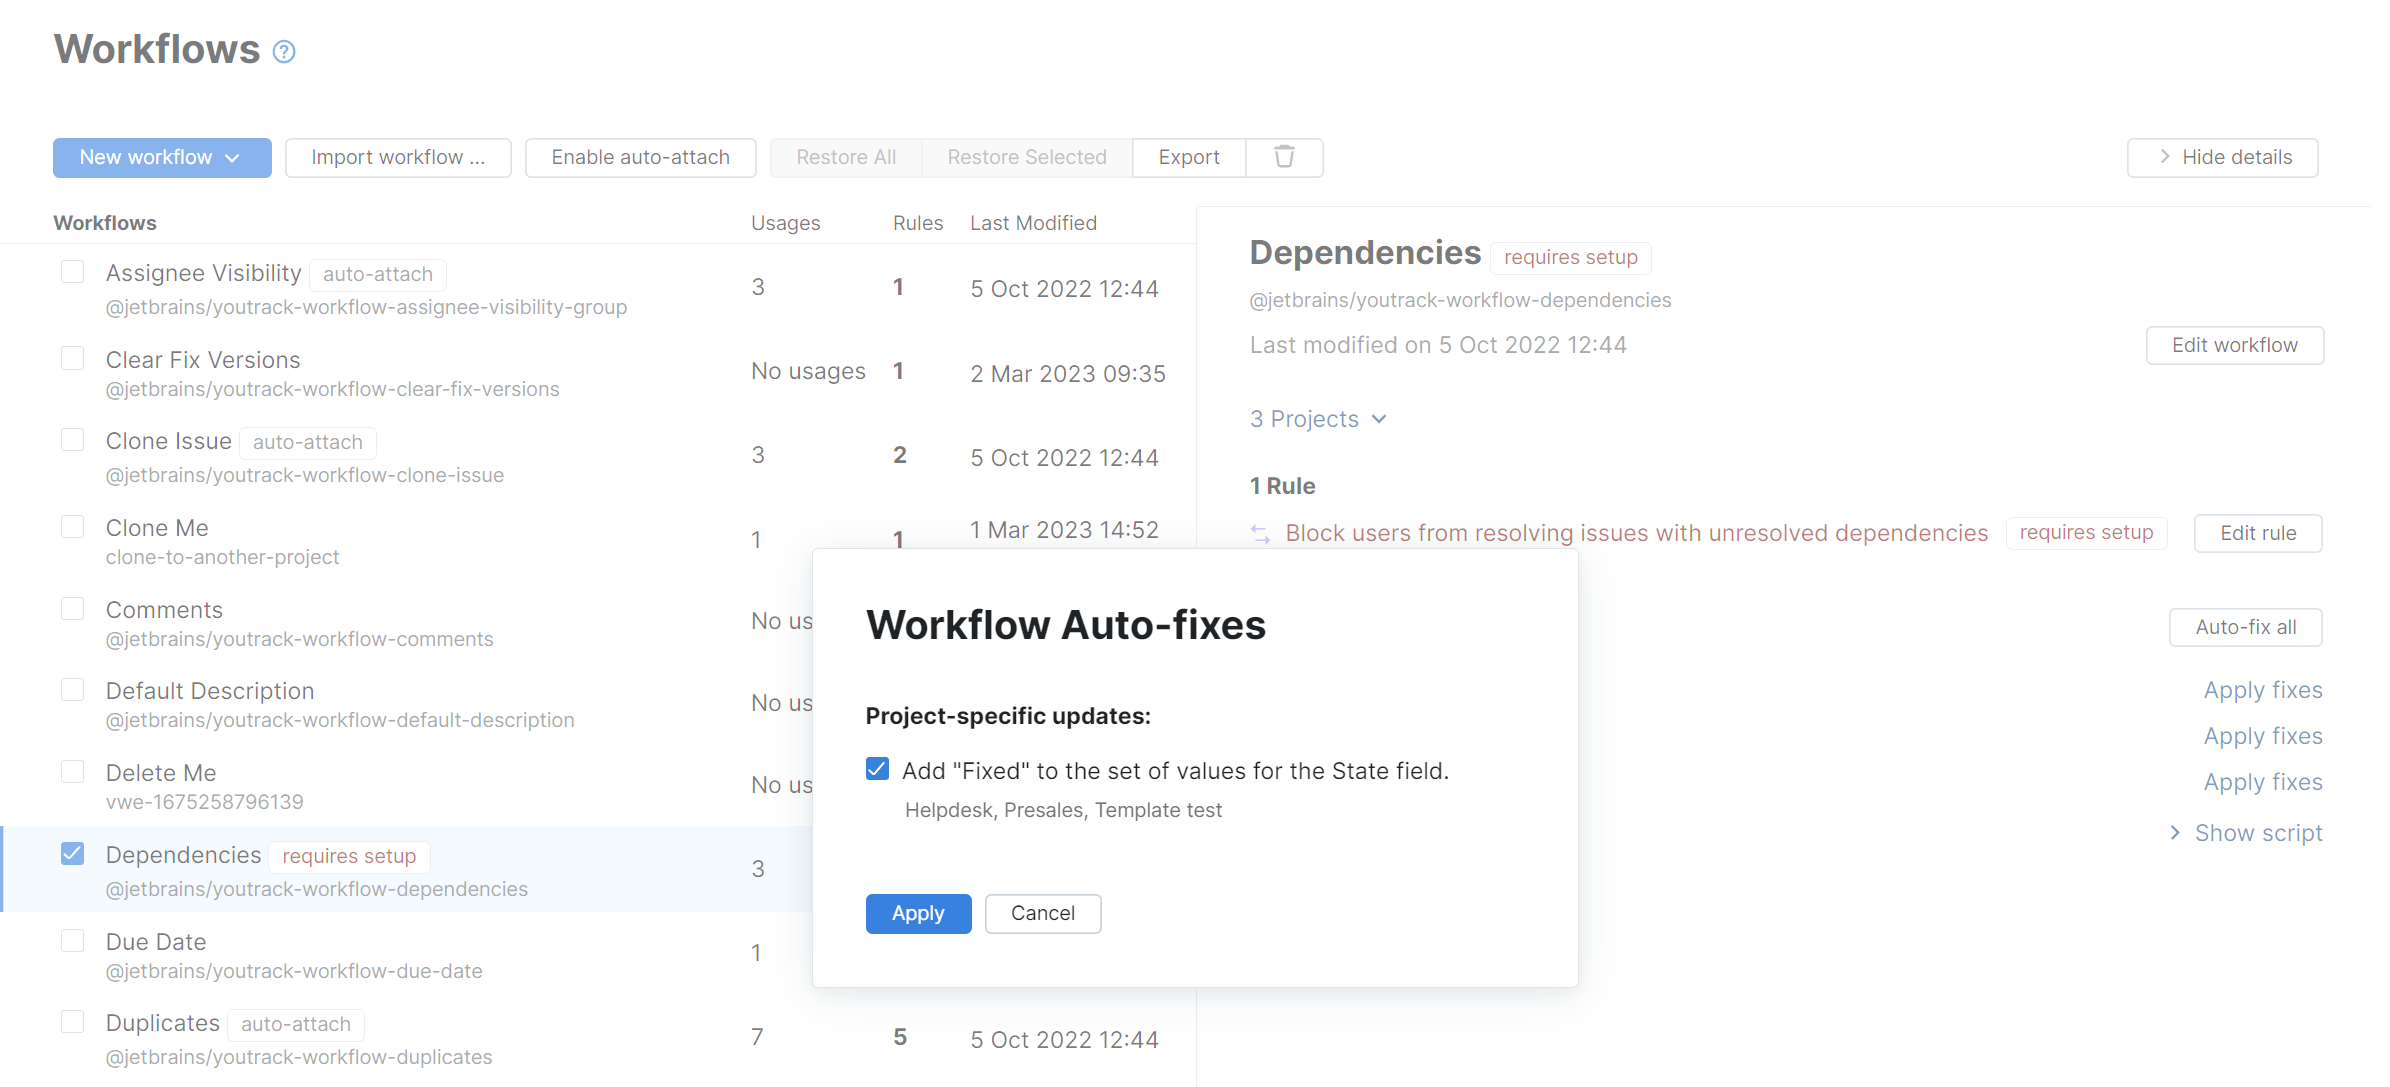
If there are any projects where you don't want to apply this fix, clear the selection for the corresponding update.
To fix the problems for a particular project, click the Apply fixes link. This opens the Apply fixes dialog

Select all the required fixes, then click the Apply button.
When done, the requires setup flag is automatically removed from each rule.
If the problems are resolved for all the projects that use the workflow, the requires setup flag is removed from the workflow.
Attach Workflows to New Projects Automatically
When working with the Workflows list as an administrator, you have the option to Enable auto-attach or Disable auto-attach for any workflow in the system. Auto-attached workflows are attached to all new projects by default.
To attach a workflow to new projects automatically:
From the Administration menu, select Workflows.
Select the desired workflow.
Click the Enable auto-attach button in the toolbar.
Auto-attached workflows are marked with an auto-attach badge in the list of available fields.
Deactivate Workflow Rules
When you attach a workflow to a project, all the rules are attached and enabled. You can customize the workflow on a per-project basis by deactivating specific rules.
To view the status for each rule in a workflow, select the workflow from the list. Rules that have been detached from all projects show No usages in the Usages column.
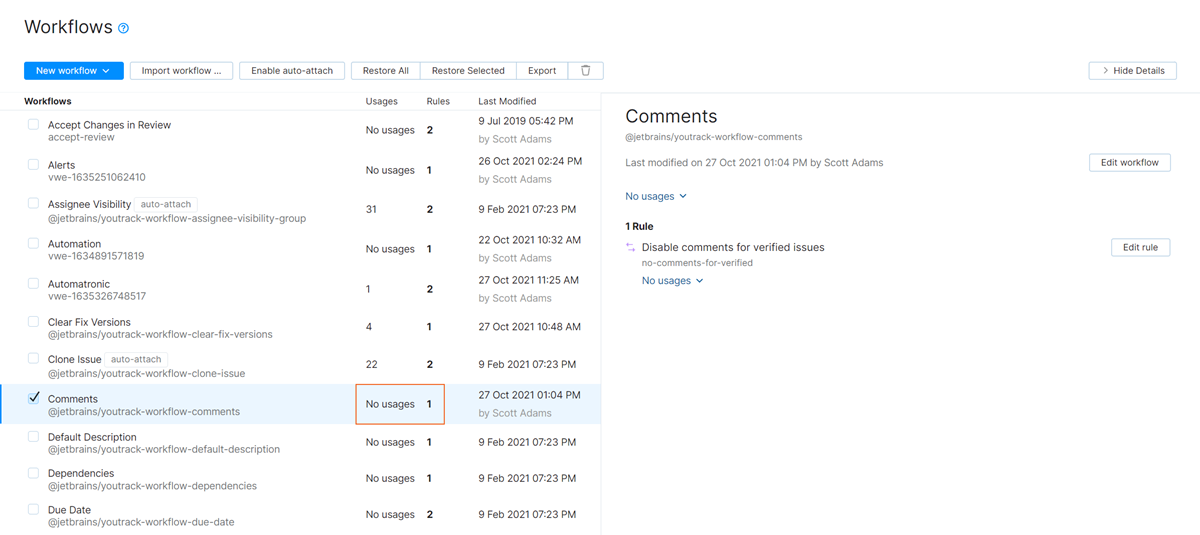
To deactivate individual rules in a project:
Detach Workflows
If you no longer want to use a workflow, you can detach it from one or more projects.
To detach a workflow:
Detaching Legacy Workflows
In YouTrack 2020.5, the logic that supported legacy workflows was removed completely. To prevent the application of breaking changes, any attempt to upgrade an installation where legacy workflows are attached to active projects will fail.
To continue with the upgrade to version 2020.5 or later, you must first detach all legacy workflows from all active projects in your installation.
The fastest way to detect and detach legacy workflows is to open the Workflows list. This list contains all the workflows that are available in your installation. You can tell the difference between these two workflow types by observing the following characteristics:
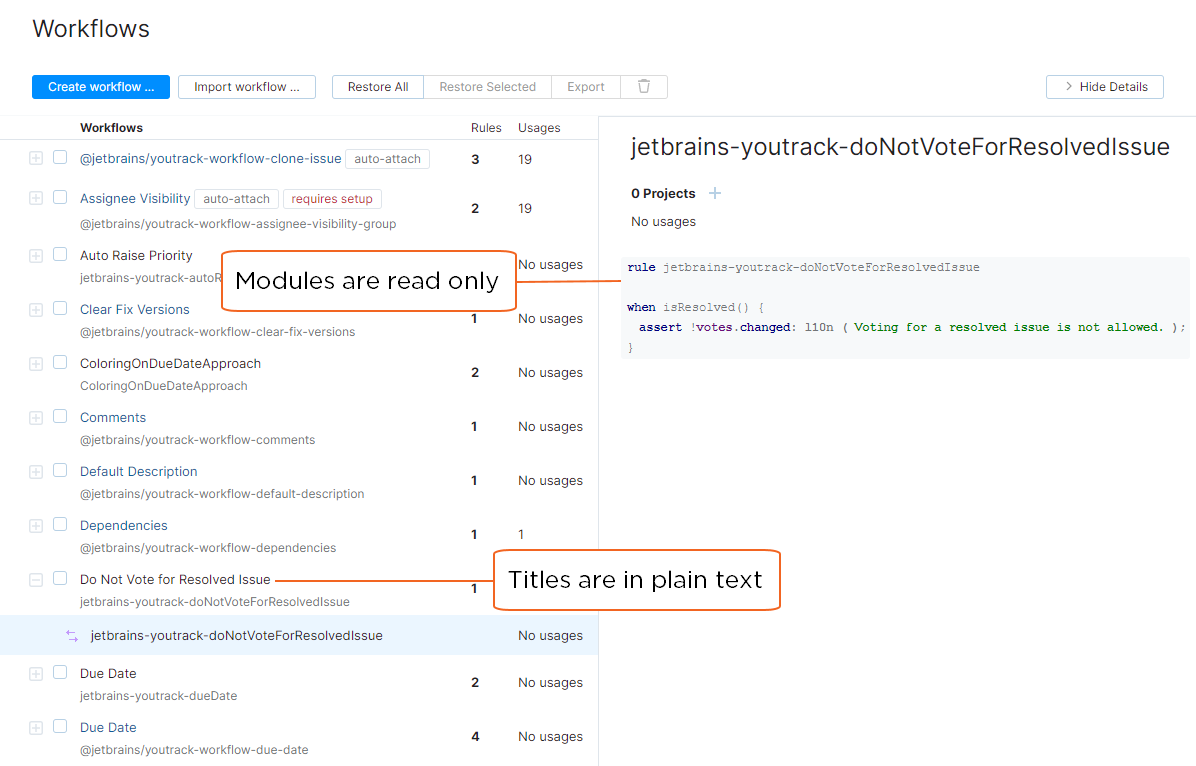
The titles for legacy workflows are formatted in plain text. When you select a rule from a legacy workflow, the workflow code is displayed in the sidebar. These rules will not open in the workflow editor window.
In YouTrack versions earlier than 2021.4, the workflow titles and module names for JavaScript workflows are formatted as links. Clicking these links opens the workflow or workflow rule in the built-in workflow editor.
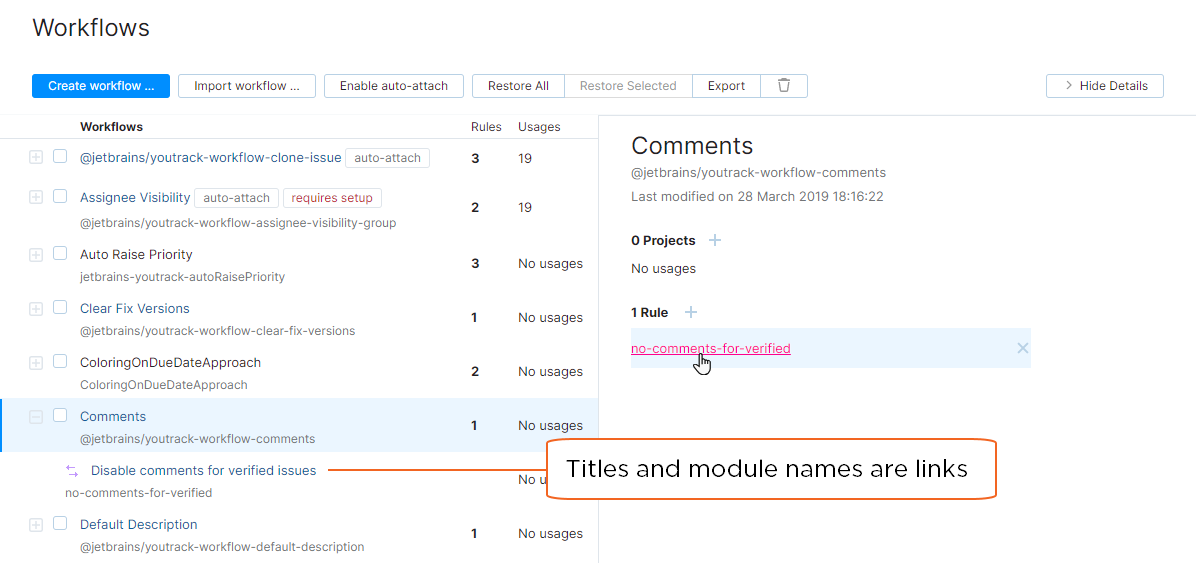
To detach legacy workflows from all projects:
From the Administration menu, select Workflows.
Check the list for a legacy workflow that is used in at least one project. Use this information to locate these workflows:
Look for workflows with titles that are formatted in plain text.
Check the Usages column for a positive number.
Select the legacy workflow. If the sidebar is hidden, click the Show details button.
Click the X icon for the first project in the list to detach the workflow from the corresponding project.
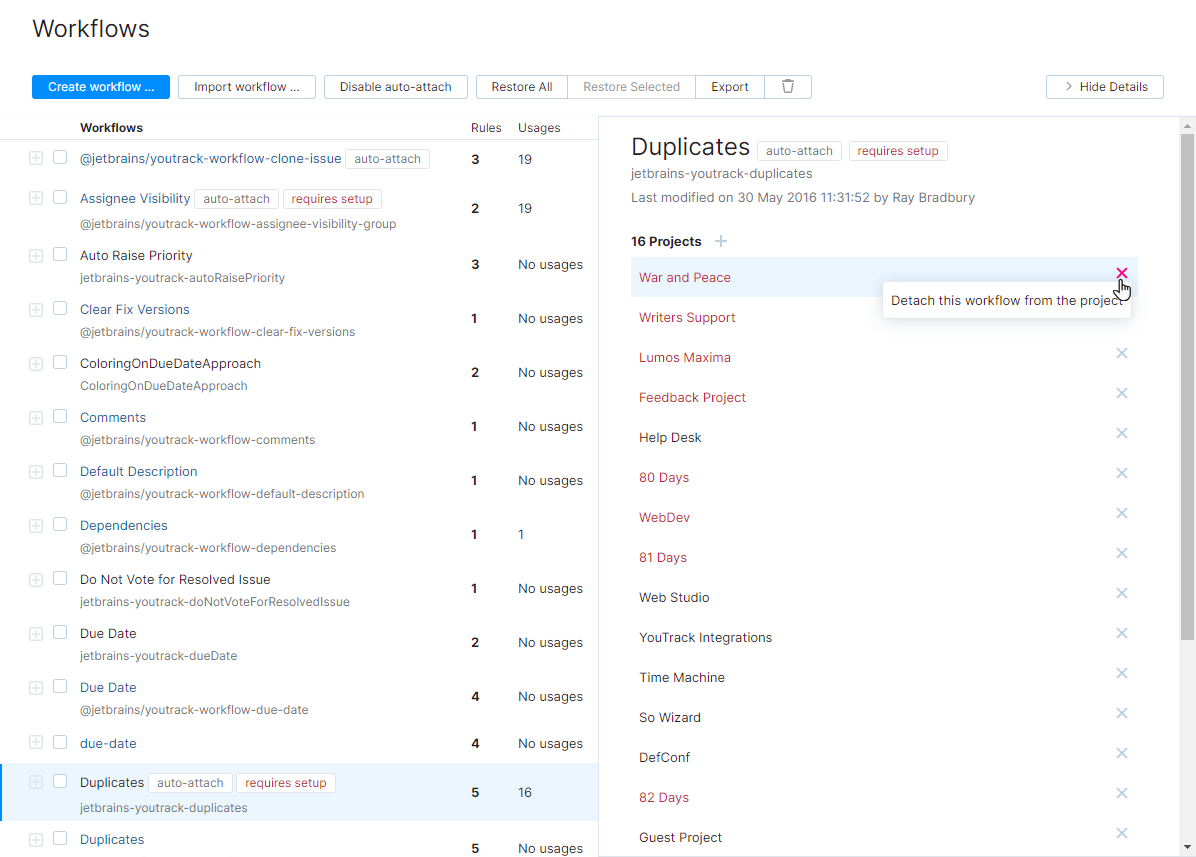
Continue detaching the workflow from any remaining projects until the setting in the detail panel reads 0 projects, No usages.
Repeat this procedure from step 2 until you have detached all legacy workflows from every project in your installation.
