Project level features
ReSharper provides a set of features that are useful when applied to projects or the entire solution, as opposed to individual coding helpers.
These features include ReSharper Build to optimize the way MSBuild compiles your projects; diagrams that display dependencies between projects or types, as well as a way to find specific code that implement these dependencies; refactorings to optimize references in your solution's projects; and a lot more functionality.
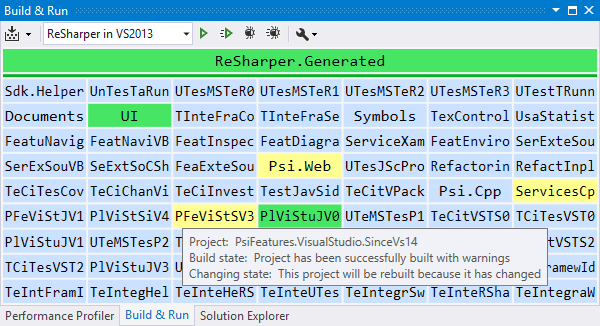
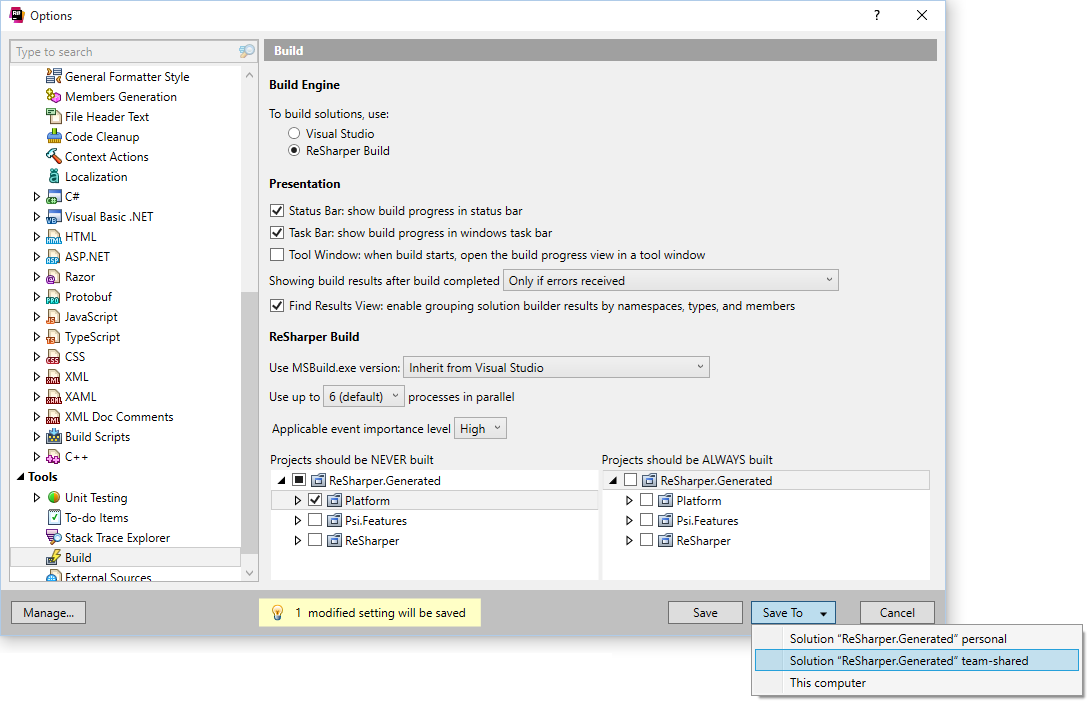
ReSharper build
ReSharper Build is an out-of-process incremental build tool that can take advantage of multiple processes, visualizes different kinds of project build status, and is optimized for large solutions with lots of dependencies.
ReSharper Build replaces Visual Studio build management with a system that applies heuristics to only build projects that need updating. Please note that it does not replace MSBuild and your projects are still built normally.
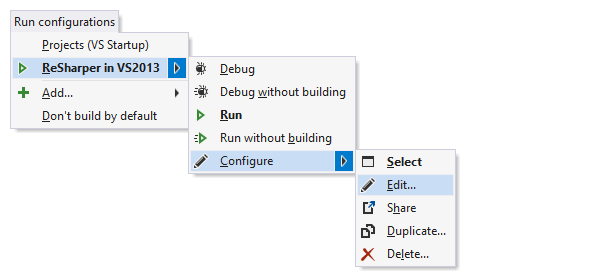
Run configurations
ReSharper provides new ways of executing code in Visual Studio with Run configurations. There are three kinds of run configurations:
- Project — With this configuration type, you can run or debug any executable project in your solution. This can be helpful in a large solution with multiple executable projects.
- Static method — This configuration type lets you run or debug any public static method without parameters. Need to debug a tricky algorithm in isolation? Simply create a static method, and have a run configuration set up.
- Executable — Using this configuration type, you can run or debug any executable file. If you choose the debug command, ReSharper will run the executable and then make Visual Studio attach to its process. A good use case for this configuration type is developing a plugin to another program where you have to create a complex execution setup.
You can also execute static methods without creating a permanent run configuration: just press Alt+Enter and use the Debug submenu in the action list.
To run or debug the active configuration, which is Visual Studio startup project by default, press Ctrl+F5 or F5. To manage run configurations, press Ctrl+Shift+Alt+R or choose in the menu.
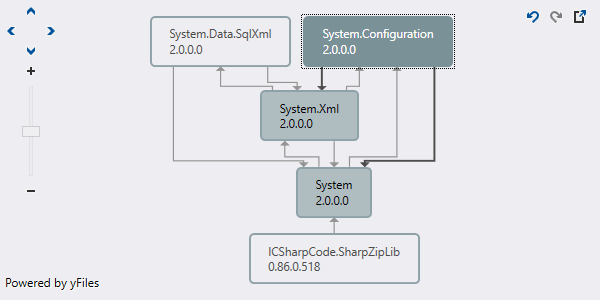
Project dependency diagram
WIth ReSharper, you can explore project dependencies in your solution using a visual representation of the solution architecture. At any time, you can open the Architecture View () and explore project dependencies without compiling anything.
Right in this view, you can perform refactorings (such as Adjust Namespaces or Remove Unused References), navigation actions and other useful commands. Besides, you can save a dependency snapshot, and then compare it to the current state of your solution as it evolves.
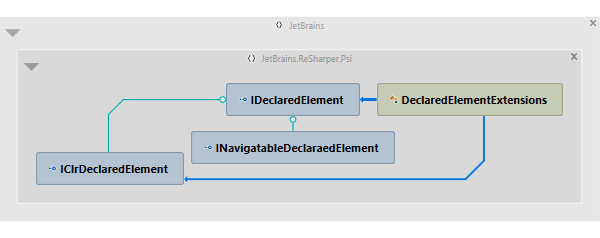
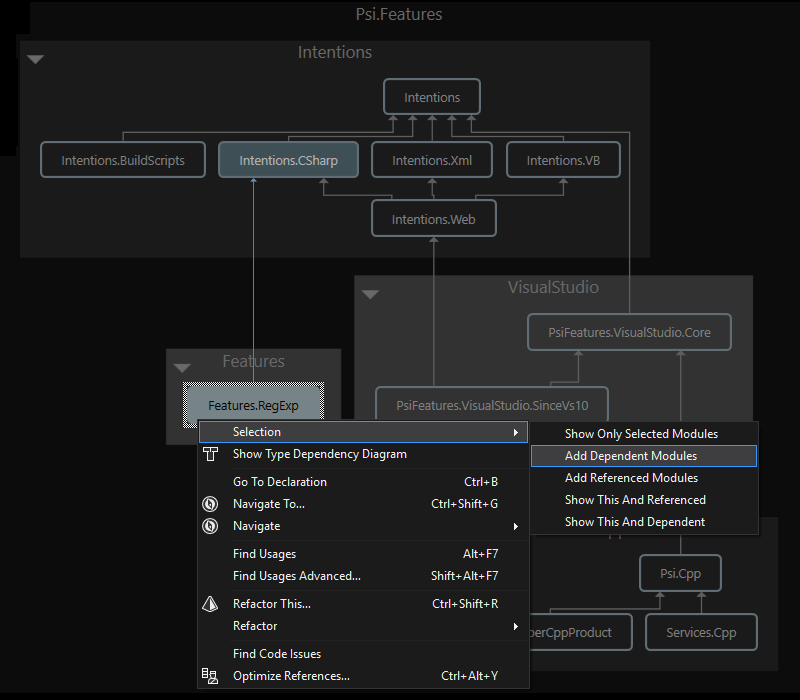
Type dependency diagram
ReSharper allows you to visually study how types depend on each other in your solution. In the type dependency diagram, you can add any number of types from different projects or compiled assemblies and visualize different kinds of dependencies between them. Besides the main menu command, , there are plenty of ways to add types to the diagram: e.g. you can add all types from the Find Results or Hierarchy window, from pop-ups showing navigation results, from the project dependency diagram, drag-n-drop types from other tool windows, and more.
Similarly to the project dependency diagram, a lot of navigation actions are available right from the type dependency diagram, as is the Move to Folder refactoring, which works with drag-n-drop here.
Assembly dependency diagram
ReSharper also lets you explore dependencies between compiled assemblies. You can create a diagram from any number of assemblies and explore how these assemblies reference each other.
You can invoke the diagram on selected assemblies in the Assembly Explorer and explore connections that are established between the assemblies by virtue of their references.
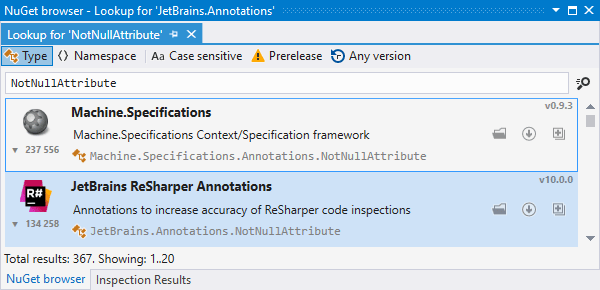
NuGet browser
With ReSharper, you can search for types or namespaces in the NuGet package gallery, and install the packages that match your search — all without leaving Visual Studio. You can do all this in the NuGet Browser window ().
You can even start the search right from the editor: press Alt+Enter on any unresolved type or namespace, and select Find on nuget.org to locate and install a missing NuGet package.
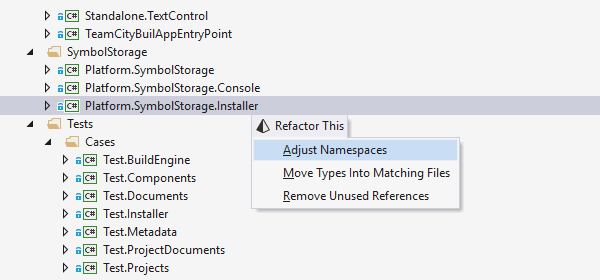
Adjust Namespaces
Some code refactoring features can be applied in the scope of a project, a solution folder or the entire solution.
For example, the Adjust Namespaces refactoring helps you synchronize namespaces to folder structure in any scope — as large as your whole solution. That is, if in a certain code file a namespace doesn't correspond to the location of the file in project structure, the namespace is renamed to comply with the file location. All using directives referencing the modified namespaces are updated accordingly.
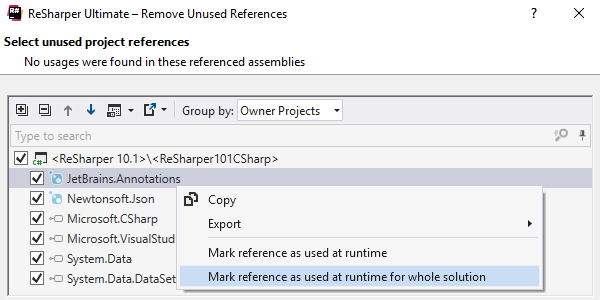
Remove Unused References
Another project-level refactoring, Remove Unused References, helps you detect and remove redundant references from your projects to clean up your solution.
There is also a way to mark references as used at runtime, which is important if you're using dependency injection frameworks.
By marking all references that are implicitly loaded, you can safely run ReSharper's Optimize References and Remove Unused References commands without breaking references that are required at runtime.
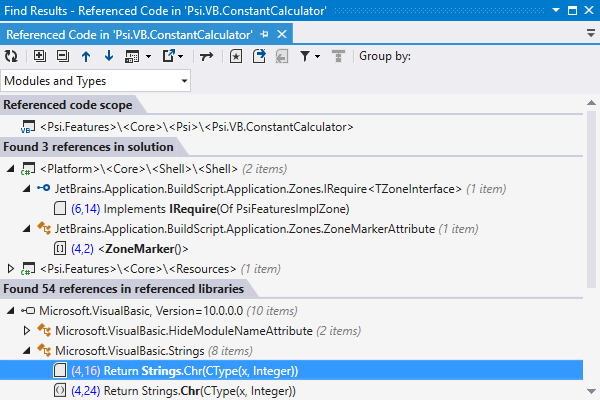
Find Referenced/Dependent Code
Find Dependent Code lets you find code that depends on a selected project. Find Referenced Code works the opposite way, letting you find any outgoing references encountered within a certain scope (which can be as narrow as a method or as large as a project).
Search results for both features are displayed in the Find Results window, or, if a single usage is found, the caret moves to the corresponding location.
To find dependent or referenced code, select a node in the Solution Explorer or position the caret at a container in the text editor, and choose or .
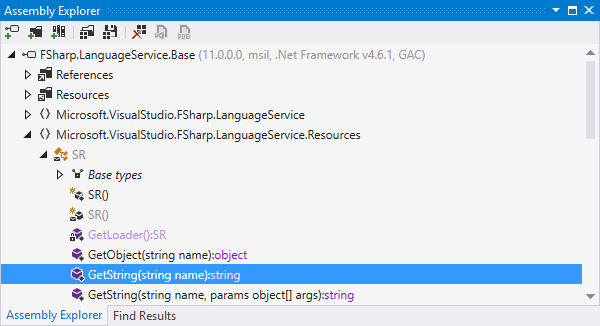
Assembly Explorer
This simple window helps you open compiled assemblies and then use navigation and search commands to traverse and explore them as if you were working with source code. Expanding an assembly node lists namespaces within the assembly, that can be further expanded to types and type members, as well as assembly references.
If a certain assembly is of a special interest to you, Assembly Explorer will help you export it to a Visual Studio project so that you can browse the source code, build, run, and debug it.
Collapse All in Solution Explorer
ReSharper aids Visual Studio when it comes to managing state of nodes in Solution Explorer. When you collapse a project or another high-level node in Solution Explorer, plain Visual Studio doesn't collapse its containing nodes. As a result, when you expand the project at a later time, you find out that it reveals a sporadically expanded structure.
With ReSharper, you can just right-click a Solution Explorer node and select Collapse All in the context menu — the selected node will be collapsed along with any of its child nodes.
Collapse All is a perfect match for another ReSharper neat little feature — Locate in Solution Explorer. For example, you can start with collapsing a project, and proceed with using Locate in Solution Explorer for expanding nodes that you really need.
Locate in Solution Explorer
This handy navigation feature, available with Shift+Alt+L, lets you highlight a corresponding node in Solution Explorer for any file that is currently open in the text editor. ReSharper highlights the node and auto-scrolls Solution Explorer, letting you actually see the highlighted node.
It is especially useful when you have a massive solution with tens to thousands of files, or a limited screen area that forces you to shrink the Solution Explorer window to the limit. In addition, the feature matches well with Collapse All in Solution Explorer.
Distributed storage of ReSharper settings
ReSharper settings are saved using a distributed storage model, meaning that any setting or setting group can be saved separately and ReSharper will combine and apply all of them as it runs.
Among the benefits of this model are having different settings for different solutions, sharing settings effortlessly, importing and exporting settings, and more. It can be especially useful for sharing settings that should be same within the team: code style settings, code templates, structural search and replace patterns.
By default, there are three setting layers: for all solutions in local computer, for the current solution, and for the shared solution settings. You can easily create, manage, and share new layers, e.g. for global company-wide settings.
Note on shortcuts
All keyboard shortcuts provided in this page are available in ReSharper's default "Visual Studio" keymap. For details on ReSharper's two keymaps, see ReSharper Documentation.