Get started
DataSpell is an Integrated Development Environment (IDE) that is dedicated to specific tasks for exploratory data analysis and prototyping ML (machine learning) models. You can download it from https://www.jetbrains.com/dataspell/.
Ensure you are all set
Before you start, check if all required software is available for your environment and installed on your machine.
Supported languages
To start developing in DataSpell you need to download and install Python from python.org and R from https://cran.r-project.org/.
DataSpell supports the following versions:
Python 2: version 2.7
Python 3: from the version 3.9 up to the version 3.15
R: 3.4 and later.
Supported platforms
DataSpell is a cross-platform IDE that works on Windows, macOS, and Linux. Check the system requirements:
Requirement | Minimum | Recommended |
|---|---|---|
RAM | 2 GB of free RAM | 8 GB of total system RAM |
CPU | Any modern CPU | Multi-core CPU. DataSpell supports multithreading for different operations and processes making it faster the more CPU cores it can use. |
Disk space | 3.5 GB | SSD drive with at least 5 GB of free space |
Monitor resolution | 1024×768 | 1920×1080 |
Operating system | Officially released versions of the following:
Pre-release versions are not supported. | The latest versions of the following:
|
If you need assistance installing DataSpell, see the installation instructions.
Install Conda
If you plan to use Conda environment:
Download Anaconda.
Install Anaconda using the installation instructions.
Find your way
Once you run DataSpell, it shows the Welcome screen, the starting point to your work with the IDE, and configuring its settings.
When you run DataSpell for the first time, you can choose one of the following options:
Quick Start
DataSpell workspace is opened. You can add directories and projects, as well as Jupyter connections to the workspace.
For more information, refer to Quick Start.
Projects
Select this option if you want to work with projects. You can either open an existing project from disk or VCS, or create a new project.
For more information, refer to Work with projects in DataSpell.
You can add local notebooks and datasets to the workspace, attach directories, and clone projects from Version Control Systems.
Get acquainted with the main UI elements:

For more information, refer to User interface.
Work with notebooks
In DataSpell, you can easily edit, execute, and examine execution outputs including stream data, images, and other media. Here is a typical workflow:
Execute the cells and evaluate the results
Debug code cells, if needed
Create a notebook file
Do one of the following:
Right-click the target directory in the Workspace tool window, and select New from the context menu.
Press Alt+Insert
Select Jupyter Notebook.
In the dialog that opens, type a filename, example.

A notebook document has the *.ipynb extension and is marked with the corresponding icon:
 .
.A newly created notebook opens in the editor. It contains one code cell. You can change its type with the cell type selector in the notebook toolbar:

Edit a notebook
To edit a cell, just click it.
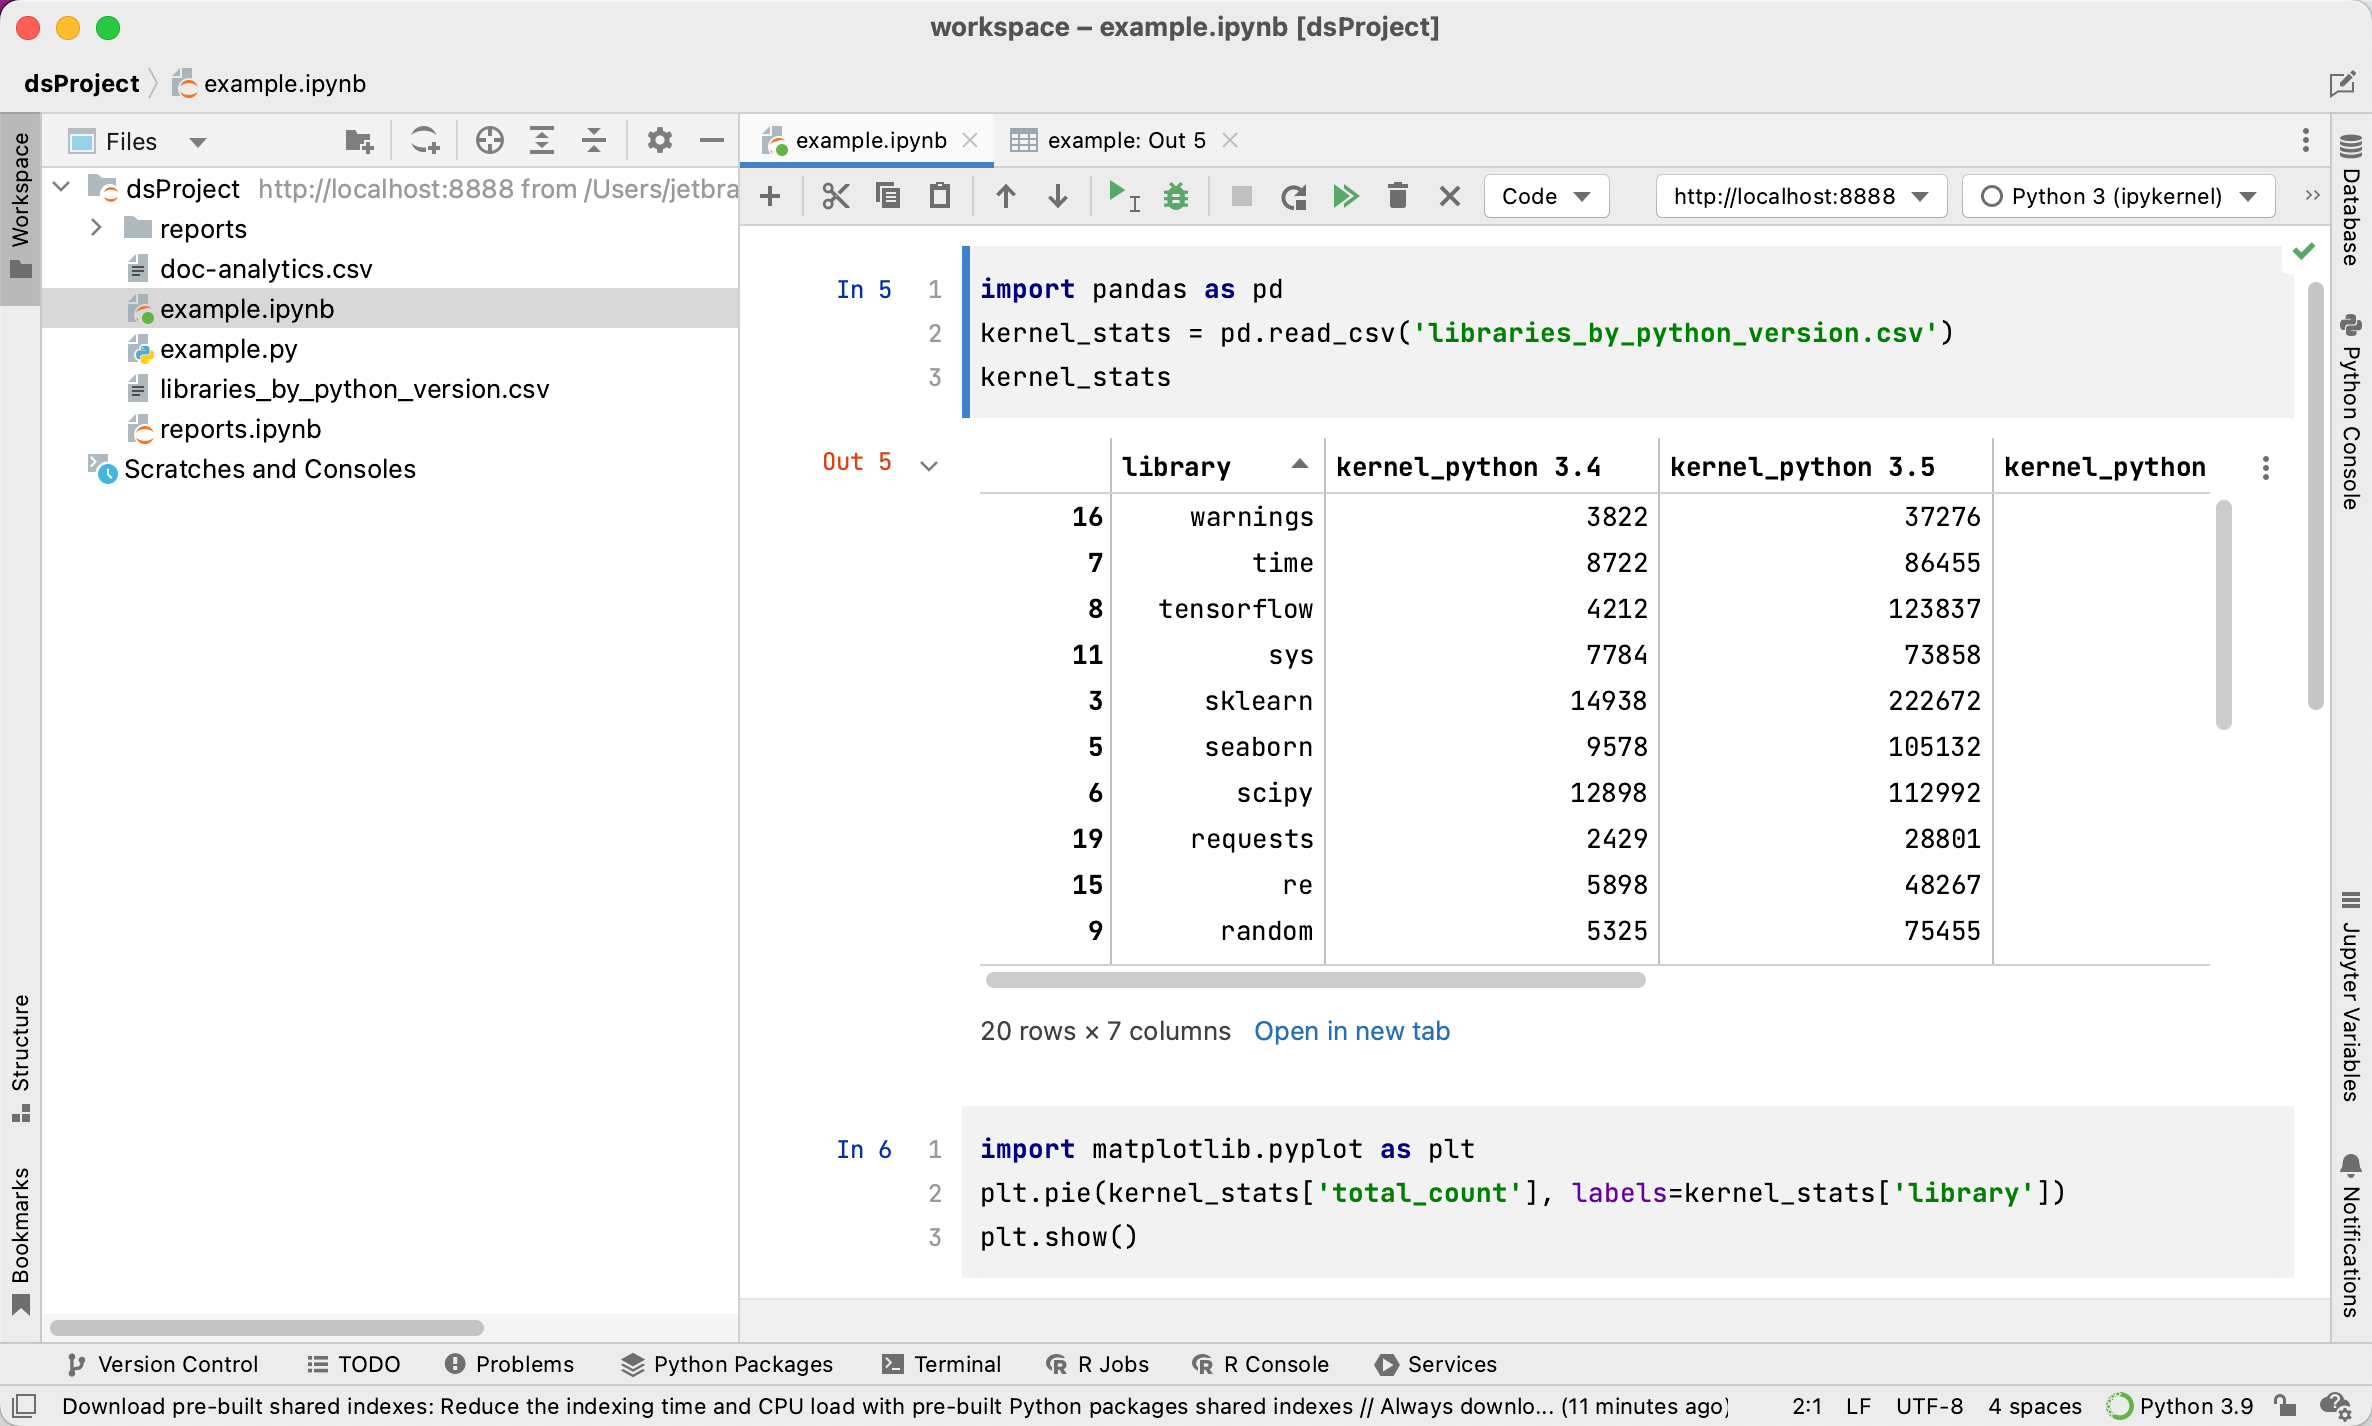
Put some pandas code in the first code cell:
import pandas as pd kernel_stats = pd.read_csv('libraries_by_python_version.csv') kernel_statsYou do not need to install the
pandaspackage in advance. Just click a highlighted line, press Alt+Enter, and select a suggested fix for the missing import statement.This example uses the libraries_by_python_version.csv dataset. Download it from libraries_by_python_version.csv and save in the project directory.
Add more code or Markdown cells to your notebook. You can add a code cell after the very last cell, add a code cell or Markdown cell right after the selected cell, and insert a new cell after executing the selected cell. You can find these actions in the main menu item.
Let's put some
matplotlibcode to visualize the data frame of the first code cell.import matplotlib.pyplot as plt plt.pie(kernel_stats['total_count'], labels=kernel_stats['library']) plt.show()
Again, there is no need to preinstall
matplotlibandnumpy. Use Alt+Enter to fix imports.
You can edit code cells with the help of code insights, such as syntax highlighting, code completion, and so on.

Execute notebooks
You can execute the code of the notebook cells in many ways using the icons on the Jupyter notebook toolbar, commands of the code cell context menu (right-click the code cell to open it), and the commands of the main menu.
Once you’ve executed the cell, its output is shown below the code. You can click Open in new tab to preview tabular data in a separate tab of the editor.

Note that when you work with local notebooks, you don’t need to launch any Jupyter server in advance: just execute any cell and the server will be launched.
The Jupyter tool window shows the execution status. the current values of the variables in the Variables tab. You can preview the variables declared in your code in the Jupyter Variables tool windows.
Now execute the second cell. Its code depends on a variable from the first cell, so the order of cell execution is important.

You can copy the built plot or save it as an image. To execute all cells, click
 on the notebook toolbar.
Debug
Click the gutter (the leftmost space in the editor) to set the breakpoints in the selected cell.
Press Shift+Alt+Enter for Windows/Linux or ⌥⇧⏎ for macOS. To debug the entire notebook, select from the main menu.

Use the stepping toolbar buttons to choose on which line you want to stop next and switch to the Debugger tool window to preview the variable values.

Manage connections
You can run notebooks on different servers and kernels. You work with two types of Jupyter servers: configured and managed:
Managed servers are automatically launched by DataSpell for the current project. They are terminated when you close DataSpell.
Configured servers. You connect to these servers by specifying its URL and token. You can connect to a local or remote Jupyter server.
Configure servers
When you launch any Jupyter server, by default it uses the current project interpreter and the automatically selected port. However, you can select any other interpreter available in your DataSpell instance and specify an alternative port. You can also connect to any configured server if you know its URL and token.
To open the server settings, select Configure Jupyter Server in the list of the Jupyter servers on the Jupyter notebook toolbar.

To connect to any running Jupyter server, select Configured Server and specify the server's path including a URL and a token.
In the Jupyter toolbar, from the list of the servers, select Switch to the current Jupyter Server to explicitly switch to the configured server.
See Manage Jupyter notebook servers for more details.
Tune your working environment
A virtual environment based on a Python interpreter is required to execute Python code in your notebooks. So, you need at least one environment be configured on your machine.
When you open an existing project in DataSpell or connect to a Jupyter server, the IDE creates a virtual environment for you. In most cases, it is a Conda environment based on your Anaconda installation. You can select any other Conda environment on your machine or create a new one.
Change your environment
Change the environment with the Python interpreter selector located in the lower-right corner of the DataSpell UI. Click it and select the target environment from the list.

Change Conda with Anaconda CLI
In the Terminal window, run the
lscommand in the <Conda Home>/envs directory (for example, /Users/jetbrains/.conda/envs) and select the target environment.Navigate to the bin directory of your anaconda installation (for example, anaconda3/bin).
Execute the
conda activate <env name> command(for example,conda activate my-conda-env).
Create a new environment
Select Add interpreter in the Python interpreter selector.
In the Add Python Interpreter dialog, enter the name of the new environment, and specify the Anaconda base in the Conda executable field.

The reason for creating various Conda environments based on the same Anaconda installation is obvious - you can install specific packages for each environment and use them for specific tasks and projects. You can also select other types of environments, venv or pipenv.
Install packages
In the Python interpreter selector, choose the target environment and select Interpreter Settings.

Click
 to add a new package. Click the Conda package manager button (
 ) to manage packages from the Conda repository. Otherwise, DataSpell will be using pip.
Type a package name in the Search field and locate the target package. If needed, specify a package version.
Click Install. Close the window on the task completion.
Go beyond
R language
With the R plugin installed in DataSpell, you can perform various statistical computing using R language and use coding assistance, visual debugging, smart running and preview tools, and other popular IDE features.

Databases
As you might have noticed already, creating projects of the various types requires a data source. It is also quite possible that you inject SQL statements into your source code.
DataSpell does not enable you to create databases, but provides facilities to manage and query them. Once you are granted access to a certain database, you can configure one or more data sources within DataSpell that reflect the structure of the database and store the database access credentials. Based on this information, DataSpell establishes a connection to the database and provides the ability to retrieve or change information contained therein.
Access to the databases is provided by the Database window (). This tool window allows you to work with the databases. It lets you view and modify data structures in your databases, and perform other associated tasks.

For more information, refer to Database Tools and SQL.