Docker containers
Docker containers are runtime instances of the corresponding images. Aqua uses Docker run configurations to execute the commands that build Docker images and run containers.
Enable the Docker plugin
This functionality relies on the Docker plugin, which is bundled and enabled in Aqua by default. If the relevant features are not available, make sure that you did not disable the plugin.
Press Ctrl+Alt+S to open settings and then select .
Open the Installed tab, find the Docker plugin, and select the checkbox next to the plugin name.
Run a container from an existing image
You can run a container from any locally existing Docker image that you either pulled or built previously.
In the Services tool window, select an image and click
or select Create Container from the context menu.
In the Create Container popup, click Create.
In the Create Docker Configuration dialog that opens, you can provide a unique name for the configuration and specify a name for the container. If you leave the Container name field empty, Docker will give it a random unique name.
When you are done, click Run to launch the new configuration.
This creates and starts the Docker Image run configuration.
Run a container from a Dockerfile
Open the Dockerfile from which you want to run the container.
Click
in the gutter and select to run the container from this Dockerfile.

This creates and starts the Dockerfile run configuration with default settings, which first builds an image based on the Dockerfile and then runs a container based on this image.
To create a run configuration with custom settings, click in the gutter and select New Run Configuration. You can specify a custom tag for the built image, as well as a name for the container, and a context folder from which to read the Dockerfile. The context folder can be useful, for example, if you have some artifacts outside the scope of your Dockerfile that you would like to add to the file system of the image.
Interacting with containers
Created containers are listed in the Services tool window. By default, the Services tool window displays all containers, including those that are not running. To hide stopped containers from the list, click in the toolbar, select Docker, and then click Stopped Containers to remove the checkbox.

When you select a container, you can view the Build Log tab that shows the deployment log produced by the corresponding Docker run configuration while creating and starting the container.

The Dashboard tab provides important information about the container. Besides its name and hash ID, it also lists the environment variables, ports, and volume bindings. You can add, edit, and remove the environment variables, ports, and volume bindings. However, these changes require you to recreate the container and do not change in the Docker run configuration that is used to create this container. This means that the changes will not persist when you run the configuration next time.

For more information, refer to Container dashboard.
Execute a command inside a running container
In the Services tool window, right-click the container name and then click Exec.
In the Run Command in Container popup, click Create and Run to create and execute a new command.
Alternatively, you can select one of the commands that you ran previously.
In the Exec dialog, type the command and click OK. For example:
ls /tmpList the contents of the /tmp directory
mkdir /tmp/my-new-dirCreate the my-new-dir directory inside the /tmp directory
/bin/bashStart a
bashsession
For more information, refer to the docker exec command reference.
View detailed information about a running container
In the Services tool window, right-click the container name and then click Inspect.
The output is rendered as a JSON object on the Inspection tab.

For more information, refer to the docker inspect command reference.
View processes running in a container
In the Services tool window, right-click the container name and then click Show Processes.
The output is rendered as a JSON array on the Processes tab.
For more information, refer to the docker top command reference.
Attach a console to the container output
In the Services tool window, right-click the container and then click Attach.
The console is attached to the output of the ENTRYPOINT process running inside a container, and is rendered on the Attached Console tab.
For more information, refer to the docker attach command reference.
Browse files in a container
In the Services tool window, right-click the container and then click Show Files.
Aqua executes the
lscommand in the container and opens the Files tab with the container's file system.
On the Files tab, you can double-click any file to view it in the editor. Aqua opens the file in read-only mode, so you cannot edit or delete it.
Bind mounts on SELinux
If the host machine uses SELinux, the security module might prevent processes running inside the container from accessing the mounted files and directories. To avoid this, label the mounted files and directories with the :z option. For more information, refer to Configure the SELinux label.
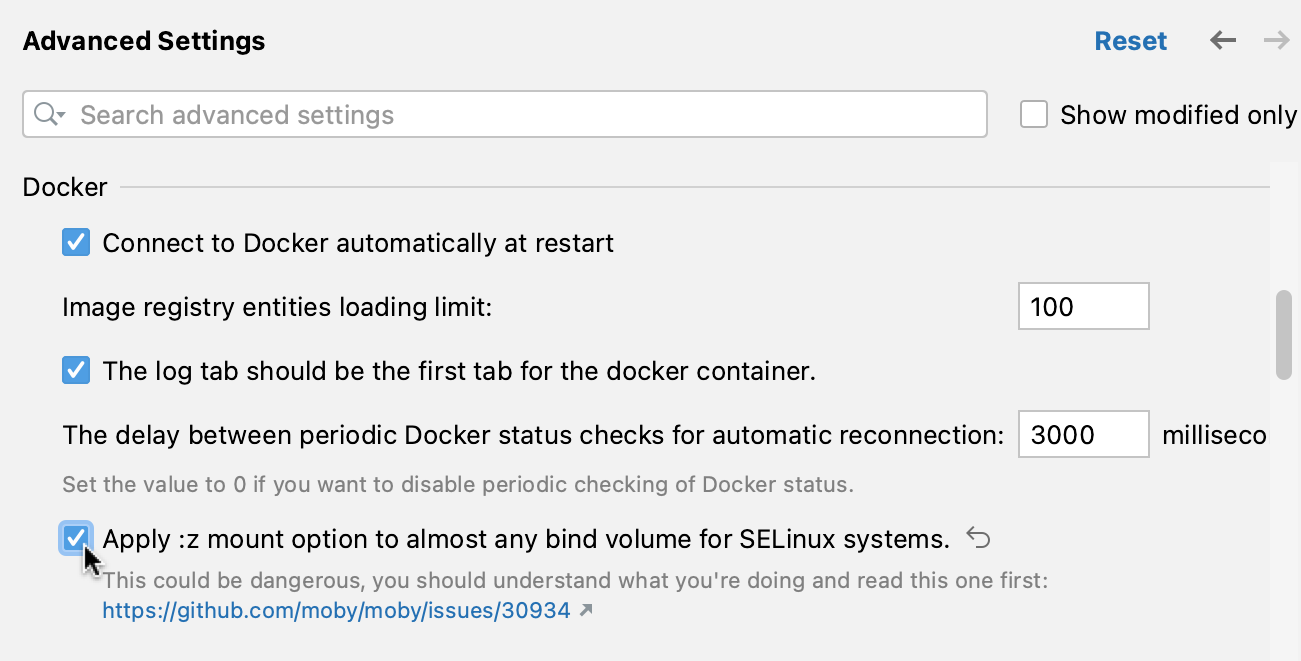
When running Docker containers, Aqua can automatically add the :z flag to all volume bindings on the host machine except top-level directories, such as /bin.
Apply SELinux labels for bind mounts
Press Ctrl+Alt+S to open settings and then select .
Select Apply :z mount option to almost any bind volume for SELinux systems.
