Configure Python interpreters
The list of Python SDKs, available for the various projects, can include interpreters installed locally, as well as the virtual environments. The procedure described below supposes that the necessary Python interpreters are already installed on your computer.
Add Python interpreters
Go to .
Click Add Interpreter next to the Python Interpreter field.
Select the interpreter type and set up the configuration:
Select Virtualenv Environment from the list of environment types.
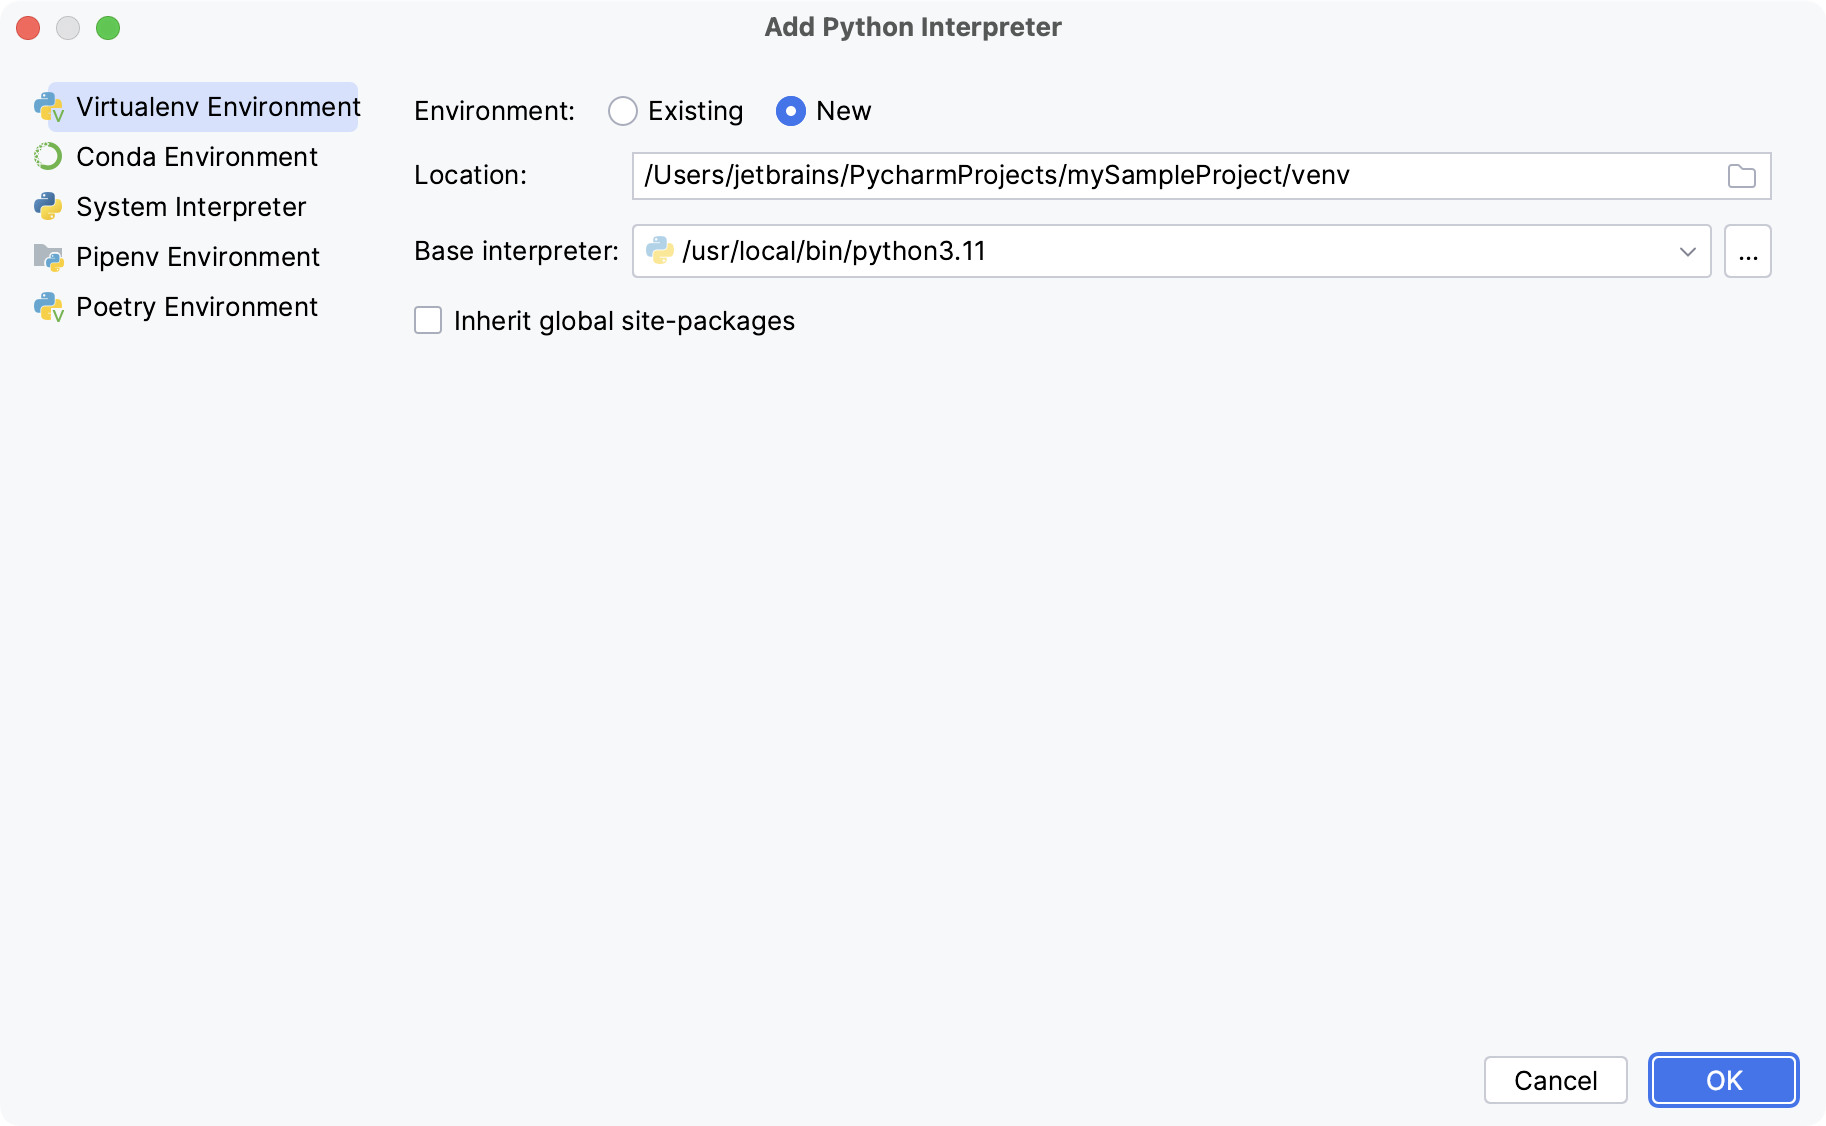
The following actions depend on whether you want to create a new virtual environment or to use an existing one.
- New virtual environment
Select the base interpreter from the list, or click
and find the Python executable in your file system.
Specify the location of the new virtual environment in the Location field, or click
and browse for the location in your file system. The directory for the new virtual environment should be empty.
Select the Inherit packages from base interpreter checkbox if you want all packages installed in the global Python on your machine to be added to the virtual environment you're going to create. This checkbox corresponds to the
--system-site-packagesoption of the virtualenv tool.
- Existing virtual environment
Choose the desired interpreter from the list.
If the desired interpreter is not on the list, click
, and then browse for the desired Python executable (for example, venv/bin/python on macOS or venv\Scripts\python.exe on Windows).
The selected virtual environment will be reused for the current project.
Click OK to complete the task.
Ensure that Anaconda or Miniconda is downloaded and installed on your computer, and you are aware of a path to its executable file.
For more information, refer to the installation instructions.
Select Conda from the list of environment types.
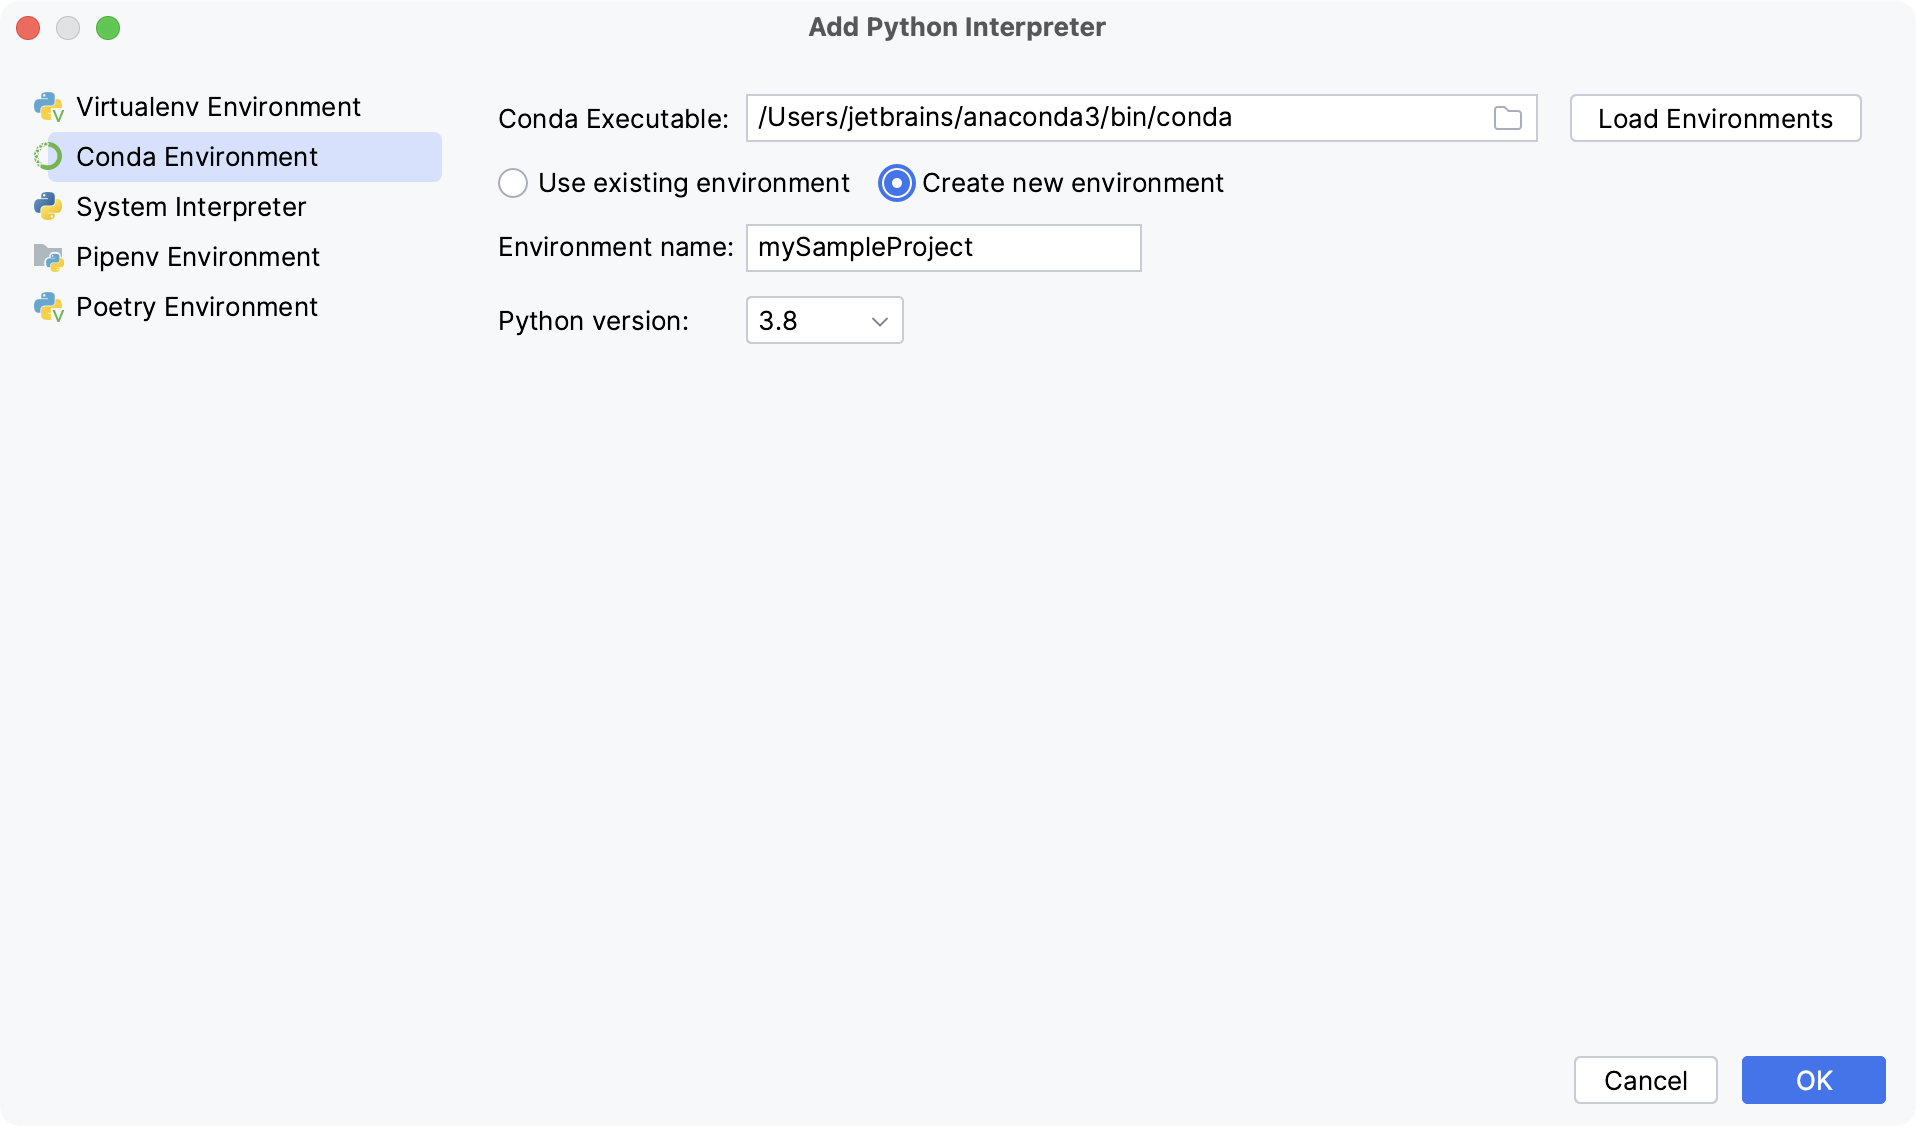
The following actions depend on whether you want to create a new conda environment or to use an existing one.
- New conda environment
Select Conda from the list of environment types.
Select the Python version from the list.
Specify the environment name.
CLion will detect a conda installation.
If CLion did not detect the installation automatically, specify the location of the conda executable, or click
to browse for it.
- Existing conda environment
Select the environment from the list.
The selected conda environment will be reused for the current project.
Click OK to complete the task.
Ensure that you have downloaded and installed Python on your computer.
- Installing Python on Windows from Microsoft Store
If you are on Windows, you can download Python from the Microsoft Store and install it as a Python interpreter. Once the Python application is downloaded from the Microsoft Store, it becomes available in the list of the Python executables.
Note that interpreters added from the Microsoft Store installations come with some limitations. Because of restrictions on Microsoft Store apps, Python scripts may not have full write access to shared locations such as
TEMPand the registry.
Select System Interpreter from the list of environment types.
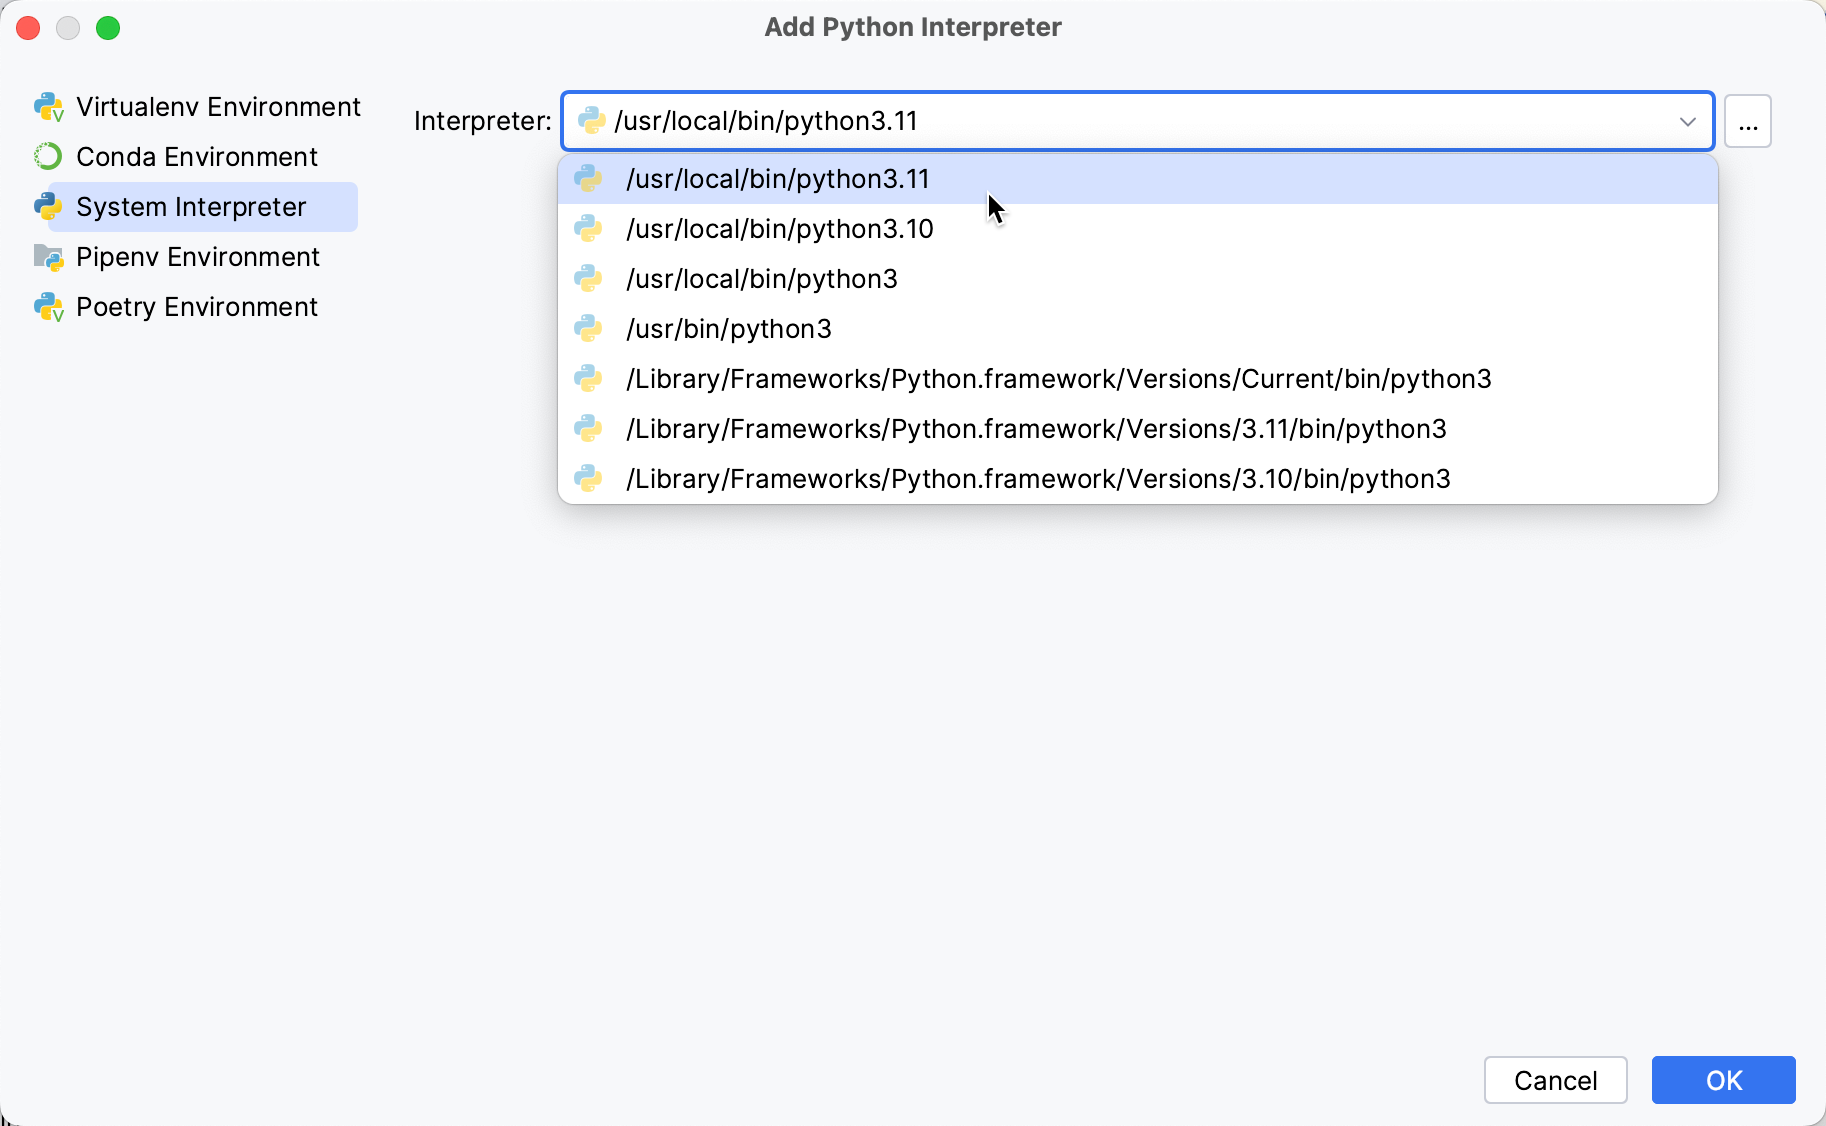
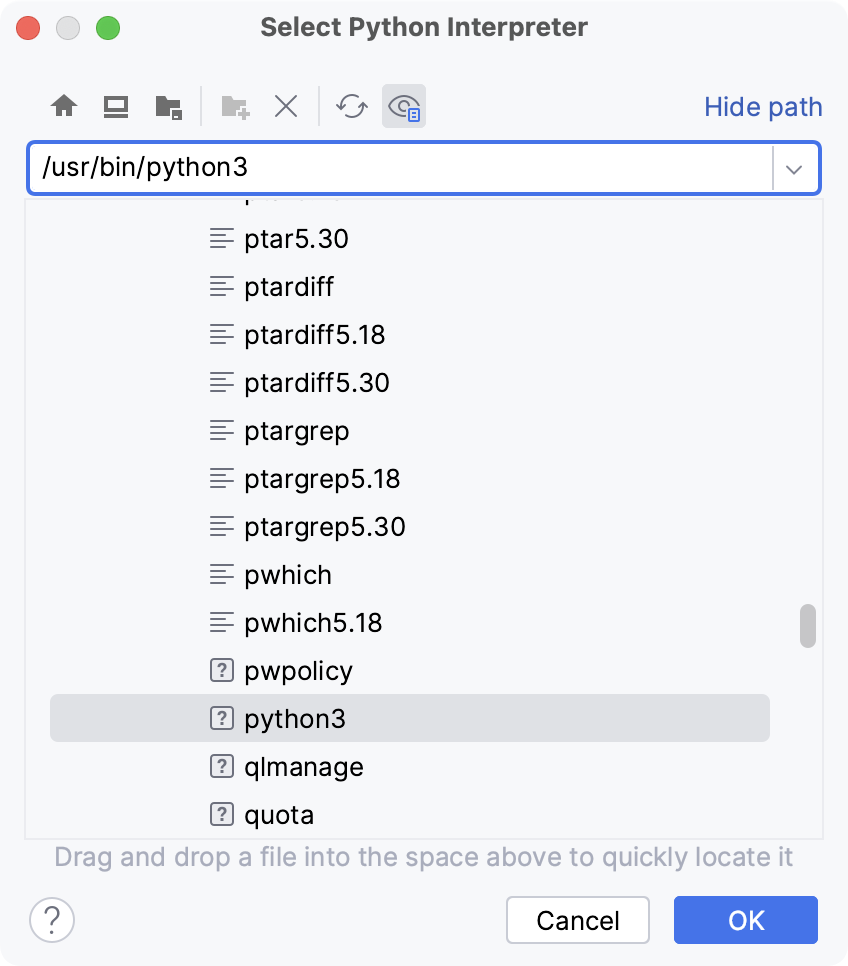
In the Interpreter drop-down, select one of the Python interpreters that have been installed in your system, or click
and in the Select C/C++ Interpreter dialog that opens, choose the desired C/C++ executable.
You will need admin privileges to install, remove, and upgrade packages for the system interpreter. When attempting to install an interpreter package through an intention action, you might receive the following error message:
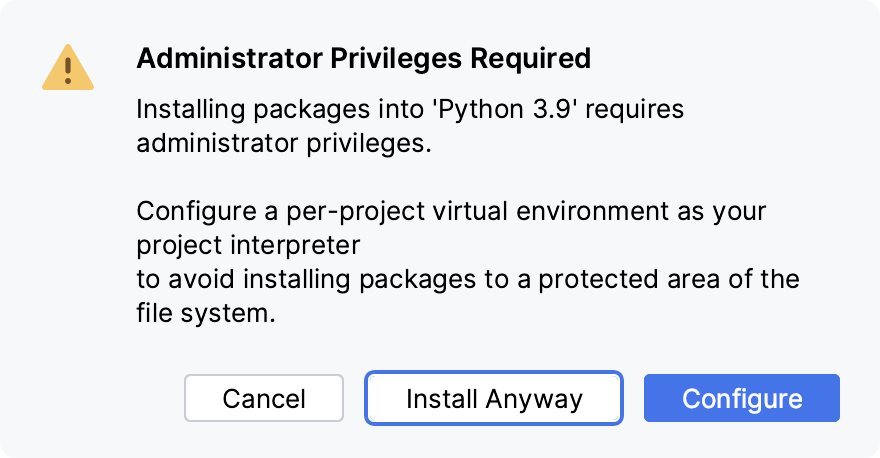
As prompted, consider using a virtual environment for your project.
Click OK to complete the task.
Select Pipenv Environment from the list of environment types.
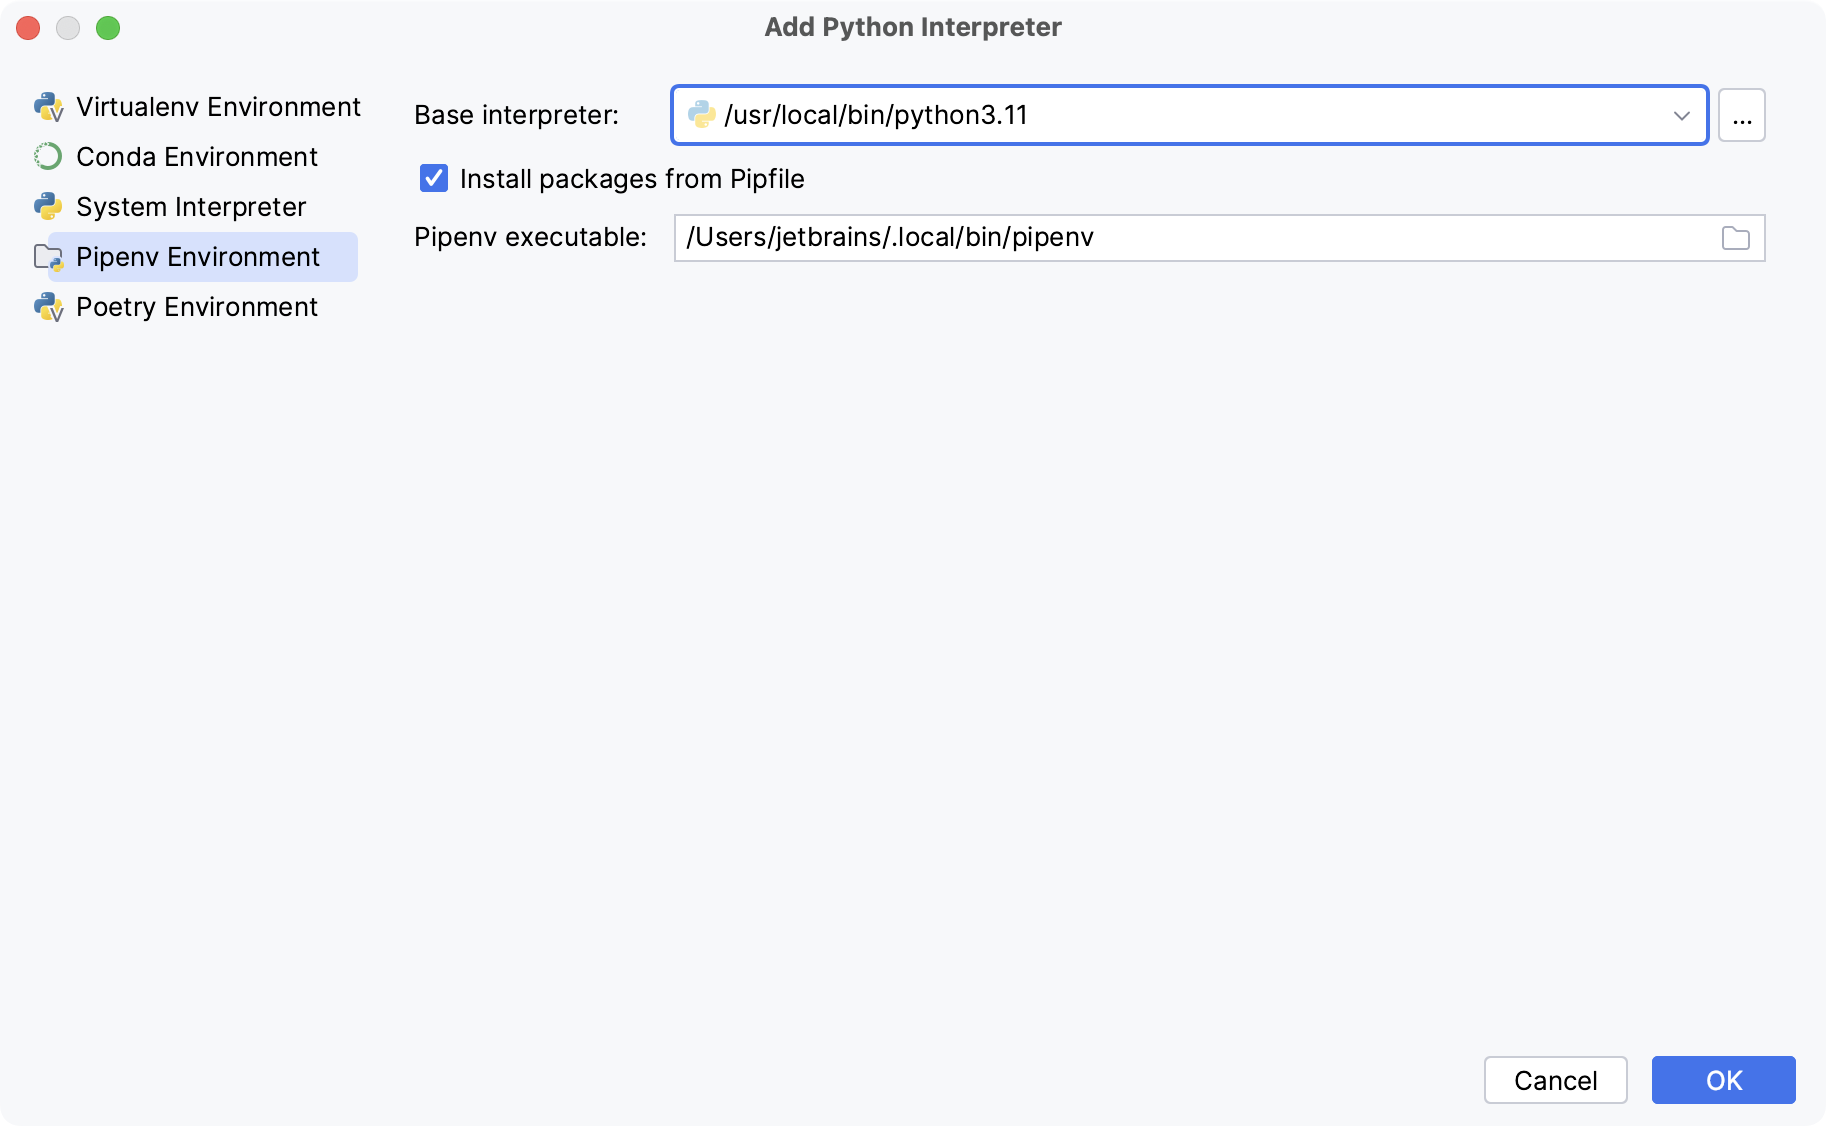
Choose the base interpreter from the list, or click
and find the Python executable in your file system.
If your project contains Pipfile, you can choose whether you want to install the packages listed in it by enabling or disabling the Install packages from Pipfile checkbox. By default, the checkbox is enabled.
If you have added the base binary directory to your
PATHenvironmental variable, you do not need to set any additional options: the path to the pipenv executable will be autodetected.If the pipenv executable is not found, follow the pipenv installation procedure to discover the executable path and then specify it in the dialog.
Click OK to complete the task.
Select Poetry Environment from the list of environment types.
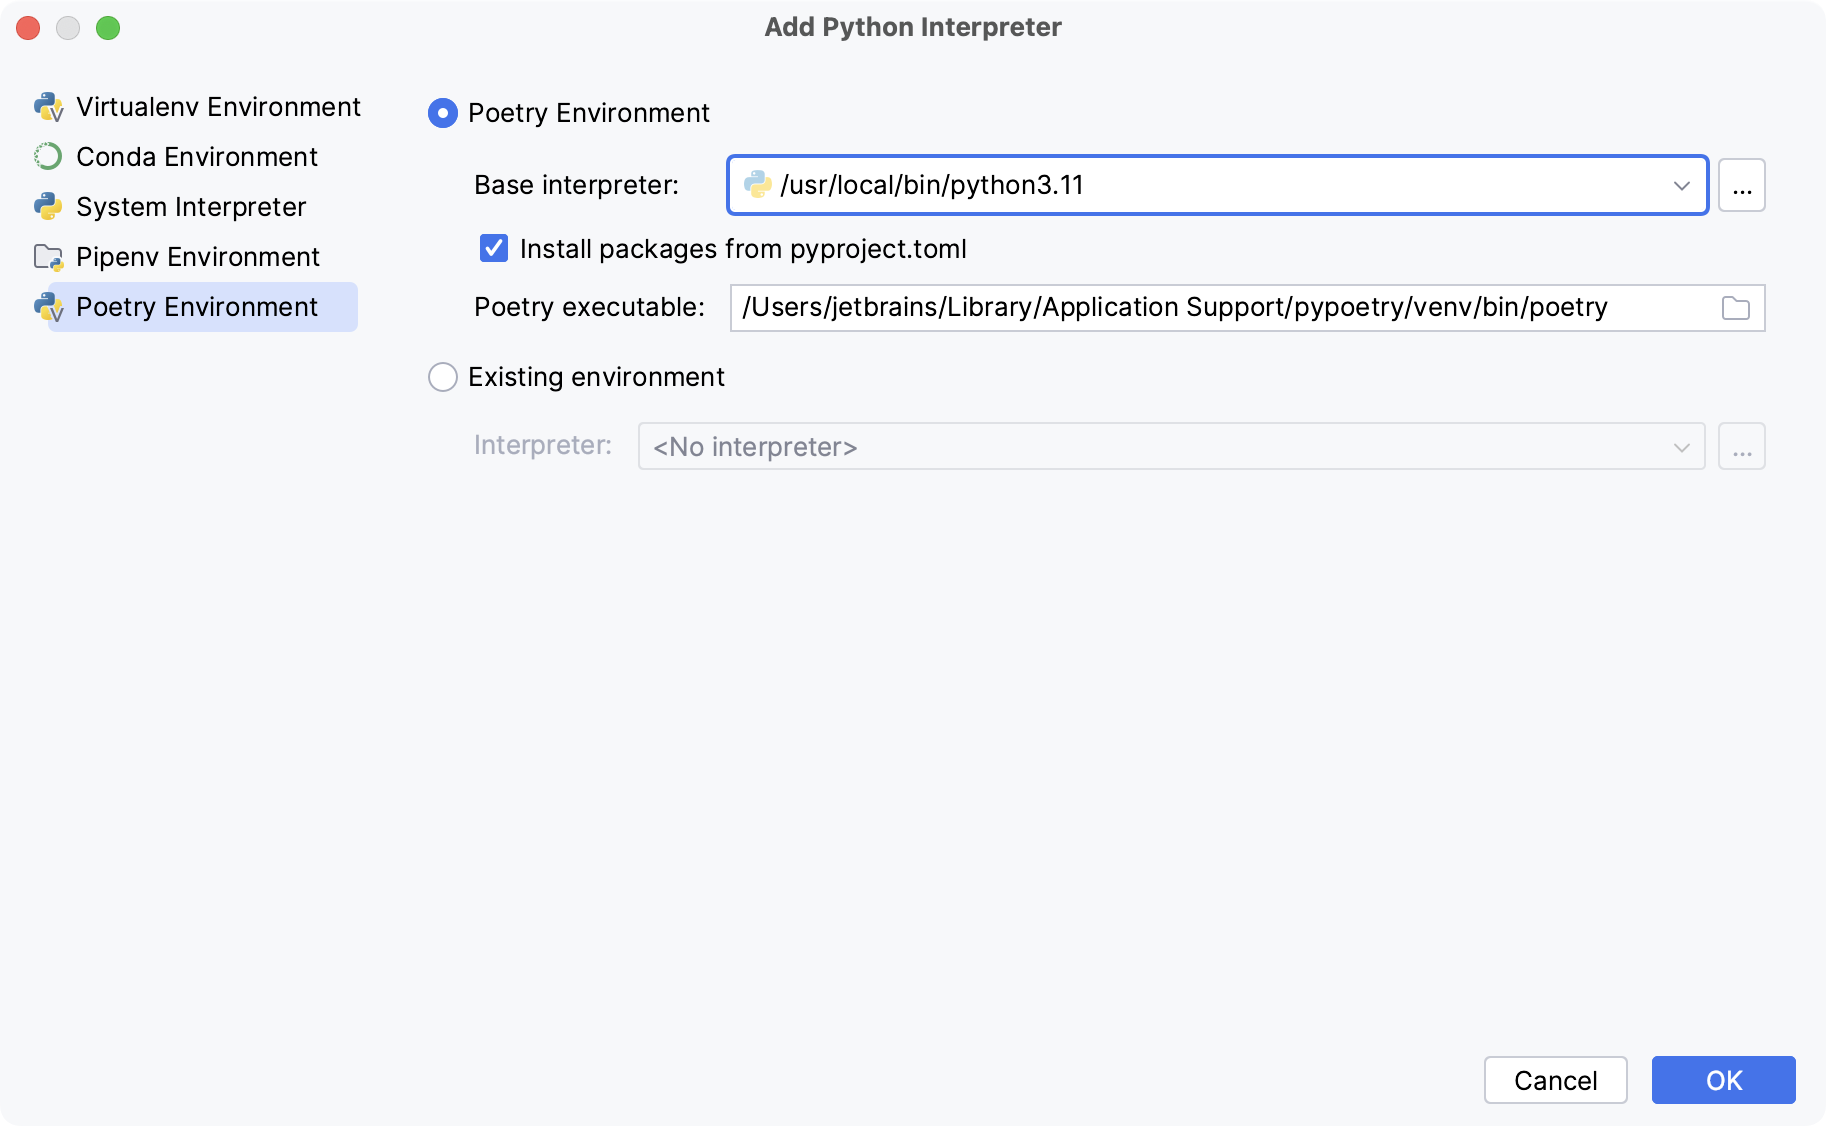
The following actions depend on whether you want to create a new Poetry environment or to use an existing one.
- New Poetry environment
Select Poetry Environment.
Select the base interpreter from the list or click
and find the Python executable in your file system.
If your project contains pyproject.toml, you can choose whether you want to install the packages listed in it by enabling or disabling the Install packages from pyproject.toml checkbox. By default, the checkbox is enabled.
- Existing Poetry environment
Select Poetry from the list of environment types.
Select Existing environment. Then expand the Interpreter list and choose the interpreter.
The selected Poetry environment will be reused for the current project.
Click OK to complete the task.
Set up a Python interpreter for the project
After you configure Python interpreters, you can select one of them from the list:
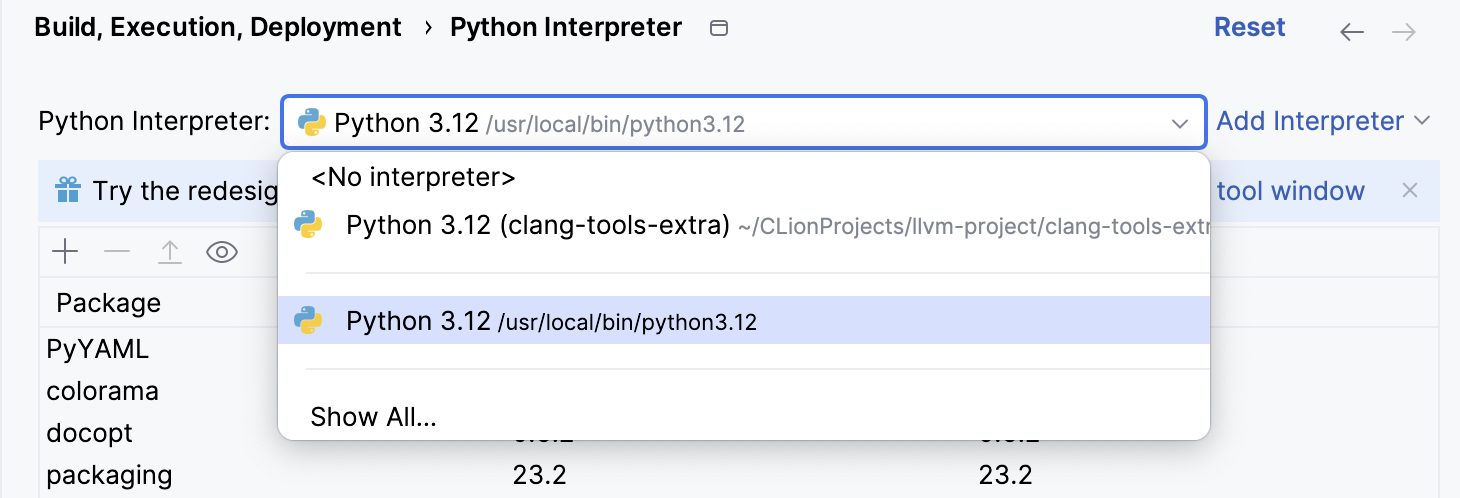
Click Apply to set the selected interpreter for your project.