Cells
Quick documentation
The quick documentation provides details about values in the selected cell or cells. For example, if a cell contains a long text, you will see the whole text. Also, you can see records that are referenced in the current record as well as the records that reference the current one.
Object | Quick documentation view |
|---|---|
Long text | If a cell contains a long text, you will see the whole text. 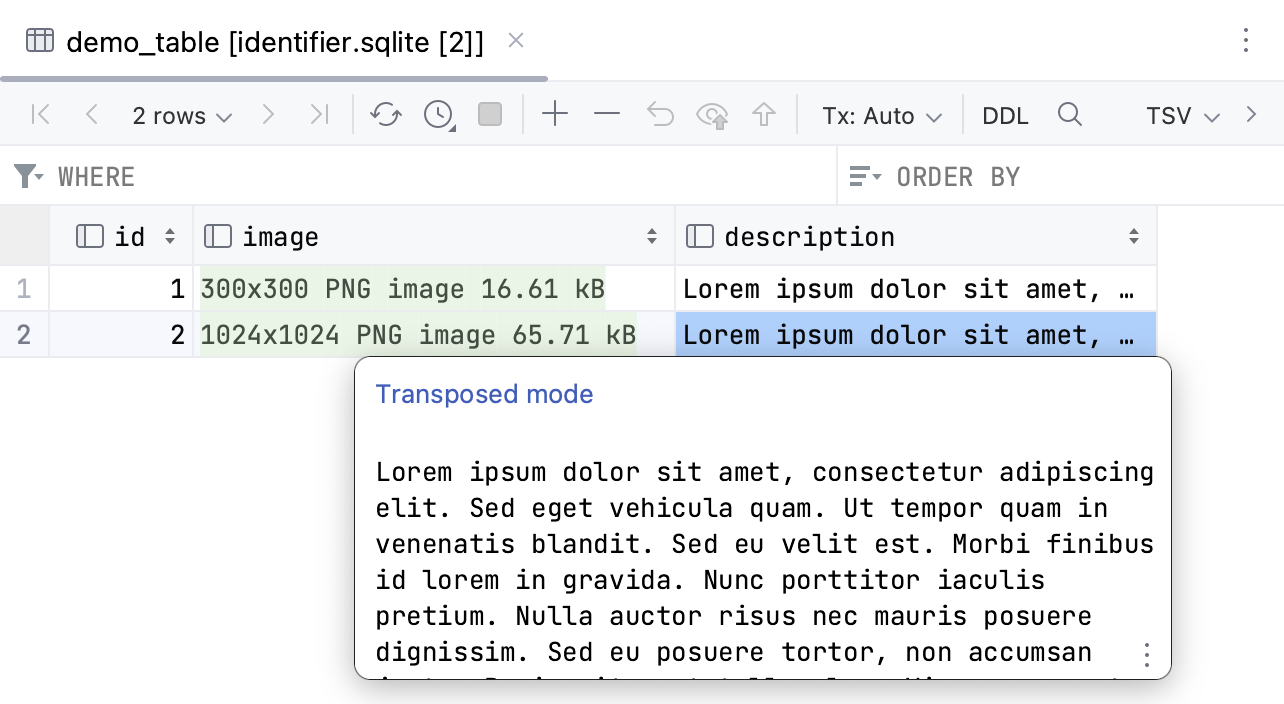 |
Records | The quick documentation view for records displays records that are referenced in the current record and records that reference the current one. You can switch to a transposed mode. In the transposed view, rows and columns are interchanged. To switch to the transposed mode, click Transposed mode. For more information about the transposed view in tables, refer to Transpose a table. 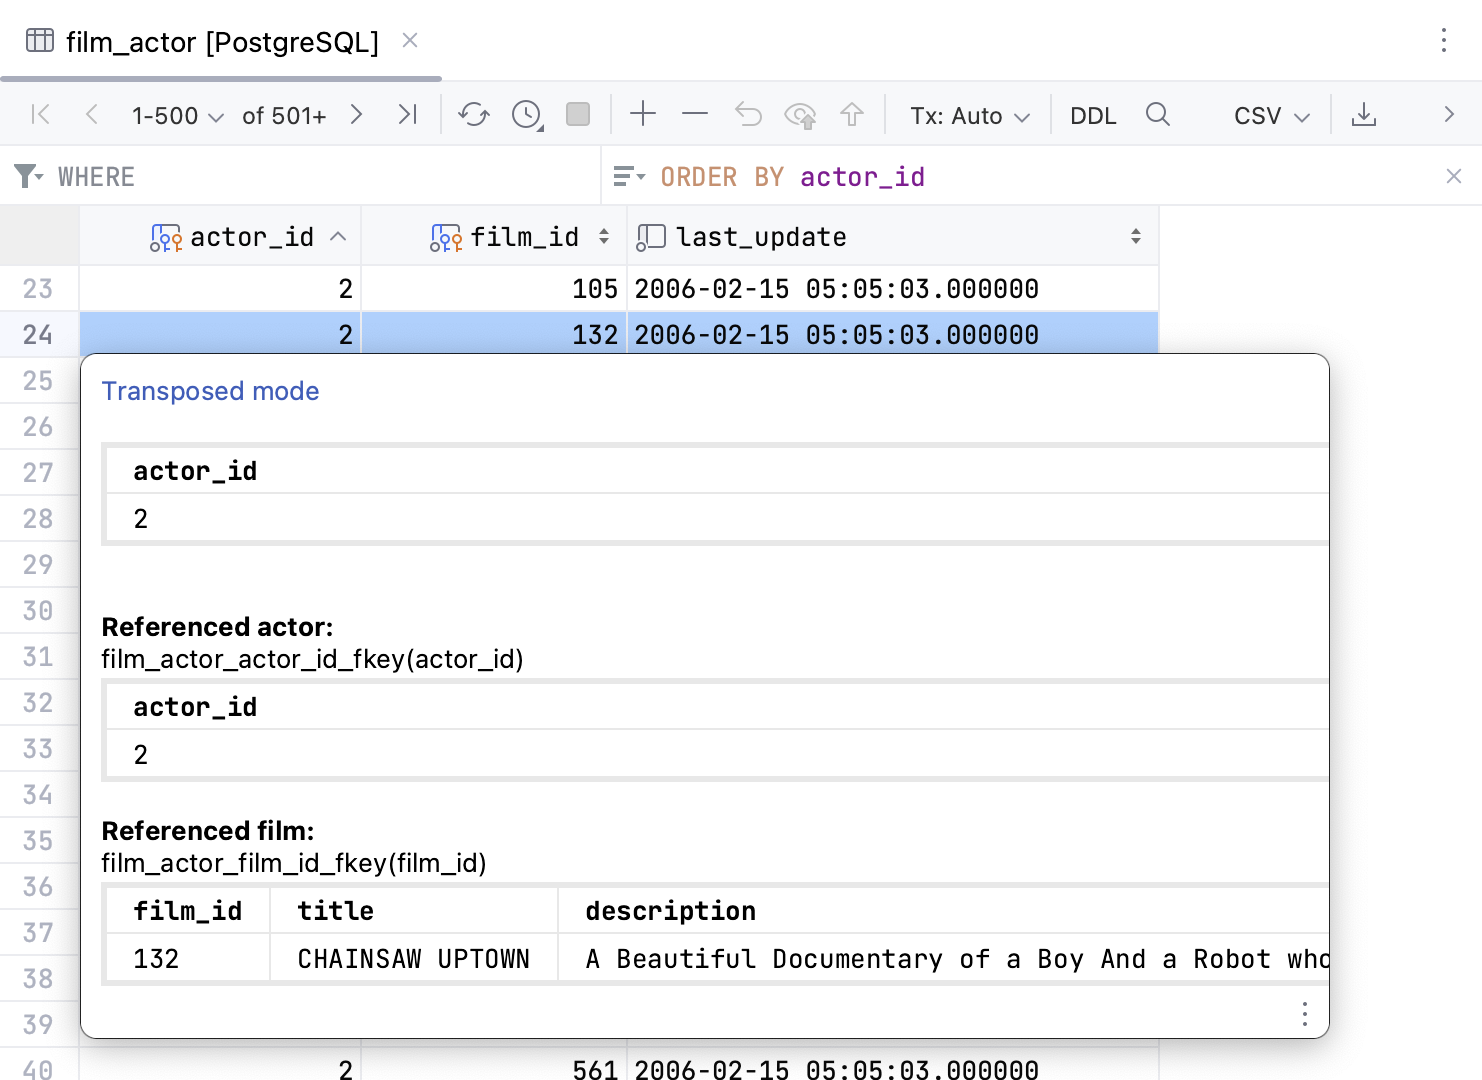 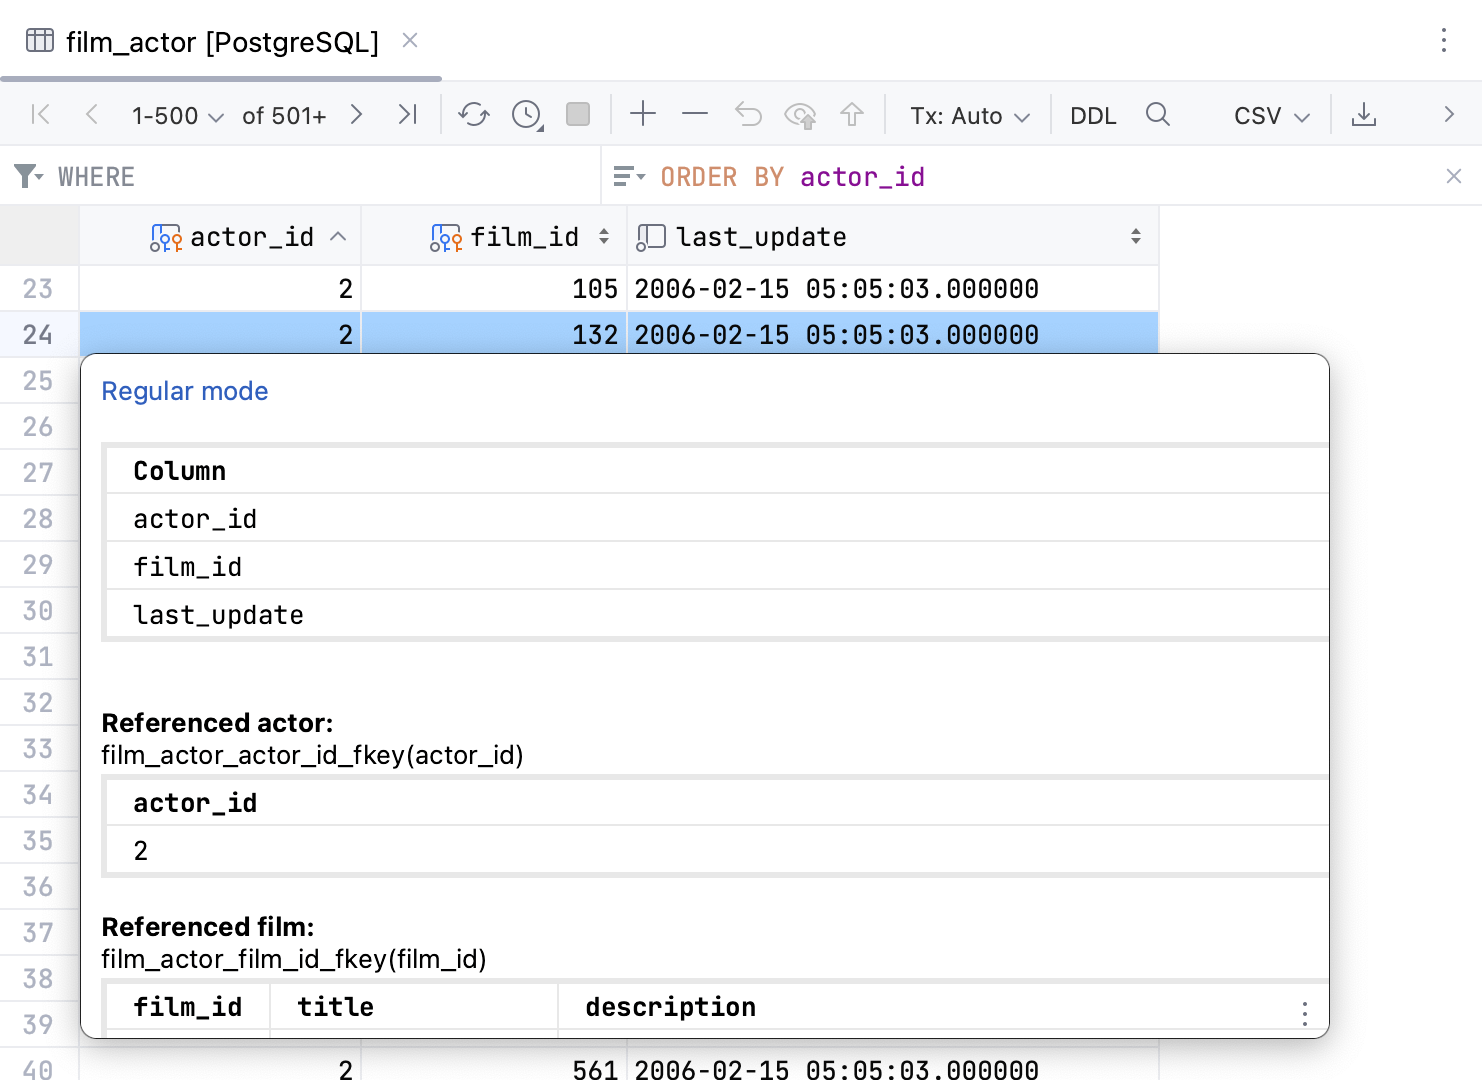 |
Quick actions popup toolbar
When you select a grid cell, depending on the data type and contents, CLion shows a popup toolbar with quick actions for working with cell contents.
Consider the following example of default actions:
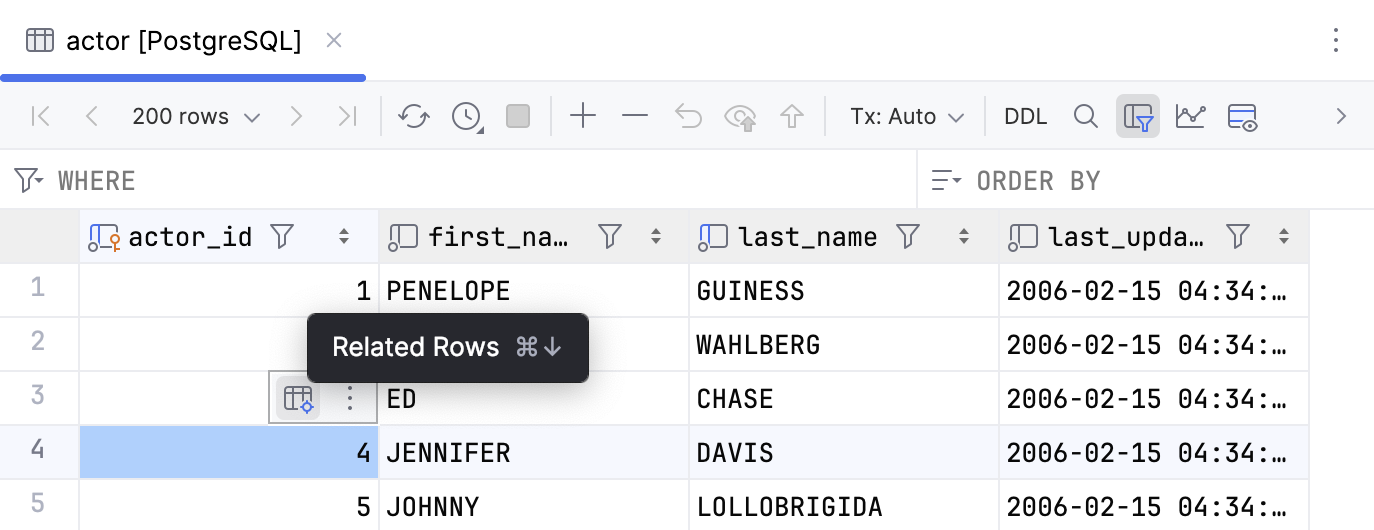
: navigate to related rows.
: open URLs in OS default web browser.

: open file URIs in OS default file browser.

Toggle the toolbar
Press Ctrl+Alt+S to open settings and then select .
In the Data Editor and Viewer section, disable the Show quick actions popup toolbar for grid cells option.
Apply the changes and close the dialog.
You can also disable the toolbar using the toolbar options: click on the toolbar and select Disable This Toolbar.
Customize the toolbar
Press Ctrl+Alt+S to open settings and then select .
Alternatively, click
on the toolbar and select Customize This Toolbar.
Add or remove actions under Quick Actions Popup Toolbar.
For more information, refer to Custom actions, menus, and toolbars.
Apply the changes and close the dialog.
Productivity tips
Manage default and NULL values for a cell
When a new row is created and no values are specified for some cells, those cells are filled with their respective default Ctrl+Alt+D or NULL (Ctrl+Alt+N) values.
When you set default values for a cell, you can use corresponding actions from the context menu (Set DEFAULT and Set NULL).
In the Database tool window, expand a data source tree.
Right-click the table and select Modify Table Ctrl+F6.
In the table structure tree, expand the columns node and double-click the column that you want to edit.
In the Default Expression field, specify the default value of the cell in the column. To allow NULL values, clear the Not Null checkbox.
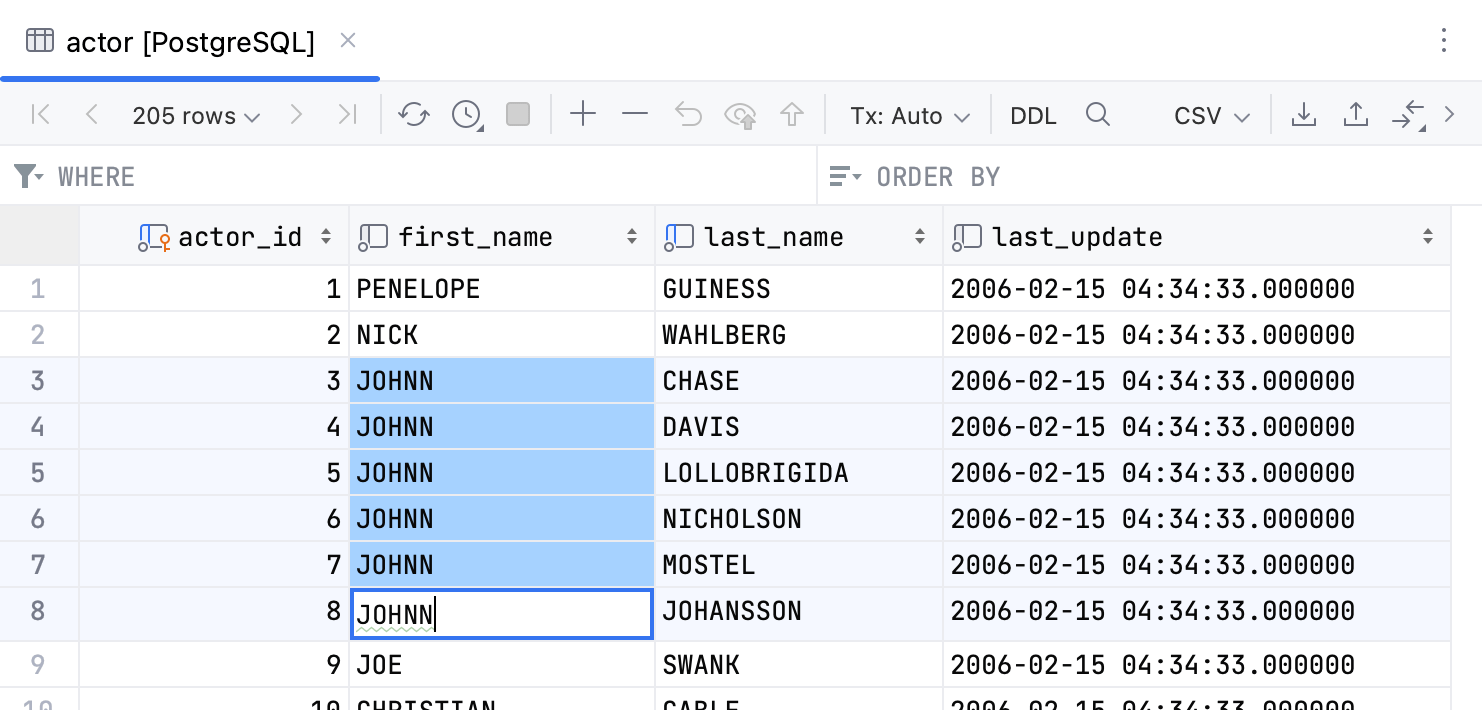
Edit multiple cell values simultaneously
Select a range of cells that you want to edit.
Start typing a new value. The changes are applied to all the selected cells.
To confirm the value, press Enter. To cancel editing, press Escape.
Saving an LOB into a file
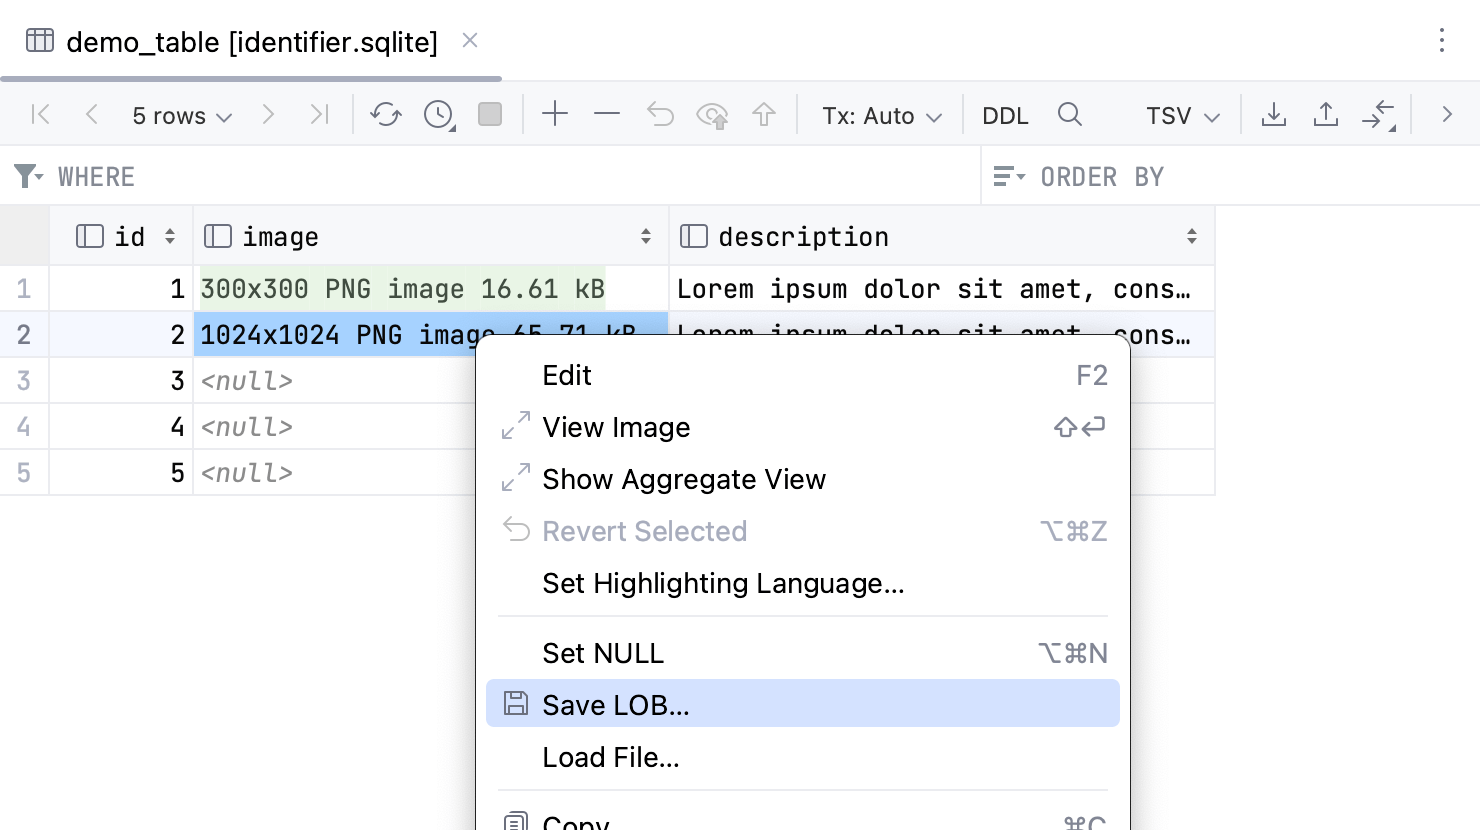
You can save a binary large object (BLOB or LOB) from a cell into a file.
Right-click the cell that contains the LOB and select Save LOB.
In the save dialog, specify the name and location of the file and click OK.
Copy and paste cells between tables
You can copy and paste selected cells and ranges of cells – within the same table or from one table to another one.
Select the cells that you want to copy and press Ctrl+C.
Select the cells into which you want to paste the copied values and press Ctrl+V.
When pasting, CLion converts data types automatically if and as necessary.
Use value completion
You can use value completion to edit cells values.
Note that the completion is local, so its options are based on other values in the current column which are already loaded.
Double-click the cell to start editing its value.
(Optional) Enter the first letter.
Press Ctrl+Space and select the value.
Submit and commit your changes to the database
Depending on the current transaction mode, you can submit and commit your changes to the database by doing one of the following:
Tx:Auto mode: click
Submit on the toolbar. The changes will be committed to the database automatically.
Tx:Manual mode: click
Submit to submit your changes and
Submit and Commit to commit the submitted changes to the database.
For more information about committing changes to the database, refer to the Submit changes to a database topic.
Context menu
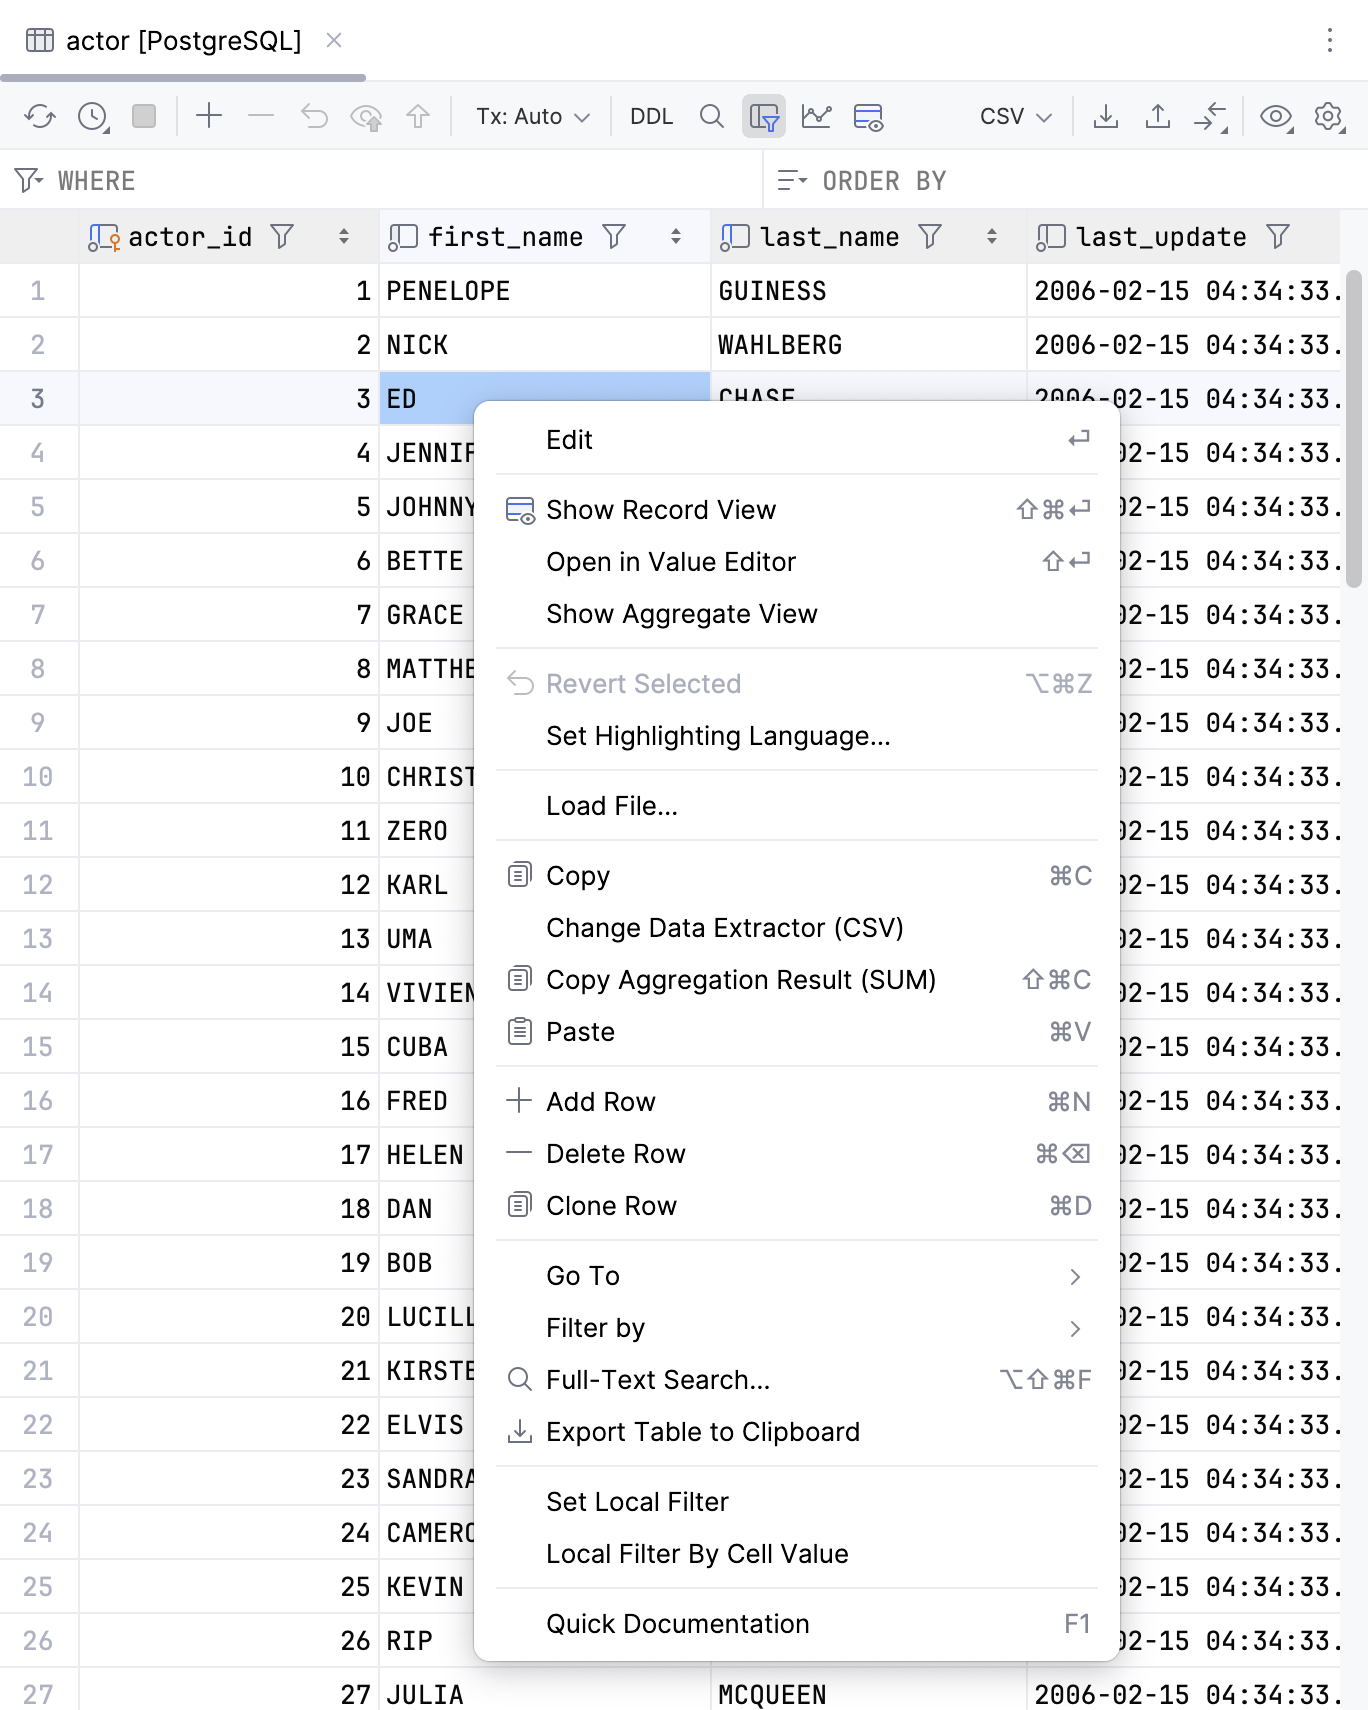
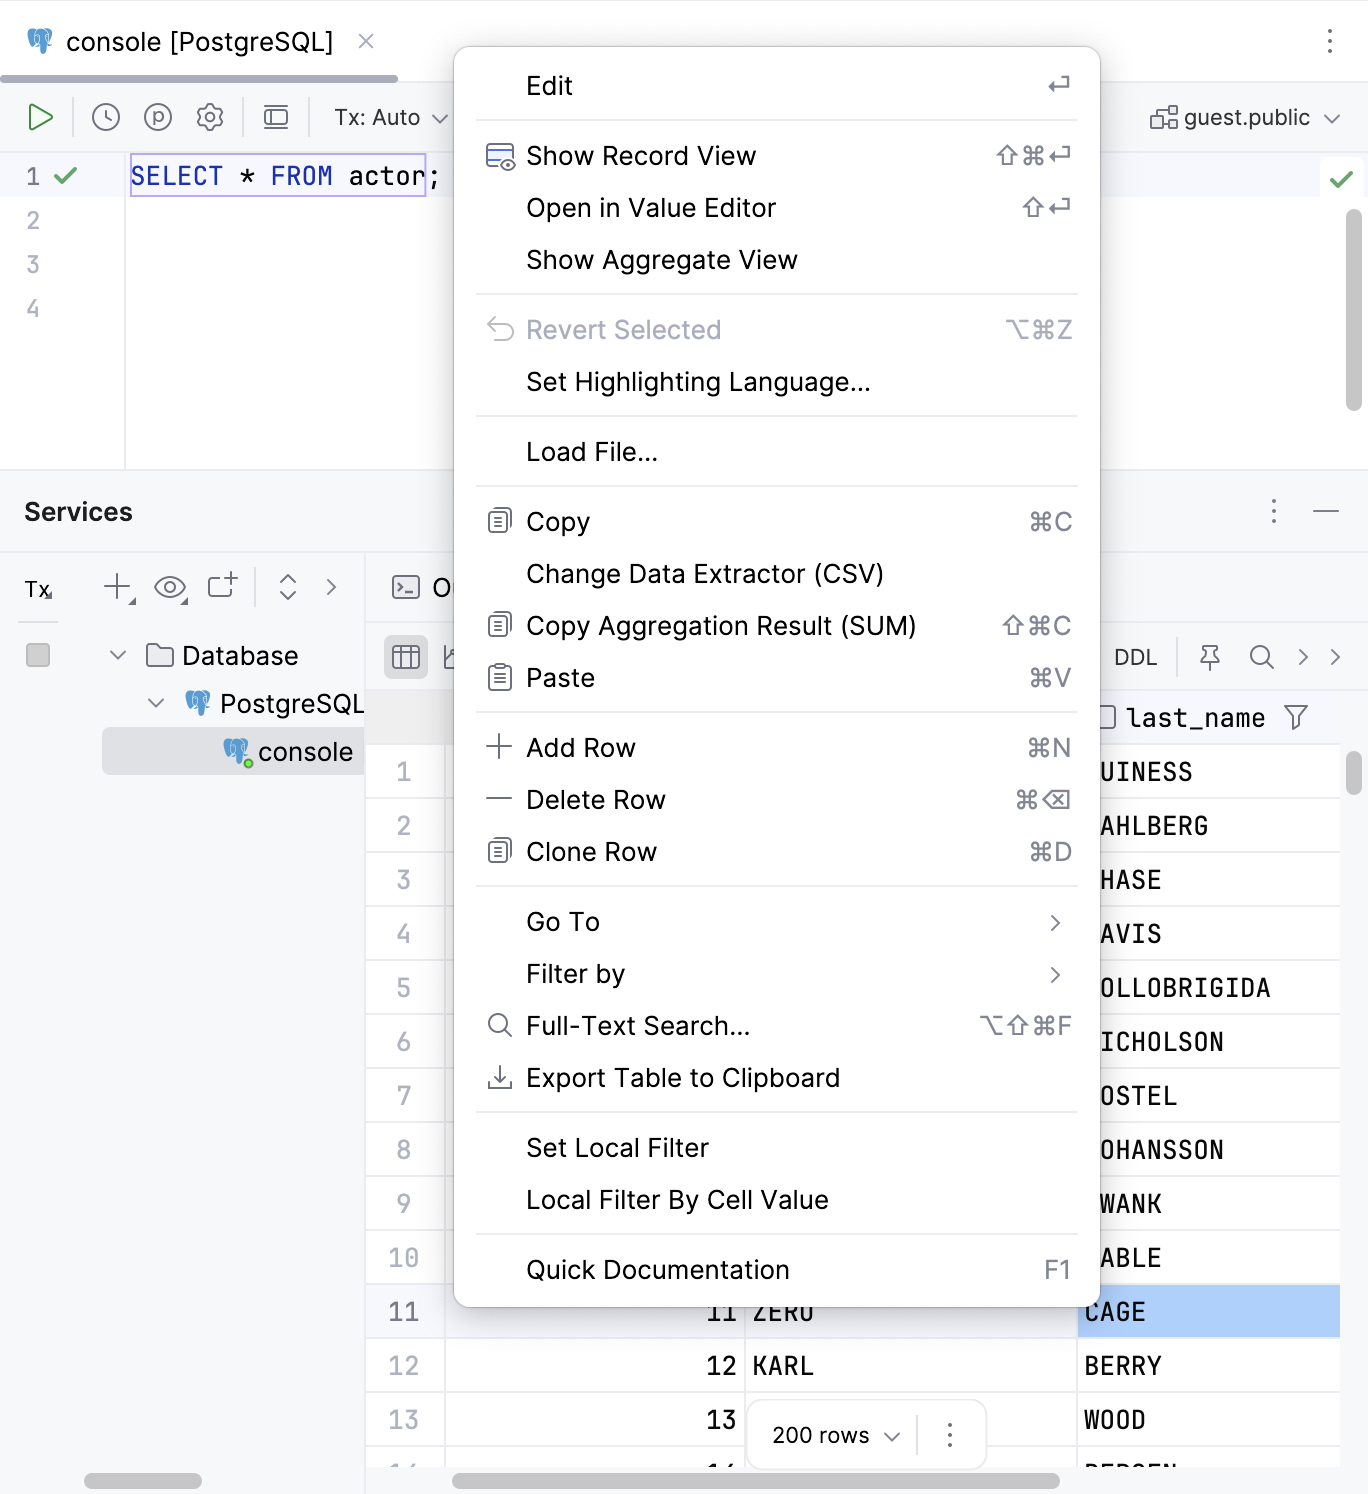
You can find all basic actions for working with cells under the context menu. To call the context menu, right-click the cell that you want to modify. The following table lists all the actions.
Action | Shortcut | Description | |
|---|---|---|---|
Edit | F2 | Edit a value in the selected cell or cells. Alternatively, you can double-click the cell and start typing a value. The Edit command is unavailable for read-only values.
| |
| View and edit values of a certain record in a side panel. For more information about the action, refer to the View data topic. | ||
Open in Value Editor | Shift+Enter | Open in a separate value editor where you can edit data that is stored in the cell. For more information about the editor, refer to Value editor. | |
Show Aggregate View | Open the aggregate view where you can select values of multiple cells and get a single summary value. For more information about the view, refer to Aggregate view. | ||
| Ctrl+Alt+Z | Revert changes that you made to a cell value. You can select a scope of different cells and revert values in this scope. For more information about reverting changes, refer to Submit changes to a database. | |
Set Highlighting Language | Select a language that the IDE should use to highlight data in a cell. | ||
Change Display Type | Select how the IDE should display binary data in the column. 16-byte data is displayed as UUID by default. | ||
Set DEFAULT | Ctrl+Alt+D | Set the current cell value to the default value or the value that you specified for the column. For more information about viewing or set a default value, refer to Manage default and NULL values for a cell. | |
Set NULL | Ctrl+Alt+N | Set the current cell value to NULL. For more information about allowing a NULL value, refer to Manage default and NULL values for a cell. | |
Generate UUID | Generates the UUID for the selected cell. | ||
Load File | Load a file into the field. | ||
Save LOB | For the cells that contain a binary large object (LOB). Save content of a cell into a file. | ||
| Ctrl+C | Copy selection to the clipboard. | |
Change Data Extractor | Change the data extractor currently selected from the Data Extractors list on the toolbar. | ||
| Copy a summary value for a range of cells. By default, CLion copies the | ||
| Ctrl+V | Paste the contents of clipboard into the table. | |
| Add a row to the end of a table. | ||
| Alt+Delete | Delete selected rows. | |
| Create a duplicate of the selected row and adds the duplicate to the end of a table. | ||
Go To | Navigation Bar | Alt+Home | Jump to a navigation bar. |
Database | Alt+Shift+B | Open the selected object in the Database tool window. | |
Related Symbol | Ctrl+Alt+Home | Navigate to one of the related objects. | |
DDL | Ctrl+Alt+Home | Open an object definition (DDL). | |
Row | Ctrl+G | Jump to a specified row. In the Go to Row dialog, specify the column and row number (use the | |
| F4 | Navigates to the related records:
If more than one record is referenced or referencing the current one, select the target record in the popup that appears. The action is not available if there are no related records. For more information about related data, refer to Navigate between related rows. For more information about action behavior options, refer to Advanced Settings. | |
| F4 | Opens URL in OS default browser. Requires the links opening URL Click Settings enabled in the Tools | Database | Data Editor and Viewer settings page Ctrl+Alt+S. | |
| F4 | Open file URI in OS default file browser. For example, Requires the links opening URL Click Settings enabled in the Tools | Database | Data Editor and Viewer settings page Ctrl+Alt+S. | |
Filter by | Select a filter that you want to a column. | ||
| Ctrl+Alt+Shift+F | Open a search window where you can search for data in your database or a group of databases. For more information about full-text search, refer to Full-text search in databases. | |
| Copy the whole table to the clipboard. This action does not depend on Limit page size to setting. | ||
Switch Session | Open a window to select another session or create a new one. For more information about sessions, refer to Sessions. | ||
Quick Documentation | Ctrl+Q | Show information about selected objects. For different database objects, Quick Documentation shows corresponding information. For example, for a group of cells, you will see a summary for the selection. You can preview it in a regular or in a transposed view and also see the related records by their foreign keys. | |