Code With Me setup overview and terminology
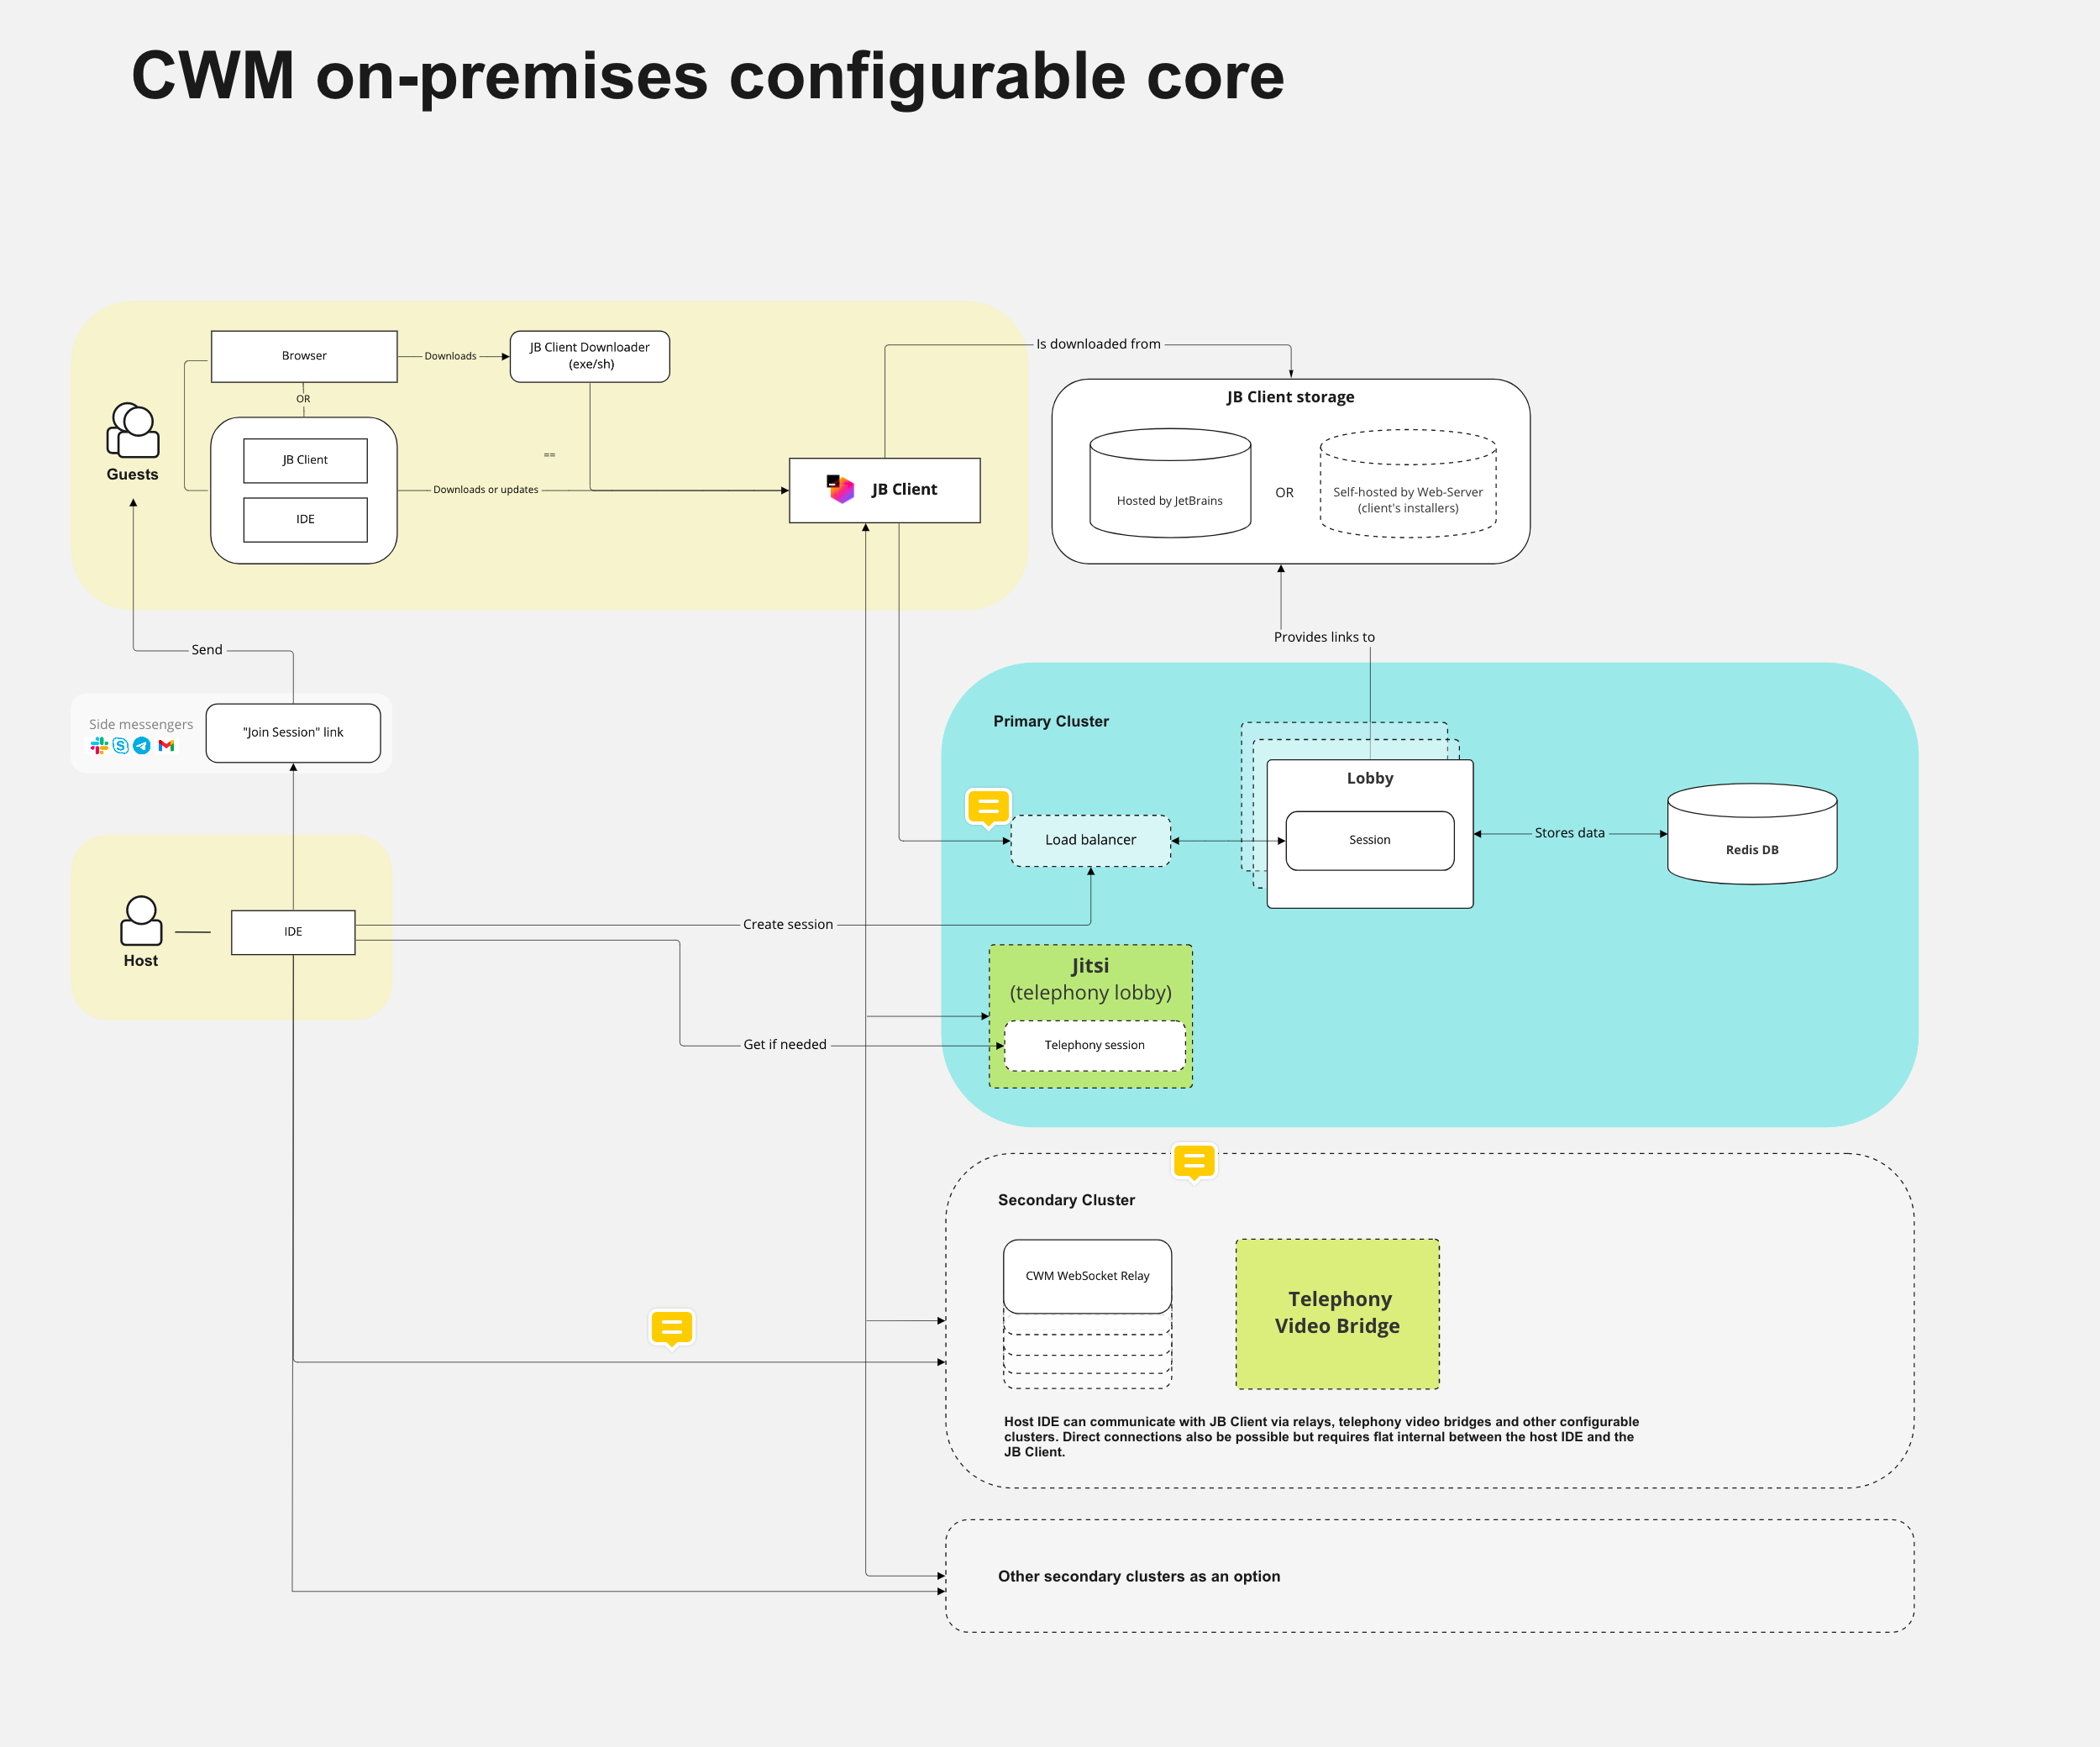
The Code With Me feature enables you to share an open project in your IDE with your distributed team. You can set up on-premises servers to have full control of your infrastructure while working with Code With Me.
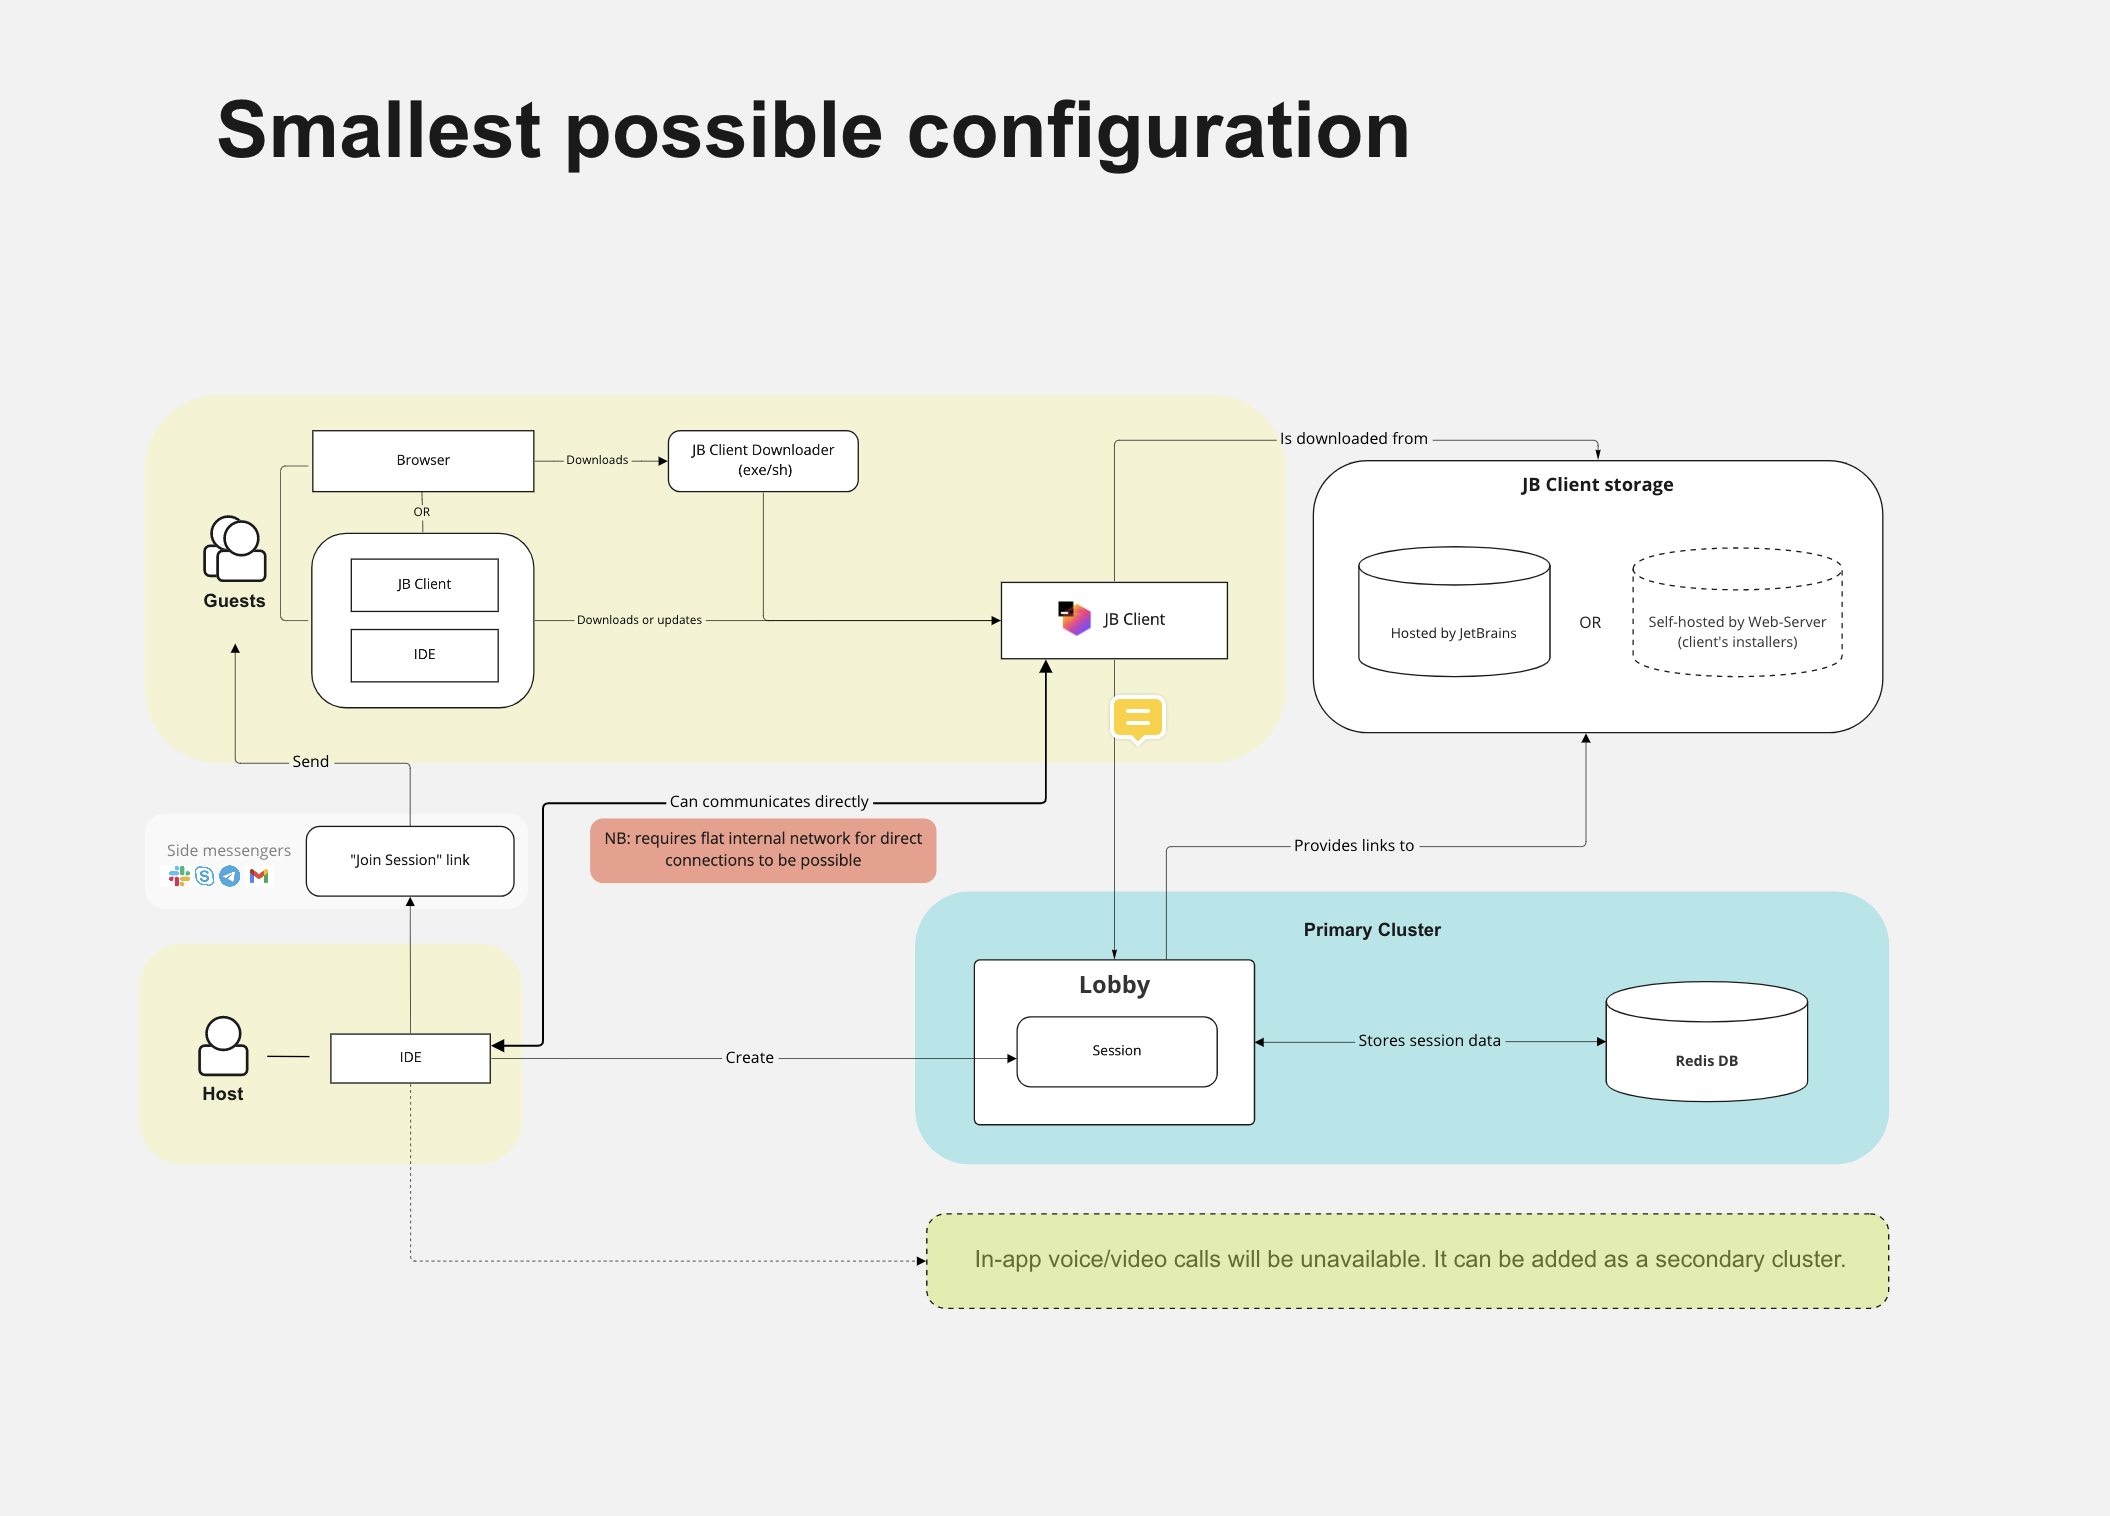
On-premises setup can work in two modes depending on your organization's network and security restrictions - full offline or with users access to JetBrains sites to get the appropriate version of Code With Me Guest.
We need the same version of the thin client for each host IDE of a particular version because the set of supported features and tools depends on it. That's why a connected guest needs to download this file either from JetBrains sites or from the local storage configured on the customer's side.


Different types of the on-premises setup will be reviewed in this documentation.
Workflow
Initiate a Code With Me session
The host requests a Code With Me session creation from the lobby server in the host IDE.
If there are available slots in the license, the lobby server creates a Code With Me session, which is persisted and can be joined until the host closes the session.
The lobby server sends a Code With Me "Join" link to the host, it appears in the IDE and can be shared with potential guests.
Occupied slot in the license is going back to the pool when the session is closed by the host user.
Join a Code With Me session
A guest opens a Code With Me join link.
A lobby server provides the guest with the required version of Code With Me Guest.
Code With Me Guest is downloaded, launched and connects to the session (either using P2P or relays, depending on the companies' policies and P2P availability).
Terminology
- Host
A host is either the instance of the JetBrains IDEA-based IDEs which shares its coding environment with clients or the person/user doing that.
- Guest
A guest is either the instance that is connected to the Code With Me coding session shared by the host or the person joining the session.
- Code With Me Guest
Lightweight version of IntelliJ IDEA, used by a guest for connecting to the host.
- Lobby server
Main part of the setup; responsible for the following actions:
Generating a link that can be used to join the Code With Me session.
Reporting a list of supported features to the host or a guest (for example, whether P2P is allowed or not).
Selecting a relay server in cases when P2P does not work or is forbidden.
Managing license info and occupied hosts slots.
- Relay server
A relay server is responsible for relaying a connection between the host or guests in case the P2P connection doesn't work or is forbidden. It's possible to have several relays in different locations, the closest one will be used based on the proximity to the session participants.
- Quick setup
Code With Me on-premises installer intended for quick evaluation purposes. We provide it as an archive containing lobby, relay, and launcher.sh script. This type of setup doesn't include SSL certificates and, by default, tries to connect to JetBrains sites. Not supposed to be used in production.
Doesn't include audio/video functionality.
- Full setup
Cluster/environment where the lobby, relay, Redis +/- video-audio components are installed separately, with SSL certificates; using our examples and templates from this documentation or according to deployment practices in your organization.
- Full offline (guests local storage) mode
Kind of setup with a configured local storage that distributes previously downloaded thin client files among connected guests. In this mode, you need to download required Code With Me guest files from JetBrains to dedicated local storage in your network and denote to the lobby server to use this storage as a source.
- Mirror-guests script
Script used for Offline (local storage) mode that downloads files required for the connection (thin client, JetBrains Runtime) from JetBrains sites. The script accepts filters (version, build, platform, product) passed as the command-line parameters. For detailed syntax, run the following command in the command line:
mirror-guests -h.Since version 1698, the
mirror-guestsscript has been renamed tojetbrains-clients-downloader, and comes as a separate distribution at distributives page. For detailed syntax, run the following command in the command line:jetbrains-clients-downloader -h.- Enterprise License
Code With Me local setup requires its own commercial license purchased from our site
IDEs licenses don't cover CWM on-premises installation.
The number of hosts in this license determines the N of users who can be inviters/hosts simultaneously. Minimal N of host users in the license is 10; after 10, you may purchase one by one.
Host slots in the Enterprise license are floating, not named. If all slots are busy, the following user can occupy it if an existing Code With Me open session is over.