Quick start with DataGrip
This quick start guide will introduce you to the key concepts and help you with your first steps in DataGrip.
Also, you can check our introduction video that covers all major topics about the IDE: adding data sources, configuring connection options, working in the editor, and installing plugins.
Prerequisites
To complete this quick start guide, ensure that you have installed the following software:
DataGrip 2021.3 and later - https://www.jetbrains.com/datagrip/download.
Git - https://git-scm.com/ (if you plan to use Sakila dump files on Step 4)
Step 1. Create a new project
When you open DataGrip, you see the Welcome screen.
DataGrip displays the Welcome screen when no project is opened. For example, when you run DataGrip for the first time or when you close the only open instance of a project. From this screen, you can create a new project, open an existing project, or clone files from a Version Control System (VCS).
Creating a project
Create a new project by clicking the New Project button. A new project in DataGrip is a complex of your data sources, console and scratch files, and attached folders.
Alternatively, click Open to open a directory with an existing project.
In the Enter new project name field, type the name of your project.

After the project is created and opened, you will see an IDE interface with all tool windows hidden. Tool windows are tabs that are attached to the bottom and sides of the IDE window. You can rearrange and even detach them to use as separate windows, for example, on another monitor.
Tool windows provide access to development tasks: viewing your database structure, running and debugging your application, integration with version control systems and other external tools, code analysis, search, navigation, and so on.
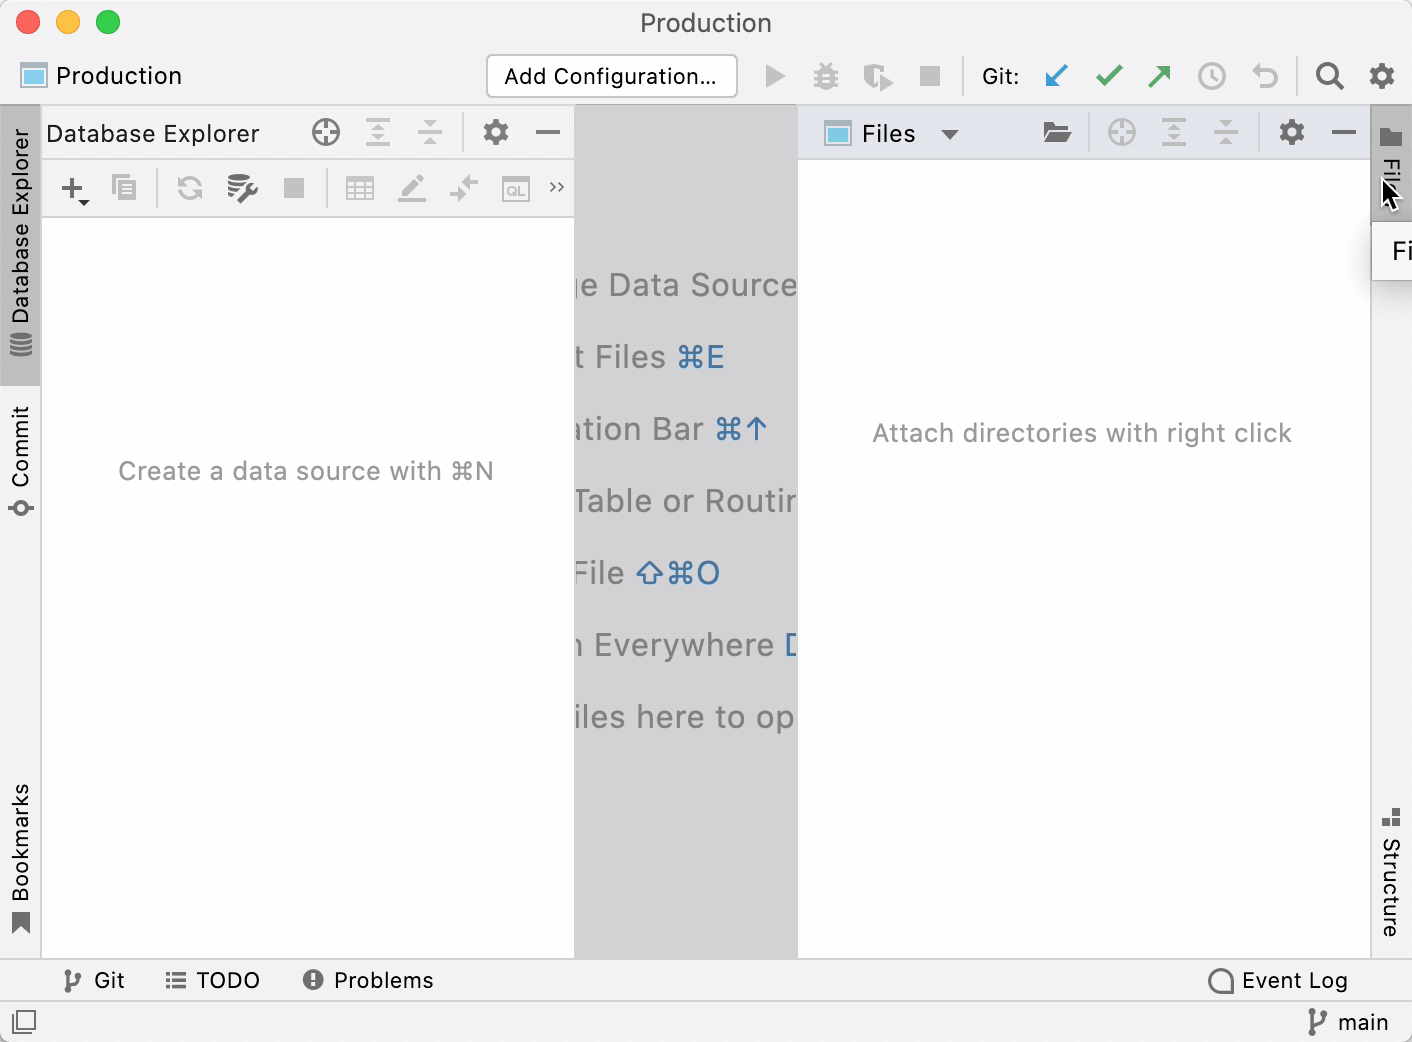
Opening the database explorer
Expand Files and Database Explorer tool windows by clicking their tabs.
Step 2. Connect to a database
Depending on a database vendor (MySQL, PostgreSQL, Oracle), you need to create a corresponding data source connection. In this tutorial, we will use SQLite because, for other databases, you need a running instance of the database. It means that you need to install and configure them before creating a connection.
A database in SQLite is a single disk file. The file format is cross-platform. A database that is created on one machine can be copied and used on a different machine with a different architecture. DataGrip can create this file for you. So, all you need is to download drivers. The file default name is identifier.sqlite but you can change it.
If you want to connect to other database management systems (DBMS), refer to Database connection.
Open data source properties. You can open data source properties by using one of the following options:
Navigate to .
Press Ctrl+Alt+Shift+S.
In the Database Explorer (), click the Data Source Properties icon
 .
.
On the Data Sources tab in the Data Sources and Drivers dialog, click the Add icon (
 ) and select SQLite.
At the bottom of the data source settings area, click the Download missing driver files link. As you click this link, DataGrip downloads drivers that are required to interact with a database. The IDE does not include bundled drivers in order to have a smaller size of the installation package and to keep driver versions up-to-date for each IDE version.
You can specify your drivers for the data source if you do not want to download the provided drivers. For more information about creating a database connection with your driver, see Add a user driver to an existing connection.
To ensure that the connection to the data source is successful, click the Test Connection link.
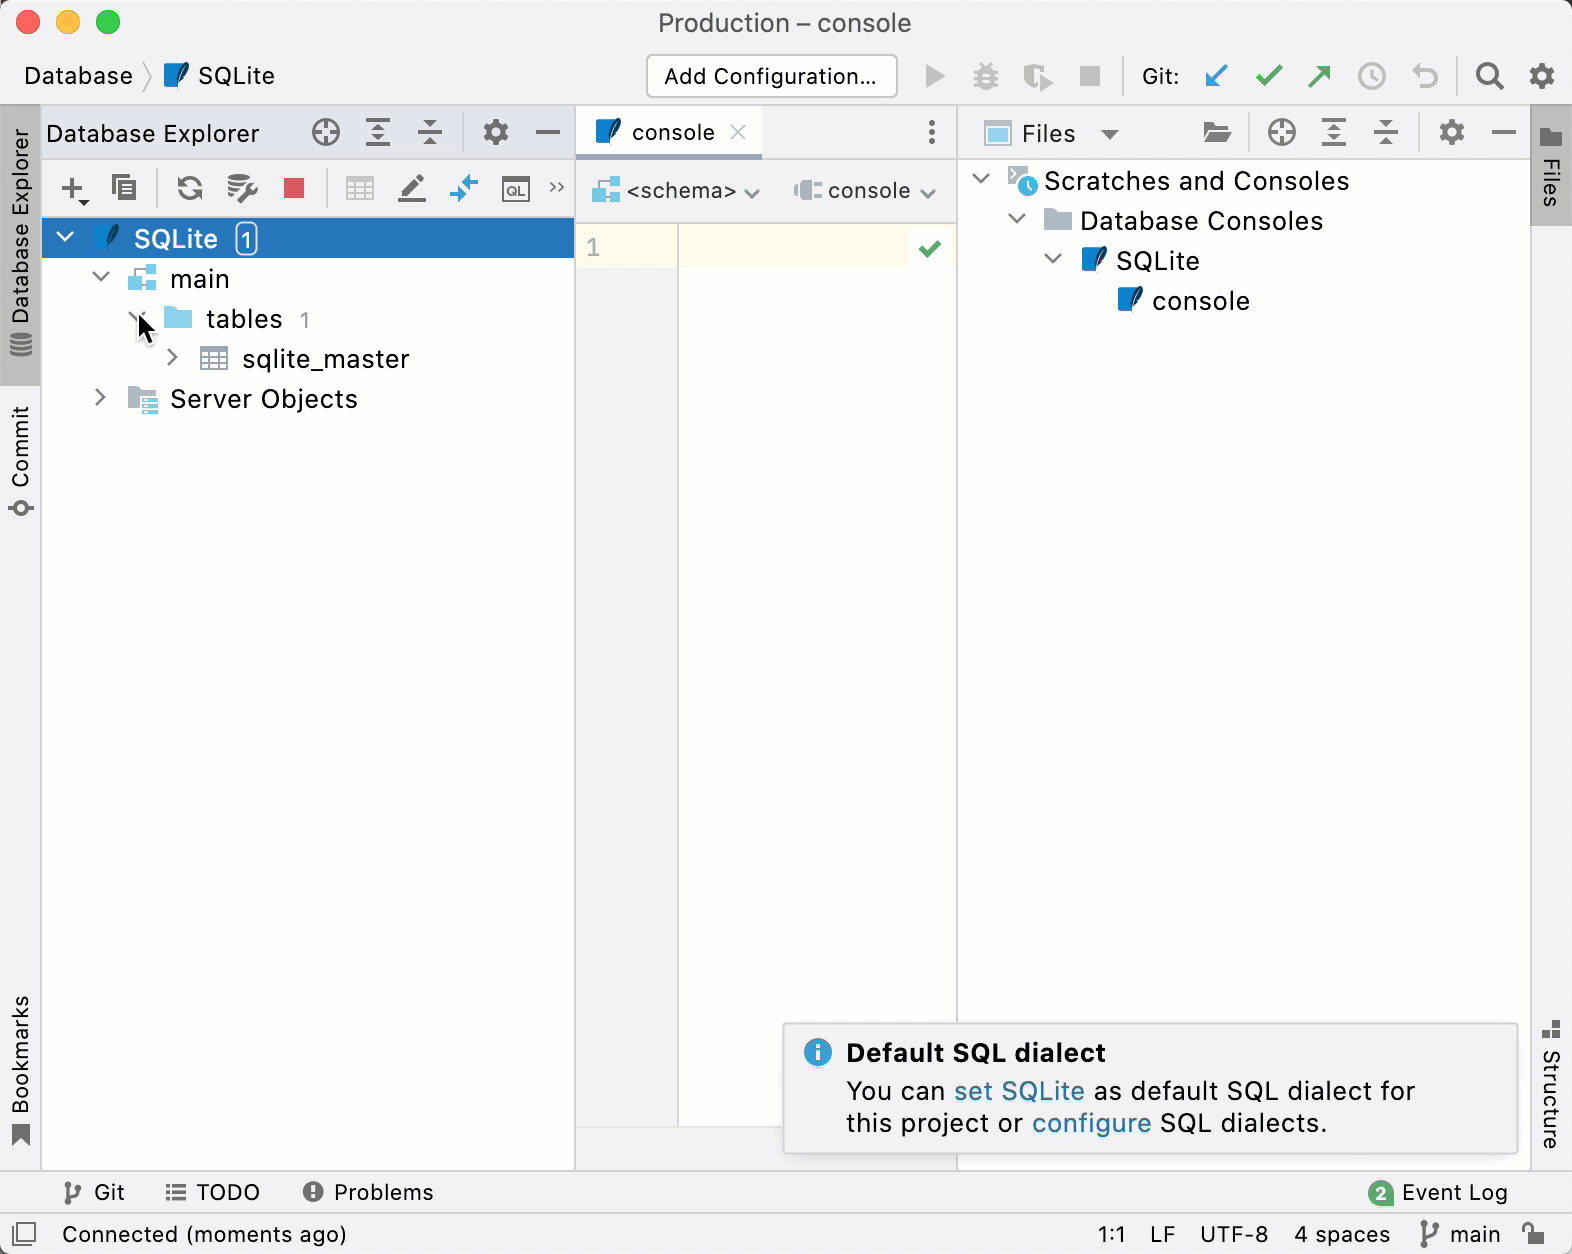
To connect to an existing SQLite database, specify a file path to the database file in the File field. Also, to create a database, you can drag an SQLite DB file to the Database Explorer.
As the data source is ready, you will see it in the Database Explorer. The data source is presented as a tree with nodes. Also, along with the data source, DataGrip creates a query console. Query consoles are SQL files in which you can compose and execute SQL statements. They are already attached to your data source, unlike usual SQL files. So, you can start writing your queries to a database right away.

Step 3. Attach a directory with SQL scripts
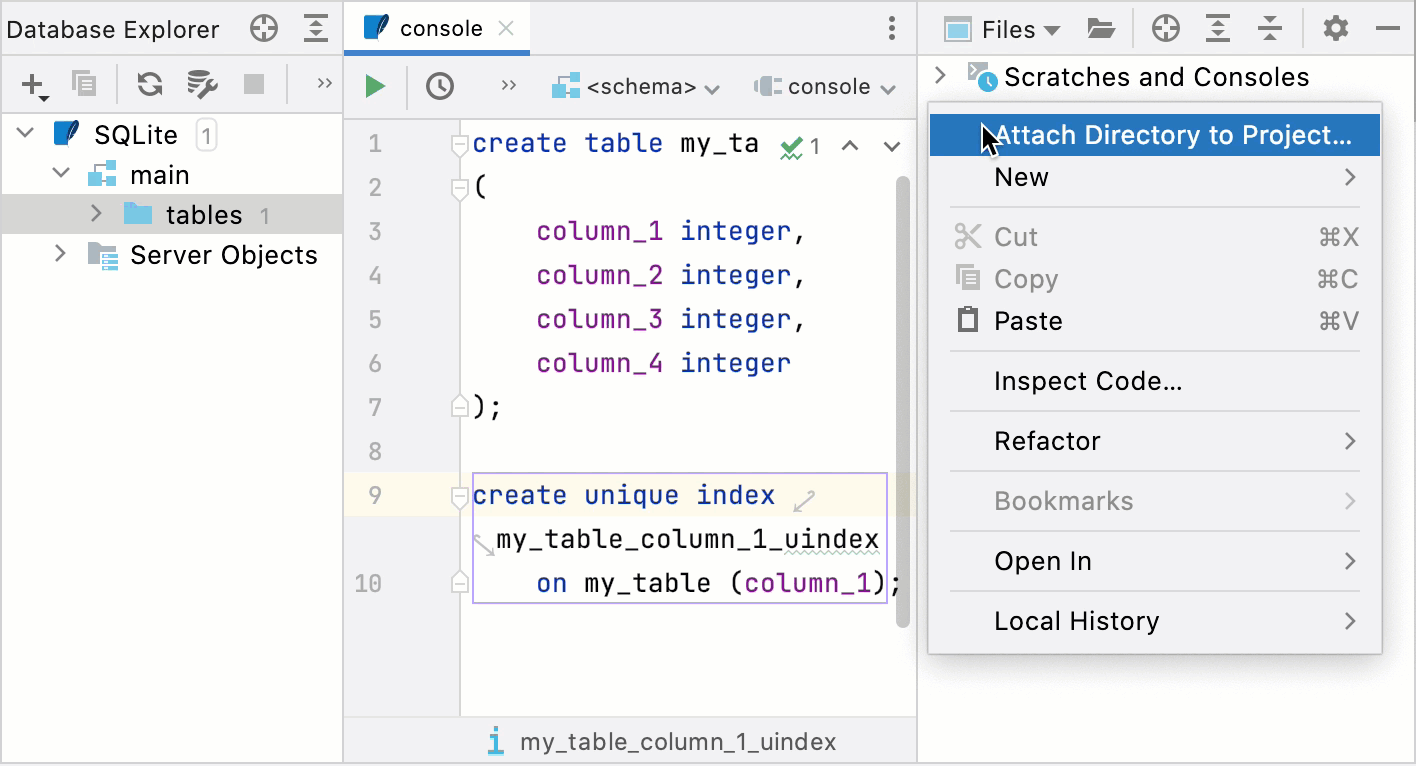
To run SQL scripts, you can right-click the data source and select Run SQL script. Alternatively, you can attach a folder with these scripts to the Files tool window and run them from here.
For illustration purposes, we will use Sakila dump files. You can get them by cloning the dumps repository. Note that you need to install Git to clone the repository.
Navigate to on the menu.
In the Files tool window, right-click any area and select Attach Directory to Project.
Navigate to the directory that you want to attach. In our case, it is the dumps directory.
Click OK.
Step 4. Run dump files
The dumps repository includes scripts that generate the structure of the Sakila database and scripts that add data to database objects. Let's run a script that generates objects in the main schema.
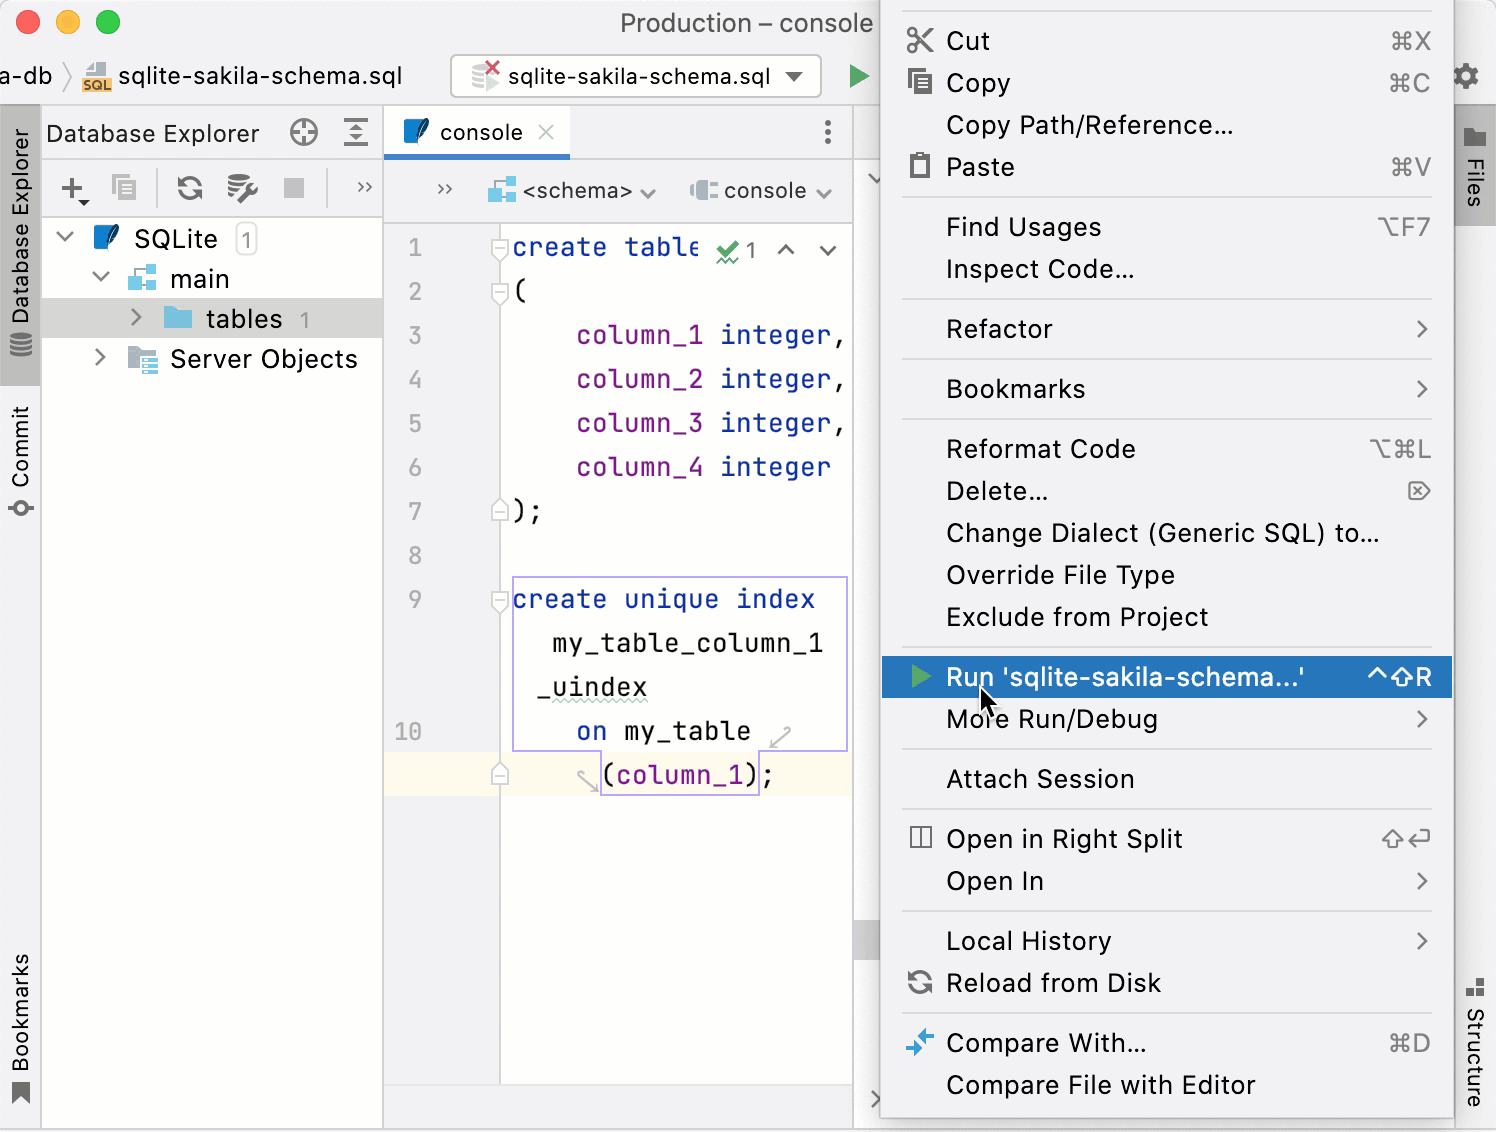
In the Files () tool window, navigate to the sqlite-sakila-db tree node.
Expand sqlite-sakila-db tree node.
Right-click the sqlite-sakila-schema.sql file and select Run 'sqlite-sakila-schema...'. Alternatively, press Ctrl+Shift+F10.
In the Target data source / schema table, click the Add button (
) and select SQLite.Click Run.
Step 5. Write your code
As you work in the editor, DataGrip analyzes your code, searches for ways to optimize it, and detects potential and actual problems. The following list includes basic features and tools that might be useful for your code writing and increase your productivity:
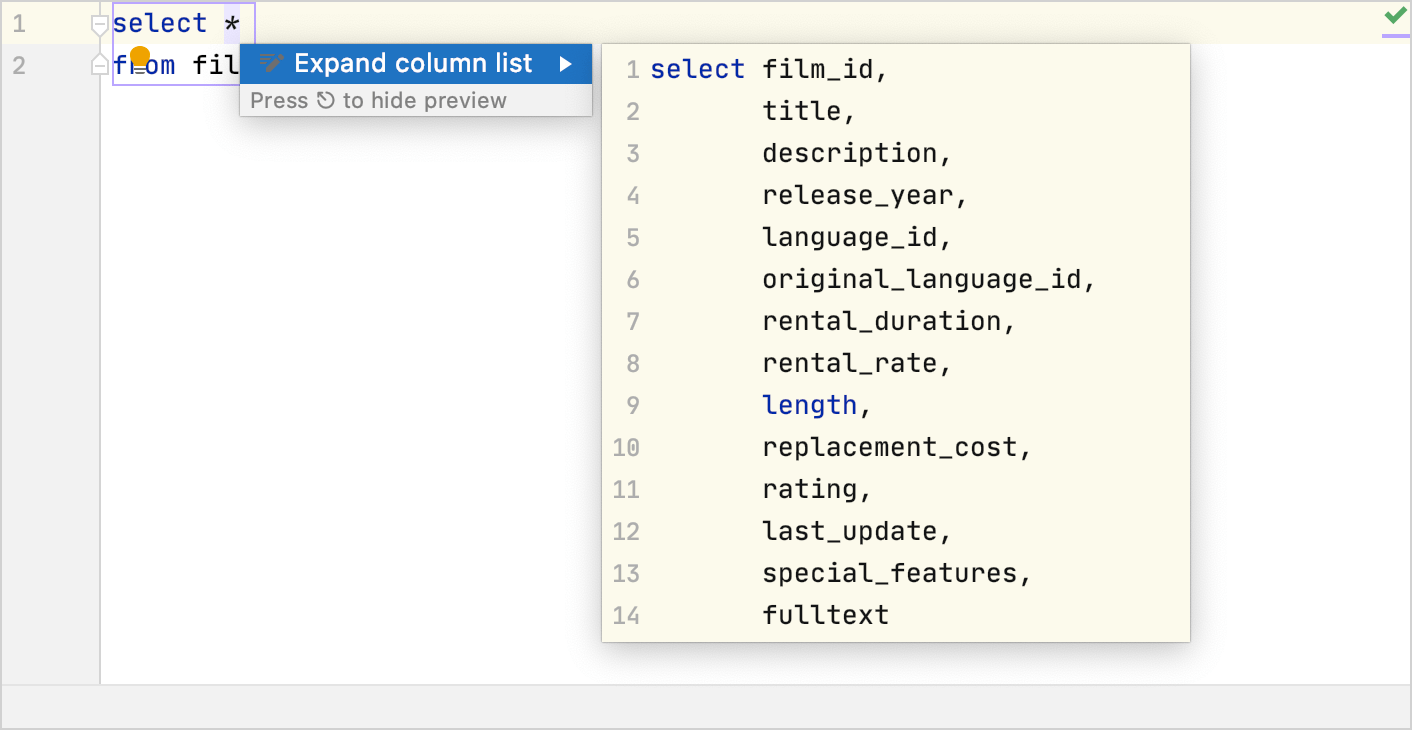
Code completion
Suggestions for code completion appear as you type your code. DataGrip has two types of code completion:
Basic code completion Ctrl+Space helps you complete names of tables, routines, types, and keywords within the visibility scope. When you invoke code completion, DataGrip analyzes the context and suggests the choices that are reachable from the current caret position. By default, DataGrip displays the code completion popup automatically as you type.
Smart code completion Ctrl+Shift+Space filters the suggestions list and shows only the types applicable to the current context.
The following animation shows the difference between basic and smart completion. Notice the number of variants that are suggested for different completion types
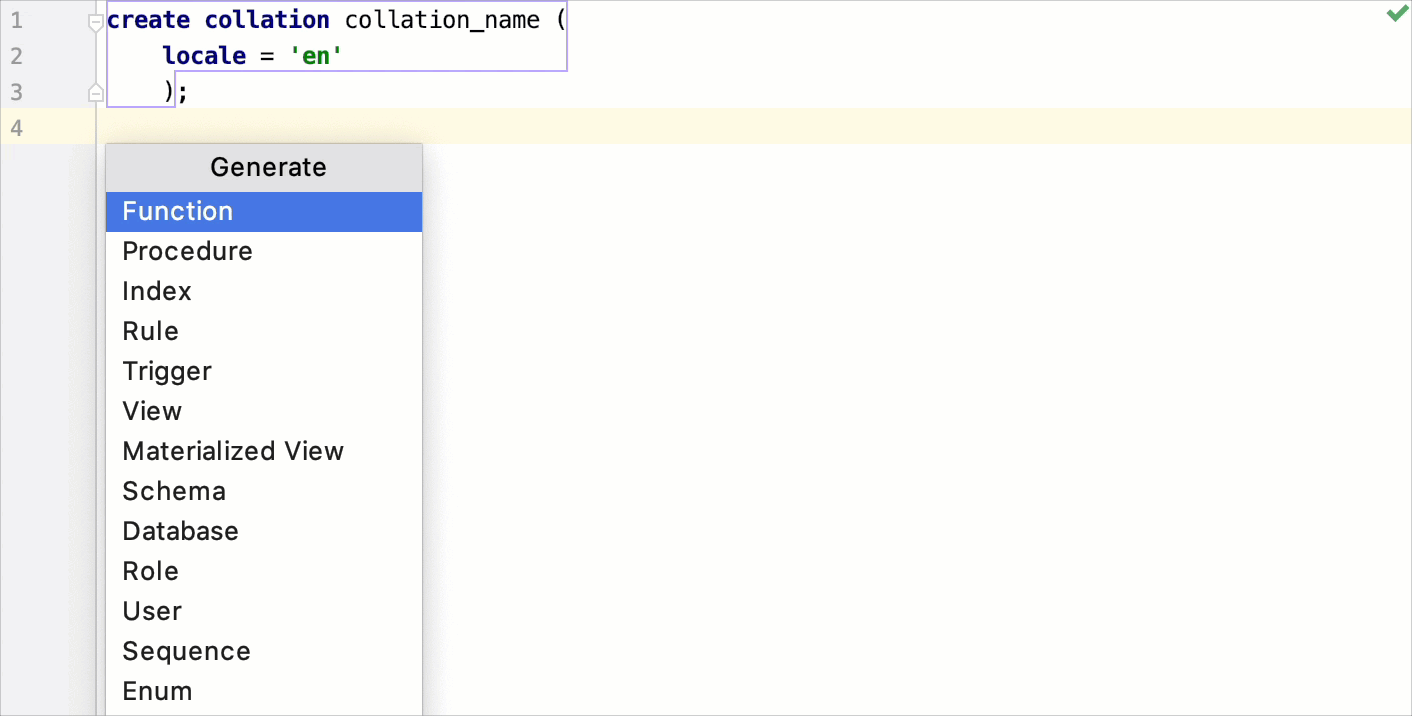
Generating code
DataGrip provides multiple ways to generate common code constructs and recurring elements, which helps you increase productivity. These can be either file templates used when creating a new file, custom or predefined live templates that are applied differently based on the context, various wrappers, or automatic pairing of characters.
You can generate functions, procedures, views, and other database objects.
To generate an object, press Alt+Insert and select the object that you want to generate.
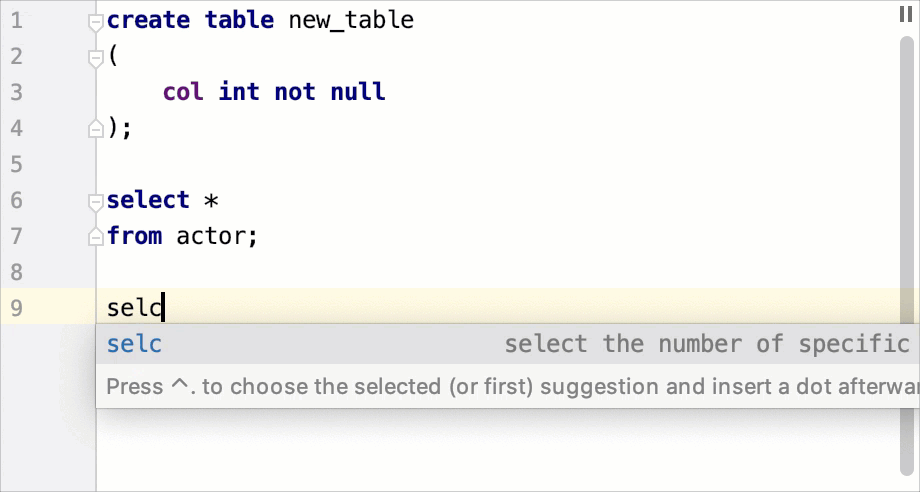
Live templates
Use live templates to insert common constructs into your code, such as statements or definitions of database objects.
The following video shows how you can use live templates.
To expand a code snippet, type the corresponding template abbreviation and press Tab. Keep pressing Tab to jump from one variable in the template to the next one. Press Shift+Tab to move to the previous variable.
To see the list of live templates, open settings Ctrl+Alt+S and navigate to .
Inspections
In DataGrip, there is a set of code inspections that detect and correct abnormal code in your project before you compile it. The IDE can find and highlight various problems, locate dead code, find probable bugs, spelling problems, and improve the overall code structure.
Inspections can scan your code in all project files or only in specific scopes (for example, only in production code or in modified files).
Every inspection has a severity level — the extent to which a problem can affect your code. Severities are highlighted differently in the editor so that you can quickly distinguish between critical problems and less important things. DataGrip comes with a set of predefined severity levels and enables you to create your own.
To see the list of inspections, open settings Ctrl+Alt+S and navigate to . Disable some of them, or enable others, plus adjust the severity of each inspection. You decide whether it should be considered an error or just a warning.
For example, the Redundant code in COALESCE call inspection reports all the arguments except for the first expression that does not evaluate to NULL.

Intention actions
As you work in the editor, DataGrip analyzes your code, searches for ways to optimize it, and detects potential and actual problems.
As soon as the IDE finds a way to alter your code, it displays a yellow bulb icon ![]() in the editor next to the current line. By clicking this icon, you can view intention actions available in the current context. Intention actions cover a wide range of situations from warnings to optimization suggestions. You can view the full list of intentions and customize them in the Settings/Preferences dialog Ctrl+Alt+S.
in the editor next to the current line. By clicking this icon, you can view intention actions available in the current context. Intention actions cover a wide range of situations from warnings to optimization suggestions. You can view the full list of intentions and customize them in the Settings/Preferences dialog Ctrl+Alt+S.
To see the list of intention actions, open settings Ctrl+Alt+S and navigate to .
Click the light bulb icon (or press Alt+Enter) to open the list of suggestions.
Select an action from the list and press Enter.
For example, you can use an intention action in the INSERT statement to create a table with valid field types:
Video tutorials
This video covers various topics about DataGrip. The video length is 40 minutes, but you can click time codes on the Youtube page to see the topic that you are interested in. For more information about time codes and topics, see the description section at youtube.com.