Sessions
In DataGrip, connections to the database are established in special wrappers – sessions. Each session is a wrapper over a single connection, and it stores the connection's information (for example, whether it is active or not, transaction control mode, and other settings).
Within a session, connections can open and close when required and in accordance with the defined settings.
Sessions can have clients – files, whose queries are sent by using the connection that the session holds. Data editor can also be a client for a session.
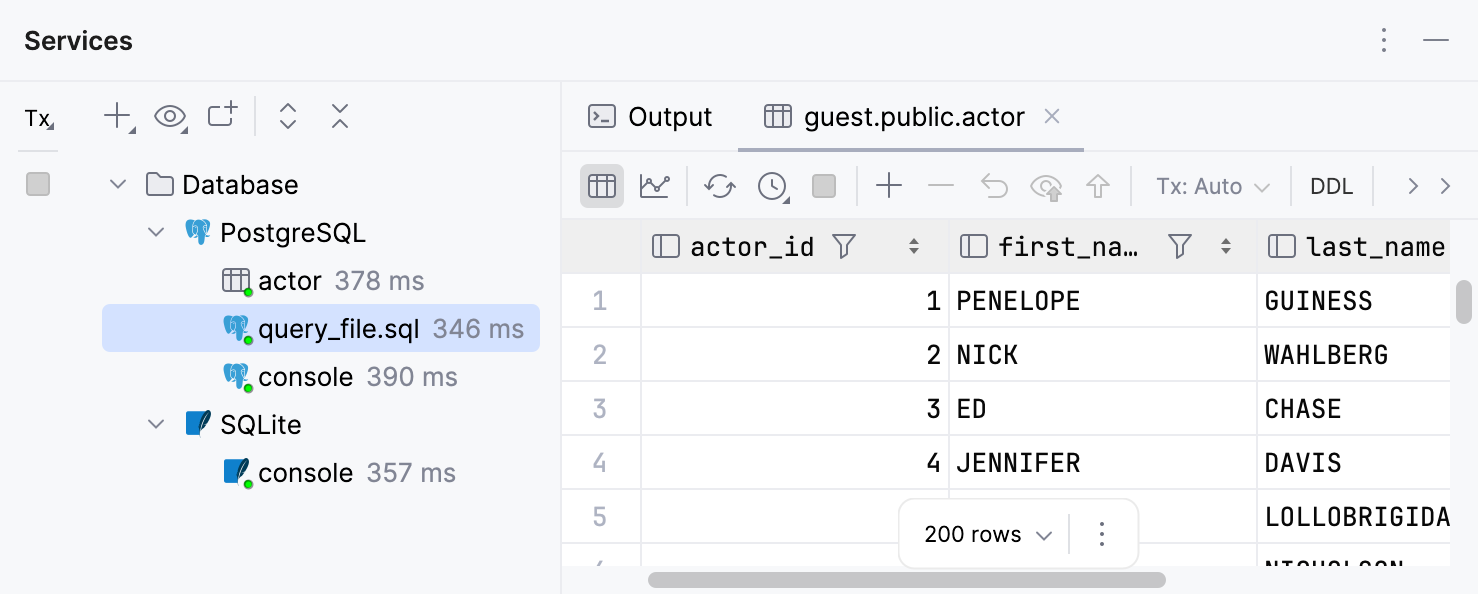
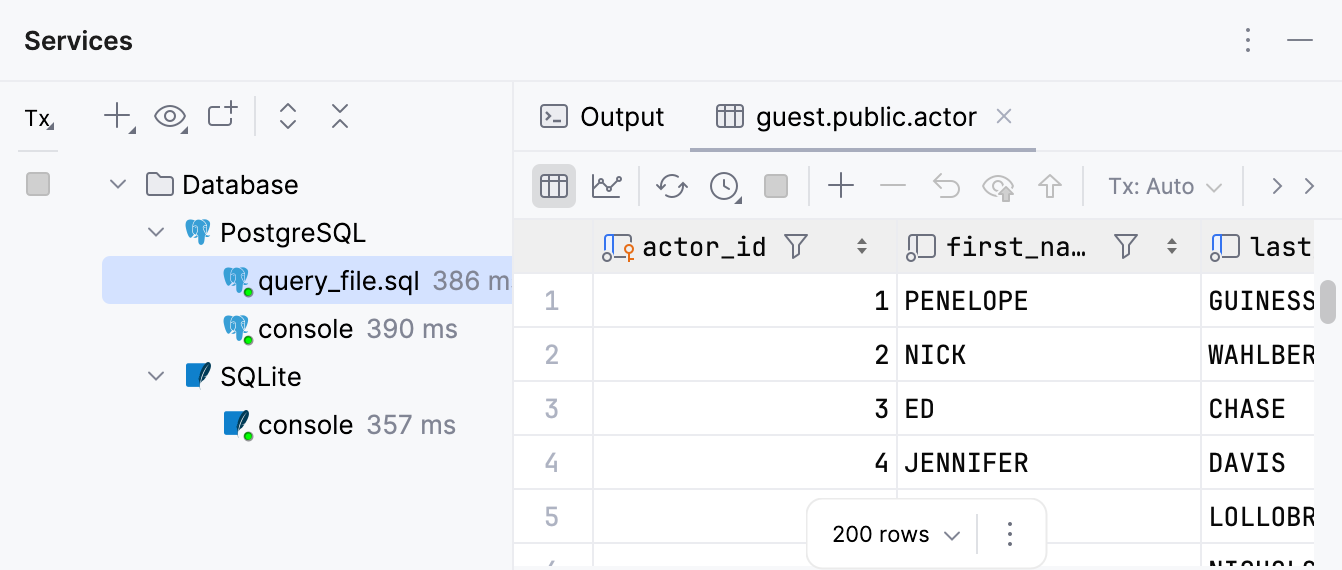
You can view data sources, sessions, and session clients in the Services tool window. The green dot in the corner of a session's icon indicates a connected session.
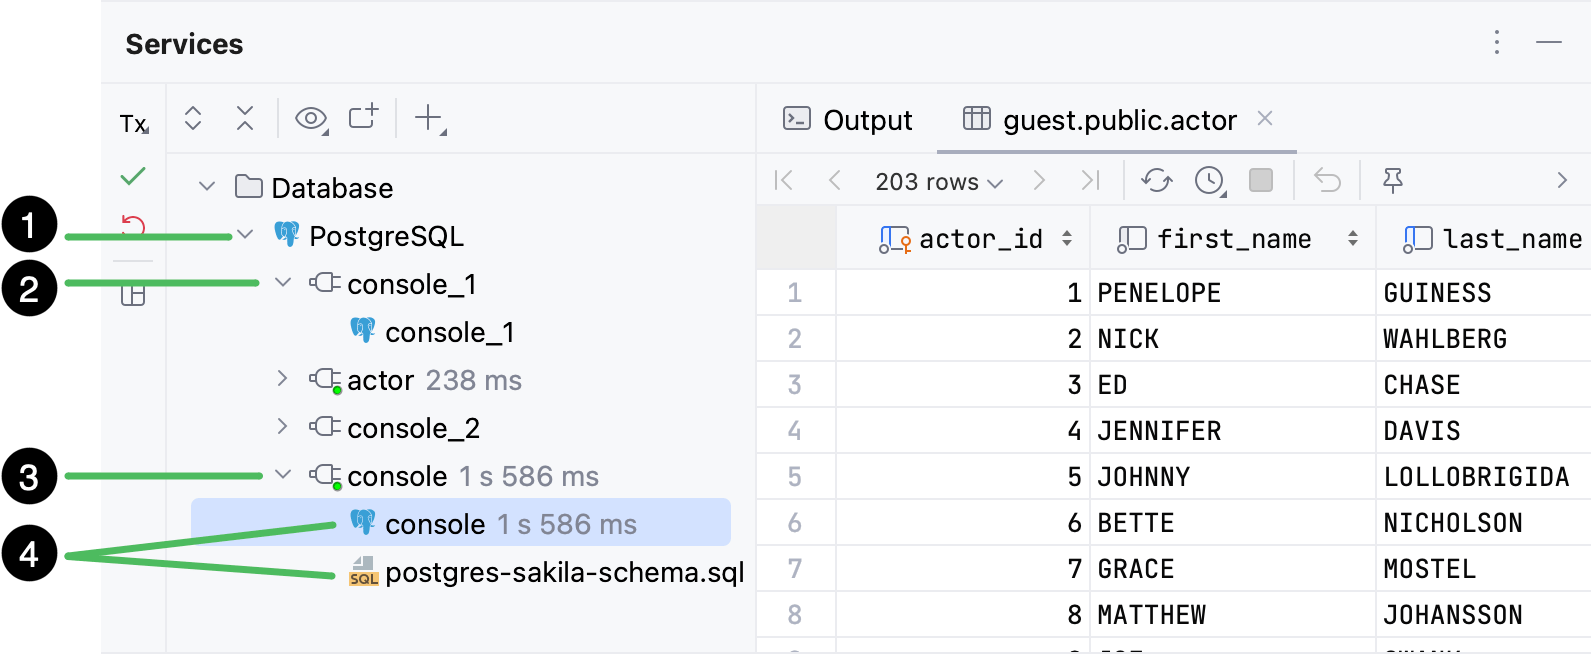
In the picture above, the Services tool window displays the following nodes:
Data source.
Disconnected session.
Connected session.
Session clients.
For more information about the session managing options and toolbar controls, refer to the Services tool window topic.
If you close DataGrip and open it again, all your sessions will be available in the Services tool window, but they will be empty.
New session
Depending on the way you create a new session, it can be connected either automatically or after a certain action. The green dot in the corner of a session's icon indicates the connected status.
You can create a new session by doing either of the following:
Open a query console, view database object's data in data editor, or attach an SQL file to a data source.
As a result, under the data source node in the Services tool window, the new session node appears with a client node under it.
For a query console, the session will be connected once you perform an action that requires interaction with the database. For example, once you run a query.
For a table, the session is connected automatically, as DataGrip requires an active connection to request the table data from the database, receive it, and display it in the data editor.
For an SQL file, the session is connected automatically. To run queries against either of the data source databases or schemas, you have to attach your file to them by selecting them in the <schema> list.
Perform an action that requires interaction with the database. For example, run a stored procedure or run a script by using run configurations.
As a result, the new connected session node appears under the data source node in the Services tool window.
Manage sessions
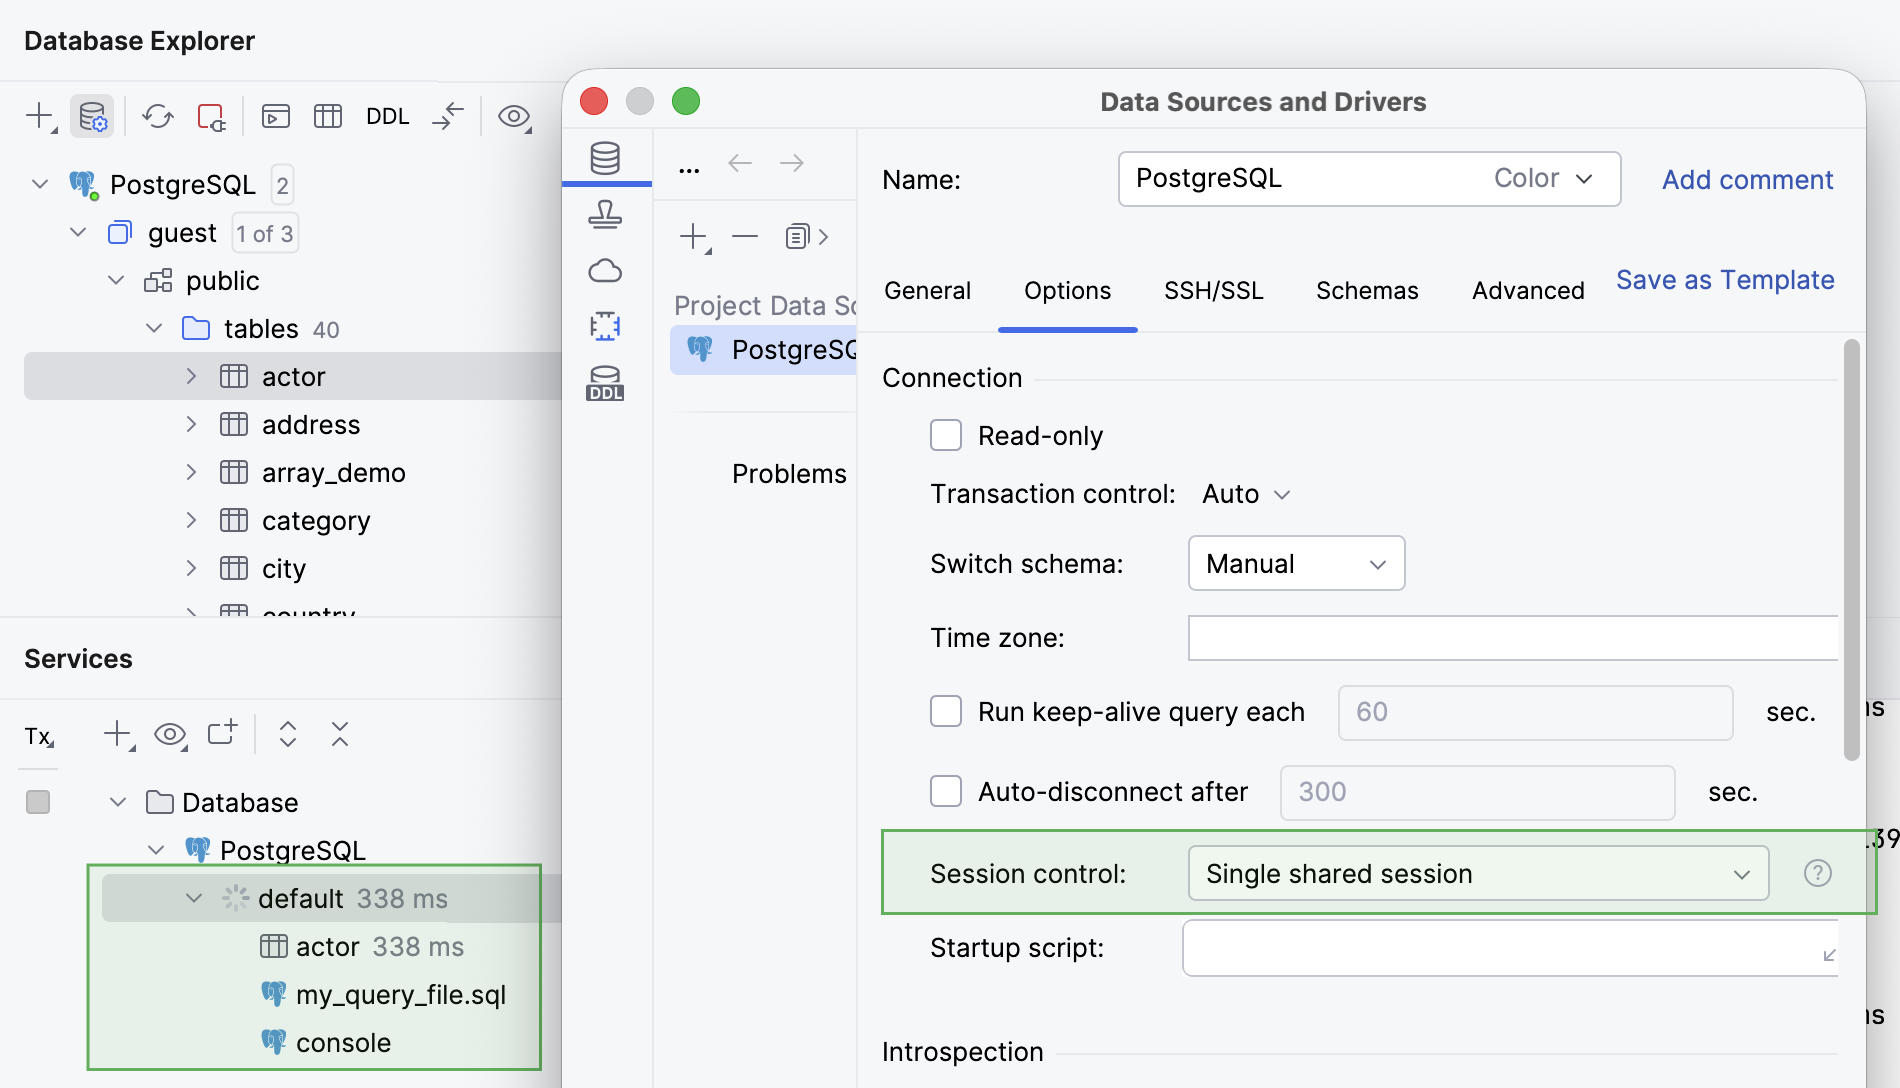
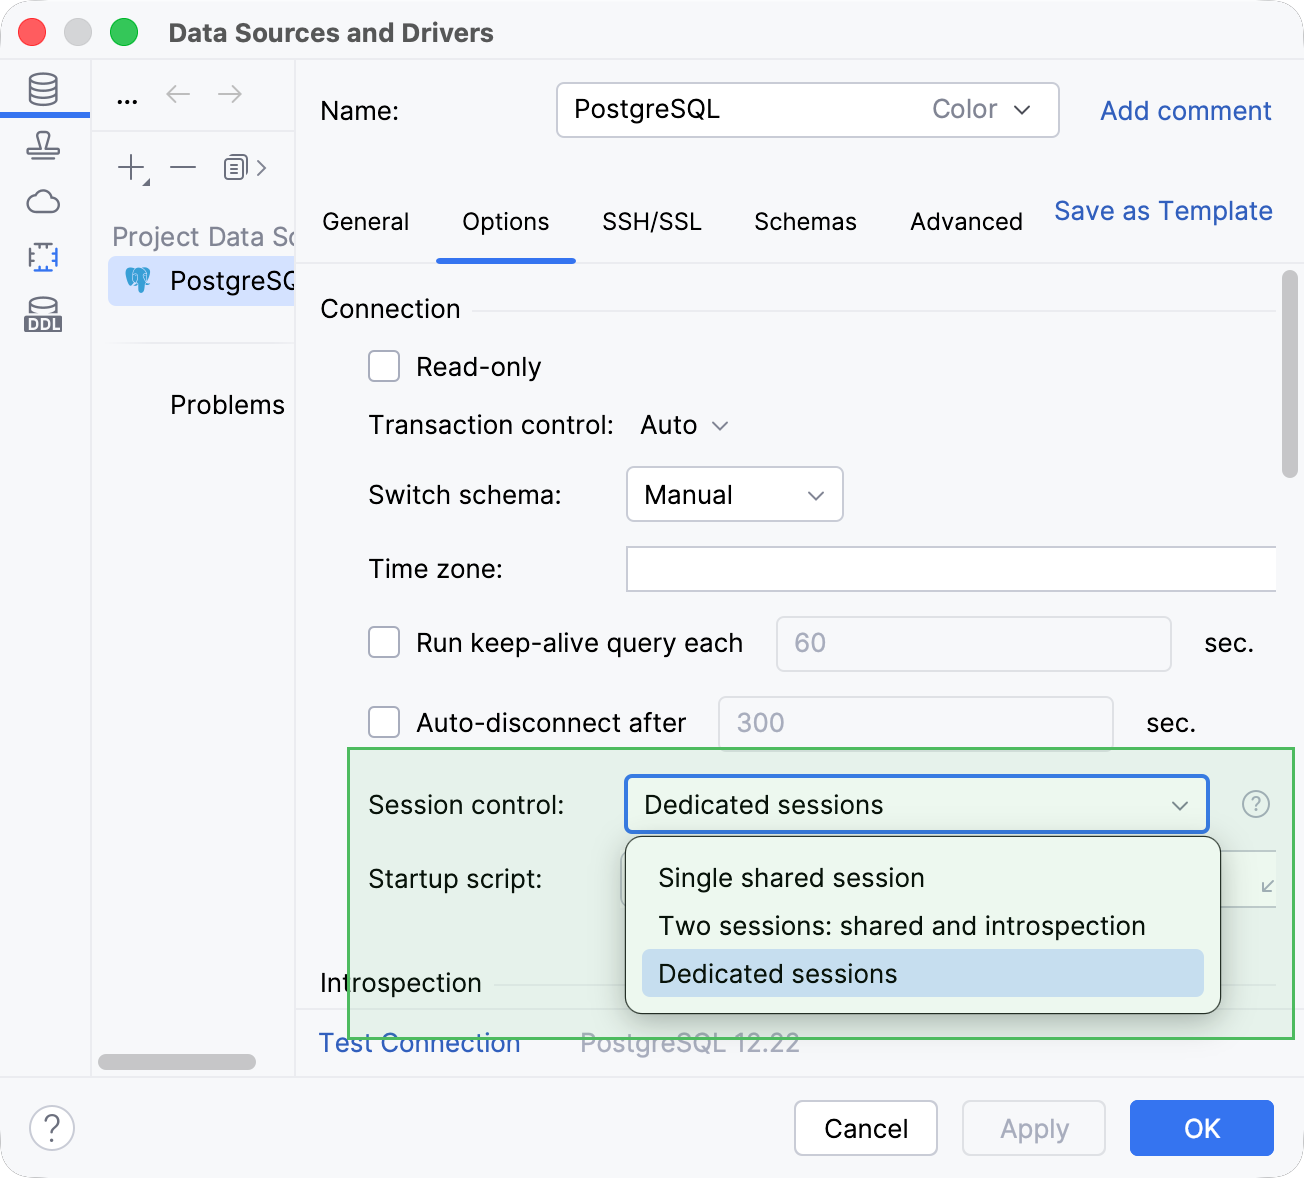
DataGrip offers three modes of distributing client connections among sessions: Single shared session, Two sessions: shared and introspection, and Dedicated sessions.
A single session is shared across multiple clients, including introspection. The shared session is
default.Use this mode, for example, if each new query requires MFA approval.
The IDE uses two sessions: one for introspection and the
defaultsession shared by all other clients.Switch to this mode if you want to use the Single shared session mode but keep introspection in a separate session. This way, if introspection takes longer, it does not block other clients.
The database introspection session is displayed as
introspectionin the Services tool window under the data source node.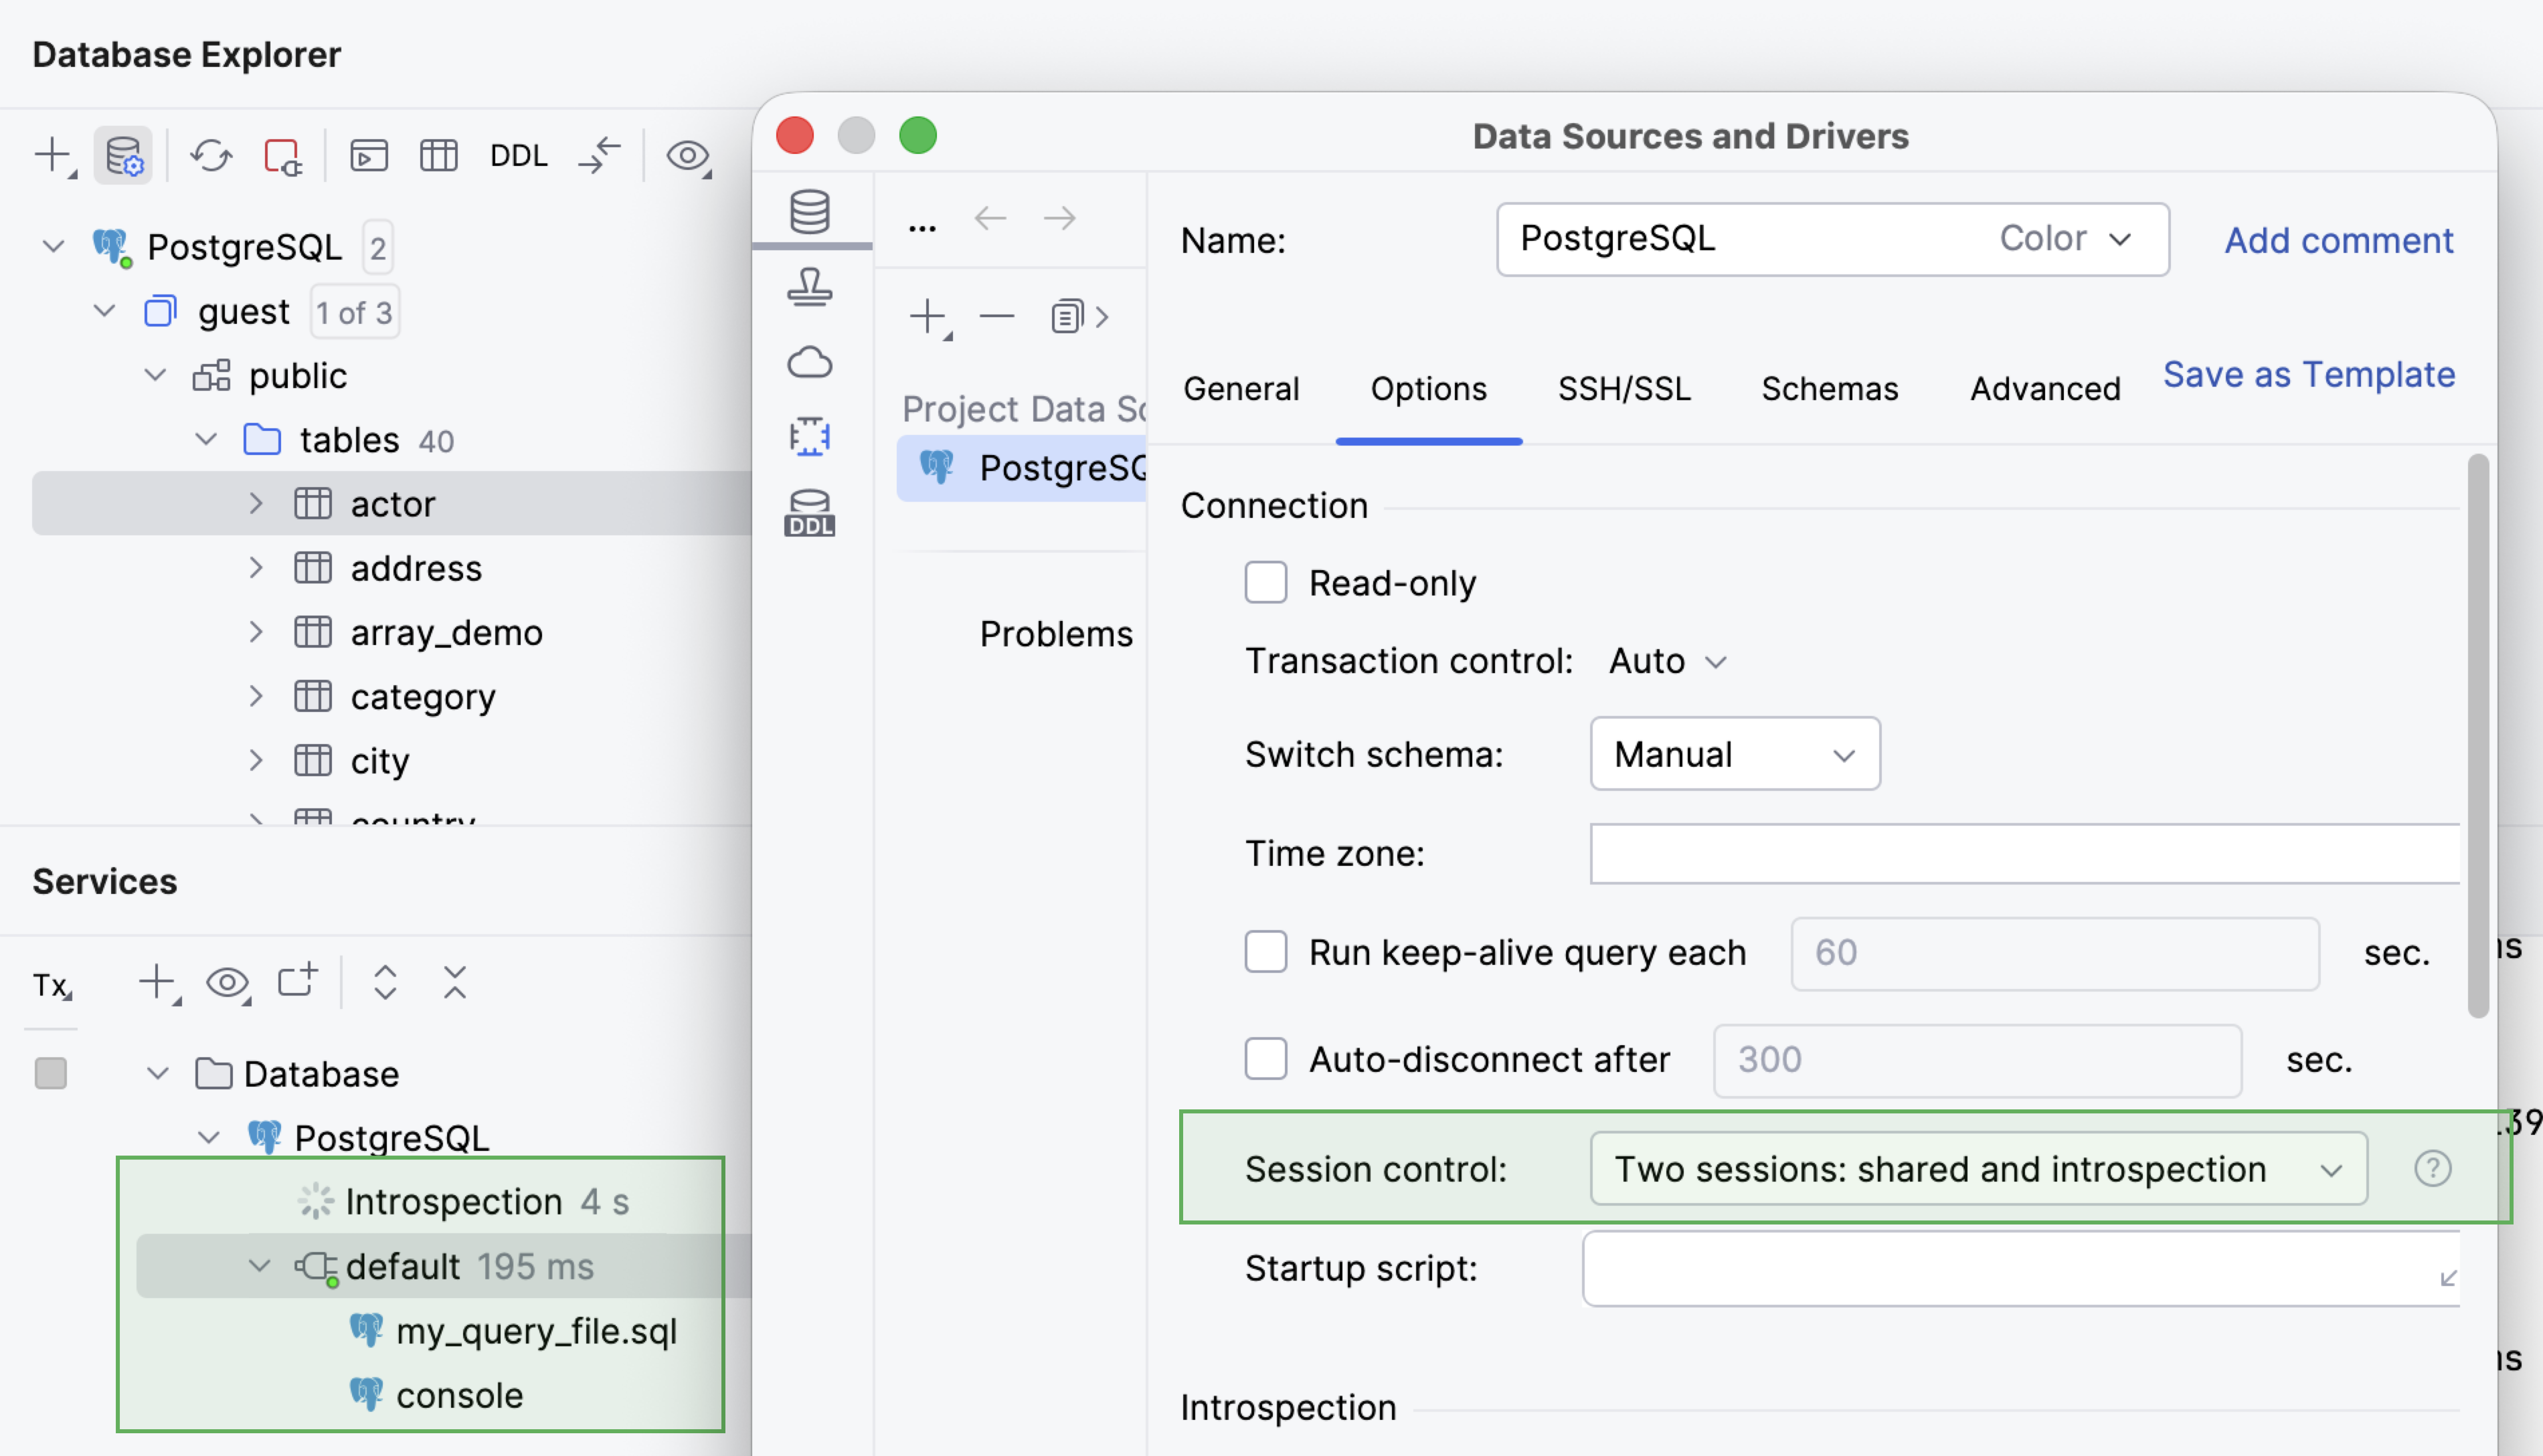
To enable displaying the
introspectionsession, press Ctrl+Alt+S to open the IDE settings, go to , and select Show internal sessions in Services tool window.- Dedicated sessions
Each new client creates a separate session.
The database introspection session is displayed as
1in the Services tool window under the data source node.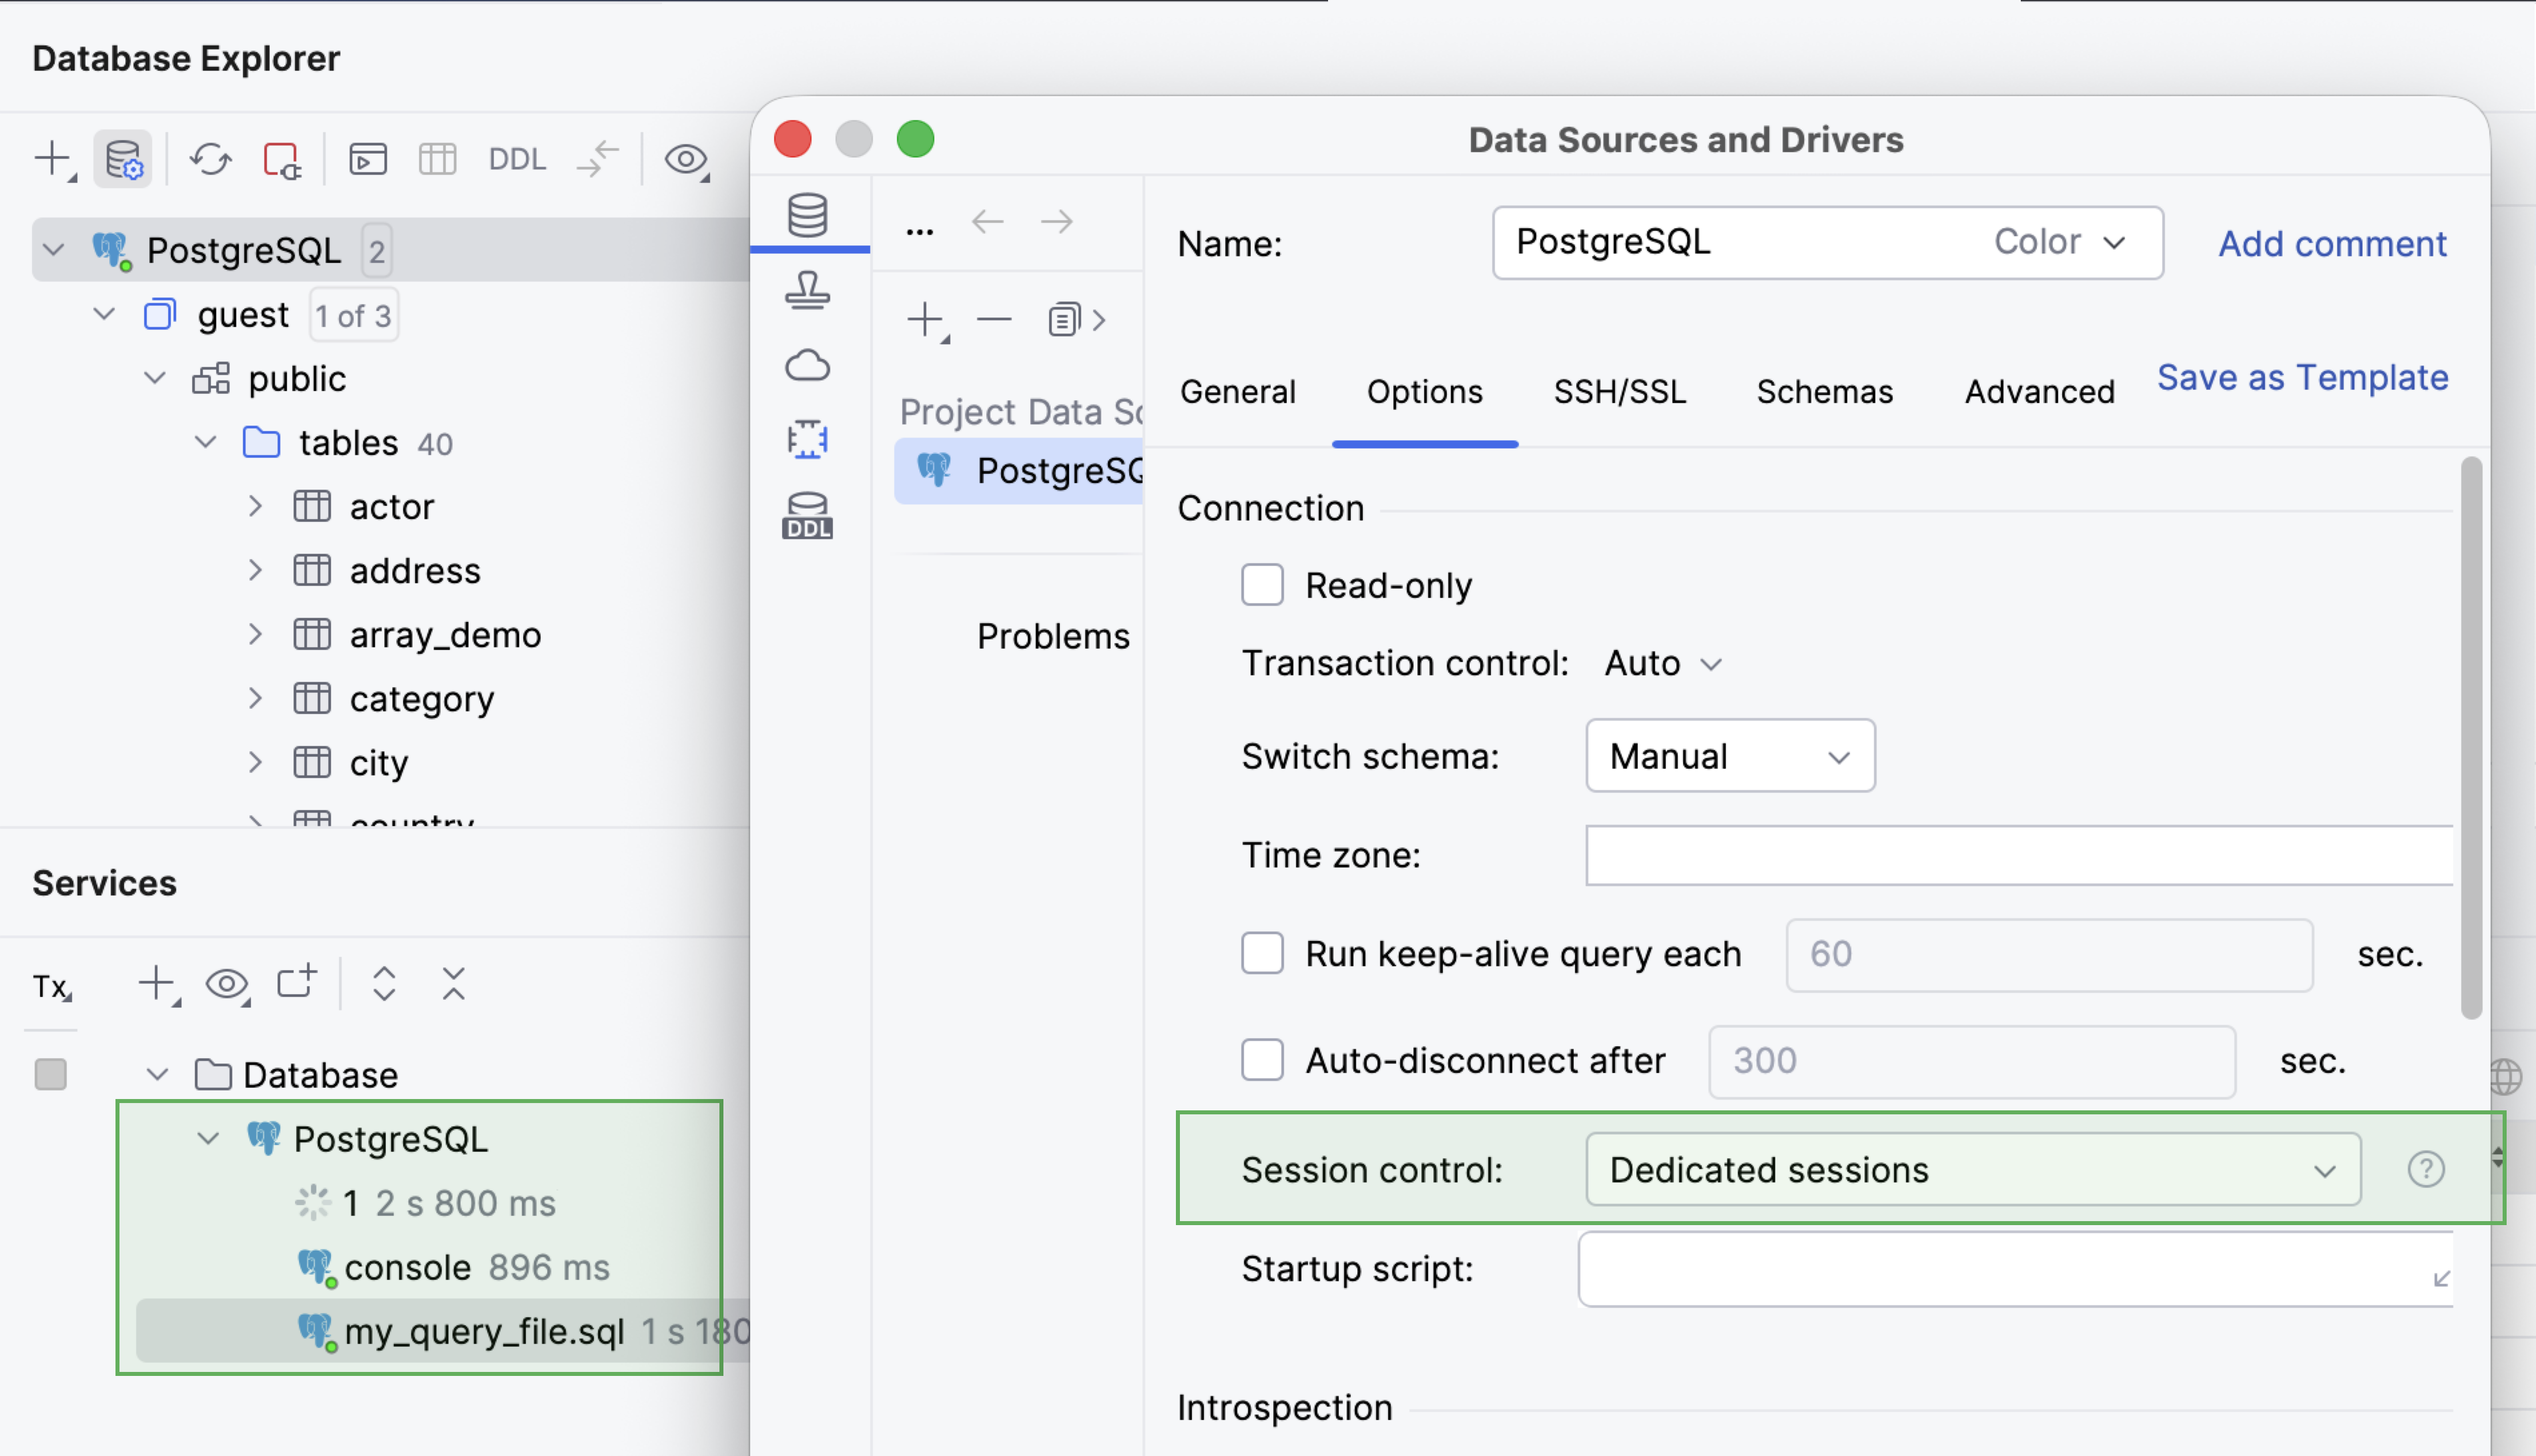
To enable displaying the
1session, press Ctrl+Alt+S to open the IDE settings, go to , and select Show internal sessions in Services tool window.
Change session mode
To control how clients use sessions, do the following:
Open the Data Sources and Drivers dialog (Ctrl+Alt+Shift+S) and select your data source.
On the right pane of the dialog, open the Options tab.
In the Connection settings section, select the mode from the Session control drop-down.
Click OK to apply the changes.
(Optional) If the Apply Changes dialog appears, select the way you want to proceed.
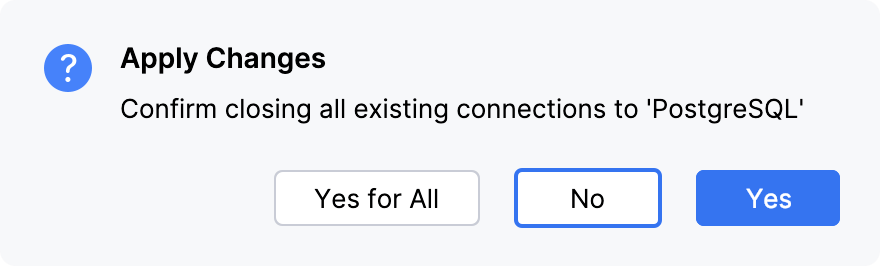
No: Leaves the connected sessions intact.
Yes: Disconnects all the connected sessions.
Switch sessions
In case you need to run your queries or SQL file in a different session, you can switch the session to another one.
To switch the session, in the Services tool window, right-click the file that you want to switch the session for, click Switch Session, and select the session that you want to attach the file to.
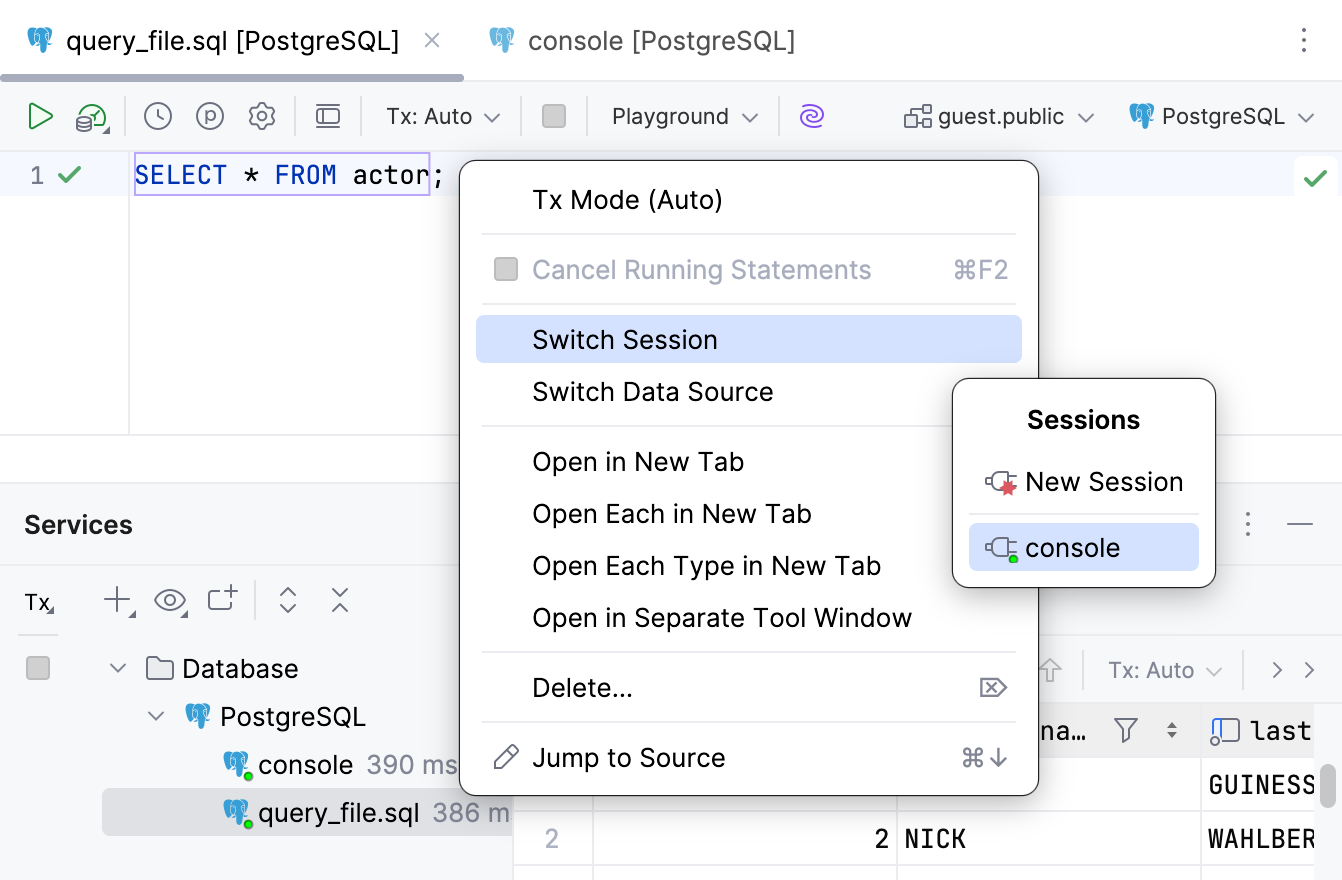
Using the context menu, you can perform the following basic actions to work with sessions: change the transaction mode, cancel the statements running in the session, and switch the client's session or data source. You can also move a session to a separate tab of the Services tool window.
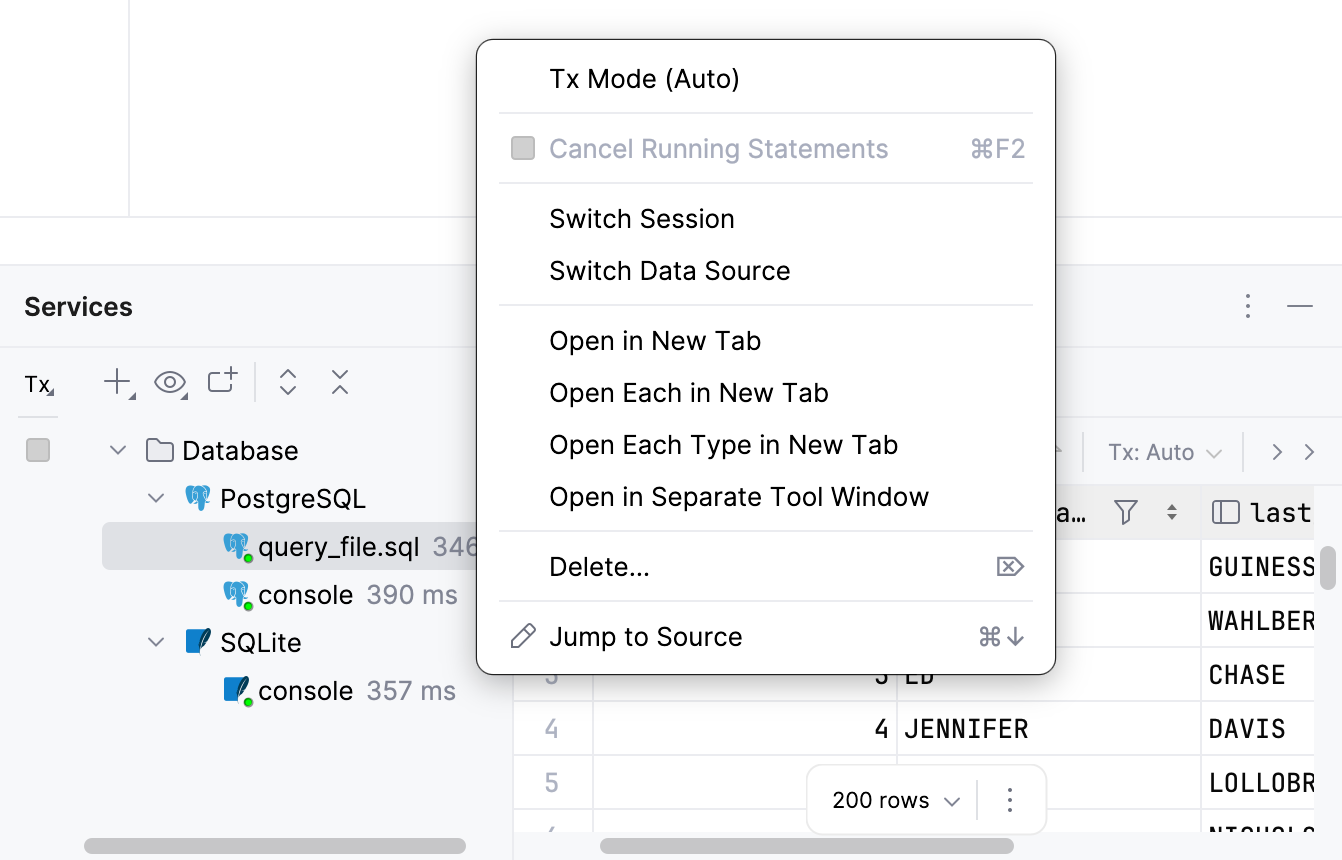
- Tx Mode
Sets the transaction mode.
- Switch Session
Attach the client to another session.
- Switch Data Source
Attach the client to another data source.
- Open in New Tab
Moves a session or a data source to a separate tab.
- Delete
Deletes the session.
- Jump to Source
Moves focus to the session's client.
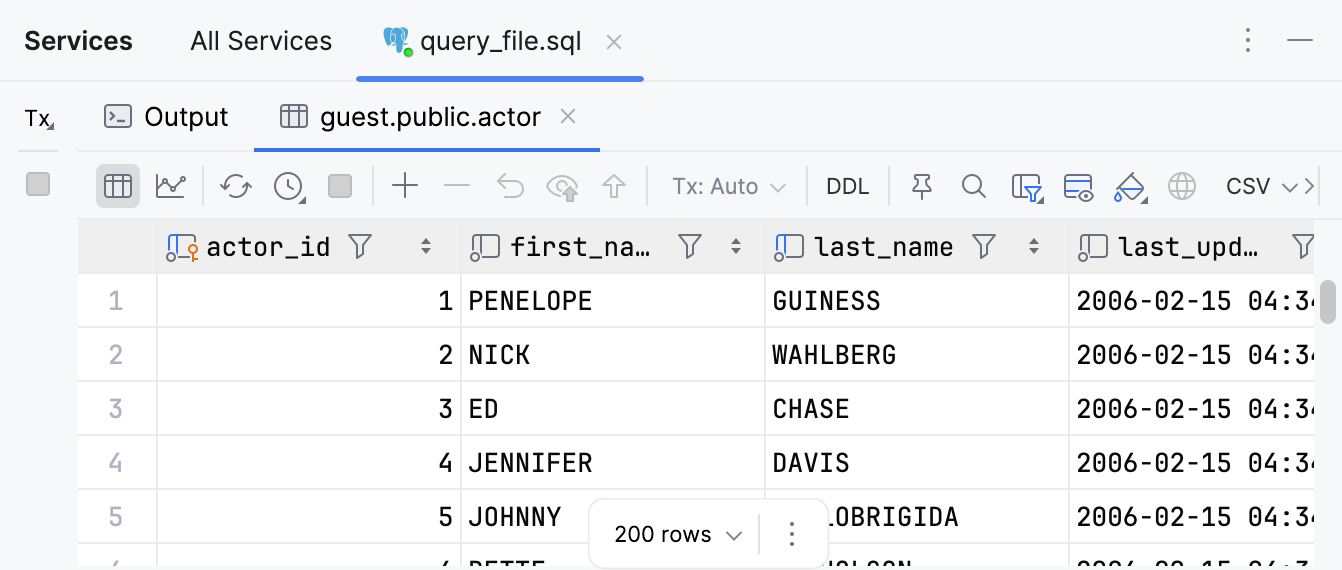
Move a session to a separate tab
Right-click a session and select Open in New Tab.
All sessions
Separate tab
Services tool window reference
For more information about tool window controls and tabs, refer to the the Services tool window topic.