Add cloned repositories and share directories on GitHub
Enable the Git plugin
This functionality relies on the Git plugin, which is bundled and enabled in DataGrip by default. If the relevant features are not available, make sure that you did not disable the plugin.
Press Ctrl+Alt+S to open settings and then select .
Open the Installed tab, find the Git plugin, and select the checkbox next to the plugin name.
Install the GitHub plugin
This functionality relies on the GitHub plugin, which you need to install and enable.
Press Ctrl+Alt+S to open settings and then select .
Open the Marketplace tab, find the GitHub plugin, and click Install (restart the IDE if prompted).
This tutorial covers two general use cases:
Add a cloned GitHub repository to your project
Step 1. Log in to your GitHub account
This step is optional. If the repository is private, log in to the GitHub account.
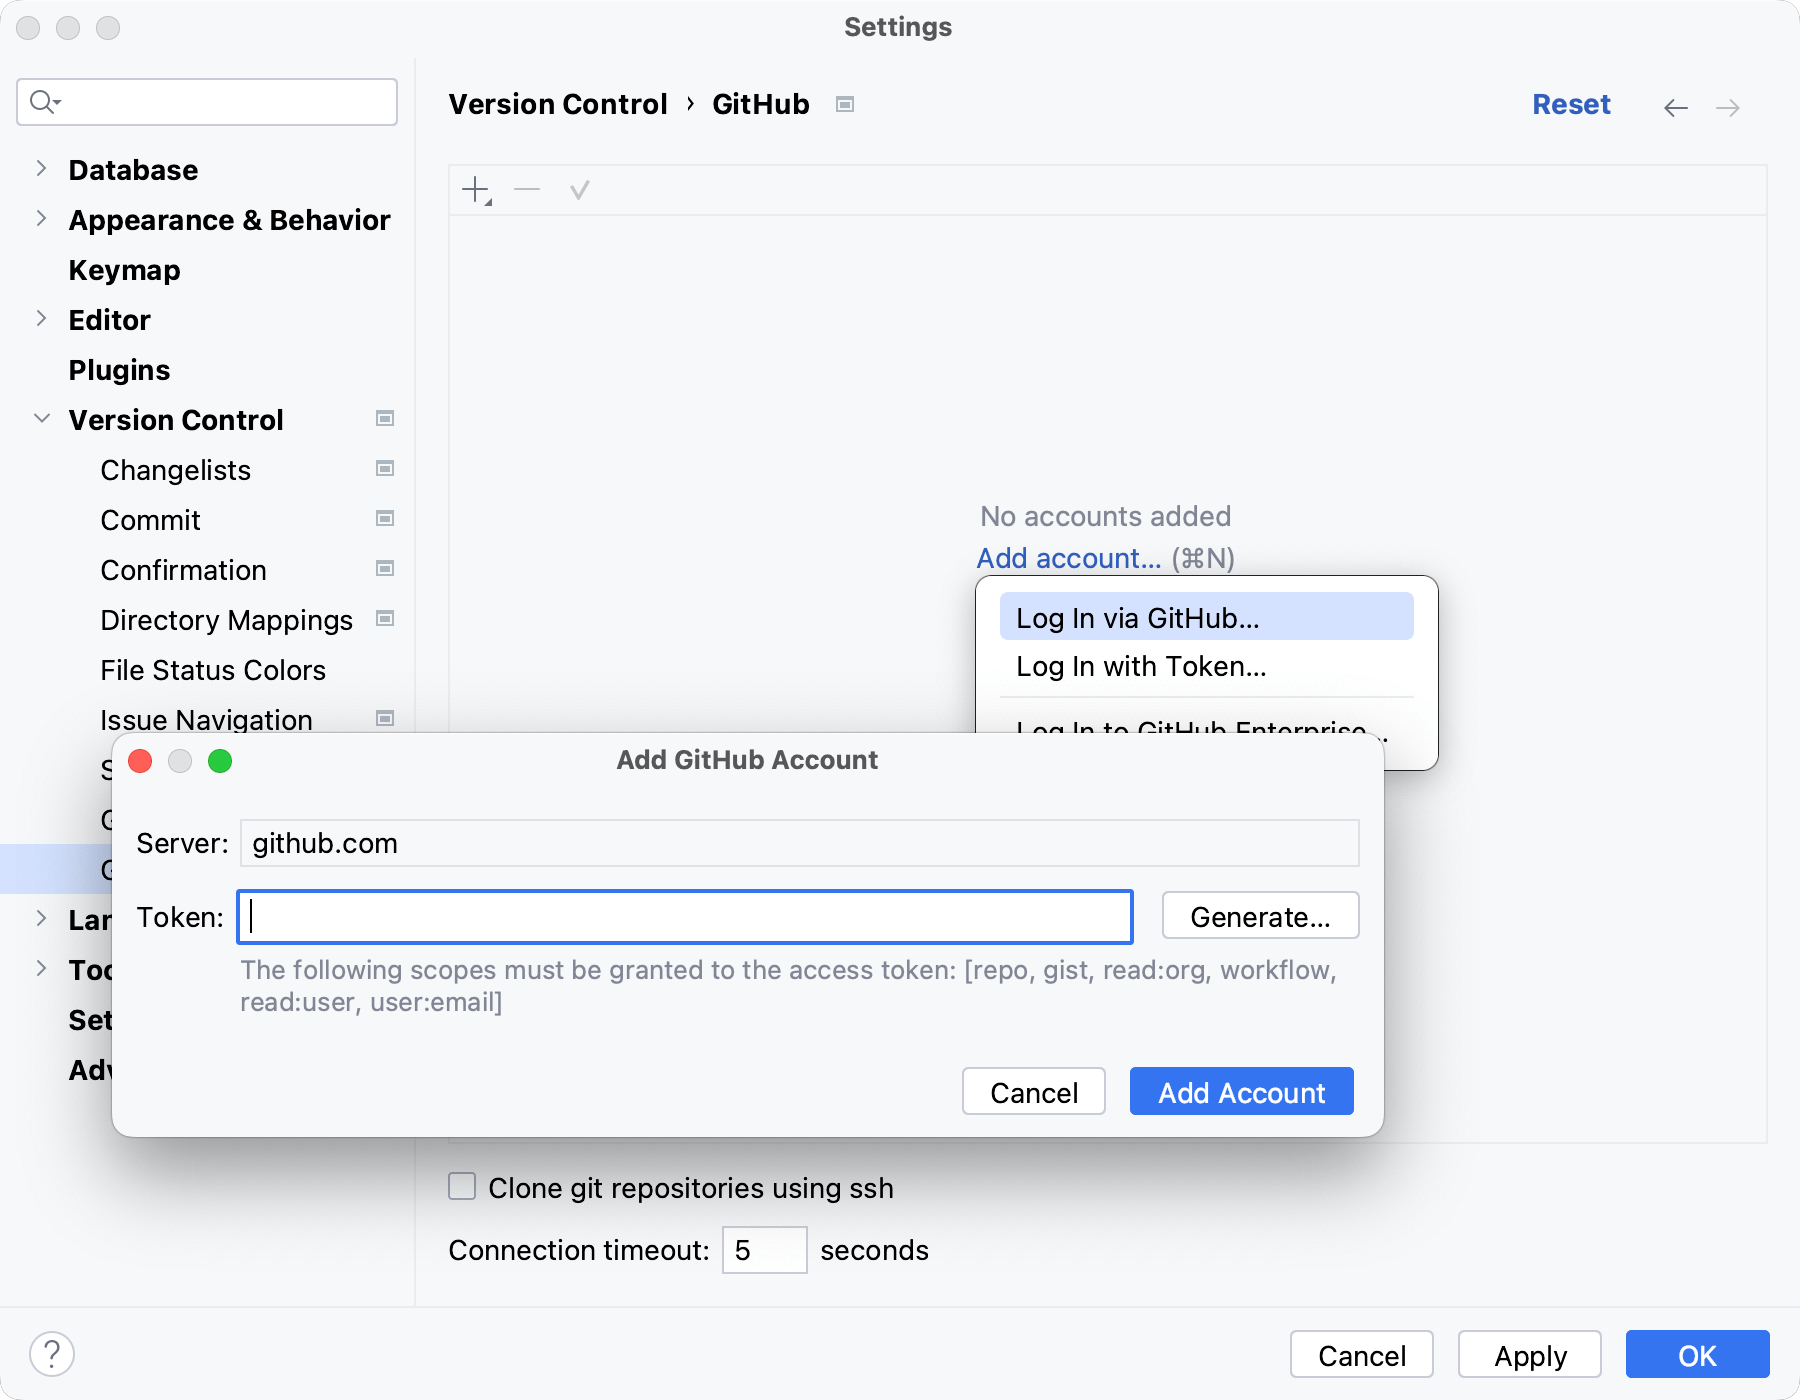
In settings Ctrl+Alt+S, navigate to .
Click Add account Alt+Insert.
In the Add GitHub Account, enter your credentials.
Click Add Account.
Step 2. Clone a GitHub repository
For example purposes, we are going to use the dumps repository: https://github.com/DataGrip/dumps.
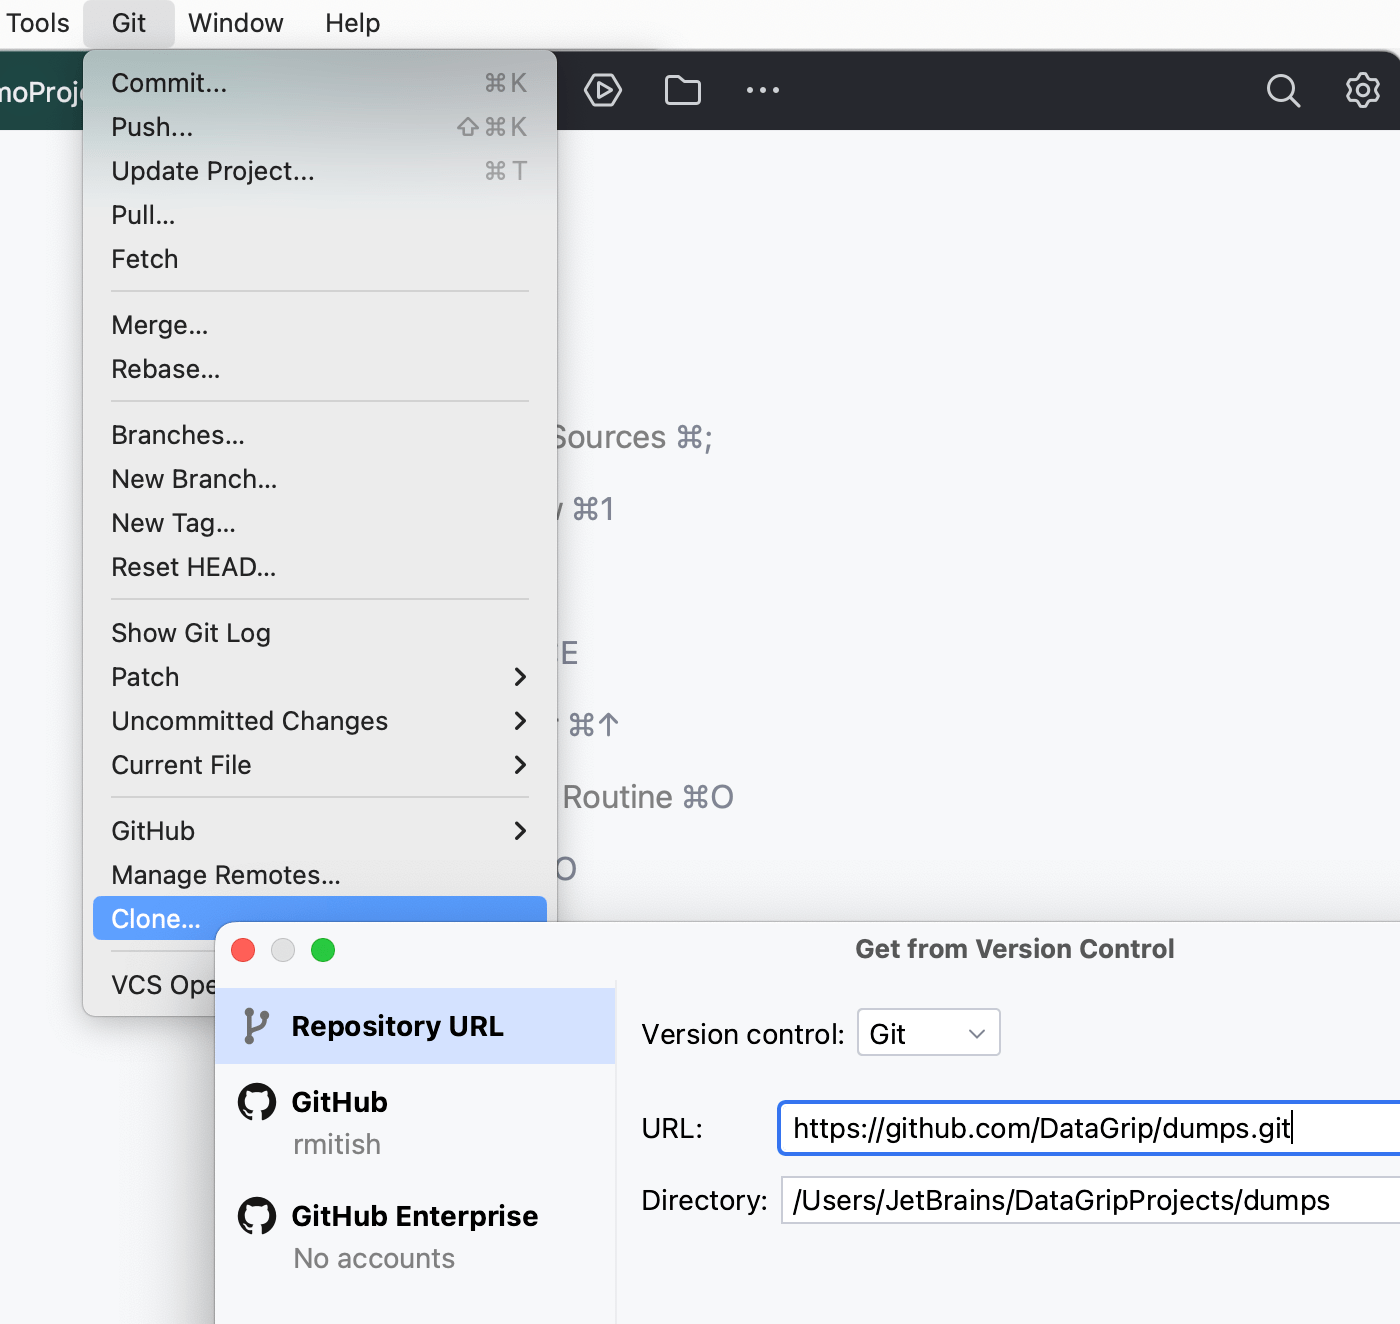
Navigate to .
In the URL field, paste
https://github.com/DataGrip/dumps.git.In the Directory field, specify a storage path for dumps files .
Click Clone.
In the Trust an Open Project '<project_name>'? project security dialog, click Don't Open. If you click Trust Project or Preview in Safe Mode, DataGrip suggests creating a new project with cloned files.
Step 3. Attach the directory
Attach the directory mapped to the GitHub repository to your project.
You can open the Files tool window by doing one of the following:
In the main menu, go to .
On the right tool window bar, click
Files.
Press Alt+2.
In the Files tool window, click the Attach Directory to Project button (
) in the toolbar.
Alternatively, right-click in the area of the Files tool window and select Attach Directory to Project.
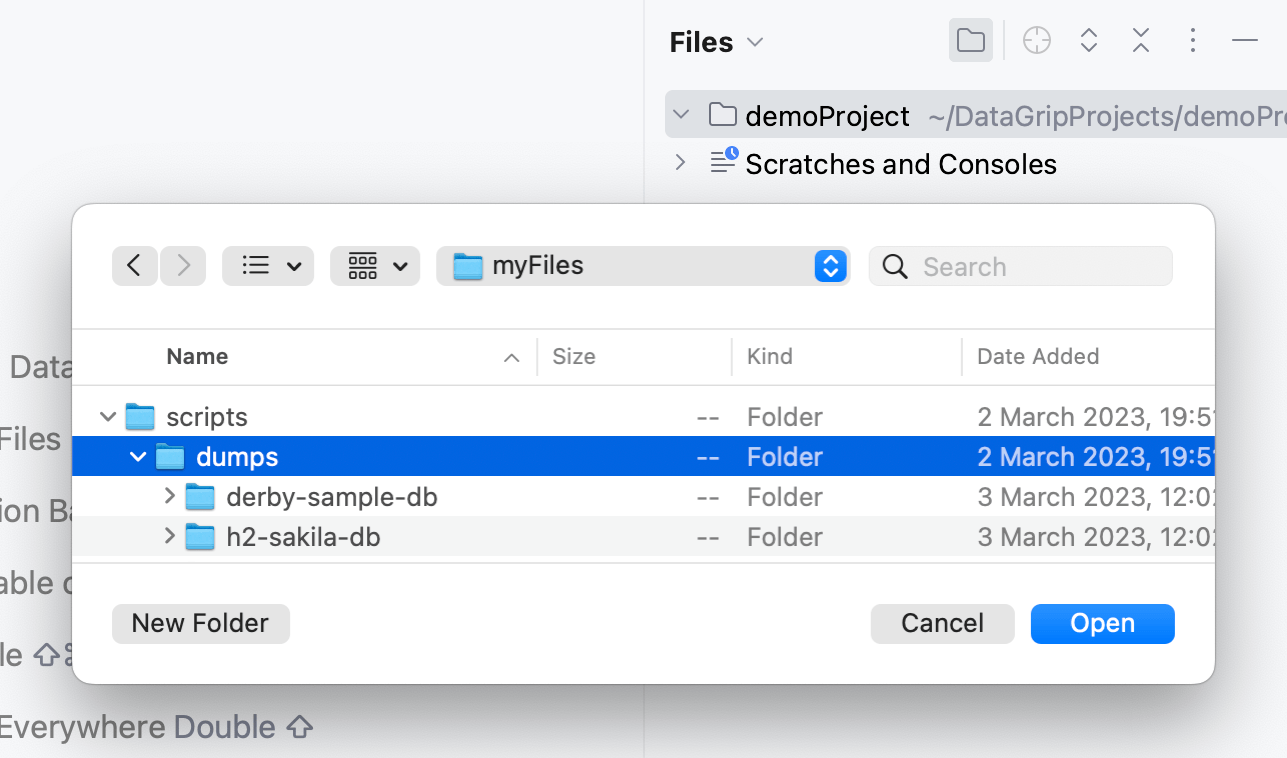
In the file browser, navigate to the directory that you want to attach (for example, dumps).
Click Open.
Step 4. Register the VCS root directory
DataGrip supports a directory-based versioning model. It means that each project directory can be associated with a different version control system.
In the Settings dialog (Ctrl+Alt+S) , open version control settings (). This page shows a list of project directories and version control systems associated with them (if no directories have been added, the list only contains the project root).
Click the Add button (
).
In the Add VCS Directory Mapping dialog, select the Directory option. Type the path to the directory that you want to associate with a version control system, or click the Browse button (
) and select the dumps directory.
From the VCS list, select Git.
Click OK.
Share a directory on GitHub
Step 1. Log in to your GitHub account
In settings Ctrl+Alt+S, navigate to .
Click Add account Alt+Insert.
In the Add GitHub Account, enter your credentials.
Click Add Account.

Step 2. Attach a directory
To share your scripts on GitHub, you need to attach the directory from your computer to the Files tool window.
You can open the Files tool window by doing one of the following:
In the main menu, go to .
On the right tool window bar, click
Files.
Press Alt+2.
In the Files tool window, click the Attach Directory to Project button (
) in the toolbar.
Alternatively, right-click in the area of the Files tool window and select Attach Directory to Project.
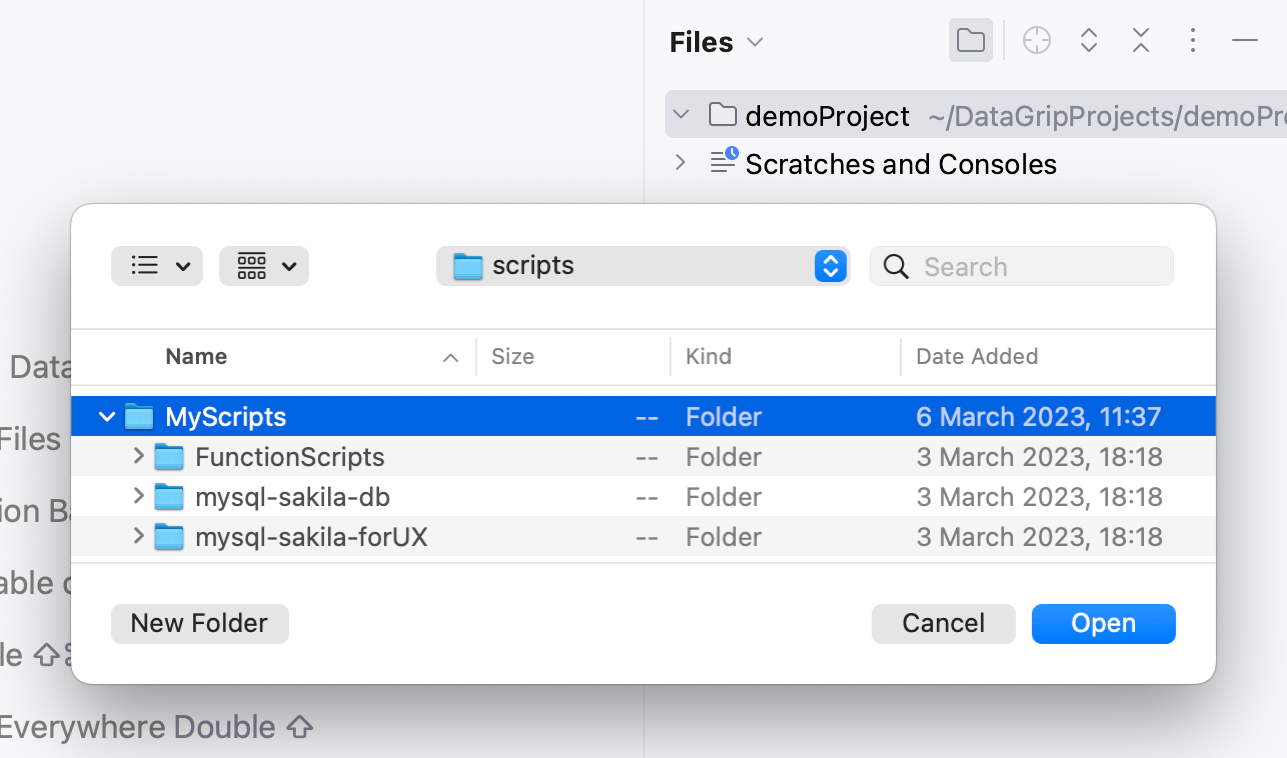
In the file browser, navigate to the directory that you want to attach (for example, MyScripts).
Click Open.
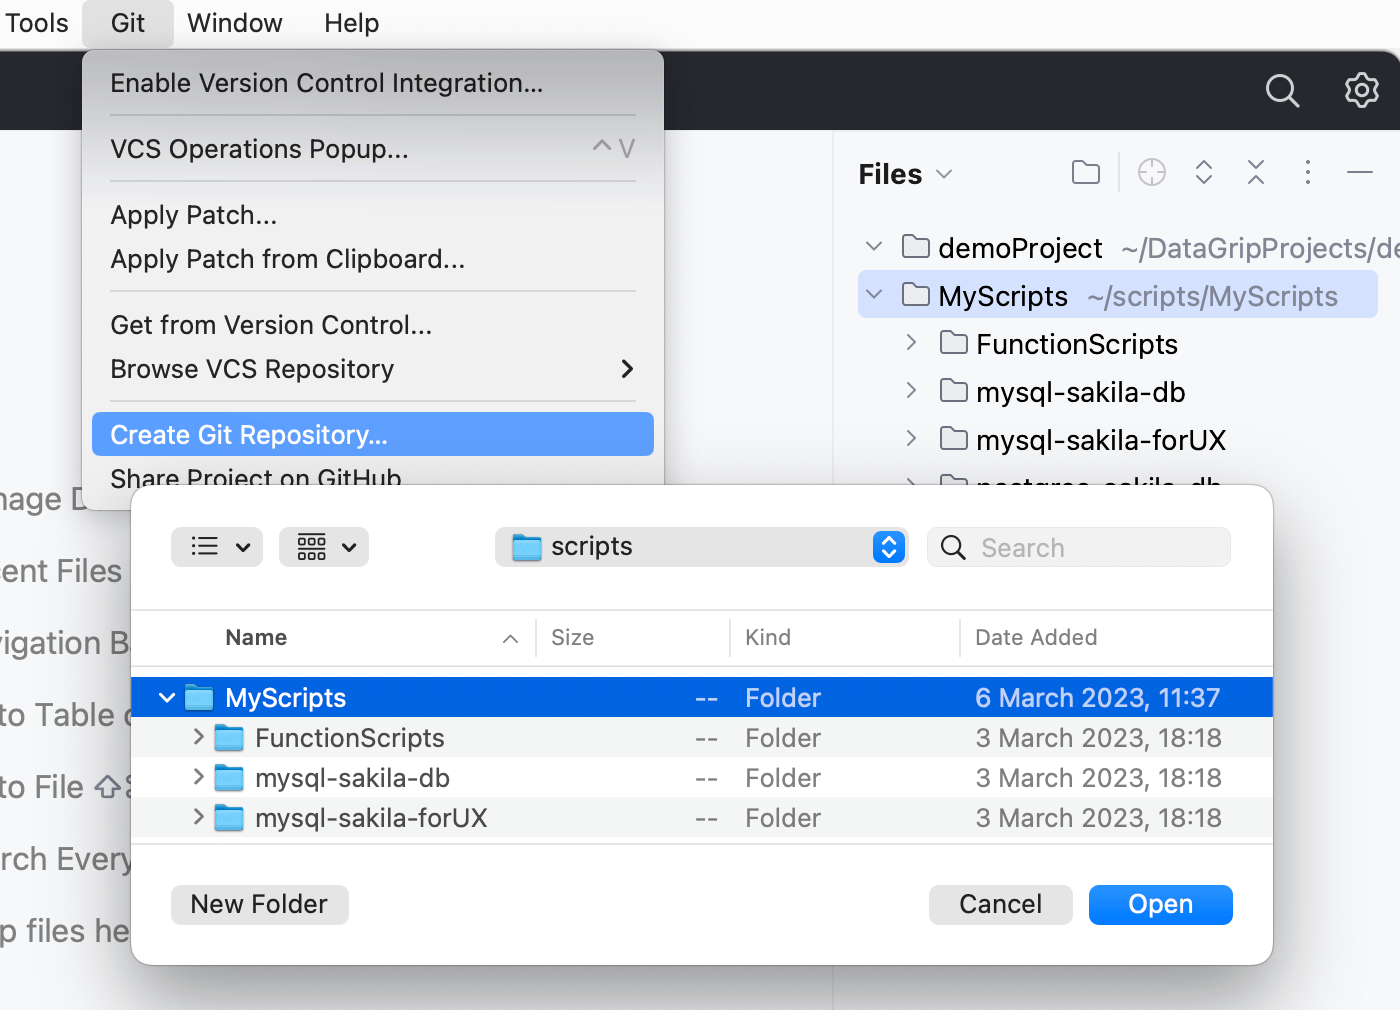
Step 3. Create a local Git repository
In the attached directory, create a Git repository that you will link with the remote repository on GitHub.
Navigate to .
In the file browser, navigate to the directory that you want to share.
Click Open.
Step 4. Create a GitHub repository
On GitHub, click the plus icon and select New repository.
In the Repository name field, specify a name for your repository (for example, dumps).
(Optional) Specify other repository settings.
Click Create repository.
As a result, the GitHub repository is created. On the Code tab, you will see a link to your repository (for example, https://github.com/JetBrainsUser/MyScripts.git).
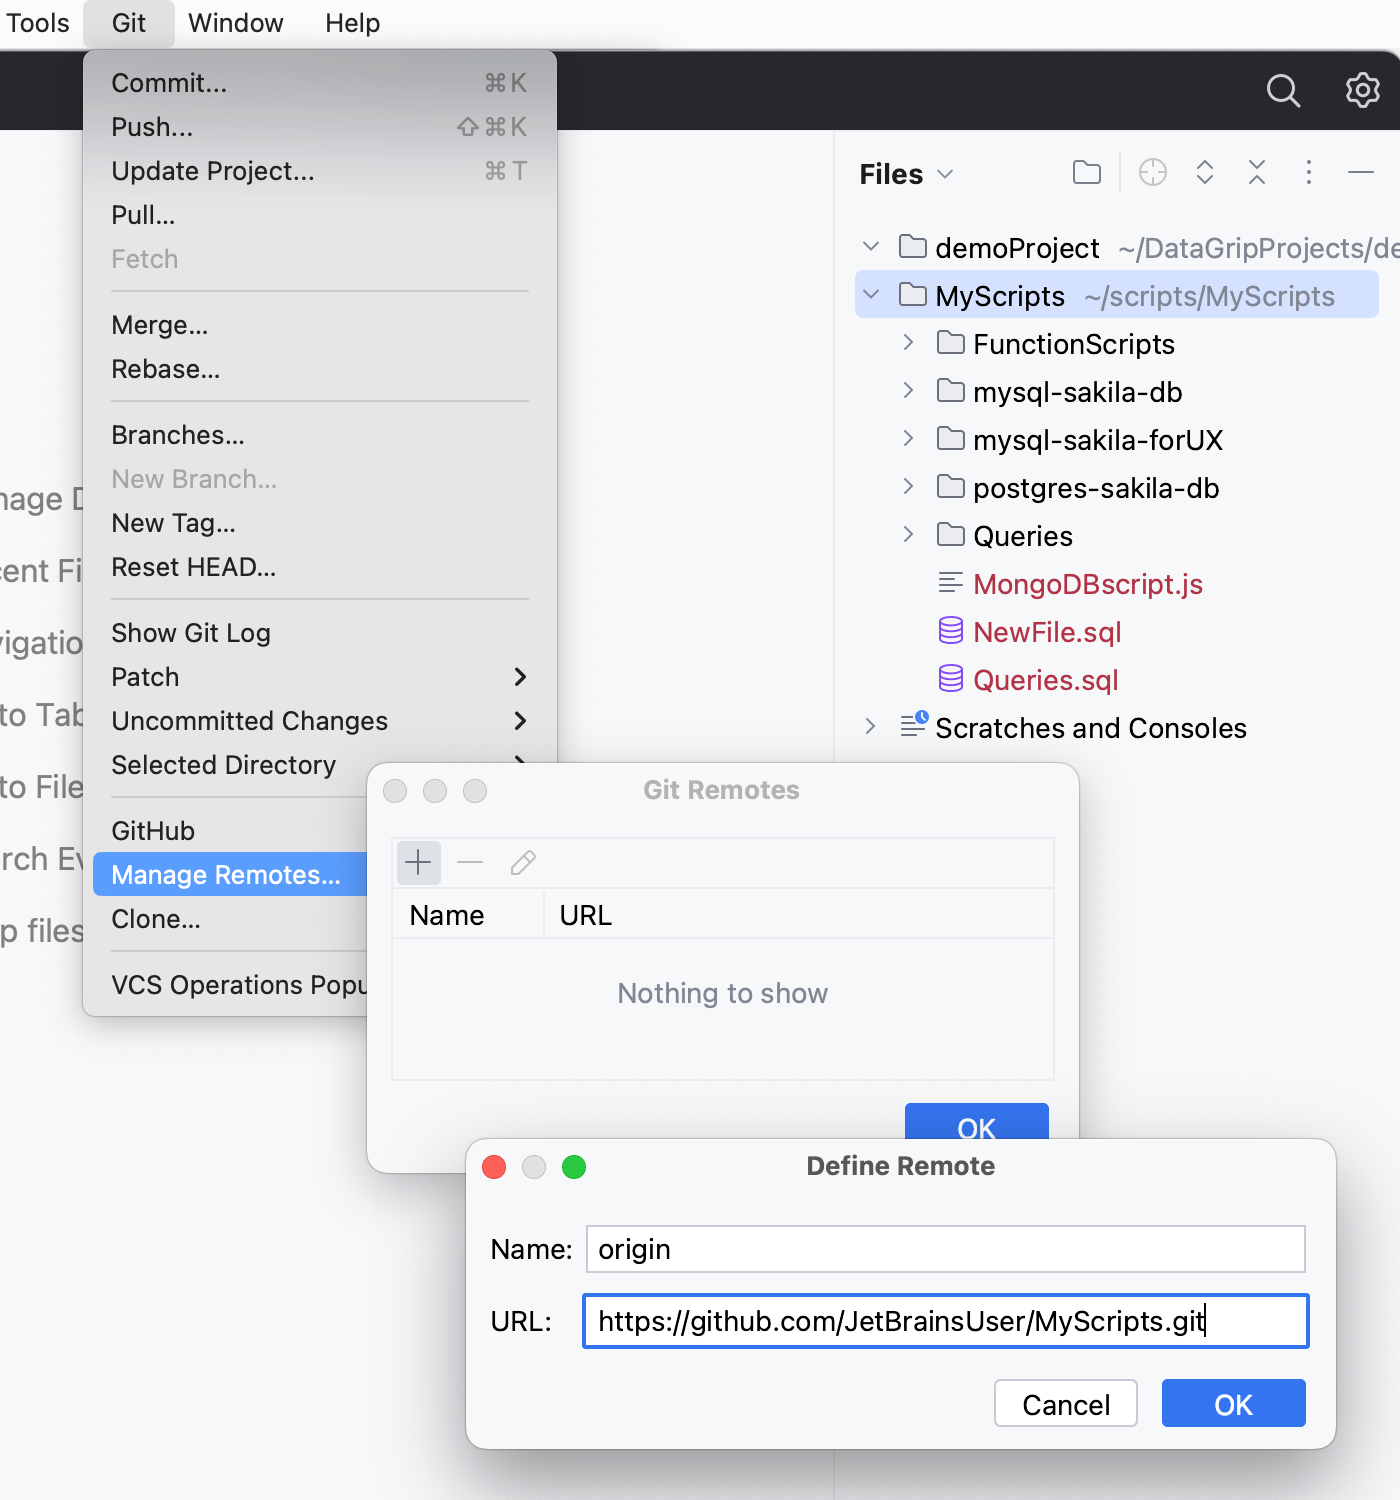
Step 5. Link local and remote repositories
In the main menu, navigate to .
In the Git Remotes dialog, click the Add icon (
).
In the Define Remote dialog, paste the link to your GitHub repository.
Apply changes by clicking OK.
Step 6. Commit local changes
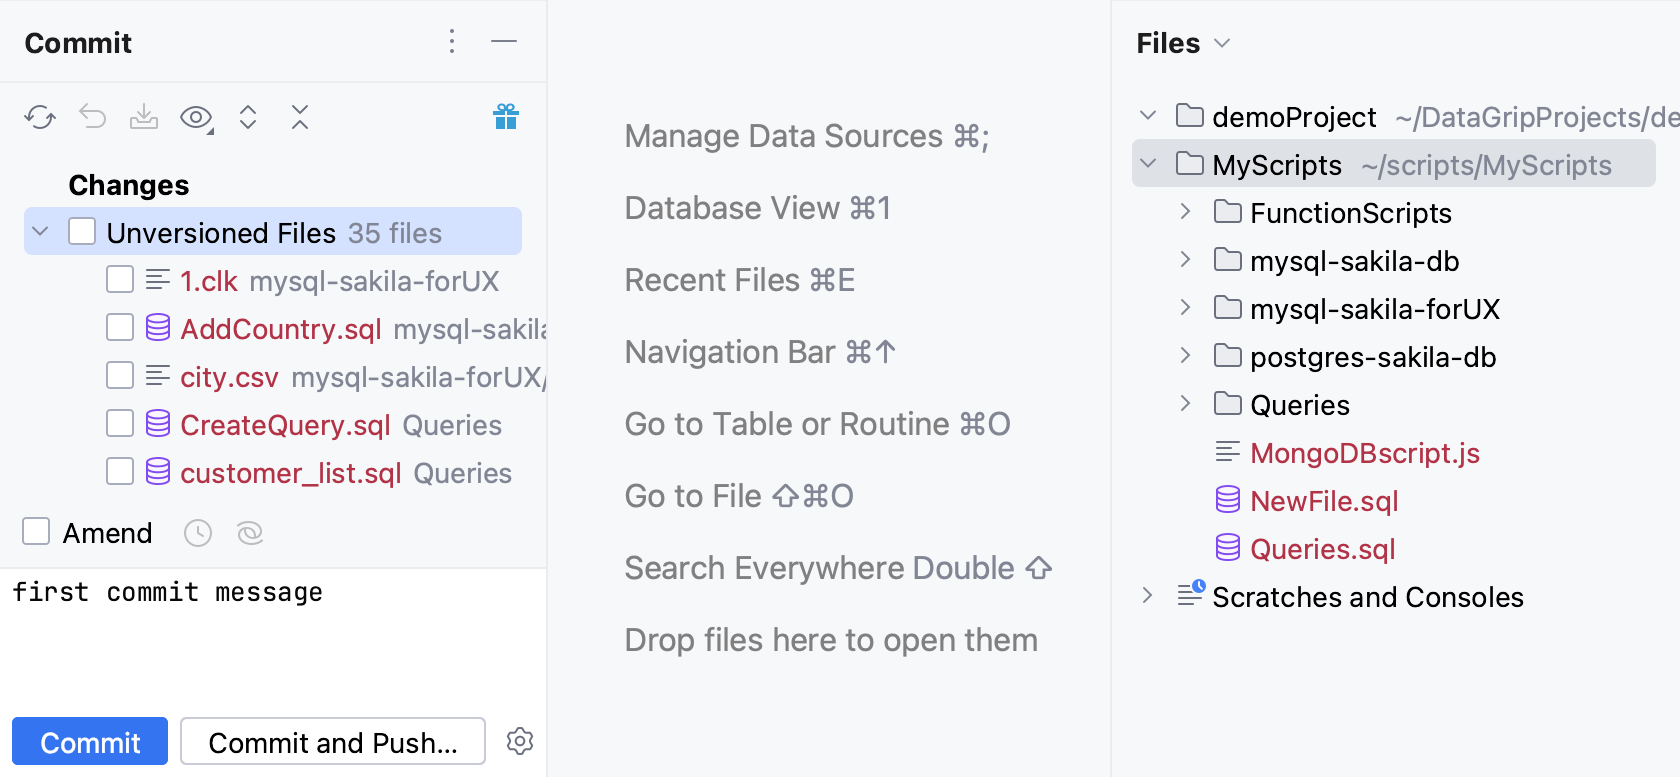
In the Files tool window (), right-click the dumps folder and select .
In the Commit tool window that opens, select the Unversioned Files checkbox in the files pane.
In the text field, write a commit message.
Click Commit.
Step 7. Push local changes
In the main menu, navigate to .
In the Push Commits dialog, click Push.
