Amazon Redshift
Enable the Database Tools and SQL plugin
This functionality relies on the Database Tools and SQL plugin, which is bundled and enabled in DataSpell by default. If the relevant features are not available, make sure that you did not disable the plugin.
Press Ctrl+Alt+S to open settings and then select .
Open the Installed tab, find the Database Tools and SQL plugin, and select the checkbox next to the plugin name.
Official documentation
For full information about Amazon Redshift, refer to the official documentation.
For more versions of Amazon Redshift JDBC driver, refer to the official JDBC driver downloads.
Before you begin
This topic presents a general procedure on how you can create a data source for the connection to your Amazon Redshift database in DataSpell, and run a test connection. It is assumed that you already have the necessary connection details and the database is up and running.
To learn about your DBMS software, refer to its official documentation.
In case you want to access a private Amazon Redshift cluster from your local machine, consider using an Amazon Elastic Compute Cloud (Amazon EC2) instance and then creating an SSH tunnel from DataSpell to this instance. For more information about configuring Amazon EC2, refer to this tutorial at aws.amazon.com.
In DataSpell, you can work with shared databases:
Shared databases, and the datashares that these databases are created on, can be introspected and displayed in Database tool window.
You can modify both datashares and shared databases. To do that, right-click the corresponding object in Database tool window and select Modify <object>. Alternatively, select the object and press Ctrl+F6.
Code editor supports all the related statements.
Prerequisites
Your Amazon Redshift dashboard must have a Amazon Redshift cluster in it. For more information about the Amazon Redshift cluster, refer to Getting Started with Amazon Redshift.
Connect to an Amazon Redshift database
To connect to a database, create a data source that will store your connection details.
Select the data source you want to create. You can do this using one of the following ways:
In the main menu, go to and select Amazon Redshift.
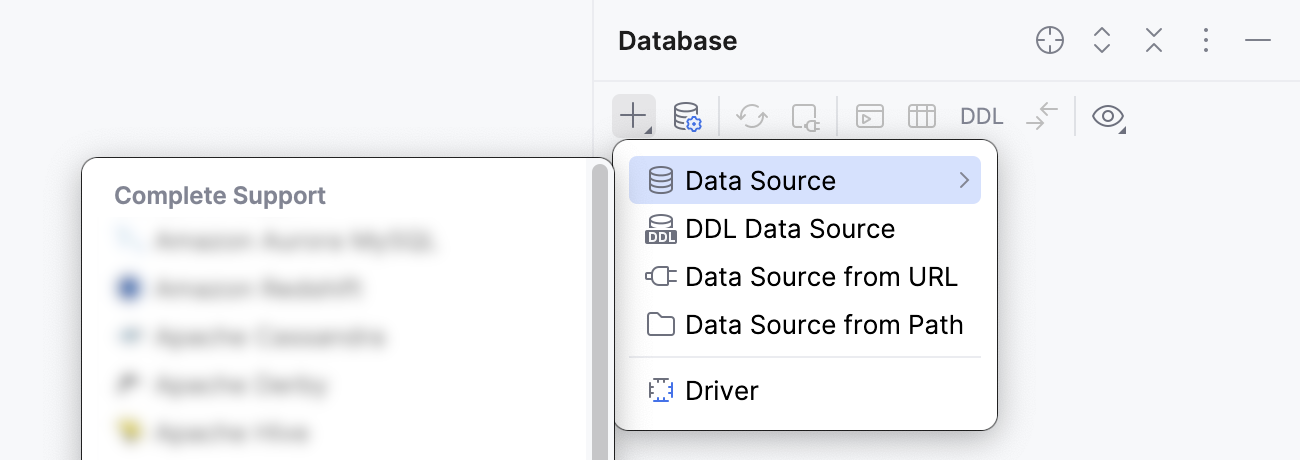
In the Database tool window, click
New on the toolbar. Navigate to Data Source and select Amazon Redshift.

In the General tab of Data Sources and Drivers dialog right pane, specify the driver and connection type.
In the Driver list, leave the default driver option, unless another driver is required for your connection.
From the Connection type list, select the connection type depending on the connection details that you have:
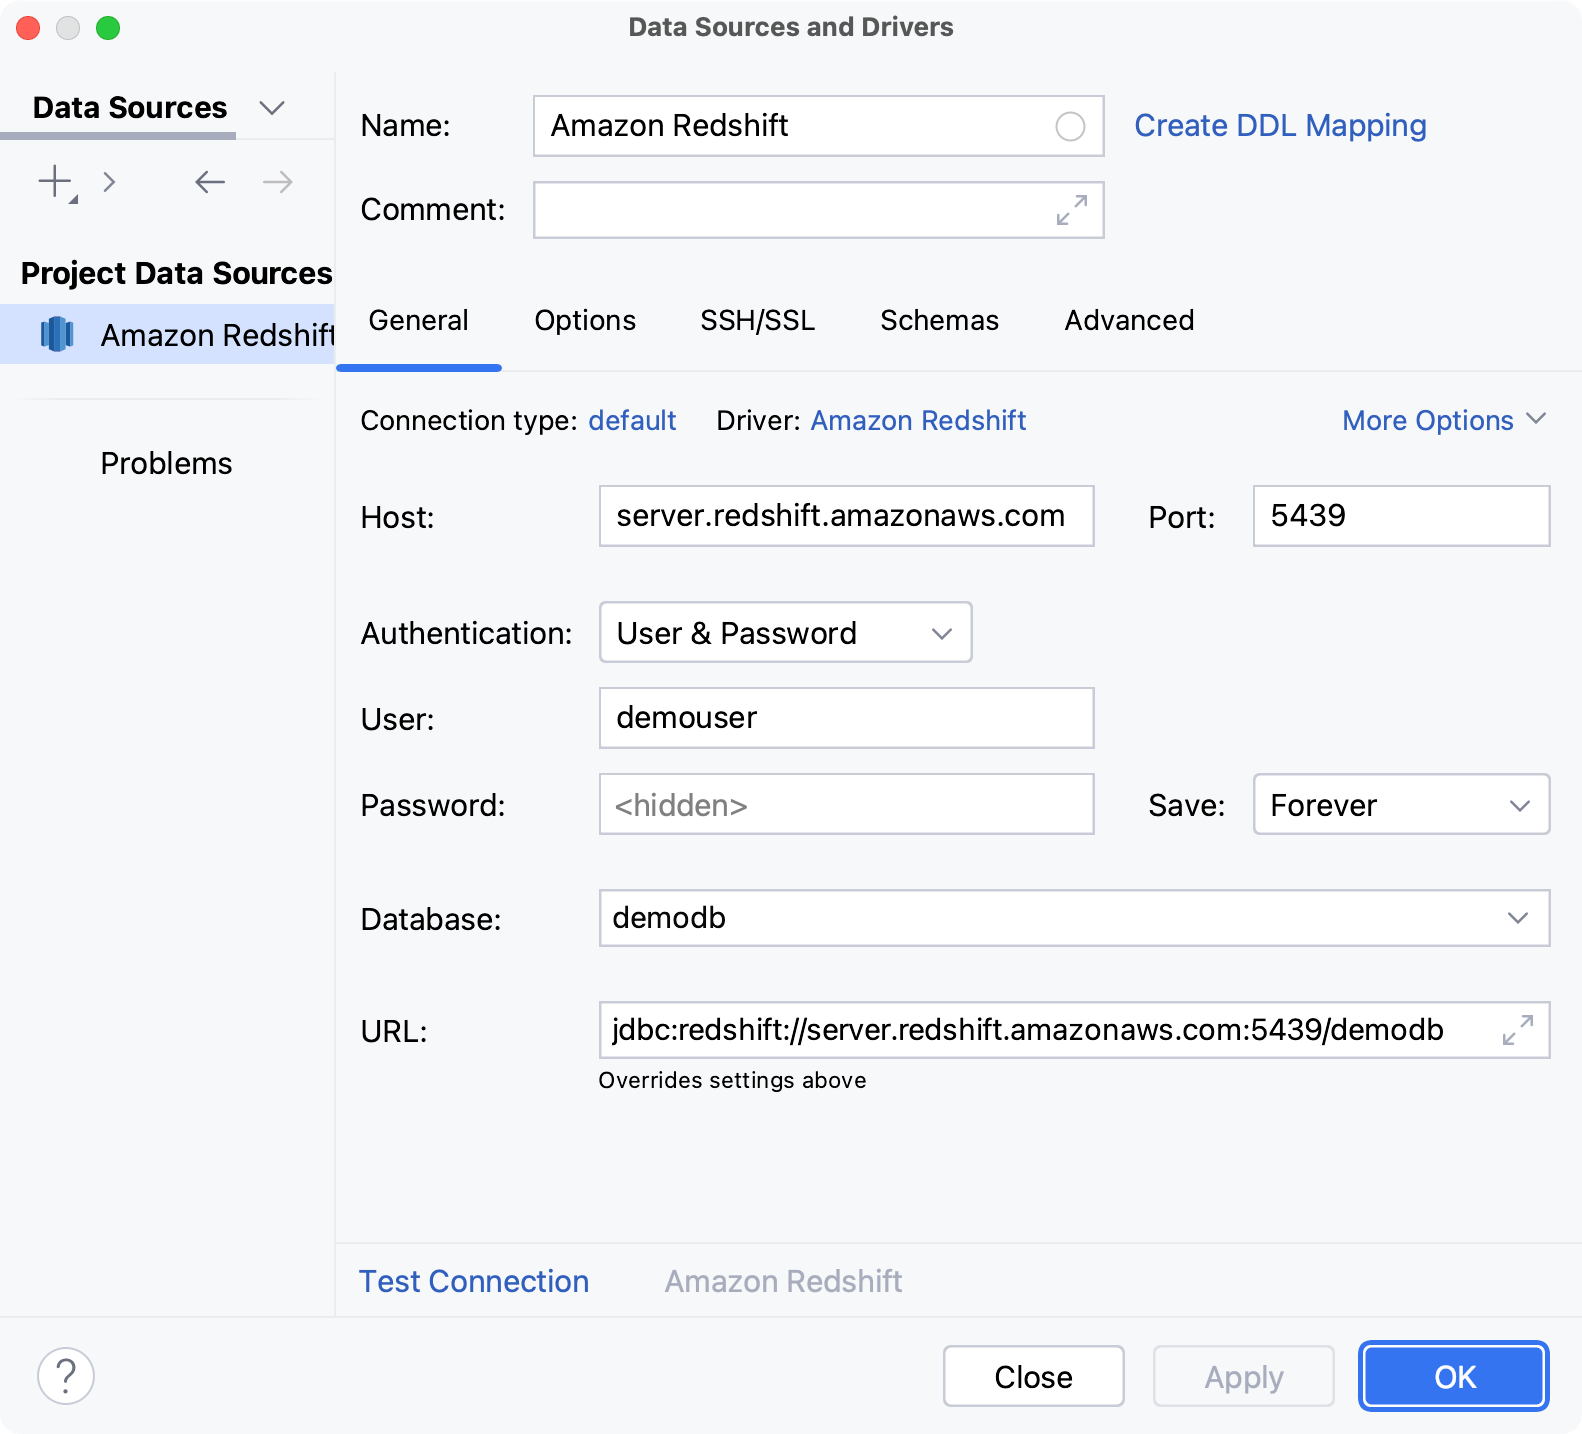
default: connect by using Host, Port, Database, and URL.
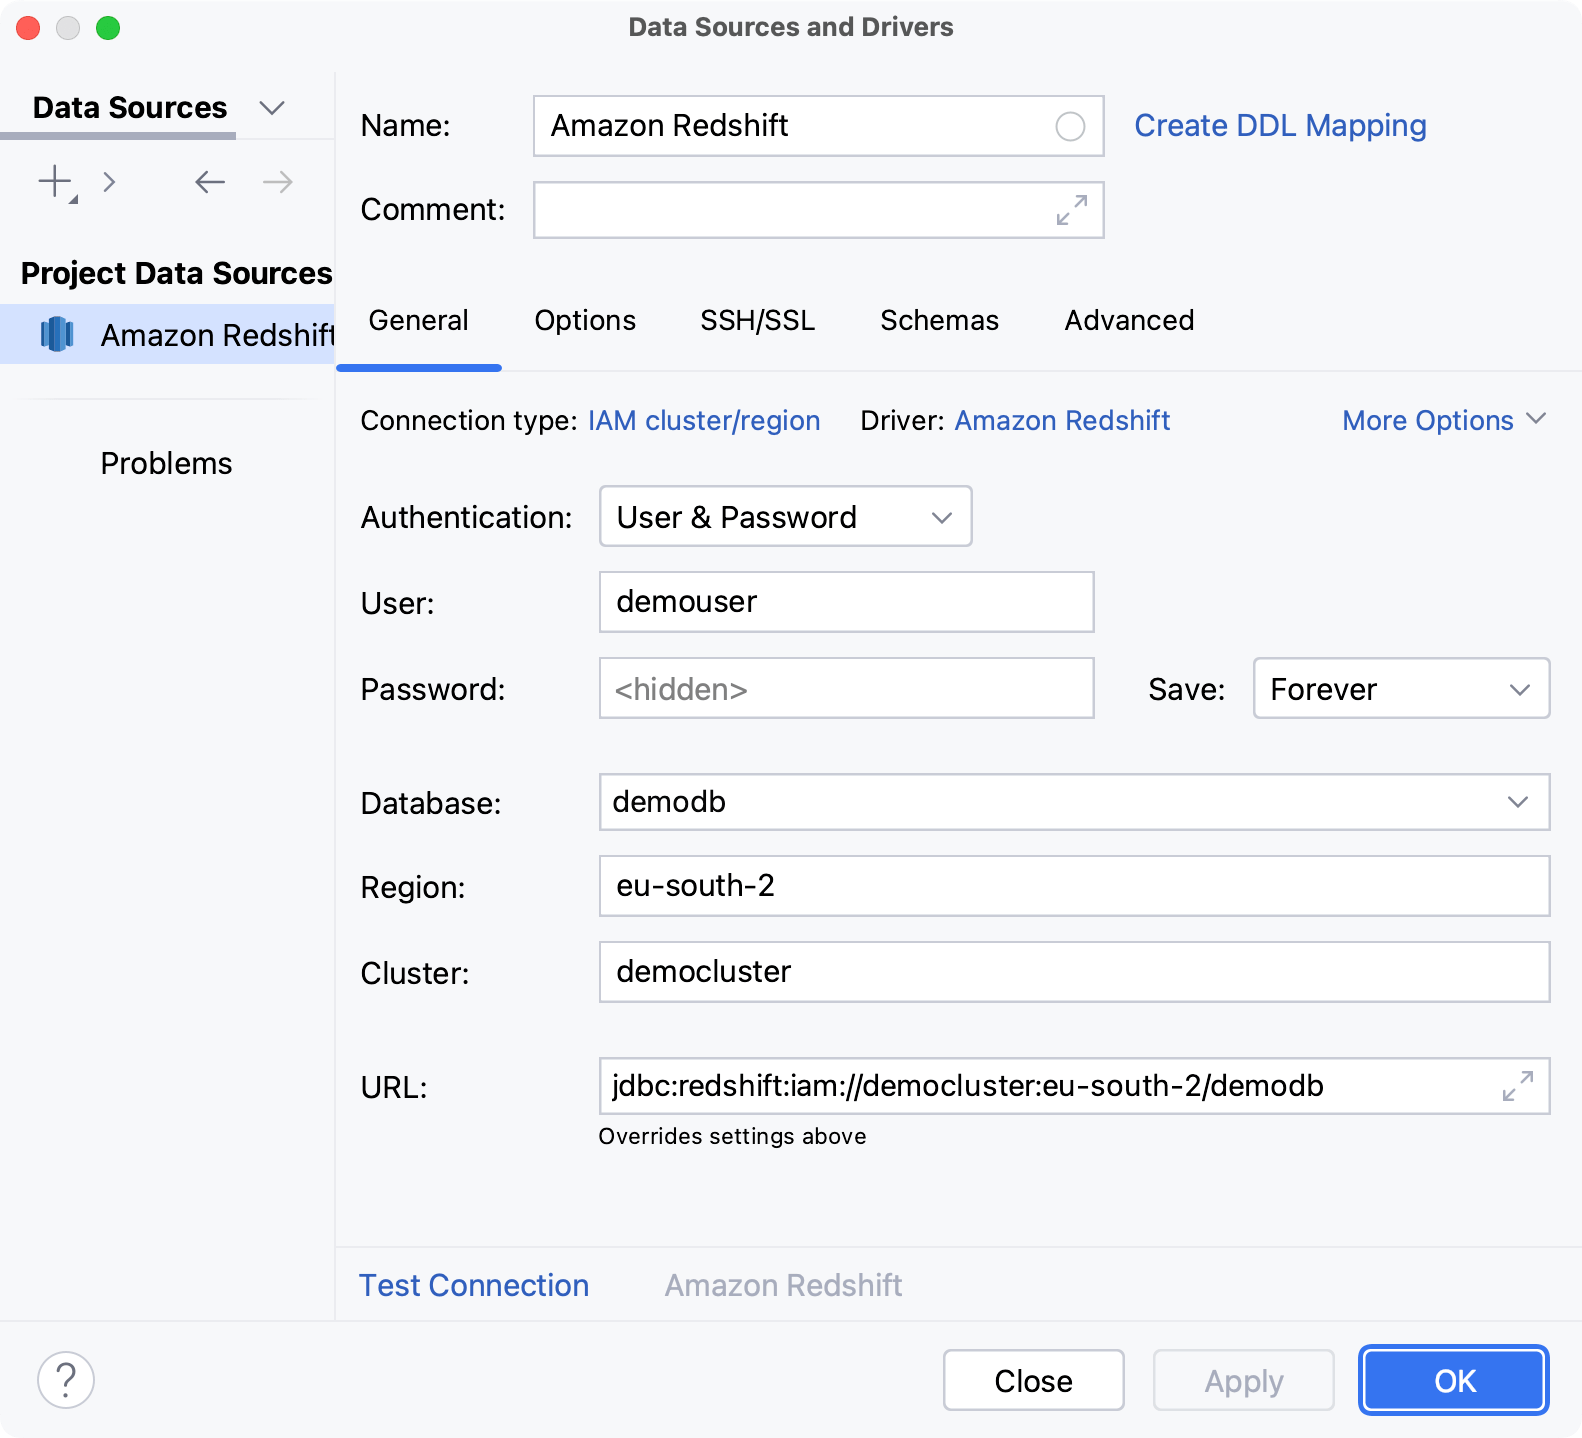
IAM cluster/region: connect by using Database, Region, Cluster, and URL.
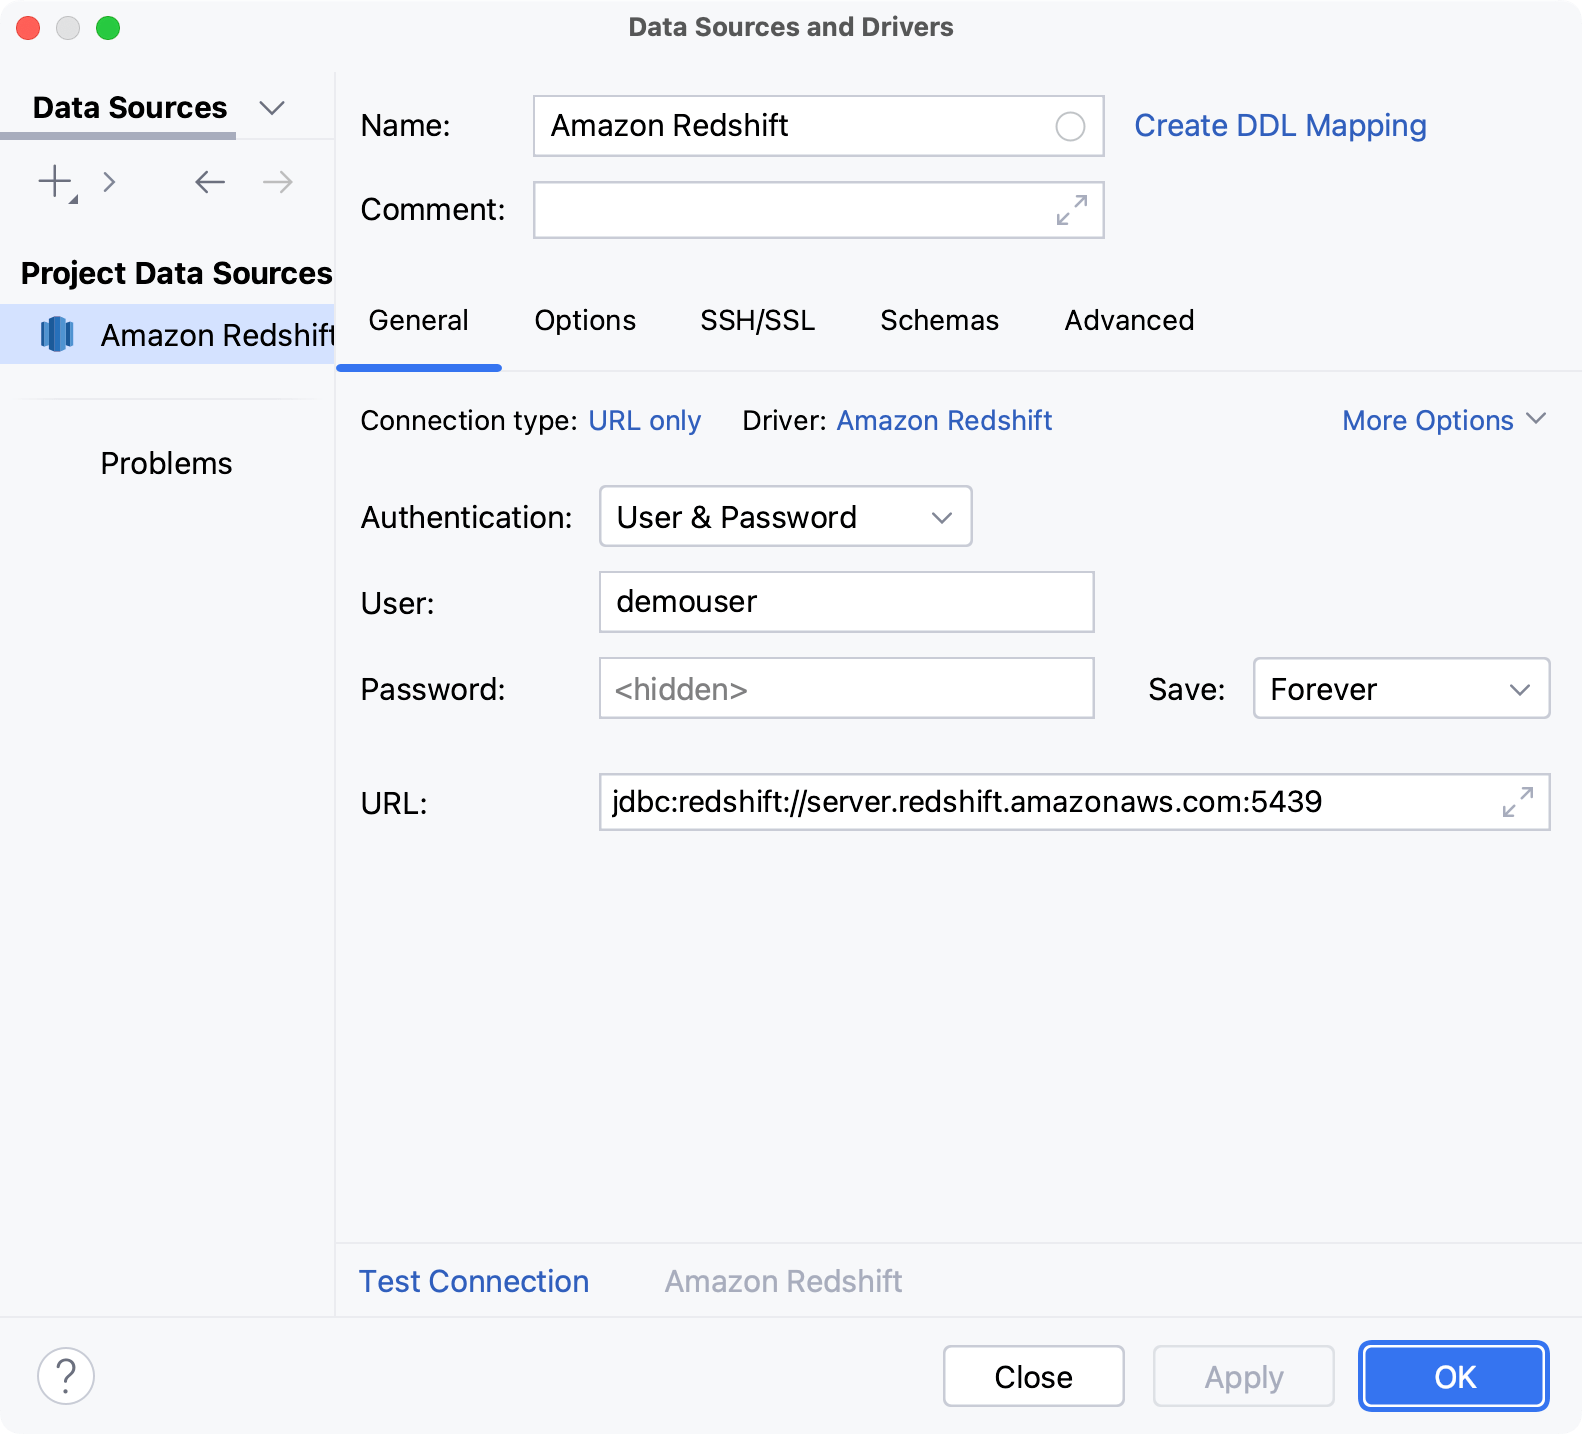
URL only: connect by using only the URL.
For the URL only connection type, the JDBC URL that you enter is used and as is, including the database credentials.
For the other connection types, the JDBC URL is broken down into connection details. You can either specify them separately and use the automatically generated URL, or you can enter the URL directly in the corresponding field.

Check if there is a Download missing driver files link at the bottom of the connection settings area. Click this link to download drivers that are required to interact with a database. For a direct download link, refer to the JetBrains JDBC drivers page.

Location for the downloaded JDBC drivers is the DataSpell configuration directory.
You can also use your drivers for the database instead of the provided ones. For more information about connecting to a database with your driver, refer to Add a user driver to an existing connection.
If there is no Download missing driver files link, then you already have the required drivers.
Specify the database connection details. Alternatively, paste the JDBC URL in the URL field.
In the Host field, type your server address.
In the Port field, type the port of Amazon Redshift. The default port is 5439.
From the Authentication dropdown, select the authentication method that you want to use to authenticate the connection. The following options are available:
pgpass: by using the pgpass file. You can store this file in the user's home directory. You can read more about the password file and its location in The Password File at postgresql.org.
User & Password: by using your login and password.
AWS Profile: by using an AWS named profile in the Profile field.
For more information about AWS named profiles, refer to the DBMS-specific properties chapter.
No auth: authentication is not required.
In the Database field, type the database name to which you want to connect.
In settings of the Amazon Redshift cluster, copy the JDBC URL.
In the URL field, DataSpell generates the JDBC URL automatically using the values of other connection settings.
Paste the JDBC URL from the Redshift cluster settings to the URL field in DataSpell.
If you need to use a JDBC URL with certain additional settings, paste it in the URL field. The general URL to use is as follows:
Format:
jdbc:redshift://<connection_url><port_number>/<database_name>Example:
jdbc:redshift://server.redshift.amazonaws.com:5439/myDatabase
For more information about the URL format, refer to the Amazon Redshift official documentation.

From the Authentication dropdown, select the authentication method that you want to use to authenticate the connection. The following options are available:
pgpass: by using the pgpass file. You can store this file in the user's home directory. You can read more about the password file and its location in The Password File at postgresql.org.
User & Password: by using your login and password.
AWS Profile: by using an AWS named profile in the Profile field.
For more information about AWS named profiles, refer to the DBMS-specific properties chapter.
No auth: authentication is not required.
In the Database field, type the database name to which you want to connect.
In the Region field, enter the AWS Region of the database that you are connecting to.
In the Cluster field, enter the name of Amazon Redshift cluster that contains your database.
In settings of the Amazon Redshift cluster, copy the JDBC URL.
In the URL field, DataSpell generates the JDBC URL automatically using the values of other connection settings.
Paste the JDBC URL from the Redshift cluster settings to the URL field in DataSpell.
If you need to use a JDBC URL with certain additional settings, paste it in the URL field. The general URL to use is as follows:
Format:
jdbc:redshift:iam://<cluster_name>:<region>/<database_name>Example:
jdbc:redshift:iam://democluster:eu-south-2/demodb
For more information about the URL format, refer to the Amazon Redshift official documentation.

From the Authentication dropdown, select the authentication method that you want to use to authenticate the connection. The following options are available:
pgpass: by using the pgpass file. You can store this file in the user's home directory. You can read more about the password file and its location in The Password File at postgresql.org.
User & Password: by using your login and password.
AWS Profile: by using an AWS named profile in the Profile field.
For more information about AWS named profiles, refer to the DBMS-specific properties chapter.
No auth: authentication is not required.
In settings of the Amazon Redshift cluster, copy the JDBC URL.
In the URL field, DataSpell generates the JDBC URL automatically using the values of other connection settings.
Paste the JDBC URL from the Redshift cluster settings to the URL field in DataSpell.
If you need to use a JDBC URL with certain additional settings, paste it in the URL field. The general URL to use is as follows:
Format:
jdbc:redshift://<connection_url><port_number>/<database_name>Example:
jdbc:redshift://server.redshift.amazonaws.com:5439
For more information about the URL format, refer to the Amazon Redshift official documentation.

For the reference information about connection settings and properties on the General and other tabs of Data Sources and Drivers dialog ( Shift+Enter) , see Connection settings and DBMS-specific properties.
In User and Password fields, specify your Redshift credentials.
Ensure that the database connection can be established using the provided details. To do this, click the Test Connection link at the bottom of the connection details section.

If you encounter any connection issues, refer to the Cannot connect to a database page.
(Optional) By default, only the default introspected and available to work with. If you also want to work with other databases, schemas, and shared databases, in the Schemas tab, select them for the introspection.

Click OK to create the data source.
Find your new data source in the Database tool window.
For more information about the Database tool window, see the corresponding reference topic.
For more information about working with database objects in DataSpell, refer to Database objects.
To write and run queries, open the default query file by clicking the data source and pressing F4.
To view and edit data of a database object, open Data editor and viewer by double-clicking the object.
Connection settings and DBMS-specific properties
Connection settings
For the reference information about connection settings (for example, Host, Port, and so on) on the General and other tabs of Data Sources and Drivers dialog ( Shift+Enter) , see Data Sources.
DBMS-specific properties
General tab
Item | Description | Connection type |
|---|---|---|
Region | The AWS Region that is available for the Amazon Redshift. | IAM cluster/region |
Cluster | Amazon Redshift cluster is a group of computing resources. For more information, refer to the Amazon Redshift official documentation. | |
Profile | Your AWS named profile. A named profile is a collection of settings and credentials that you can use for authentication. Named profiles are stored in the Consider the following example of the
[default]
aws_access_key_id=ASIAIOSFODNN7EXAMPLE
aws_secret_access_key=wJalrXUtnFEMI/K7MDENG/bPxRfiCYEXAMPLEKEY
aws_session_token = IQoJb3JpZ2luX2IQoJb3JpZ2luX2IQoJb3JpZ2luX2IQoJb3JpZ2luX2IQoJb3JpZVERYLONGSTRINGEXAMPLE
[user1]
aws_access_key_id=ASIAI44QH8DHBEXAMPLE
aws_secret_access_key=je7MtGbClwBF/2Zp9Utk/h3yCo8nvbEXAMPLEKEY
aws_session_token = fcZib3JpZ2luX2IQoJb3JpZ2luX2IQoJb3JpZ2luX2IQoJb3JpZ2luX2IQoJb3JpZVERYLONGSTRINGEXAMPLE
To use the credentials stored in the For more information about named profiles, refer to the Amazon AWS official documentation. | all types (AWS Profile authentication method) |
Schemas tab
Item | Description |
|---|---|
Show internal system schemas | Show internal system schemas like |
Show template databases | Show template databases. |