Keymap
JetBrains Fleet provides a set of predefined keymaps, which is useful if you come from another IDE and want to use a familiar keymap. Furthermore, JetBrains Fleet allows you to tailor any keymap to your needs by assigning your own bindings.
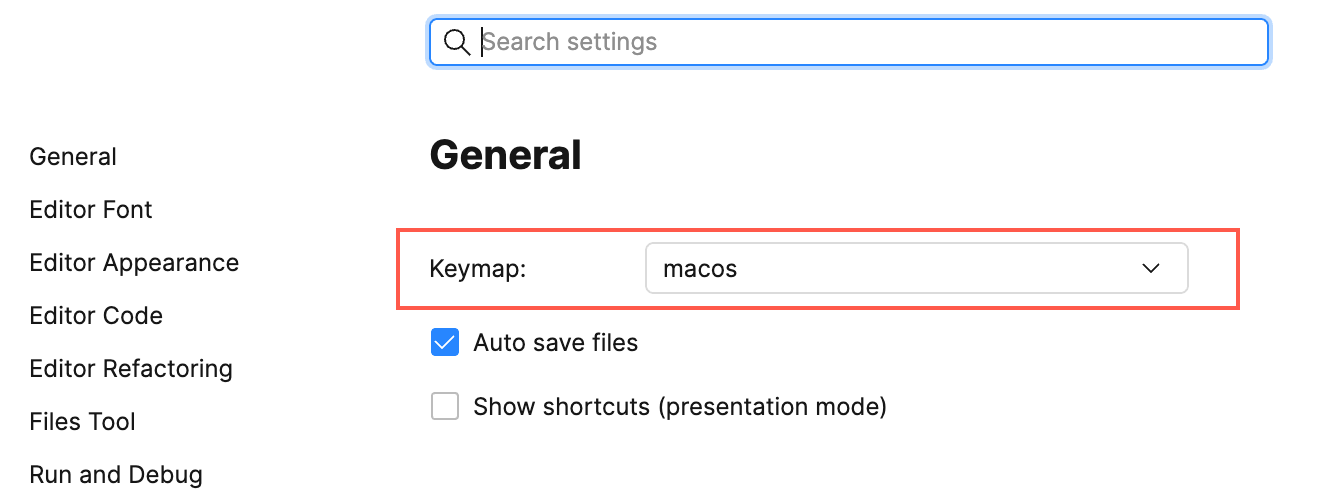
Select a keymap
Press ⌘, to access the settings menu.
Select the keymap under General.

Manage bindings
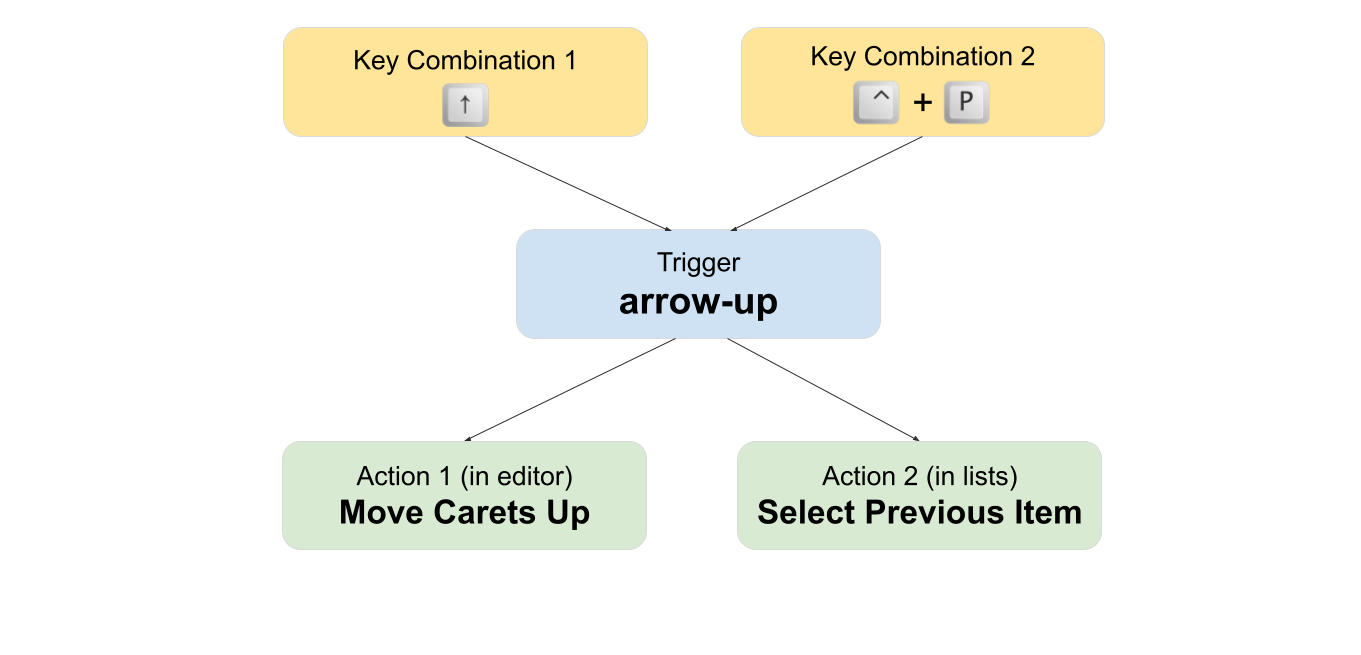
For managing key bindings, JetBrains Fleet uses the concept of triggers. A trigger is a single point, through which an action or group of actions can be bound to one or more key combinations. If a trigger corresponds to multiple actions, the action will be chosen depending on the context.

JetBrains Fleet's keymap is designed with respect to OS shortcuts and popular shortcuts from other applications. Also, the number of default shortcuts is deliberately low, and only the most important actions have a default key binding. This allows for more freedom in assigning a custom shortcut when you need one.
Review key bindings
Press ⌘⇧K and start typing
Keymap. Select the Keymap action.
The list of key bindings appears.
Add a key binding
In the keymap, find the trigger for which you want to add a key binding. Click the edit icon near it. This opens the user.json file.
Add the binding by specifying an additional object in the
keymaparray. The object has to contain key combination and trigger name:{ "key": "cmd-v", "trigger": "paste" }
Remove a key binding
In the keymap, find the trigger for which you want to remove a key binding. Click the edit icon near it. This opens the user.json file.
Remove the binding by specifying an additional object in the
keymaparray. The object has to contain key combination and trigger name prepended with a minus sign:{ "key": "cmd-v", "trigger": "-paste" }