Working with Database Consoles
Database consoles are SQL files in which you can compose and execute SQL statements. Unlike scratch files, consoles are attached to a data source. When you create a data source, a database console is created automatically. If necessary, you can create additional consoles.
Create a database console
To create a console, use one of the following actions in the Database tool window ().
Click a data source and select .
Right-click a data source and select .
Click a data source, press Alt+Insert, and select Console.
Click a data source, press Ctrl+Shift+F10, and select New console.
Open a console
In the Files tool window (), navigate to , double-click a console file.
In the Database tool window, click the Jump to console icon (
 ) and select a console.
 Click a data source, press F4, and select the console that you need.
Modify console settings
Open a console.
- Click the Settings icon (
 ).
).
Change the SQL dialect in a console
Right-click the editing area of the input pane, select Change Dialect (<current_dialect>), and select the necessary dialect.
Closing a console
Click
 (Ctrl+Shift+F4) to close the Database Console tool window.
 Click
 on the editor tab (Ctrl+F4) to close the input pane.
Managing database consoles
To manage your database consoles, use the Scratches and Consoles directory of the Project tool window.
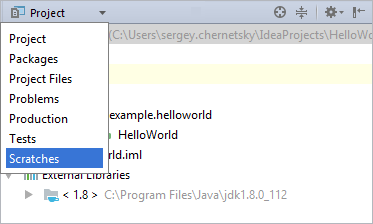
To open the list of consoles, select Scratches from the list in the left-hand part of the title bar.

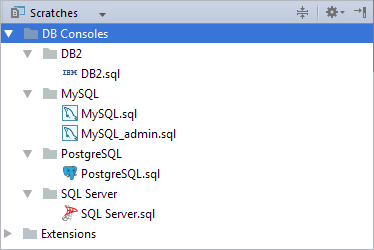
The directory contains the existing database consoles (represented by SQL files) grouped by your data sources (shown as folders). The default consoles (the ones that were created by GoLand automatically) have the same names as the corresponding data sources.

You can:
- Create new consoles. Select the target data source or a node within it, and do one of the following:
Select from the main menu.
Select from the context menu
Press Alt+Insert and select Console File.
- Rename your consoles. When a new console is created, it has the name of the data source with a number at the end, e.g.
MySQL_1. If you want to give a console a more descriptive name, select the console and do one of the following:Select from the main or the context menu.
PressShift+F6.
Then, specify a new name in the dialog that opens.
Save your console files in arbitrary directories. Select the console and then choose (F5). Specify the file name and location in the dialog that opens.
Group your consoles. This is done by creating folders and then dragging your consoles into those folders.
- Open your consoles. Select the consoles of interest and do one of the following:
Select from the main menu.
Select Jump to Source from the context menu.
PressF4.
View the history of changes for your consoles. Select from the main menu or from the context menu.
Delete individual consoles and groups of consoles. Use , Delete from the context menu or Delete on the keyboard.