Run tests
Generally, GoLand runs and debugs tests in the same way as other applications, by running the run/debug configurations you have created. When doing so, it passes the specified test classes or methods to the test runner.
If you run a test for which there is no permanent run/debug configuration, a temporary configuration is created. You can then save such a configuration using the Run/debug configuration dialog if you want to reuse it later.
The tests run in the background, so you can execute several tests at the same time.
Each running configuration gets its own tab in the Run tool window (the Test Results tab ). One tab can aggregate several tests.
Quick way
If your tests don't require any specific actions before start and you don't want to configure additional options, you can run them by using the following options:
Place the caret at the test file to run all tests in that file, or at the test method, and press Ctrl+Shift+F10. Alternatively, click the gutter icon next to the test method.
The gutter icon changes depending on the state of your test:
The
 gutter icon marks new tests.
The
 gutter icon marks successful tests.
The
 gutter icon marks failed tests.
To run all tests in a folder, select this folder in the Project tool window and press Ctrl+Shift+F10 or select Run Tests in 'folder' from the context menu.

Customizable way
When you run a test, GoLand creates a temporary run configuration. You can save temporary run configurations, change their settings, share them with other members of your team. For more information, refer to Work with run/debug configurations.
Create a new run configuration or save a temporary one.
From the list on the main toolbar, select the configuration you want to run.
Click
or press Shift+F10.
After GoLand finishes running your tests, it shows the results in the Run tool window on the Test Runner tab. For more information on how to analyze test results, refer to Explore test results.

Stop tests
Use the following options on the Run toolbar of the Test Runner tab:
Click
 or press Ctrl+F2 to terminate the process immediately.

Rerun tests
Rerun a single test
To rerun a single test, right-click this test on the Test Runner tab of the Run tool window and select Run 'test name'.
Rerun all tests in a session
Click
 on the Run toolbar or press Ctrl+F5 to rerun all tests in a session.
Rerun failed tests
Click
on the Run toolbar to rerun only failed tests.Hold Shift and click
to choose whether you want to Run the tests again or Debug them.You can configure the IDE to trigger tests that were ignored or not started during the previous test run together with failed tests. Click
 on the Test Runner toolbar and enable the Include Non-Started Tests into Rerun Failed option.
Rerun tests automatically
In GoLand, you can enable the autotest-like runner: any test in the current run configuration restarts automatically after you change the related source code.
Click
 Toggle auto-test on the Run toolbar to enable the autotest-like runner.
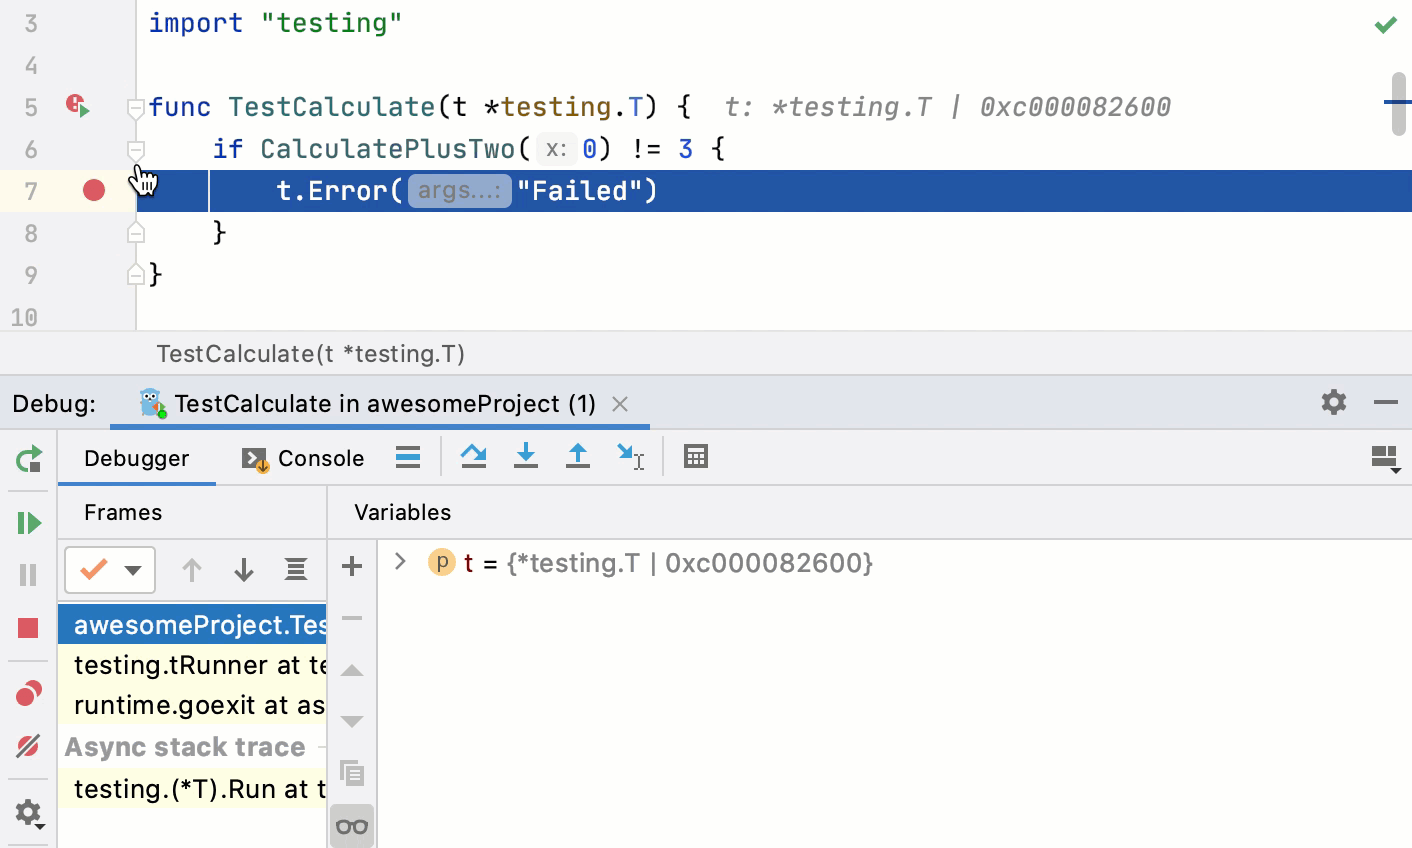
Debug failed tests
If you don't know why a test fails, you can debug it.
In the editor, click the gutter on the line where you want to set a breakpoint.
There are different types of breakpoints that you can use depending on where you want to suspend the program. For more information, refer to Breakpoints.
Right-click the
gutter icon next to the failed test and select Debug 'test name'.The test that has failed will be rerun in the debug mode. After that, the test will be suspended, allowing you to examine its current state.
You can step through the test to analyze its execution in detail.
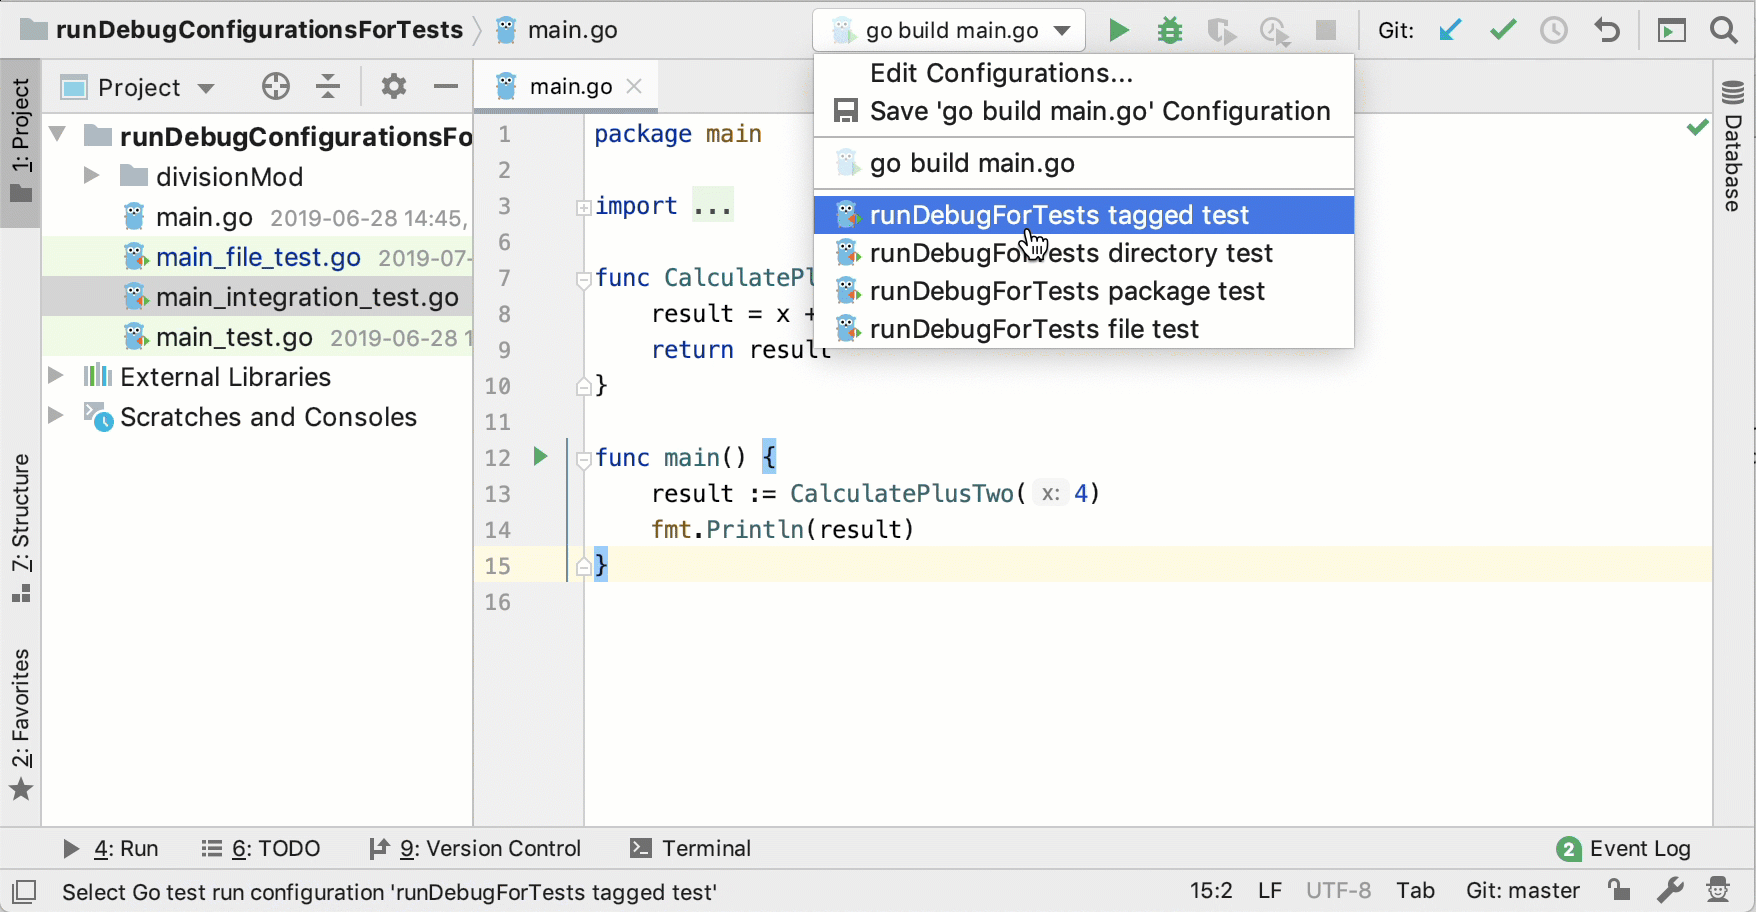
Run a run/debug configuration for tests
To run a run/debug configuration for a test, you must create the run/debug configuration. Read about creating a run/debug configuration for tests in Create run/debug configurations for tests.
Click the Edit Run/Debug Configurations list and select configuration that you want to run.
Click the Run button
 .
.
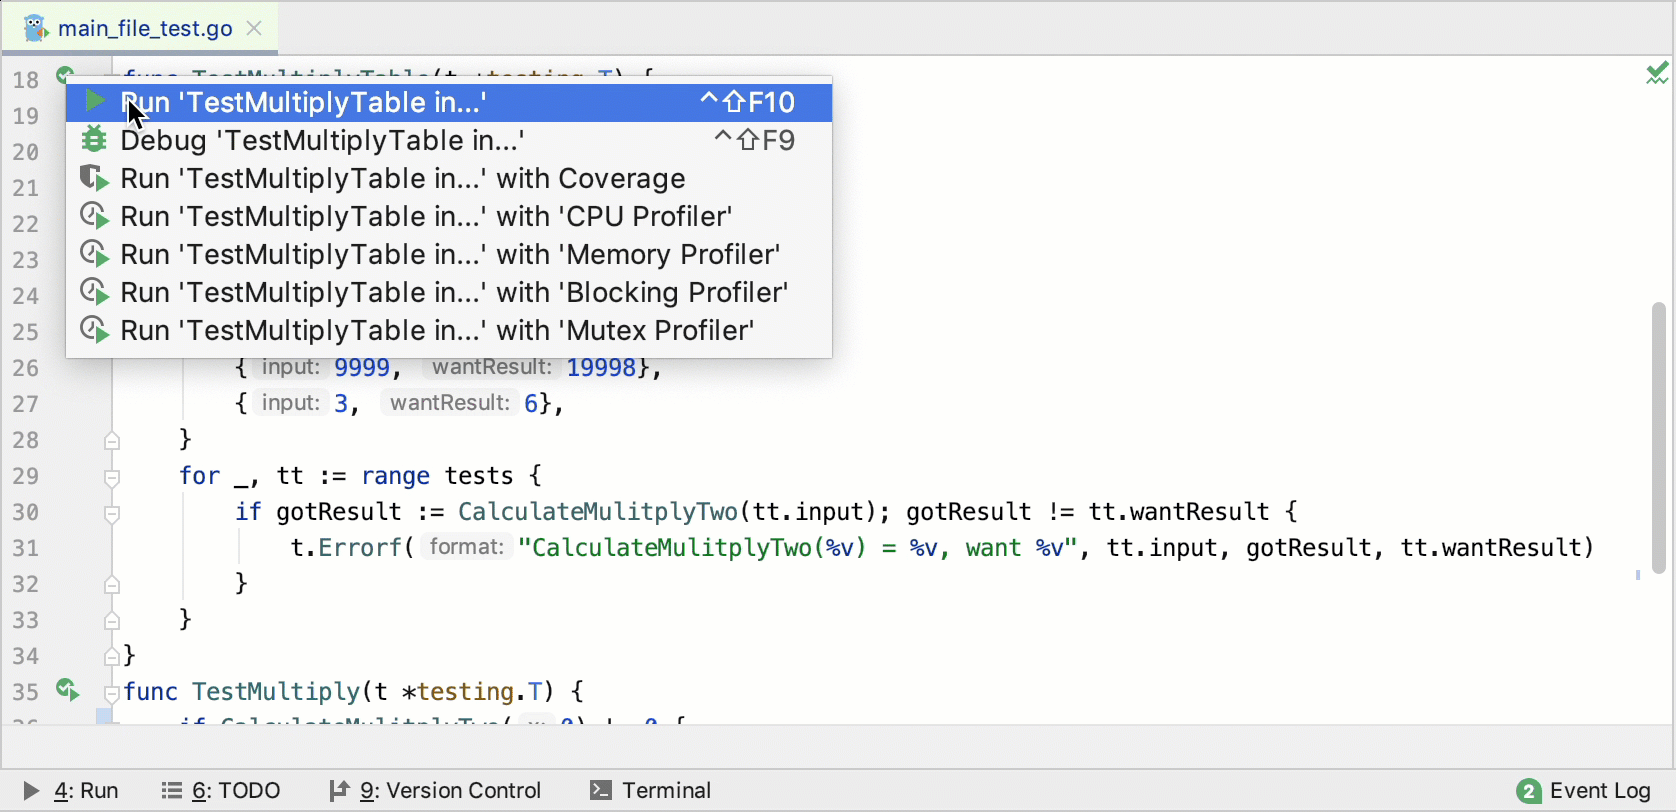
Run tests from the gutter
When you run a test from the gutter, you create a temporary run/debug configuration. To save this configuration, navigate to Run | Edit Configurations, select the grayed-out item in the configurations list, and click the Save Configuration button ![]() .
.
Click the Run Test icon
in the gutter.Select Run <configuration_name>.
Run tests from the context menu
Right-click a test file or a directory with test files and select (for directories) or (for files).

Productivity tips
Run individual table tests
You can run individual table tests by using the Run icon (
 ) in the gutter. Also, you can navigate to an individual table test from the Run tool window.
Current support of table tests has following limitations:
The test data variable must be a slice, an array, or a map. It must be defined in the same function as the
t.Runcall and must not be used after initialization (except for therangeclause in theforloop).The individual test data entry must be a struct literal. Loop variables used in a subtest name expression must not be used before the
t.Runcall.A subtest name expression can be test data string field, a concatenation of test data string fields, or a
fmt.Sprintf()call with%sand%dverbs.For example, in the following code snippet,
fmt.Sprintf("%s in %s", tc.gmt, tc.loc)is a subtest name expression.for _, tc := range testCases { t.Run(fmt.Sprintf("%s in %s", tc.gmt, tc.loc), func(t *testing.T) { loc, err := time.LoadLocation(tc.loc) if err != nil { t.Fatal("could not load location") } gmt, _ := time.Parse("15:04", tc.gmt) if got := gmt.In(loc).Format("15:04"); got != tc.want { t.Errorf("got %s; want %s", got, tc.want) } }) }
