How to run PostgreSQL queries from GoLand
Step 1. Clone files from repositories
For example purposes, we are going to use the following two repositories: Sakila dump files (https://github.com/DataGrip/dumps) and Docker-compose files (https://github.com/DataGrip/datagrip-documentation). Sakila repository includes scripts that generate the structure of the Sakila database and scripts that add data to database objects. Docker repository includes YAML files that define services, networks, and volumes.
Enable version control integration
Click VCS | Enable Version Control Integration.
In the Enable Version Control Integration dialog, ensure that
Gitis selected in the drop-down list and click OK.
Clone repositories
Click .
In the URL field, copy and paste the following web URL:
Sakila dump files:
https://github.com/DataGrip/dumps.gitDocker-compose files:
https://github.com/DataGrip/datagrip-documentation.git
In the Directory field, click the folder icon (
 ) and specify a directory for the repository files.
Step 2. Run a Docker container
For this tutorial, we are going to run a PostgreSQL container for Docker (from the datagrip-documentation repository). In the Docker directory of the repository, you can find .env and docker-compose.yml files. .env includes credentials for the PostgreSQL service. docker-compose.yml defines how the service is created and configured.
The service name is the first line of the service definition (before the JDBC URL). In our example, the service name is postgresql_12, the JDBC URL is jdbc:postgresql://localhost:54333/guest?user=guest&password=guest.
You can run the container from a command line by running:
Alternatively, you can enable and use the Docker plugin in GoLand.
Enable Docker support
Install and run Docker.
For more information, see the Docker documentation.
Configure the Docker daemon connection settings:
In the Settings/Preferences dialog Ctrl+Alt+S, select .
Click
 to add a Docker configuration and specify how to connect to the Docker daemon.
The connection settings depend on your Docker version and operating system.
The Connection successful message should appear at the bottom of the dialog.

Connect to the Docker daemon.
The configured Docker connection should appear in the Services tool window ( or Alt+8). Select the Docker node
 , and click
  , or select Connect from the context menu.
To edit the Docker connection settings, select the Docker node and click
 on the toolbar, or select Edit Configuration from the context menu.
Create the Docker-compose deployment configuration
In the Services tool window (), right-click the Docker node and select Deploy.
In the popup window, select Create Docker-compose Deployment.
In the Create Deployment Configuration dialog, click the Browse icon of the Compose file(s) field.
In the Docker Compose Configuration Files dialog, click the Add button and navigate to the compose file. The Compose YAML file defines services, networks, and volumes. In our case, it is docker-compose.yml
In the Docker Compose Configuration Files dialog, click OK.
In the Service(s) field, type
postgresql_12.Click Run.
As a result, you can see the
postgresql_12running container in the Services tool window.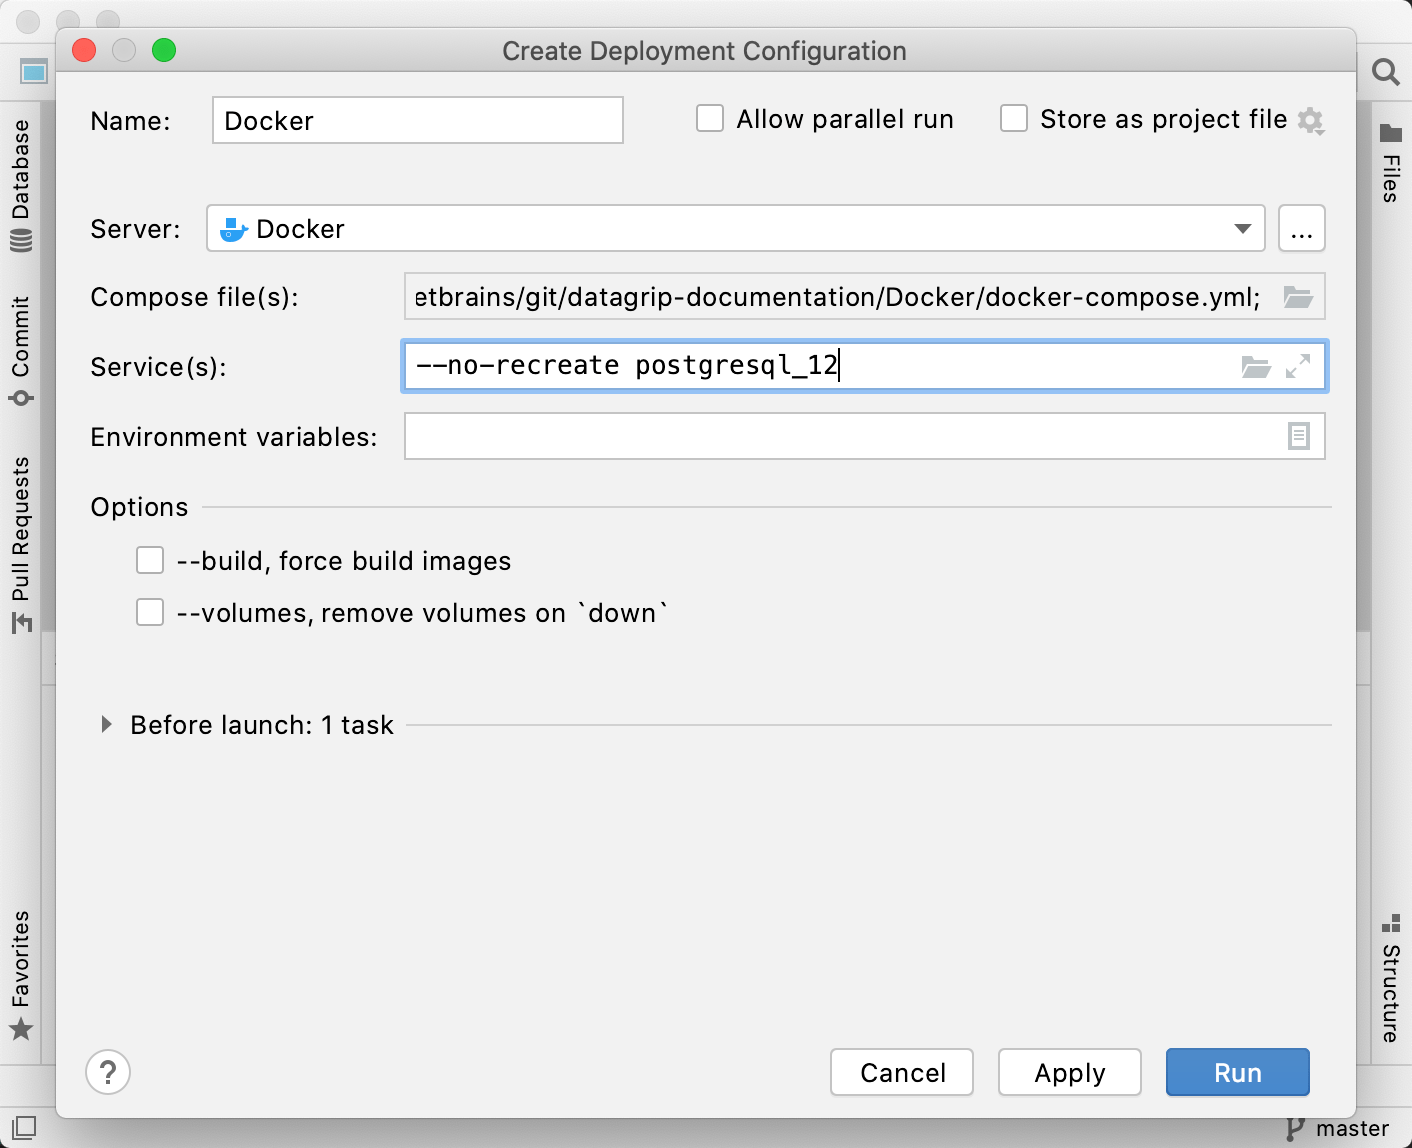
Step 3. Connect to a data source
Depending on a database vendor (MySQL, PostgreSQL, Oracle), you need to create a corresponding data source connection. In this tutorial, we will create a PostgreSQL connection. If you want to connect to other database management systems (DBMS), refer to Database connection.
In the Database tool window (), click the Data Source Properties icon
 .
.In the Data Sources and Drivers dialog, click the Add icon (
) and select PostgreSQL.At the bottom of the data source settings area, click the Download missing driver files link. As you click this link, GoLand downloads drivers that are required to interact with a database. To decrease the size of the installation package and keep driver versions up-to-date, drivers are not bundled with the IDE.
You can specify your own drivers for the data source if you do not want to download the provided drivers. For more information about creating a database connection with your driver, see Add a user driver to an existing connection.
In the URL field, copy and paste the JDBC URL: jdbc:postgresql://localhost:54333/guest?user=guest&password=guest. JDBC URL for other DBMS, see in docker-compose.yml. You can open docker-compose.yml in a text editor.
(Optional) In the Name field, delete the current name and type a new name for the connection (for example, PostgreSQL).
To ensure that the connection to the data source is successful, click the Test Connection link.

Step 4. Attach a directory to the project
To run dump files from the project in GoLand, attach a directory with dump files.
Click .
Navigate to the folder that you want to attach. In this tutorial, this folder is dumps that you cloned on Step 1 (Sakila dump files).
Click Open.
In the Open Project dialog, click Attach.

Step 5. Run the dump files
Create the database structure
In the Project () tool window, navigate to the postgres-sakila-db tree node.
Expand postgres-sakila-db tree node.
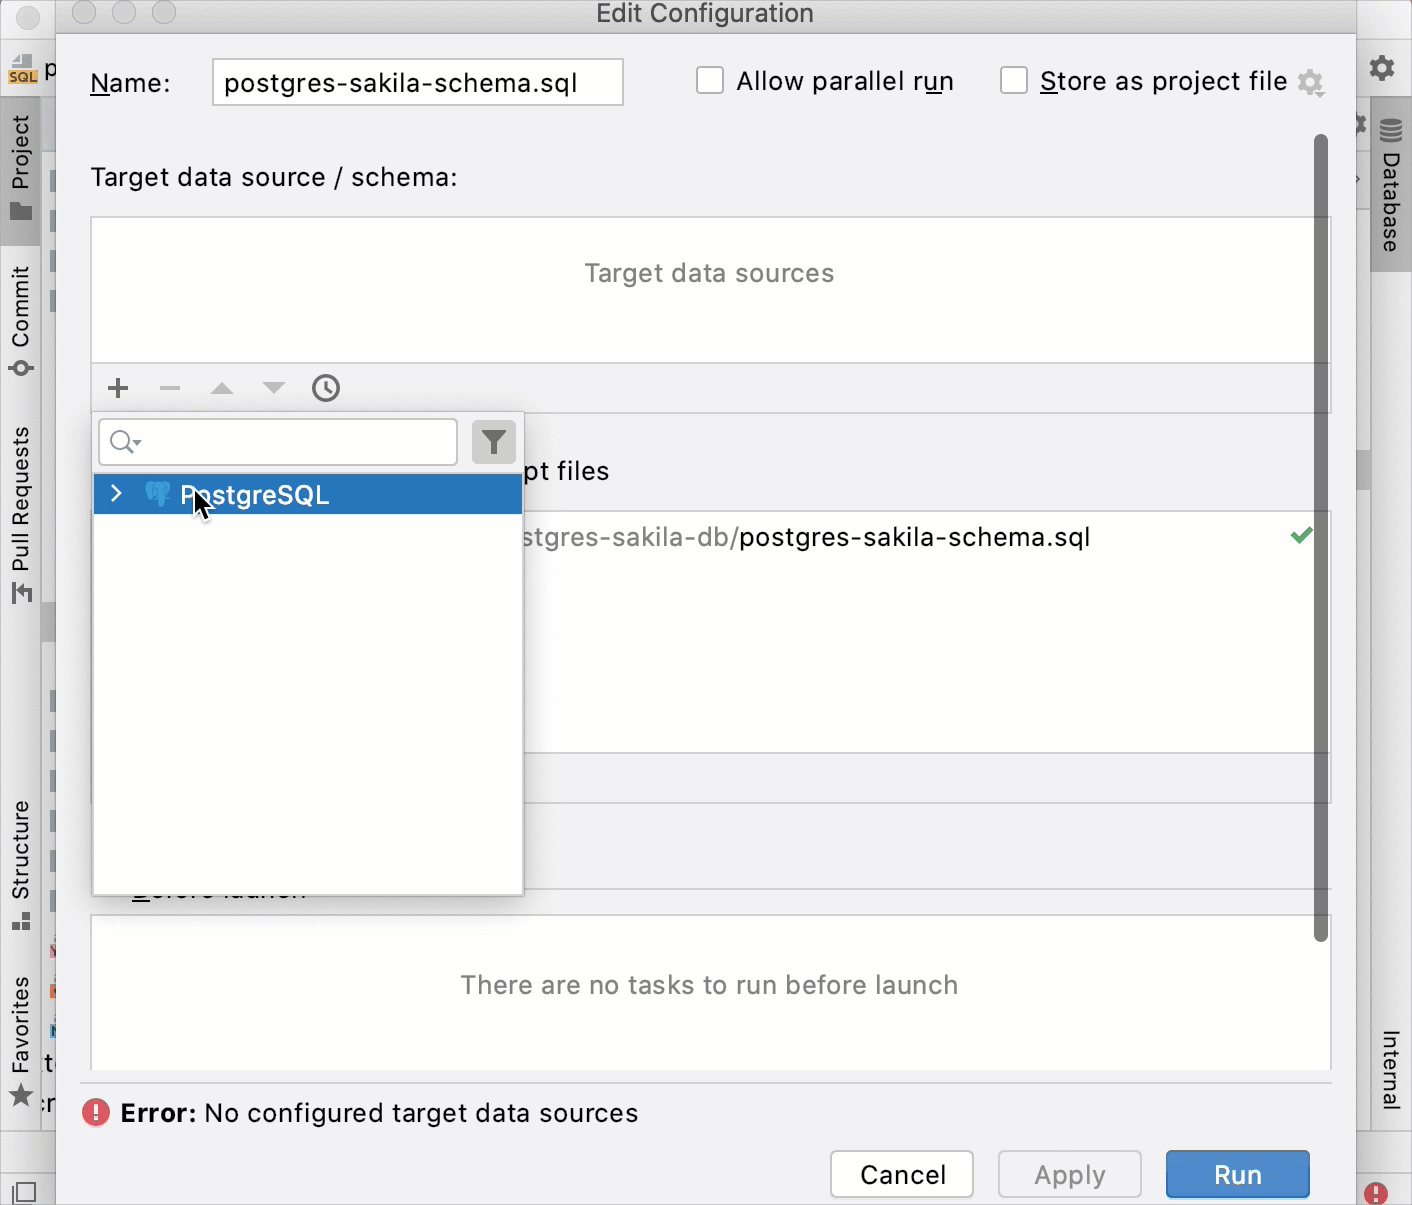
Right-click the postgres-sakila-schema.sql and select Run postgres-sakila-schema .sql. Alternatively, click the postgres-sakila-schema.sql file and press Ctrl+Shift+F10.
In the Edit Configuration dialog, click the Add button and select PostgreSQL.
Press Run.
Load sample data to the database
In the Project () tool window, navigate to the postgres-sakila-db tree node.
Expand postgres-sakila-db tree node.
Right-click the postgres-sakila-insert-data.sql and select Run postgres-sakila-insert-data.sql. Alternatively, click the postgres-sakila-insert-data.sql file and press Ctrl+Shift+F10.
In the Edit Configuration dialog, click the Add button and select PostgreSQL.
Press Run.
Step 6. Fetch dependencies from the Go code
To issue a query to PostgreSQL, we are going to use the sqlx library that provides a set of extensions for the Go standard database/sql library. For more information about the library, read about sqlx on GitHub.
main.go at GitHub: click the link to get the code from the GiHub repository.
Create a Go project in GoLand.
Right-click the root folder in the project and navigate to .
In the New Go File dialog, type
mainin the Name field and click OK.Copy the attached code snippet and paste it to the main.go file.
Place the caret at the "github.com/jmoiron/sqlx" import line, press Alt+Enter and click go get -t github.com/jmoiron/sqlx.

Step 7. Run the configuration
To run the configuration, click the Run icon (
) in the gutter near the main function and select Run 'go build main.go'.