Create a data source with SAML authentication
Enable the Database Tools and SQL plugin
This functionality relies on the Database Tools and SQL plugin, which is bundled and enabled in GoLand by default. If the relevant features are not available, make sure that you did not disable the plugin.
Press Ctrl+Alt+S to open settings and then select .
Open the Installed tab, find the Database Tools and SQL plugin, and select the checkbox next to the plugin name.
Official documentation
For full information about Amazon Redshift, refer to the official documentation.
For more versions of Amazon Redshift JDBC driver, refer to the official JDBC driver downloads.
Amazon Redshift identity federation with multi-factor authentication
In this tutorial, we will create an Amazon Redshift data source, configure it to use SAML authentication with JumpCloud identity provider, and run a test connection to a database.
For more information about the integration and connection settings, refer to the following pages:
Prerequisites
Your Amazon Redshift dashboard must have a Amazon Redshift cluster in it. For more information about the Amazon Redshift cluster, refer to Getting Started with Amazon Redshift.
AWS SSO has to be enabled for your AWS account.
Your AWS account has to be linked to your JumpCloud account.
Create a data source
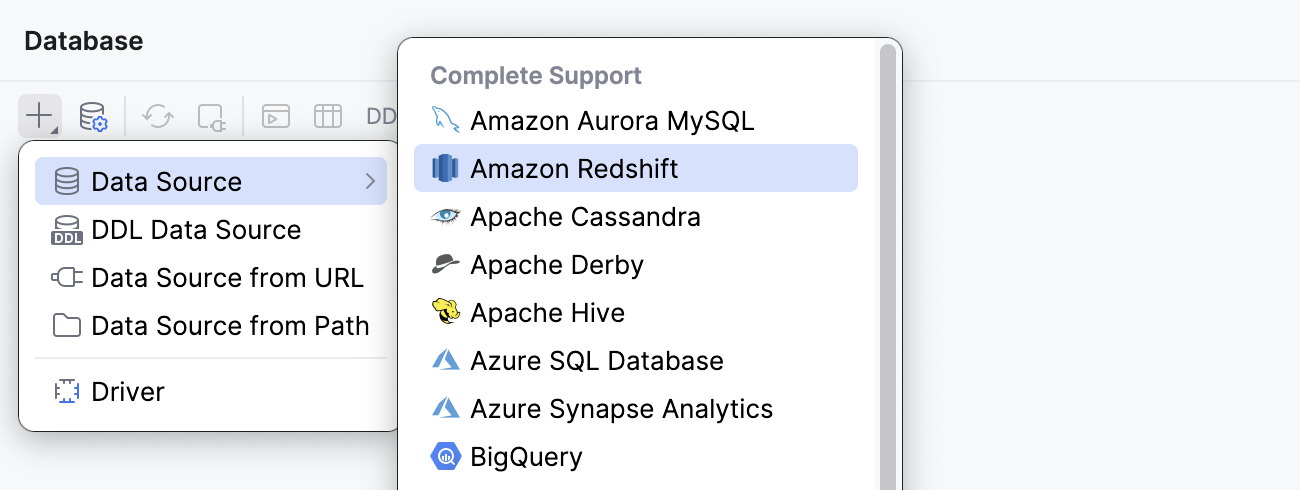
In the Database tool window, click
New on the toolbar and navigate to .

Check if there is a Download missing driver files link at the bottom of the connection settings area. Click this link to download drivers that are required to interact with a database. For a direct download link, refer to the JetBrains JDBC drivers page.

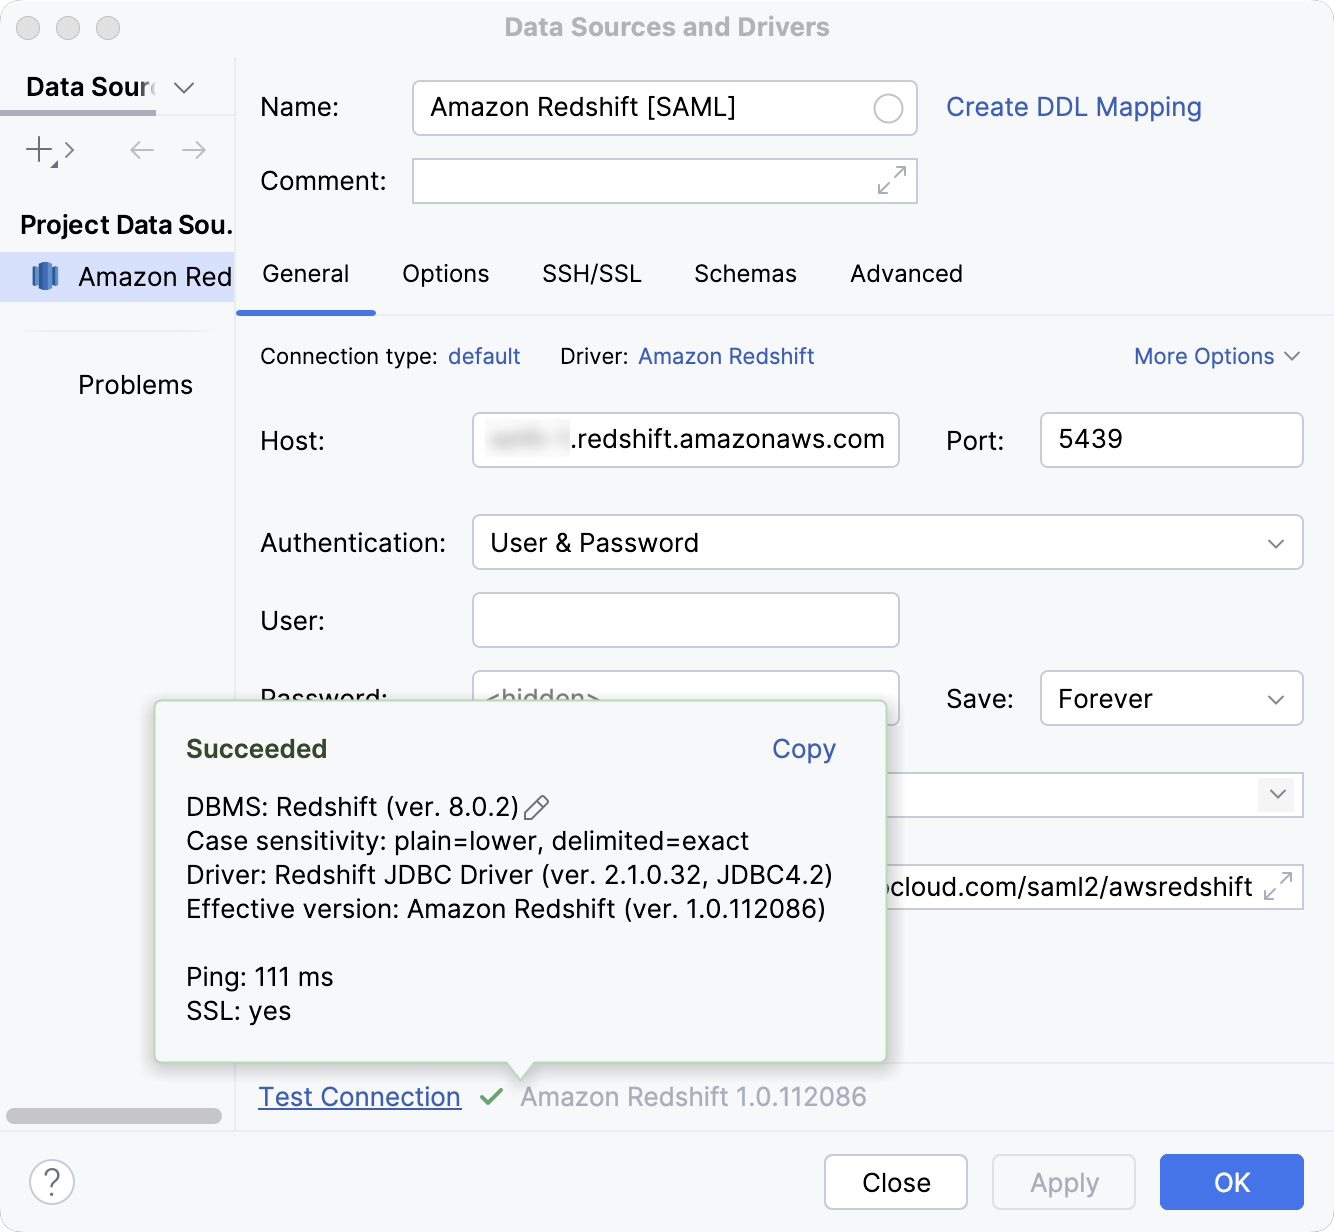
Specify the database connection details.
In the Host field, type the URL to connect to your Redis account with. For example,
examplecluster.abc123xyz789.us-west-2.redshift.amazonaws.com.In the Port field, type the port number. In our case, it is
5439.Leave the User and Password fields empty.
In the Database field, type the database name to which you want to connect. In our case, the database is
dev.To the end of autogenerated URL in the JDBC URL field, add
?and the following properties separated with&:plugin_name=<credentials_provider_class_name>: the SAML-based credential provider plugin you use for authentication. In this tutorial, we will use the Browser SAML plugin that can work with SAML-based identity providers:plugin_name=com.amazon.redshift.plugin.BrowserSamlCredentialsProvider.login_url=<login_url>: the identity provider URL. In our case, it is the URL to the JumpCloud login page:login_url=https://sso.jumpcloud.com/saml2/awsredshift.
So, our JDBC URL is as follows:
jdbc:redshift:iam://examplecluster.abc123xyz789.us-west-2.redshift.amazonaws.com:5439/dev?plugin_name=com.amazon.redshift.plugin.BrowserSamlCredentialsProvider&login_url=https://sso.jumpcloud.com/saml2/awsredshiftAlternatively, type your JDBC URL in the URL field. The general URL to use is as follows:
Format:
jdbc:redshift:iam://<cluster_name>.<additional_unique_identifier>.<cluster_region>.redshift.amazonaws.com:<port_number>/dev?plugin_name=<plugin_name>&login_url=<login_url>&user=<username>&password=<password>Example,:
jdbc:redshift:iam://examplecluster.abc123xyz789.us-west-2.redshift.amazonaws.com:5439/dev?plugin_name=com.amazon.redshift.plugin.BrowserSamlCredentialsProvider&login_url=https://sso.jumpcloud.com/saml2/awsredshift&user=my_username&password=dummy_password
Click the Test Connection link at the bottom of the connection details area to initiate a test connection to your database.

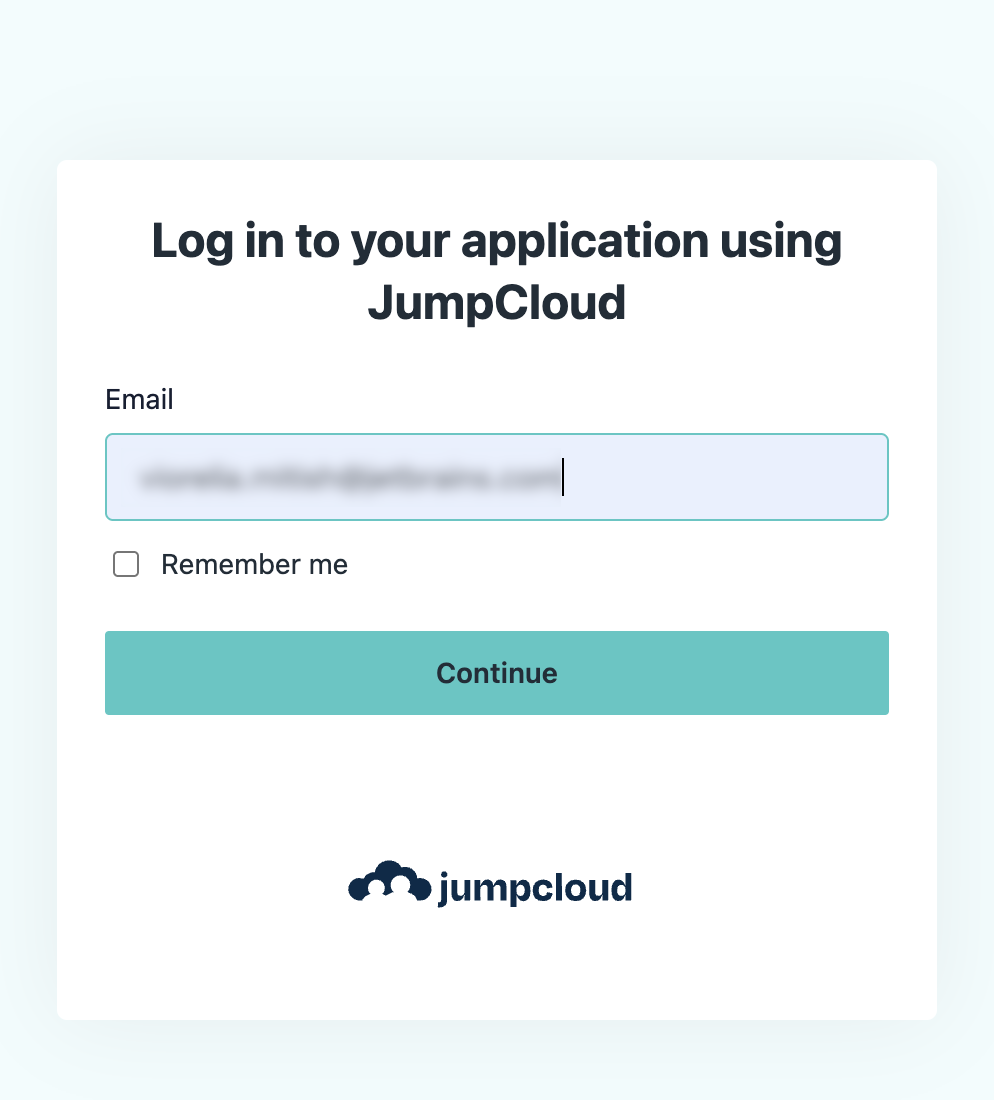
On the JumpCloud website that opens in the browser, enter your user credentials and log in to your JumpCloud account.

Once JumpCloud confirms your identity, return to GoLand.

In the IDE, click OK to save your new data source.
