Restore a Docker Installation
Before you begin, make sure you have a backup copy of the database that you want to restore. Note the location of the backup copy so you are sure to select the correct file during this procedure.
- If you're rolling back to the previous installation version after an unsuccessful upgrade, use the backup that you created prior to installation. If you ignored this prerequisite, locate a backup file that corresponds with the version of your previous installation.
- If you're attempting to restore the current installation, locate an archived backup file in the directory that is set as the Backup location that corresponds with the current version of your installation.
Restore an Installation from a Backup Copy of Your Database
To restore your database to the current or previous version, you need to reinstall Hub and use the backup as the Upgrade Source during installation.
When you restore to a previous version of Hub, use a backup that corresponds to the version of the product that you want to restore.
To restore your database from a backup:
- Stop the Hub service. For detailed instructions, see Stop and Start the Hub Service.
- Clean the contents of the
dataandconfdirectories. You need to clean the content of these two Hub-specific directories on the host machine. For more details, see Create and Configure Directories chapter of the installation instructions. - Make sure that the backup file that you wish to restore is located in the
backupsHub directory on the host machine. The backup file must also be accessible to the user13001:13001that runs Hub service inside the container. For instance, on a Linux host machine, you can use the following commands to ensure the access:chmod 750 <path to the backup file on the host machine> chown 13001:13001 <path to the backup file on the host machine>When you run the docker image, you need to map this directory to the corresponding directory inside the container -
/opt/hub/backups - Execute the following command to run a container with Hub server:
docker run -it --name <hub-server-instance> \
-v <path to data directory>:/opt/hub/data \
-v <path to conf directory>:/opt/hub/conf \
-v <path to logs directory>:/opt/hub/logs \
-v <path to backups directory>:/opt/hub/backups \
-p <port on host>:8080 \
jetbrains/hub:<version>
For more details about running Hub container and command parameters, see Docker Installation.
- Hub image starts the web-based Configuration Wizard. In a browser, open the URL of the Configuration Wizard displayed in the console output.
- In the Configuration Wizard, select the Upgrade option.

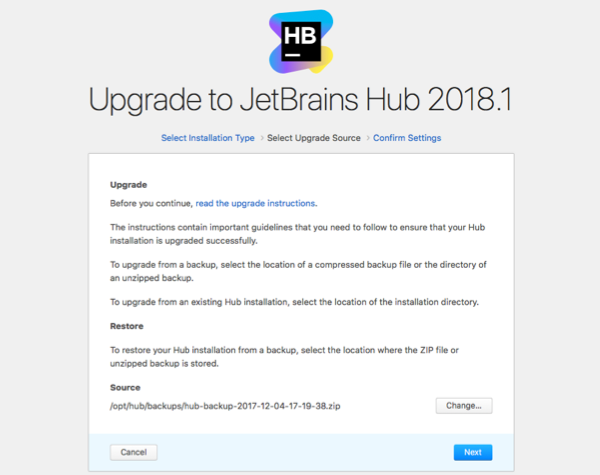
- On the Select Upgrade Source page, select your backup as the Upgrade Source and click the Next button.

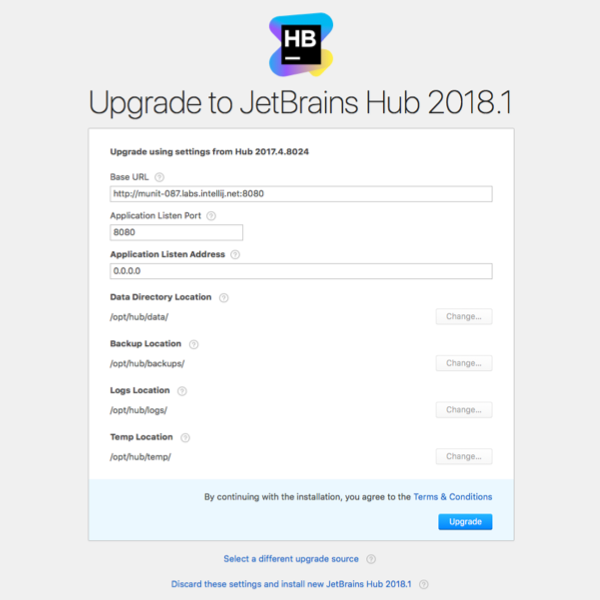
- Confirm the locations where Hub stores product data. When done, click the Upgrade button.

- Hub service starts with the data from the backup file.
Last modified: 22 May 2018