Docker Installation
To run a new instance of the Hub service in a docker container:
Pull Hub Image
Pull an image of the latest Hub version from the Docker Hub Repository:
<version> is a full version number of a Hub build. See the complete list of available versions
Create and Configure Directories
Hub image container is a stateful container. Thus, before running it, you should create specific directories on the host machine to store Hub database, configuration files, logs, backups, and pass them to the Hub container as volumes. Otherwise, you risk losing Hub data when the container is removed.
These directories are:
data— a directory where Hub stores its database. For a new installation, this directory must be empty.conf— a directory where Hub stores configuration files that contain environment settings, JVM options, Hub integration settings, and so on.logs— a directory where Hub stores its log files.backups— a directory where Hub stores backups. For more details about backups, see Backup.
These directories must be accessible to the user account that runs Hub service inside the container. Hub uses the non-root account `13001:13001` (`group:id`, respectively).
For example, if you use a Linux host machine, you can execute the following commands to create Hub directories and apply the required access permissions:
When the Hub-specific directories are created and configured, you can define the mapping between them and directories inside the docker container as the arguments of the docker run command.
Run Hub Docker Container
Use the following command to run a container with Hub service and map Hub data volumes and port:
Where:
-it— a flag that attaches Hub container input and output including the startup logs to the terminal window. Note that pressing `Ctrl+C` when the terminal is attached to a container output causes the container to shut down. Use `Ctrl+PQ` in order to detach the terminal from container output. For more details, see the official docker documentation.--name hub-server-instance— the arbitrary name for the container.-v <path to NNN directory>:/opt/hub/NNN— binding the Hub-specific 'NNN' directory on the host machine to the respective/opt/hub/NNNdirectory inside the container.-p <port on host>:8080— parameter that defines the ports mapping. It instructs the host machine to listen on port<port on host>and propagate all traffic to the port `8080` inside the docker container.
Hub service is started on {0.0.0.0:8080} inside the Docker container, and port 8080 is mapped to <port on host> that you have specified. This way the service may be accessed from any machine that has network access to <port on host> of your host machine. For instance, if FQDN of the host machine is host.mydomain.com and the <port on host> is 7777, then the service will be available at http://host.mydomain.com:7777
Configure Hub
On the first run, the Hub service starts with the web-based Configuration Wizard at the address mentioned above. Open your browser, enter the address and follow the steps described in Configuration Wizard to complete the setup.
To configure the new docker installation:
-
On the Confirm Settings page, confirm or change the basic system settings.
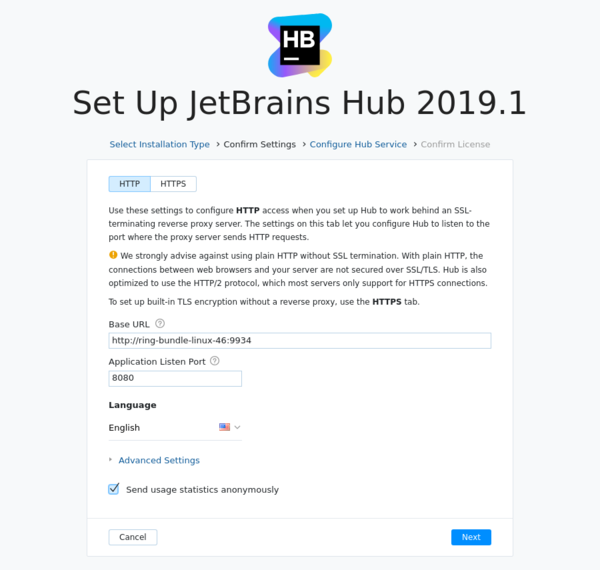
Here you can also enable the built-in TLS to secure the network connection for the server. For detailed procedure, read the Enable HTTPS during Installation page.
Setting
Description
HTTP | HTTPS Allows you to enable or disable the built-in TLS and configure the secure the network connection to your server. If you enable HTTPS, the TLS specific settings are displayed.
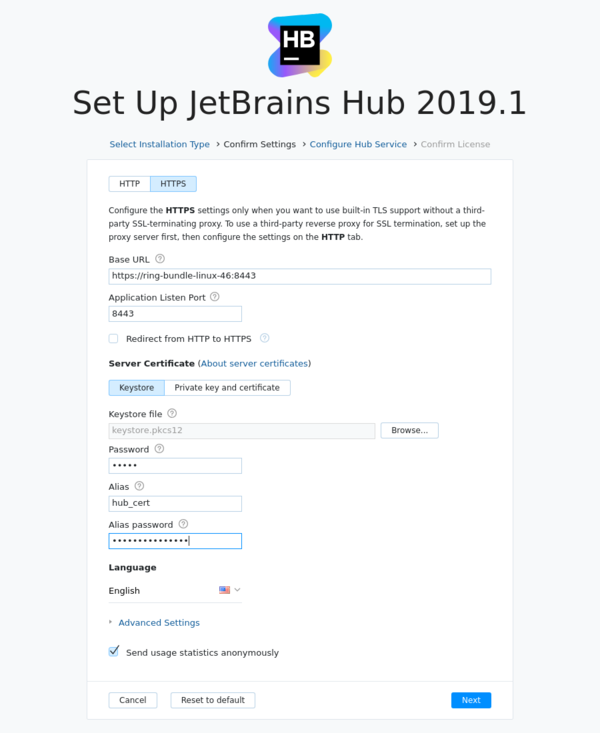
See the TLS Attributes page for details.
Base URL The URL where end users access Hub.
Application Listen Port The port your Hub server listens to after installation.
Language The default language that is shown in the user interface.
-
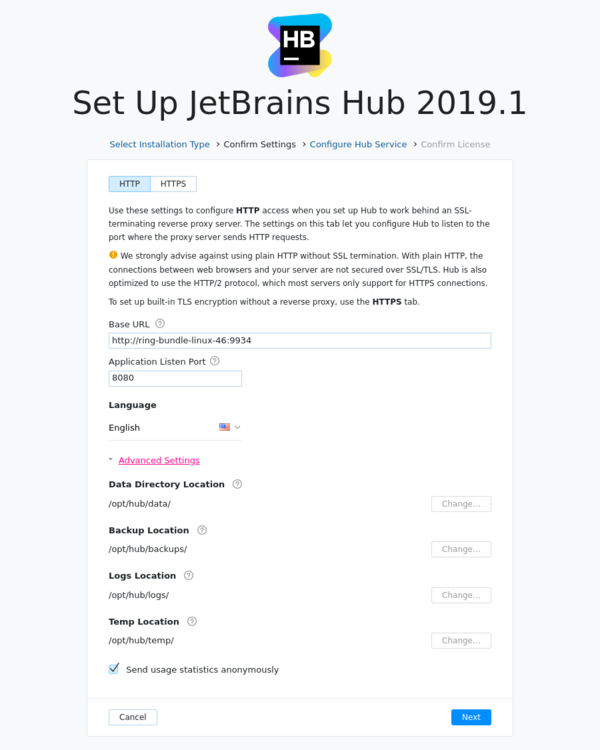
Expand the Advanced Settings section to review the locations where Hub stores product data.
Setting
Description
Data Directory Location The directory where Hub stores content data.
Backup Location The directory where Hub stores backups of the database.
Logs Location The directory where Hub stores log files.
Temp Location The directory where Hub stores product-specific temporary files.
To change the location for any of these file types, you need to change bindings between the folders on a hosted machine and Hub-specific directories inside the container. For more details, see Change Database Location for Docker.
To share usage statistics with JetBrains, keep the Send usage statistics anonymously option enabled. This feature helps JetBrains track usage statistics to make Hub better. We never share collected data with any third party.
When done, click Next.
-
On the Select Hub Service page, enter and confirm the password for the system administrator account. The default username is
admin.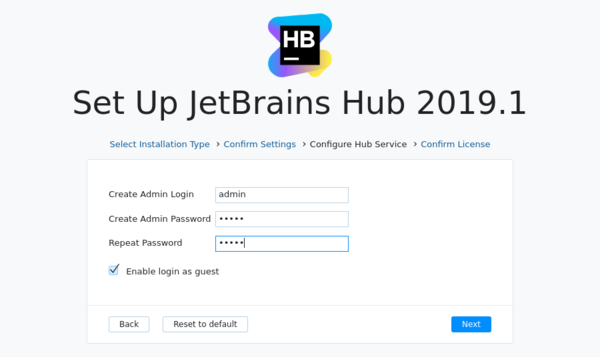
To assign a different username to the administrator account, edit the Create Admin Login setting.
Optionally, deselect the Enable login as guest option to ban the guest user account .
When done, click Next.
On the Confirm License page, verify the license name and key.
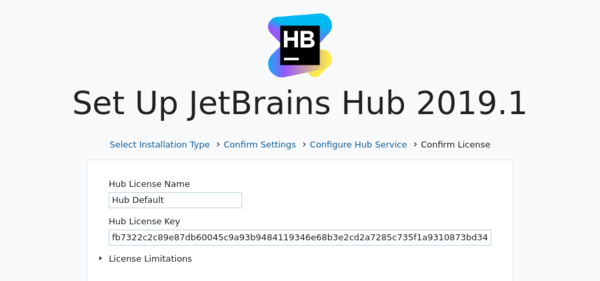
When done, click Finish.
The configuration is applied to your Hub server.
Do not close the page in the browser until the setup is complete. When the Hub server is ready:
If you disabled
guestuser account, you are redirected to the login page.If you enabled
guestuser account, you are redirected to the Dashboard.
That's it. Your Hub service is installed and ready for use.
Configure Hub service from the Command Line
For automated installation purposes, you can skip the wizard. However, in this case, the Hub service starts with the default parameters. Thus, you need to explicitly set the base URL — the URL at which the Hub service is available to the end users.
To skip Configuration Wizard, run the configure command before running Hub:
If you ever need to change the base URL for your running Hub instance, use the configure command with the --base-url argument.
To change the Base URL of the Hub service
-
Stop Hub:
docker exec <containerId> stop -
Run the following command:
docker run --rm -it \ -v <path to data directory>:/opt/hub/data \ -v <path to conf directory>:/opt/hub/conf \ -v <path to logs directory>:/opt/hub/logs \ -v <path to backups directory>:/opt/hub/backups \ -p <port on host>:8080 \ jetbrains/hub:<version> \ configure --base-url=http://hub.mydomain.com:XXXX -
Start Hub:
docker start <containerId>
To see all stopped containers, run docker ps -a
