Data sources
Enable the Database Tools and SQL plugin
This functionality relies on the Database Tools and SQL plugin, which is bundled and enabled in IntelliJ IDEA by default. If the relevant features are not available, make sure that you did not disable the plugin.
Press Ctrl+Alt+S to open settings and then select .
Open the Installed tab, find the Database Tools and SQL plugin, and select the checkbox next to the plugin name.
Data source is a connection configuration. It stores a list of connection details that are used to establish connection to a database. For example, host, port, database name, driver, SSH and SSL configuration settings, and so on. In data source settings, you can also select databases and schemas for introspection and display in Database tool window, and change the driver for your connection.
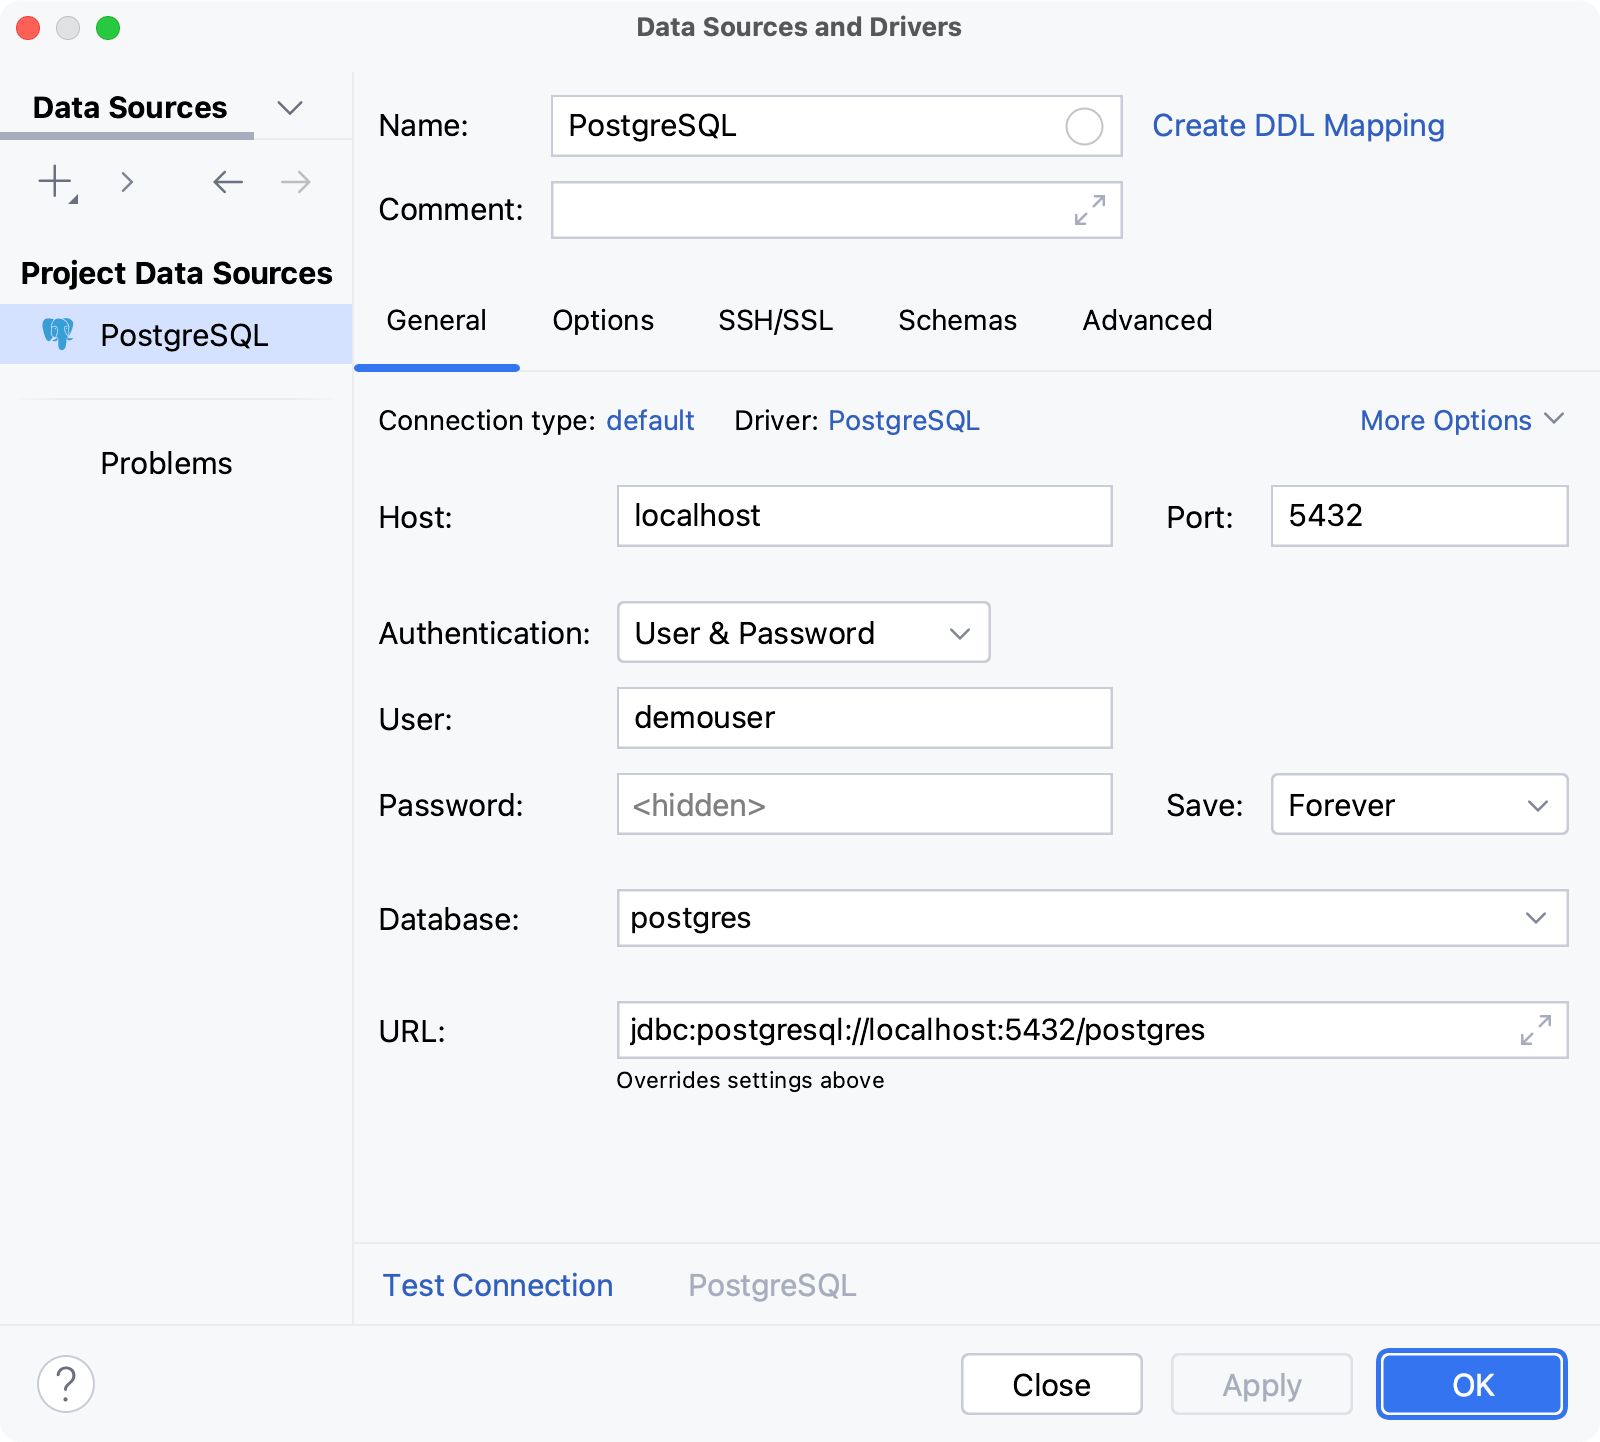
You can configure your data sources in the Data Sources and Drivers dialog ( Shift+Enter) . To access the dialog, in the Database tool window () , click Data Sources on the toolbar.
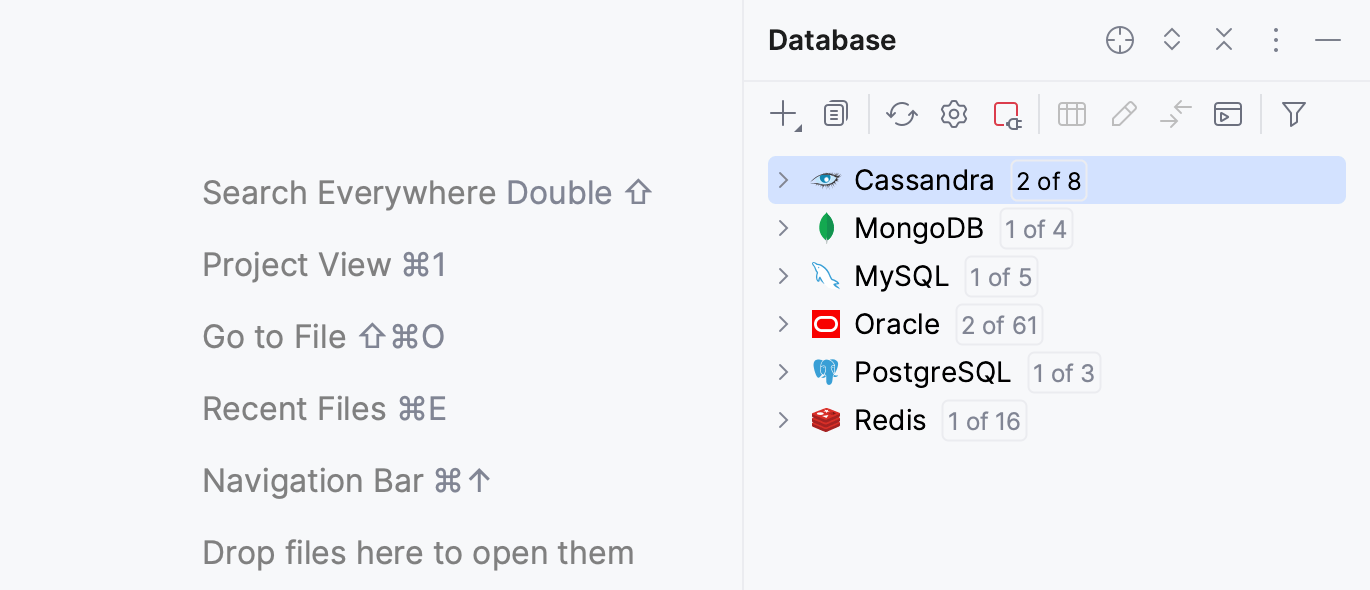
You can view the list of created data sources and explore them in the Database tool window () .
In IntelliJ IDEA project, settings of all data sources are stored in the dataSources.xml file located in the project directory under the .idea subdirectory.
In IntelliJ IDEA, you can create the following data sources:
Database data sources: connection configurations for the operational databases that contain data.
For different databases, IntelliJ IDEA provides complete support and basic support. Complete support of a database includes such features as enhanced code completion and better retrieval of database objects (introspection). All the inspections, quick-fixes, and other coding assistance features are also available, whereas basic support has limited features available.
For more information on the support types, refer to the Other databases topic.
Data Definition Language (DDL) data sources: SQL files that contain data definition language statements (refer to DDL data sources).
Create a data source
To connect to a database and start working with it, create a data source that will contain the connection details and specify those details for the database that you are connecting to.
Supported databases
IntelliJ IDEA can connect to databases running locally or remotely, whether on host servers or cloud platforms.
To create a data source and run a test connection to your database, follow the instructions provided in a dedicated topic.
- Complete support
The IDE provides complete support for the following databases:
- Basic support
For the databases listed below, basic support is provided:
Amazon Athena
Apache Ignite
Apache Phoenix
Apache Spark
Databricks
Denodo
DuckDB
Elasticsearch
Firebird
Google Cloud Spanner
IBM Informix
InterSystems IRIS
Mimer SQL
OpenEdge
Presto
SAP HANA
SingleStore
Tarantool
Teradata Vantage
TiDB
TmaxTibero
Trino
YugabyteDB
- DDL data sources
To create a DDL data source, follow the instructions from the DDL data sources topic.
- Cloud databases
IntelliJ IDEA also supports the following cloud databases:
AWS
Azure
Google
IBM
Copy of a data source
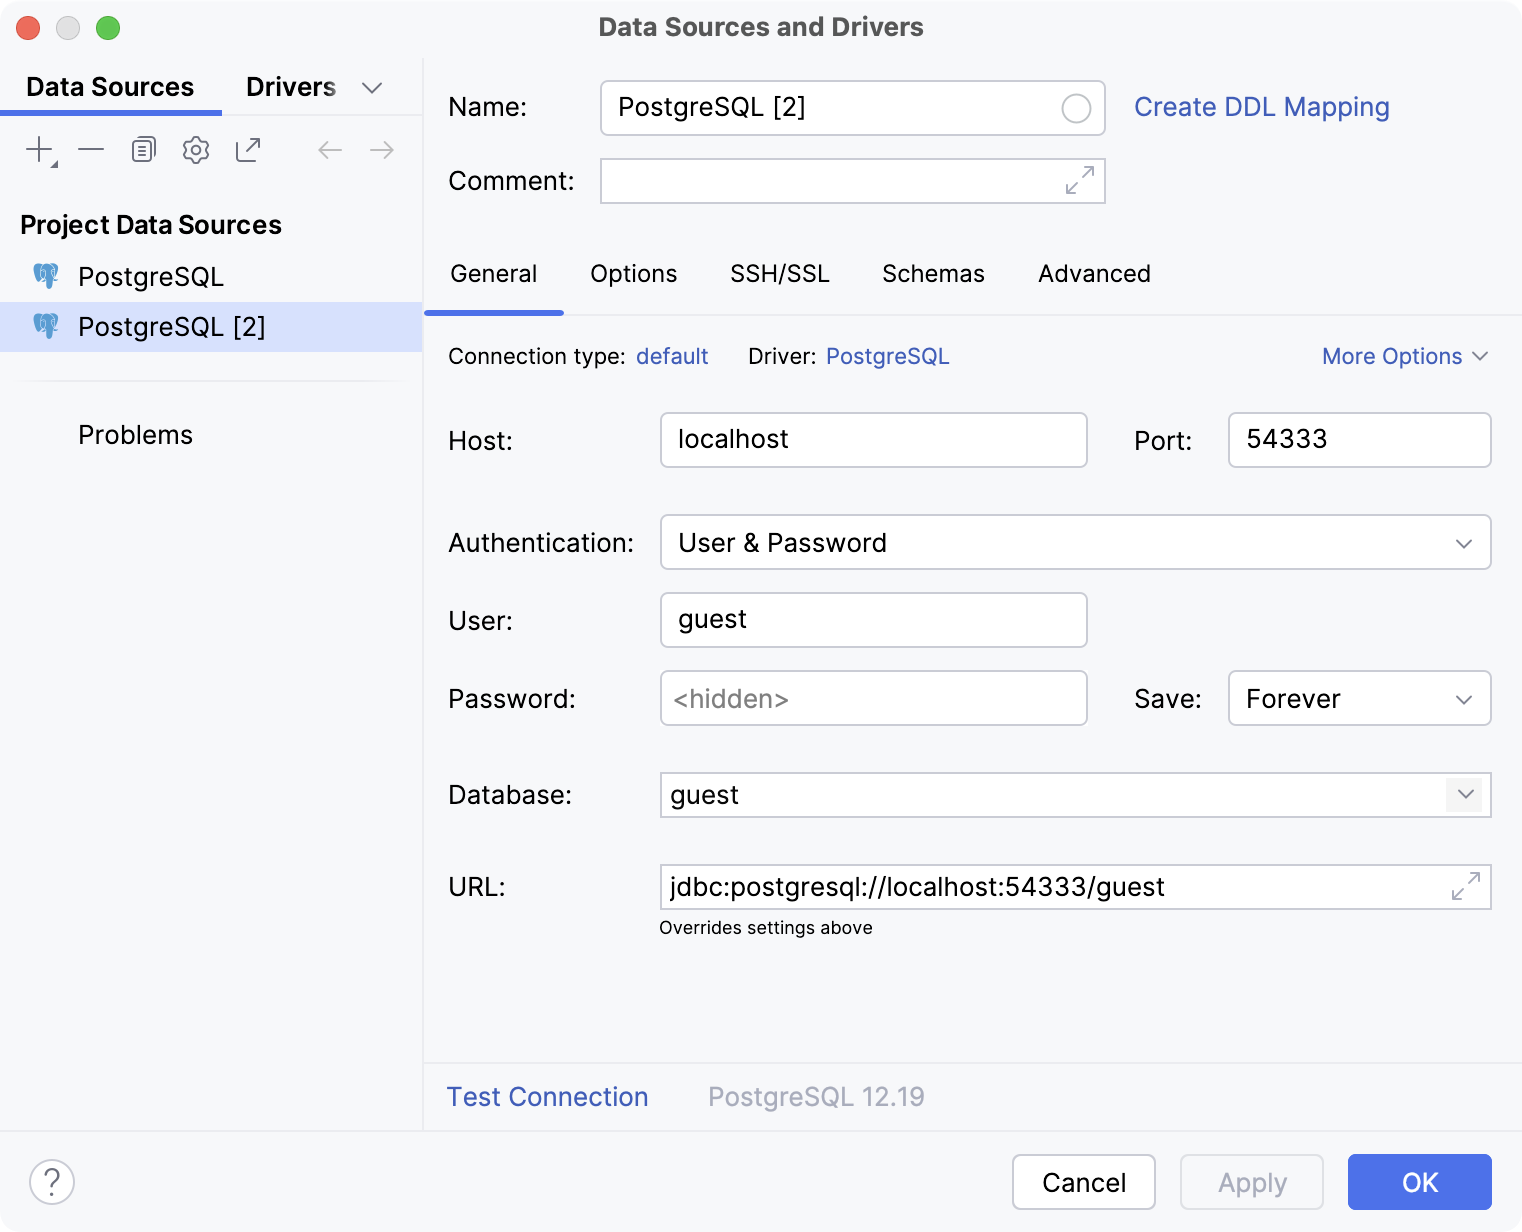
Duplicating a data source preserves all the connection settings, including the password. A data source can only be duplicated within a single project.
You can duplicate the connection configuration either in Database tool window or in the Data Sources and Drivers:
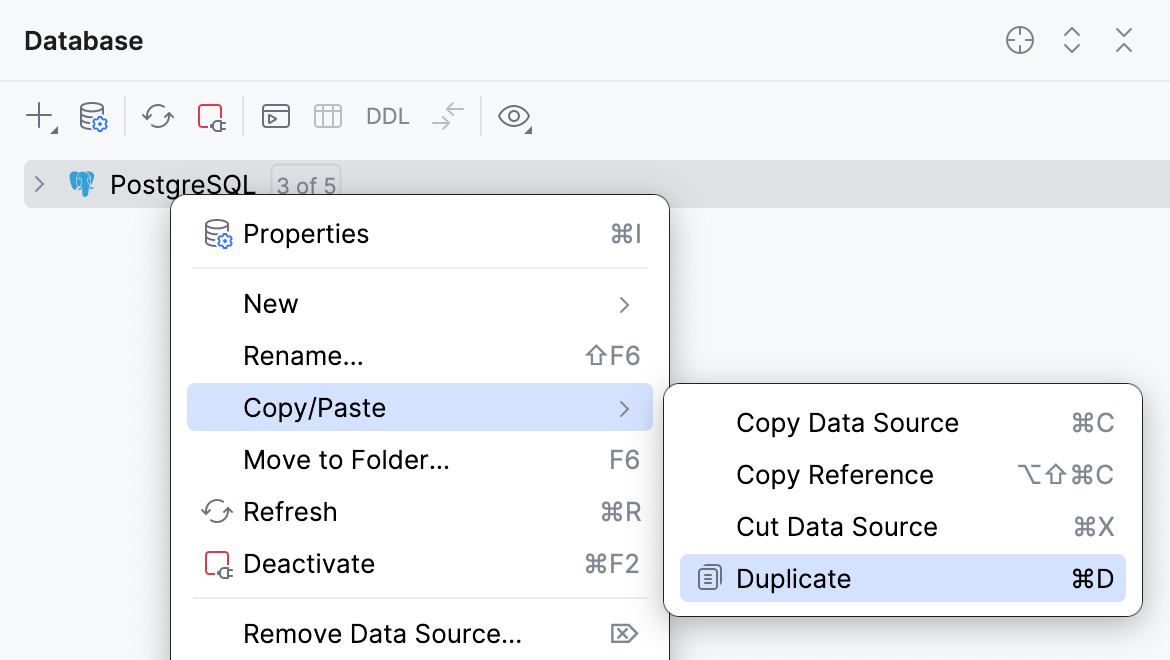
In Database tool window, select the data source you want to duplicate, right-click it and select .
In the left area of the Data Sources and Drivers dialog ( Shift+Enter) , select the data source you want to duplicate and click
Duplicate on the toolbar.
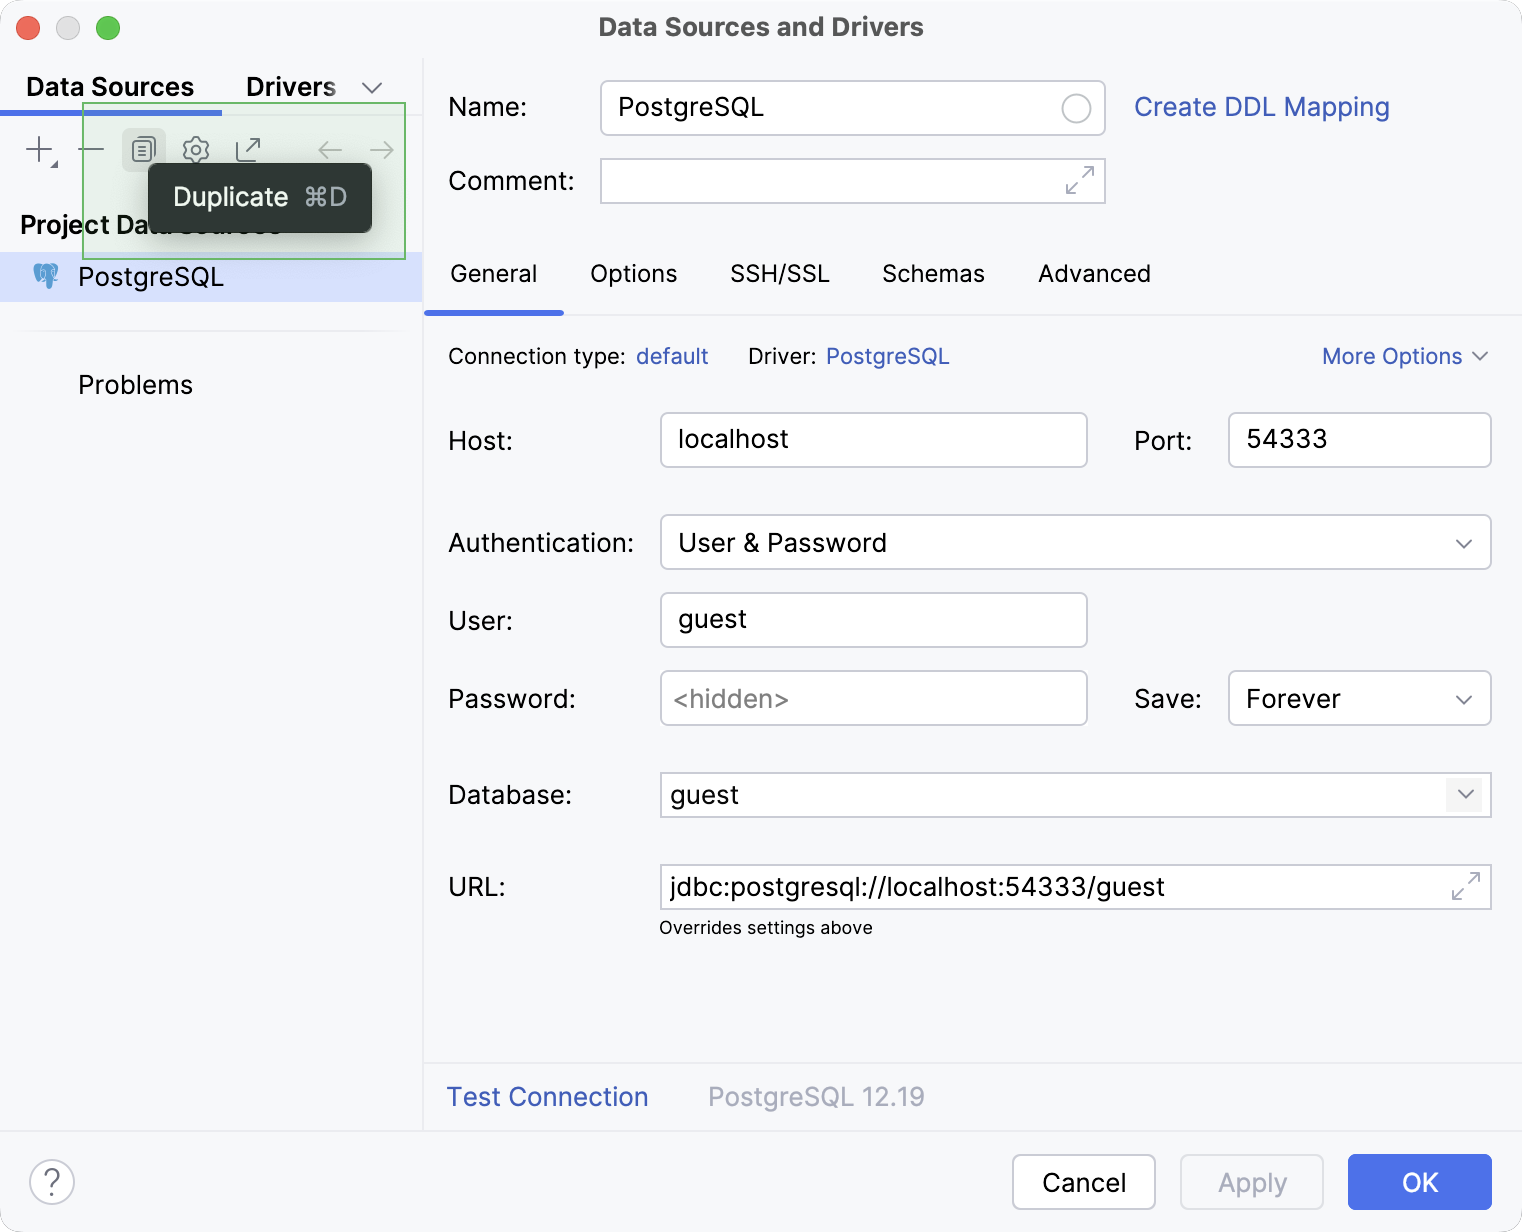
Alternatively, select the data source and press Ctrl+D.
IntelliJ IDEA will create a new data source with the same settings, including the password.
Click OK to save your new data source and close the dialog.
Delete a data source
You can delete a data source in one of the following ways:
To delete the data source using its context menu, in the Database tool window () , right-click the data source that you want to delete and select Delete Data Source.
To delete a data source in the Data Sources and Drivers dialog, follow these steps:
Open data source properties by doing one of the following:
On the Database tool window toolbar, click
Data Sources.
Press Shift+Enter.

In the left pane of the dialog, select the data source that you want to delete and click
Remove on the toolbar.
To delete a data source in the Data Sources and Drivers dialog via its context menu, in the left pane of the dialog, right-click the data source that you want to delete and select Remove.
Configure display options for data sources
You can group, assign a color, and filter objects in the Database tool window ().
Group data sources in folders
IntelliJ IDEA allows to move a data source to a new folder or to an existing one.
To move a data source to a new folder, do the following:
Right-click the item and select . Alternatively, press F6.
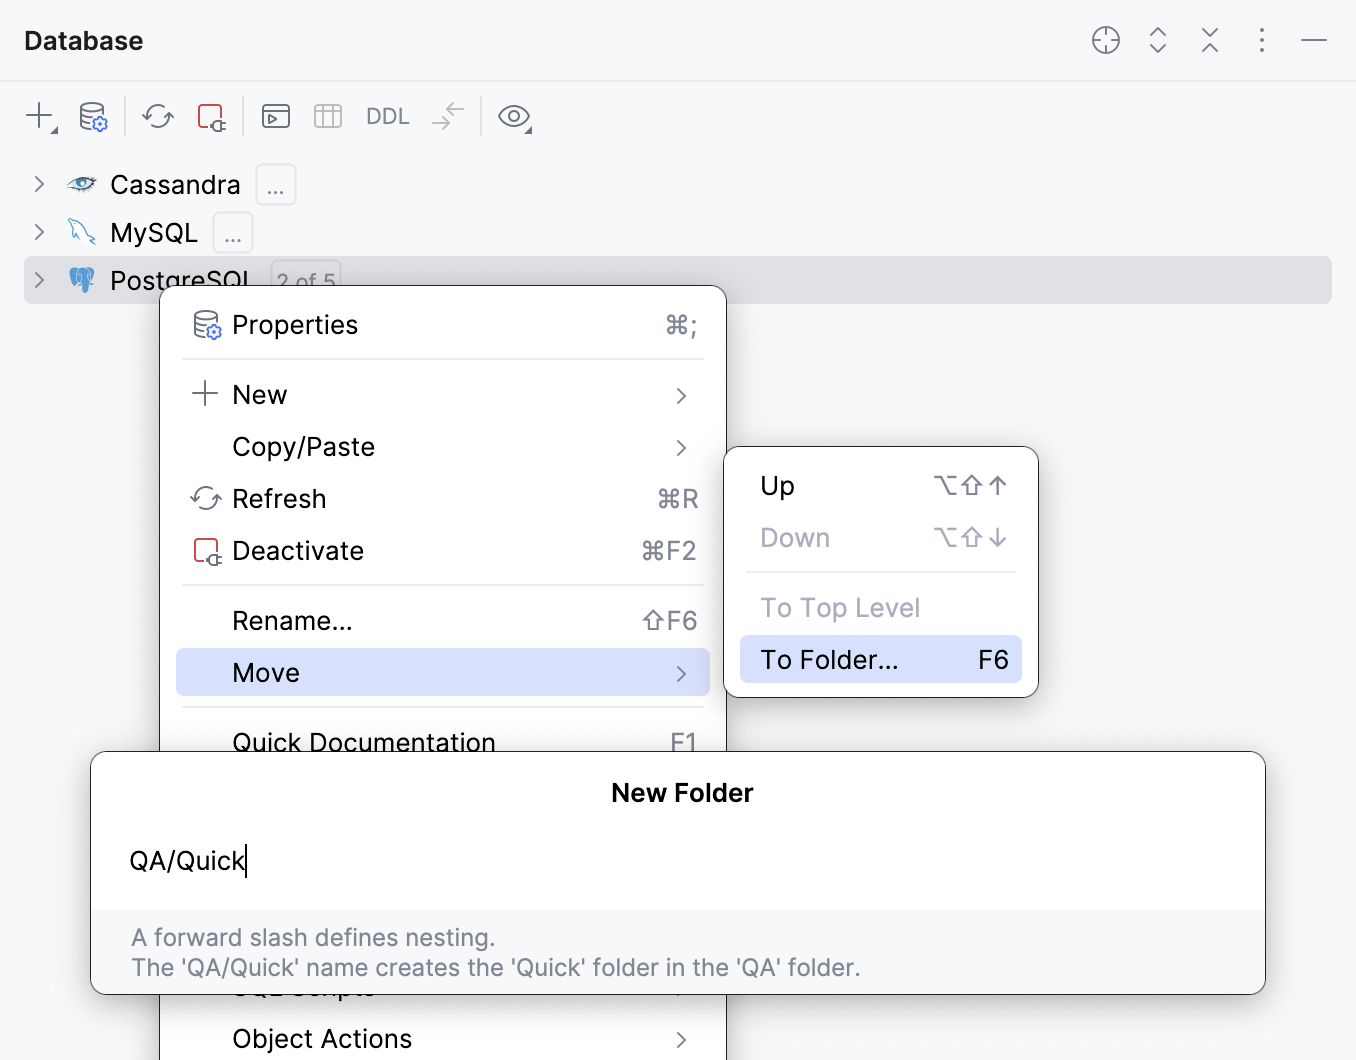
If there are no existing folders yet, IntelliJ IDEA will show the New Folder dialog. If there are existing folders already, the Move to Folder popup will appear. In the popup, select New Folder.
In the New Folder dialog, type the folder name. You can use a forward slash (
/) to define nesting. For example, theQA/Quickname will create theQuickfolder inside theQAfolder.
To move a data source to an existing folder, do the following:
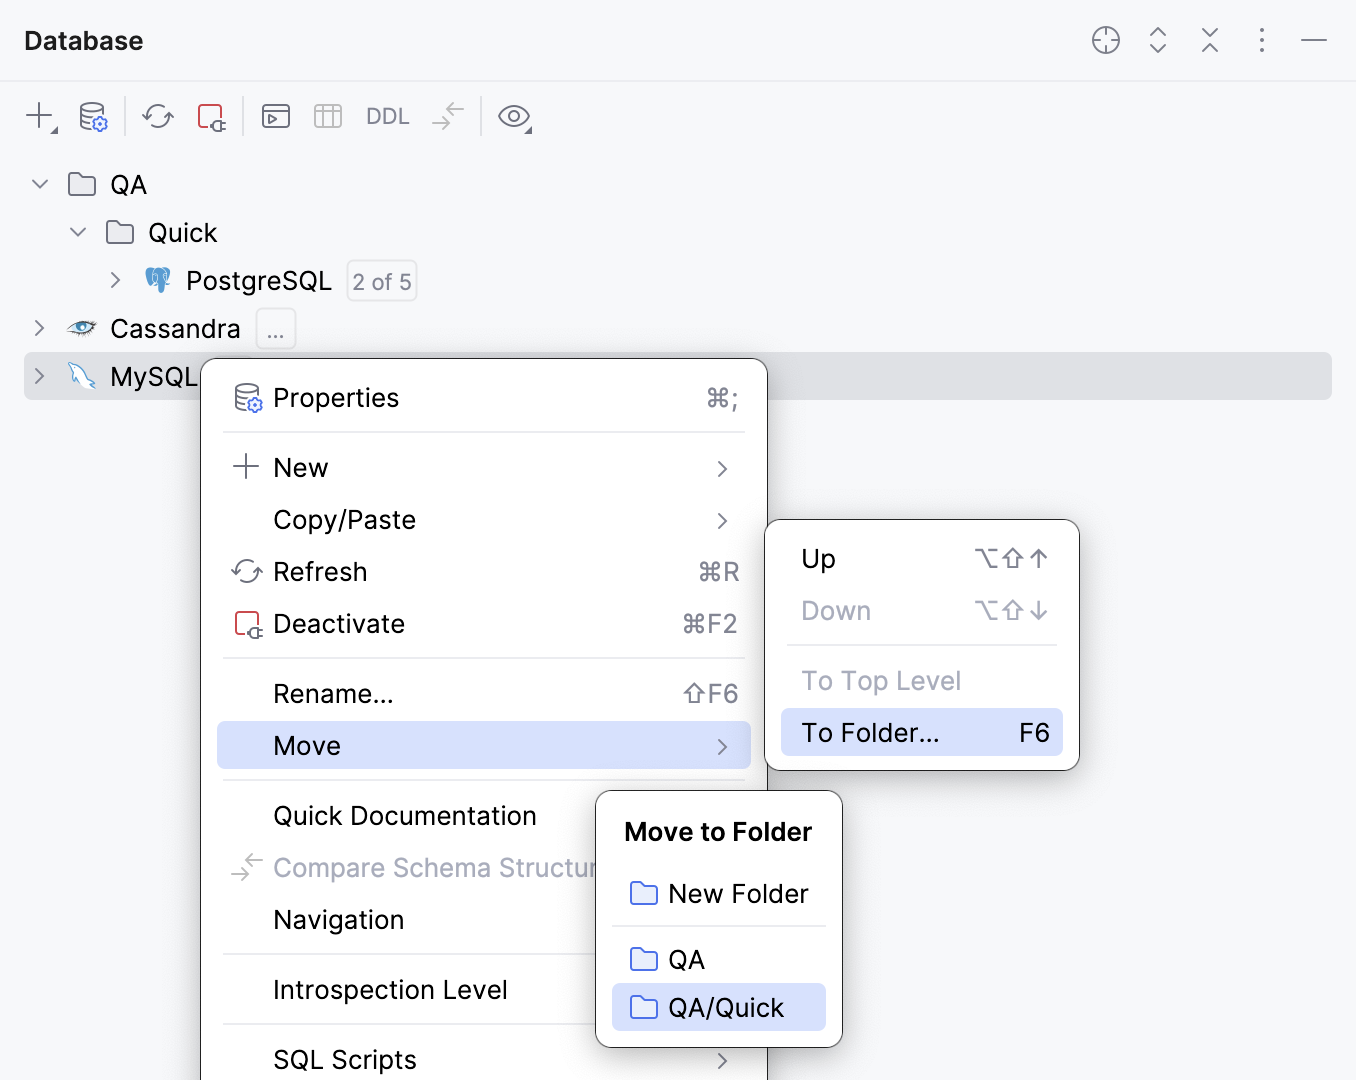
Right-click the item and select . Alternatively, press F6.
From the Move to Folder popup, select the target folder.
To undo an operation, press Ctrl+Z.
Assign a color to a data source
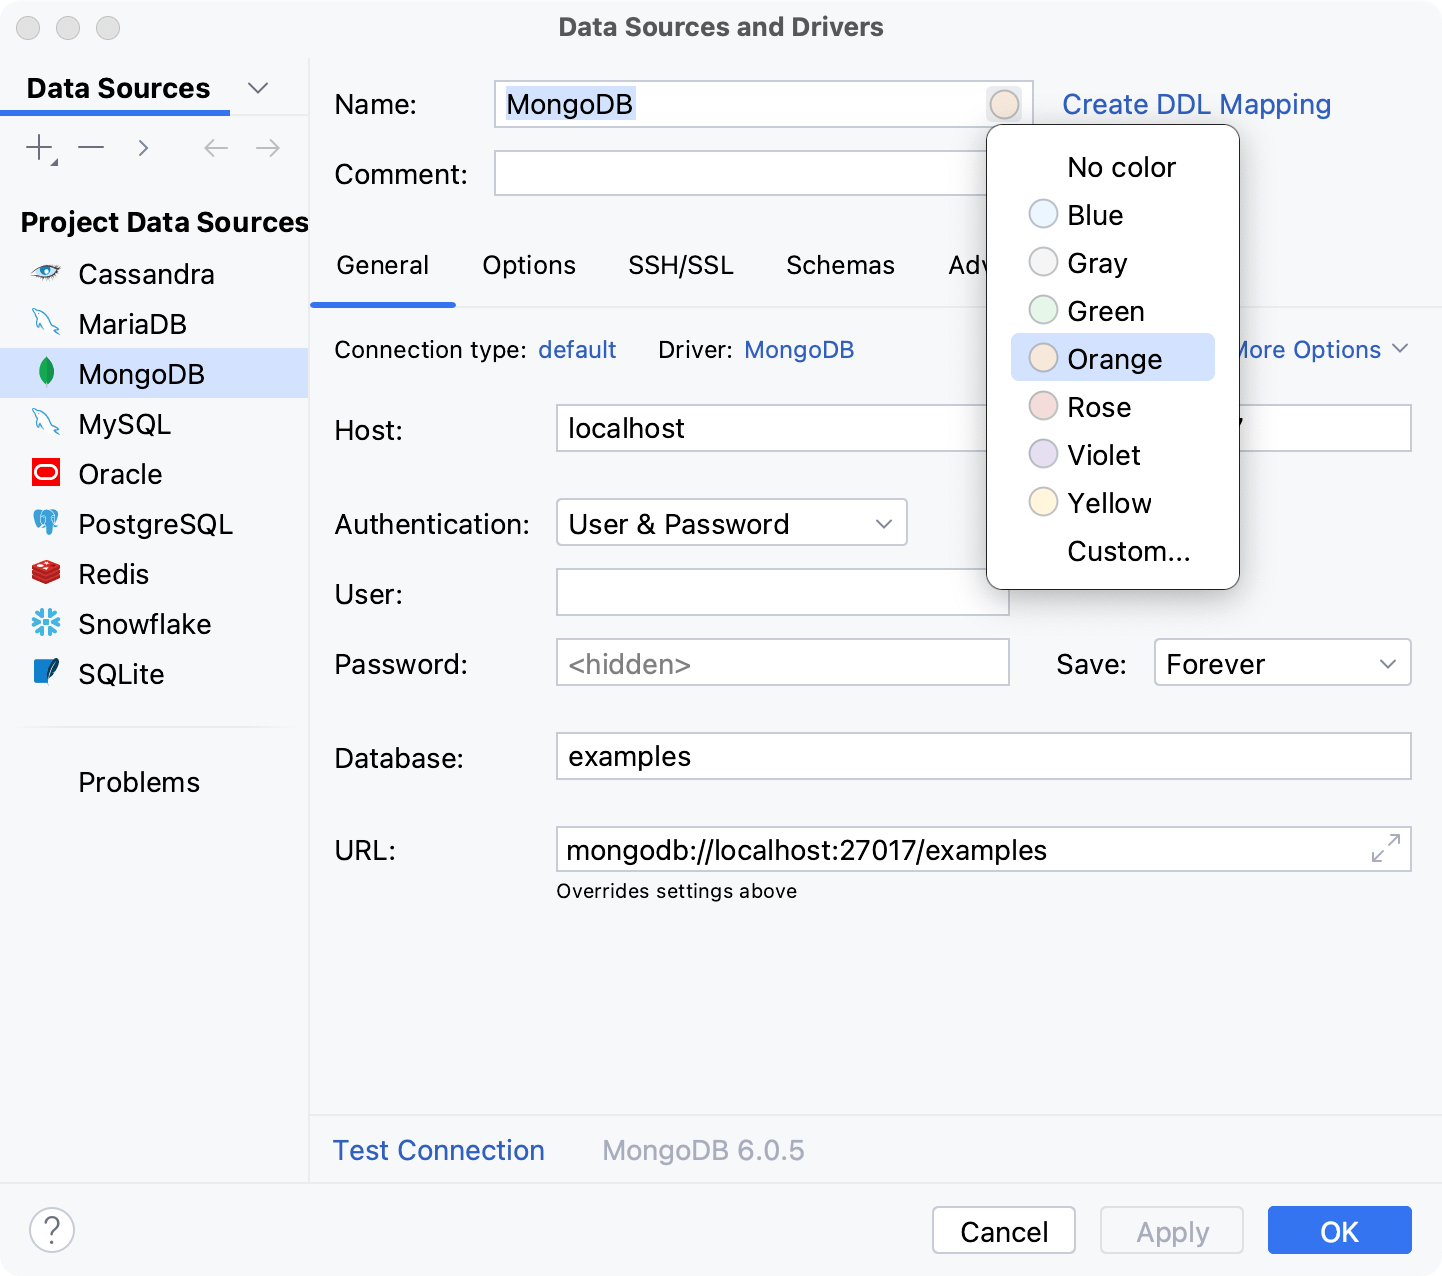
In Data Sources and Drivers dialog ( Shift+Enter) , select the data source for which you want to assign a color.
Click the circle in the Name field to select a color.
Apply the changes and close the dialog.
For more information about assigning colors to data sources and database objects in a database tree, refer to Assign colors to data sources and database objects.
Use full names of data sources
By default, the Shorten Tab Titles option is enabled. A data source name in the tab title is shortened to 36 characters.
Right-click a tab of a query console and select Shorten Tab Titles.
Share data sources
In IntelliJ IDEA, you can share data sources between different projects within a single IDE instance and also between different IDE instances. To share data sources between projects, you have to change their accessibility level. To share data sources between IDEs, you have to either copy and paste them or use the IDE settings export and import features.
Share data sources between projects
Data sources in IntelliJ IDEA are available at two levels: project and global. The project level means that you can access a data source only from the project where this data source was created initially. At the global level, a data source is available for other projects. By default, a data source is available at the project level.
To share a data source between different projects inside your IDE, you need to move the data source to the global level.
In the Database tool window, click
Data Source Properties on the toolbar.
In the Data Sources and Drivers dialog ( Shift+Enter) that opens, select the data source you want to make global, right-click it and select
Make Global.
Alternatively, click
Make Global on the toolbar.
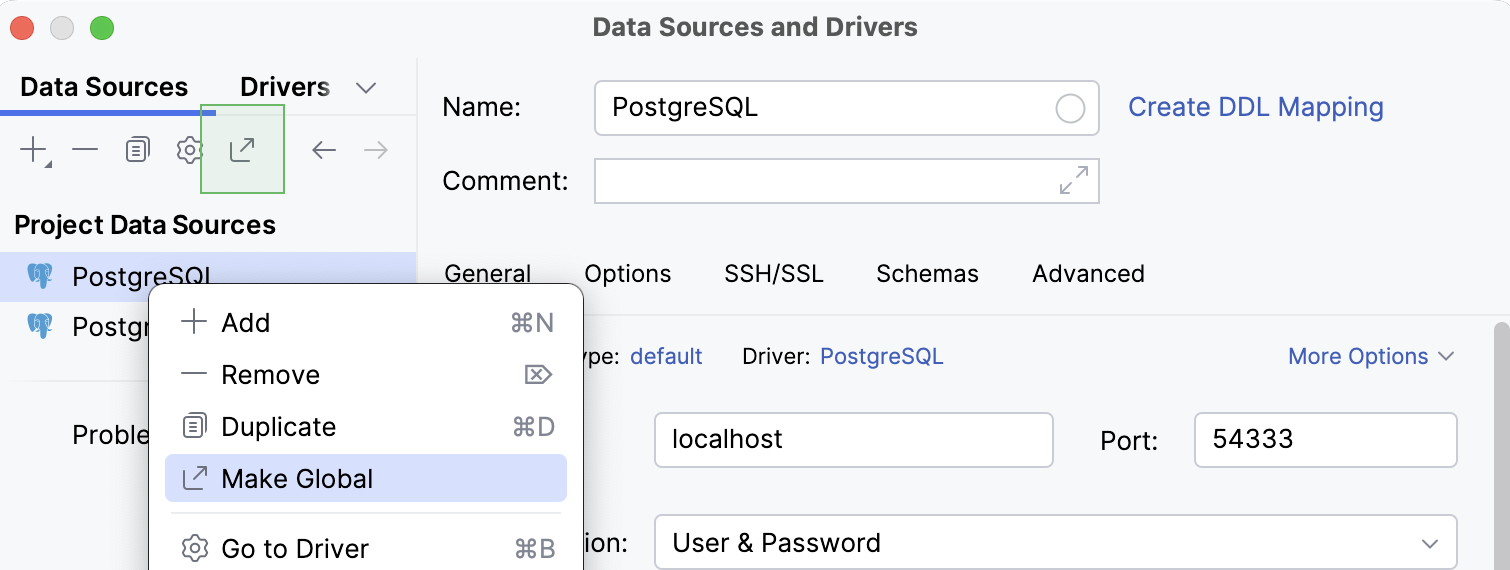
Click OK to save your changes and close the dialog.
To make a data source local again, click Move to Project that replaces
Make Global for the data source.
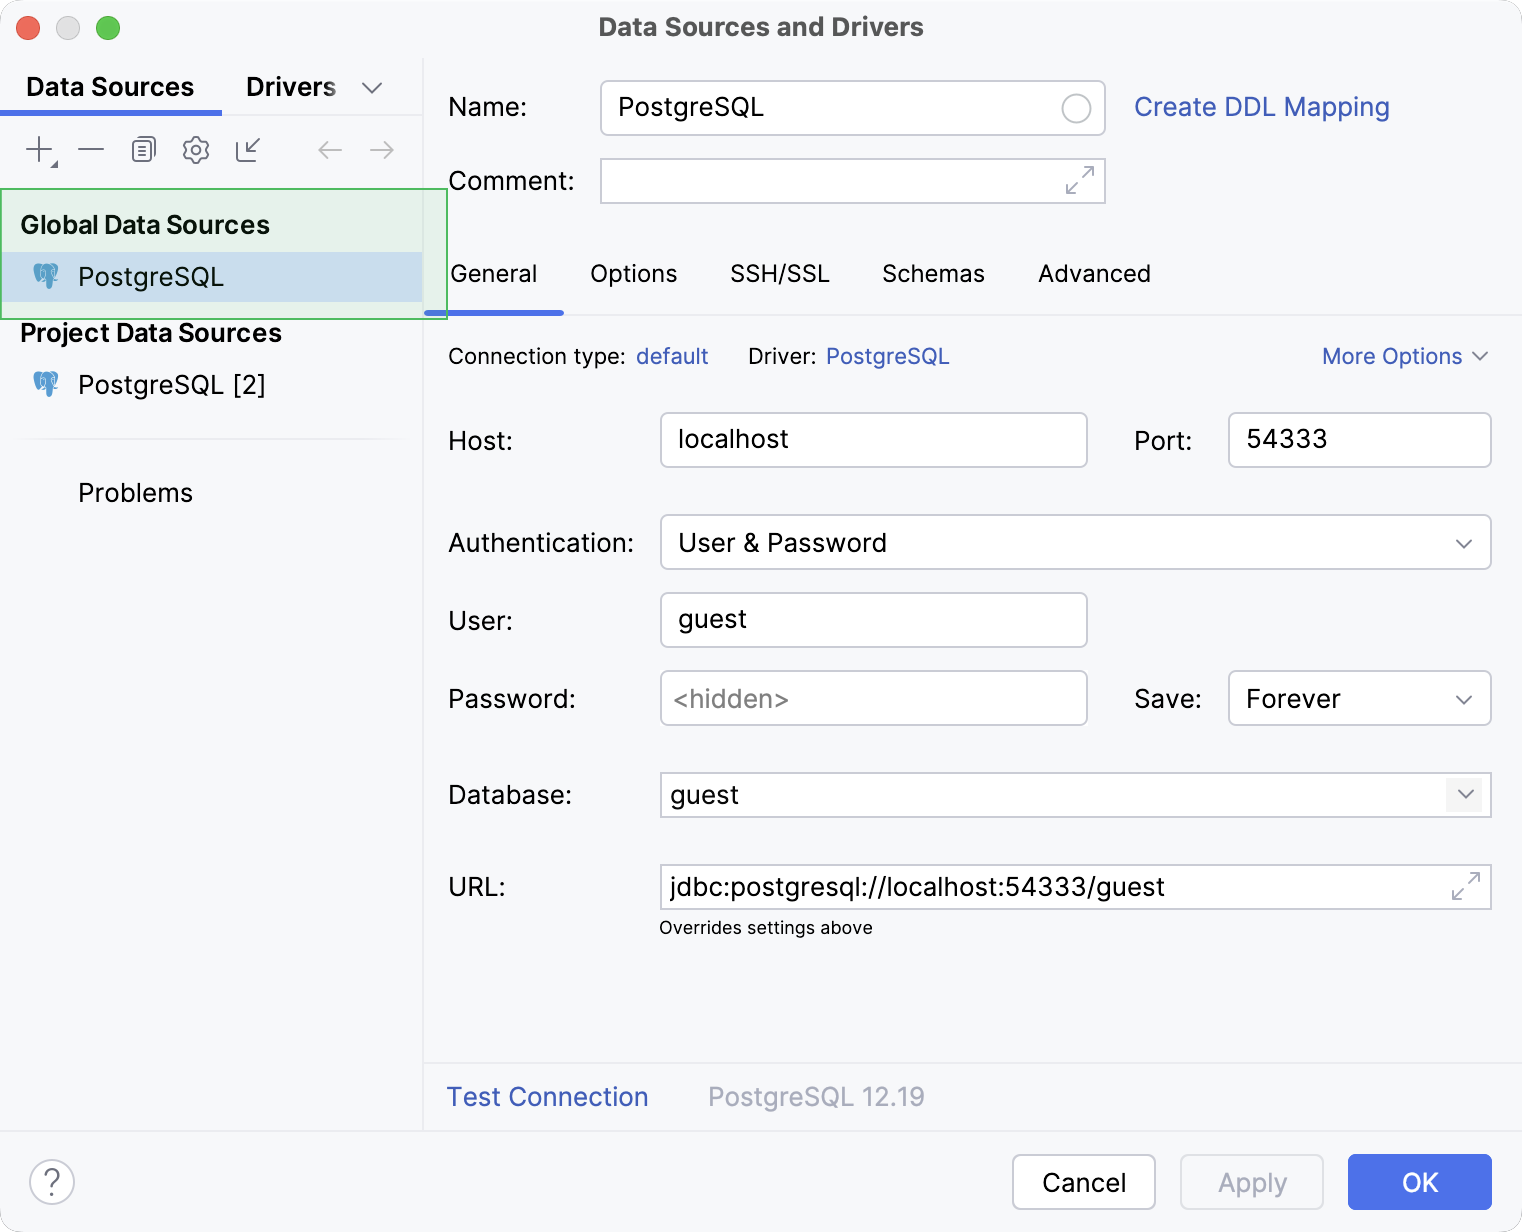
Share data sources between IDE instances
In IntelliJ IDEA, you can share data sources by either copying their settings to clipboard or using the XML file that includes settings for all the project data sources. Also, you can export and import the file using the IDE settings export and import features.
The reason is that IntelliJ IDEA does not have its own password store. It either uses the native password management system or KeePass. To change the way your IDE stores passwords, in IDE settings Ctrl+Alt+S, navigate to . For more information about storing passwords in IntelliJ IDEA, refer to the Passwords topic.
Copy data sources to clipboard
In IntelliJ IDEA, you can copy a data source to the clipboard. When you do this, the IDE copies the connection settings as an XML snippet. You can paste the snippet to another IDE and create a copy of your original data source there.
In the Database tool window, select the data source you want to copy.
Right-click the selected data source and navigate to to copy your data source to the clipboard. Alternatively, press Ctrl+C.
IntelliJ IDEA copies the XML snippet with connection settings.
Switch to the target IDE or send the data source to another user.
In the target IDE, open Database tool window.
In the Database tool window, click
New and select Import from Clipboard. Alternatively, right-click the Database tool window and select (or press Ctrl+V).
In the Data Sources and Drivers dialog ( Shift+Enter) dialog that opens, enter the password for the database or schema you are connecting to with this data source.
Click OK to save your new data source and close the dialog.
For every IntelliJ IDEA project, there is a dataSources.xml file that stores settings for all data sources of the project. By copying this file, you can share the data sources with another IDE instance. Also, you can store the file under VCS to keep track of changes and to synchronize the data sources list between several users.
The dataSources.xml file is stored under the .idea subdirectory of a dedicated project settings directory in the IDE projects directory.
Locate the dataSources.xml file
In the Project tool window, expand the project directory and .idea directory nodes and locate the dataSources.xml file.
Right-click the dataSources.xml file and select .
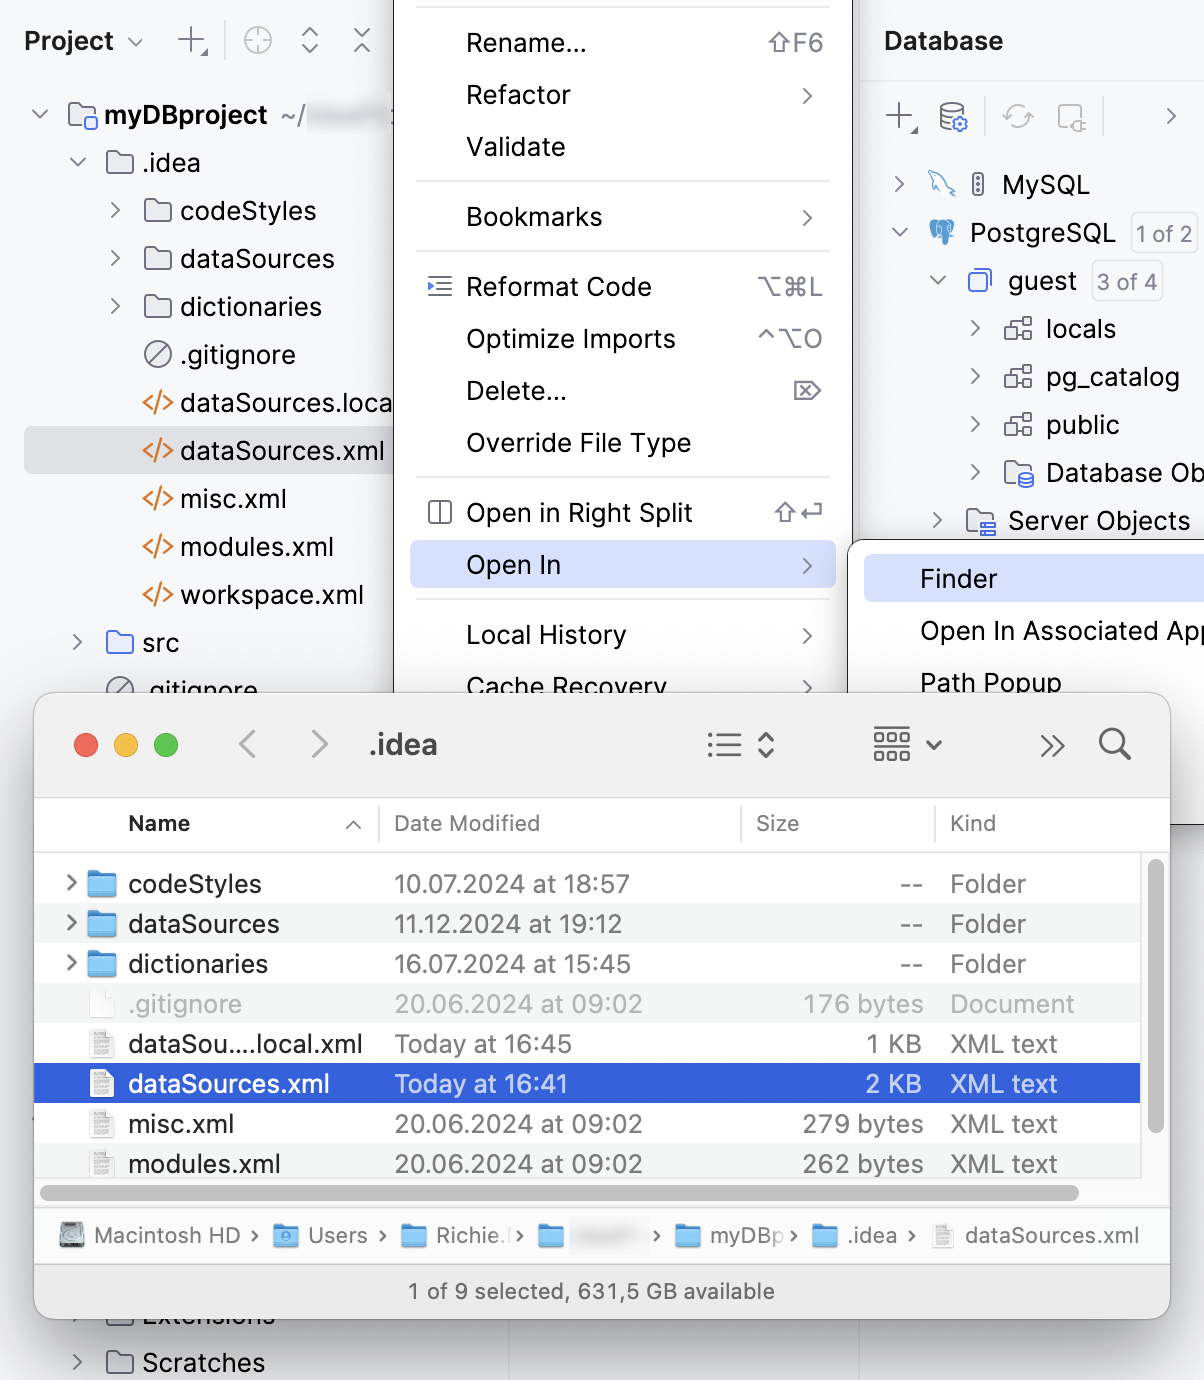
You can also export and import the data source settings file by using the IDE settings export and import feature with the settings.zip file. The settings.zip file includes only data sources that are available at the global level. For more information about changing a level, refer to Change the project level to global.
Export global data source settings to a ZIP archive
Select from the main menu.
In the Export Settings window, click Select None.
In the Export Settings window, select Database: global data sources.
In the Export settings to field, specify a path to the directory where you want to store the settings.zip file.
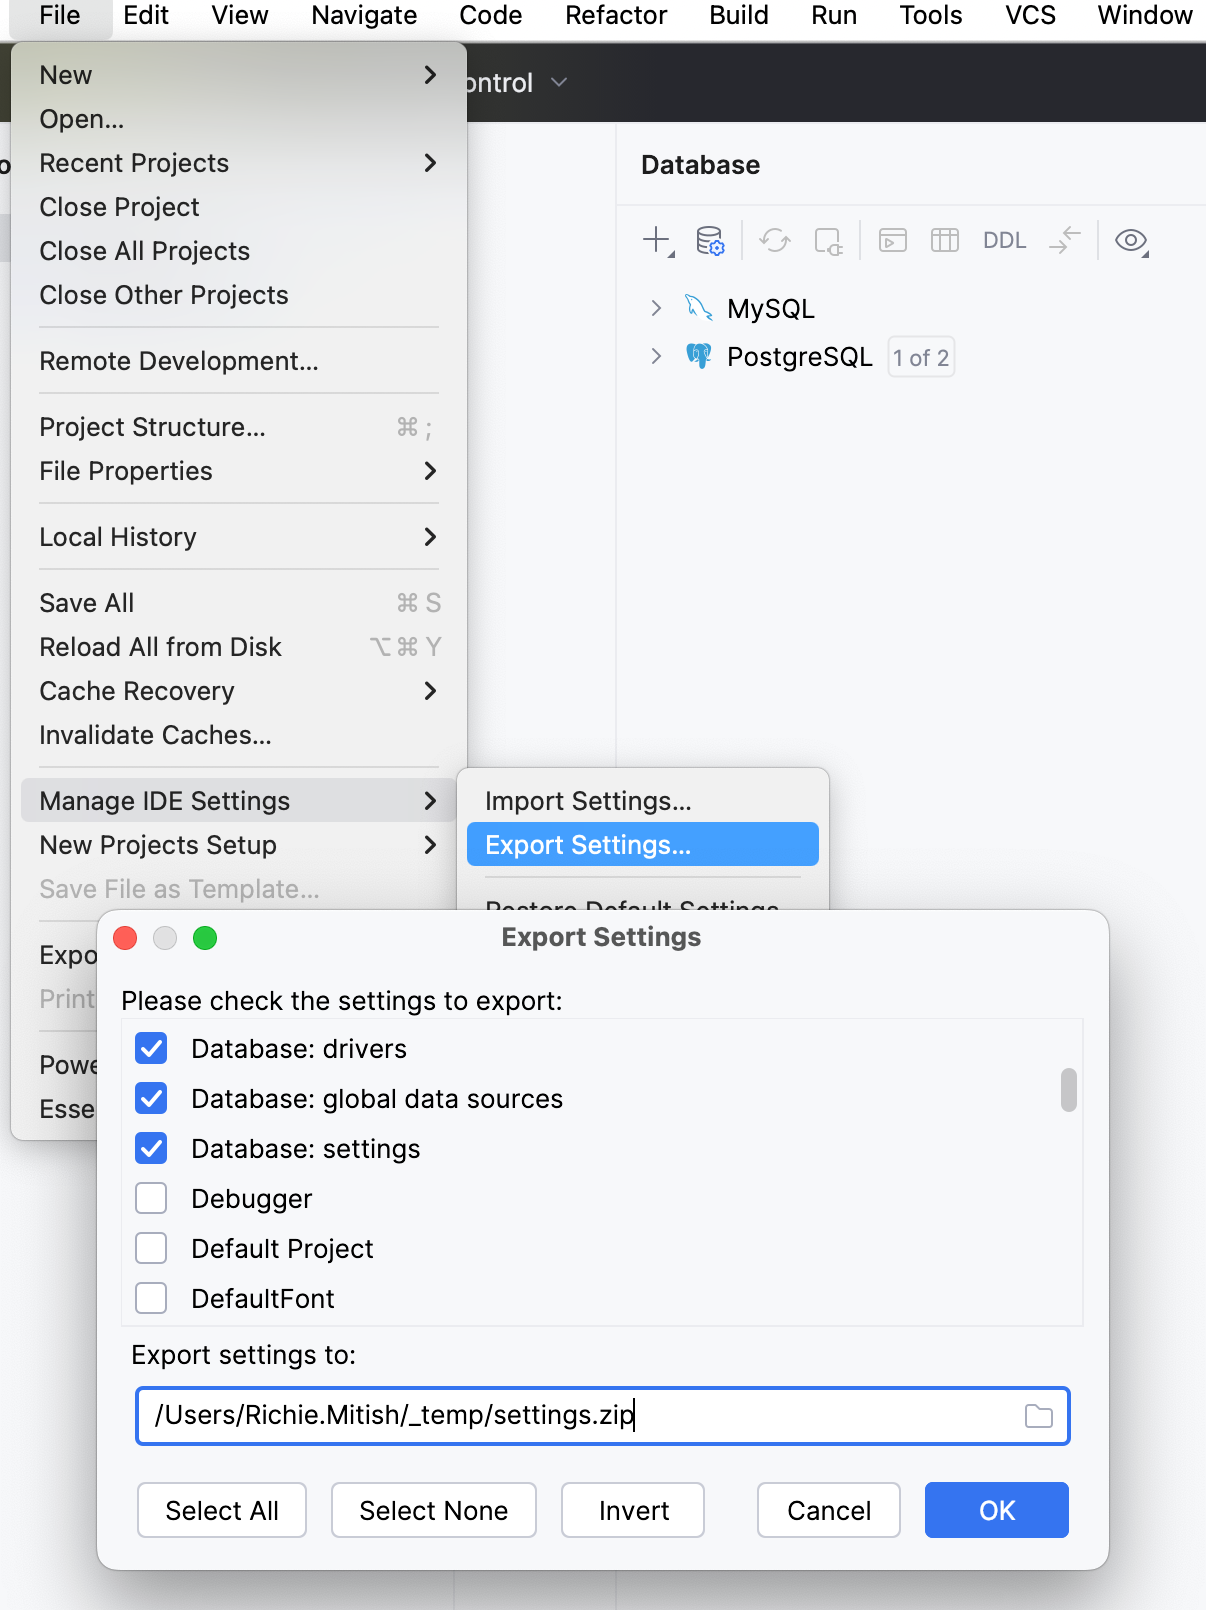
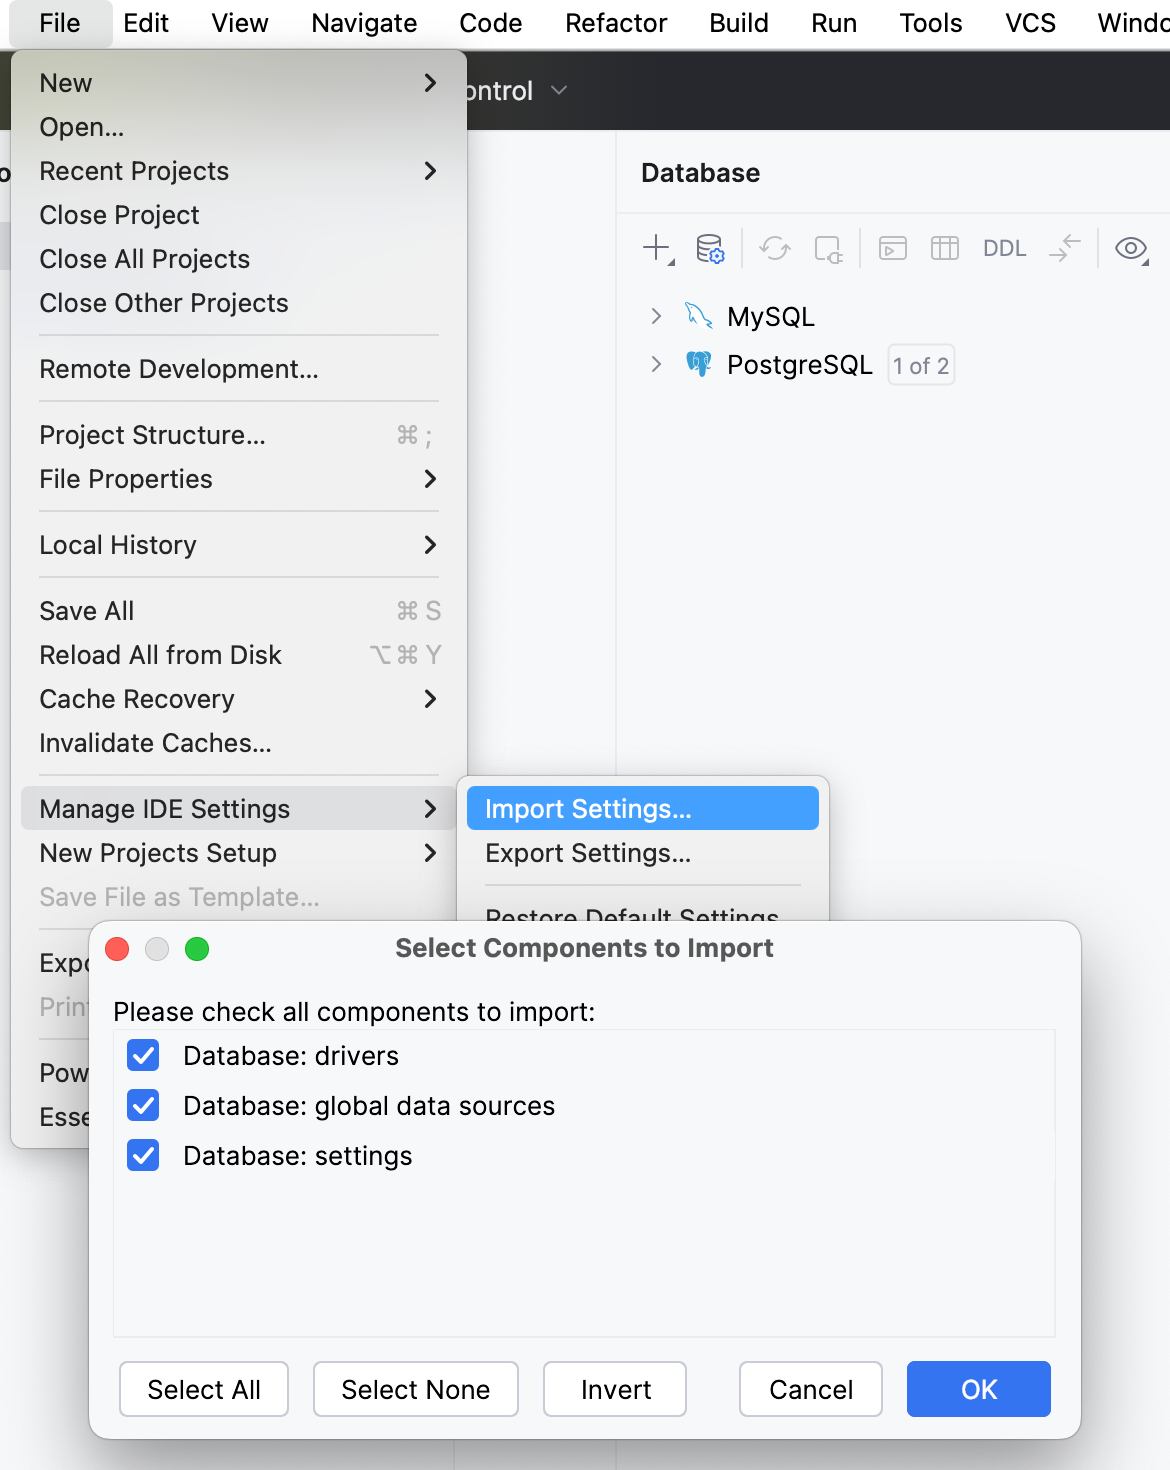
Import global data source settings from a ZIP archive
Select from the main menu.
In the file browser window, locate the settings.zip file that you exported, and select it.
In the Select Components to Import window, select Database: global sources.
Click OK.
In the Restart Needed window, click OK to restart your IDE.
Open the Data Sources and Drivers dialog ( Shift+Enter) , enter necessary connection credentials in the data source properties. If the data source is on a local or network drive, ensure that the path to this data source is correct.
To ensure that the connection to the data source is successful, click Test Connection.
Tips and tricks
Share all the connections with passwords
Open settings by pressing Ctrl+Alt+S and navigate to .
Select the In KeePass option.
In the Database field, specify a path for the KDBX file in the directory where you store your project.
Copy the whole directory with your project to another computer.
On another computer, open settings by pressing Ctrl+Alt+S and navigate to .
In the Database field, type a path to the copied KDBX file.
Click and navigate to the directory with copied project files.