Configuring remote Node.js runtimes
In IntelliJ IDEA, you need to configure a remote Node.js runtime when you want to develop, test, lint, run and debug your application on Node.js installed on a remote host or in a virtual environment.
Remote Node.js runtimes are configured in the Configure Node.js Remote Interpreter dialog. You can open this dialog from the JavaScript Runtime page of the Settings dialog or later, when you create or edit a Node.js run/debug configuration for running or debugging your application in a remote environment.
The recommended way is to configure a remote Node.js runtime in the Settings dialog. In this case you can set the runtime and the associated package manager as default for your project.
A remote Node.js runtime that you configure right in the Node.js run/debug configuration can be used only with this run/debug configuration.
Remote Node.js runtime on a host accessible through SSH connection
Before you start
Install the Node.js and Node.js Remote Interpreter plugins on the Settings | Plugins page, tab Marketplace, as described in Installing plugins from JetBrains Marketplace.
Make sure the FTP/SFTP/WebDAV Connectivity plugin is enabled in the settings. Press Ctrl+Alt+S to open settings and then select . Click the Installed tab. In the search field, type FTP/SFTP/WebDAV Connectivity. For more information about plugins, refer to Managing plugins.
Configure access to an SSH server on the target remote host as described in Create SSH configurations and make sure this server is running.
Node.js runtime via SSH are configured in the Configure Node.js Remote Interpreter dialog. You can open this dialog from the JavaScript Runtime page of the Settings dialog or later, when you create or edit a Node.js run/debug configuration for running or debugging your application.
The recommended way is to configure a remote Node.js runtime in the Settings dialog. In this case you can set the runtime and the associated package manager as default for your project.
A remote Node.js runtime that you configure right in the Node.js run/debug configuration can be used only with this run/debug configuration.
Configure a remote Node.js runtime via SSH in the Settings dialog
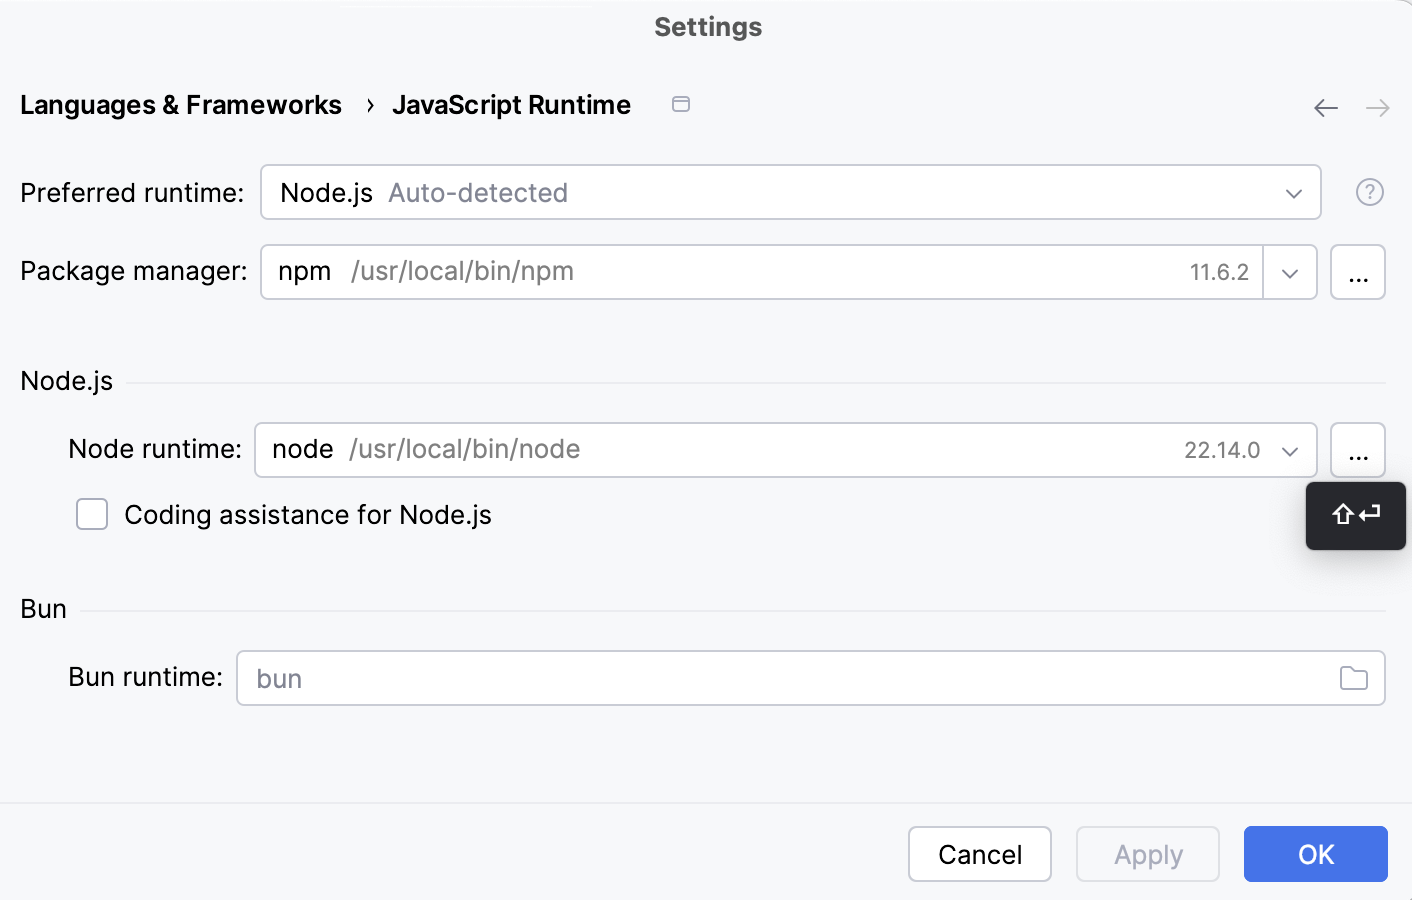
Open the Settings dialog (Ctrl+Alt+S) and go to .
Click
next to the Node runtime field.
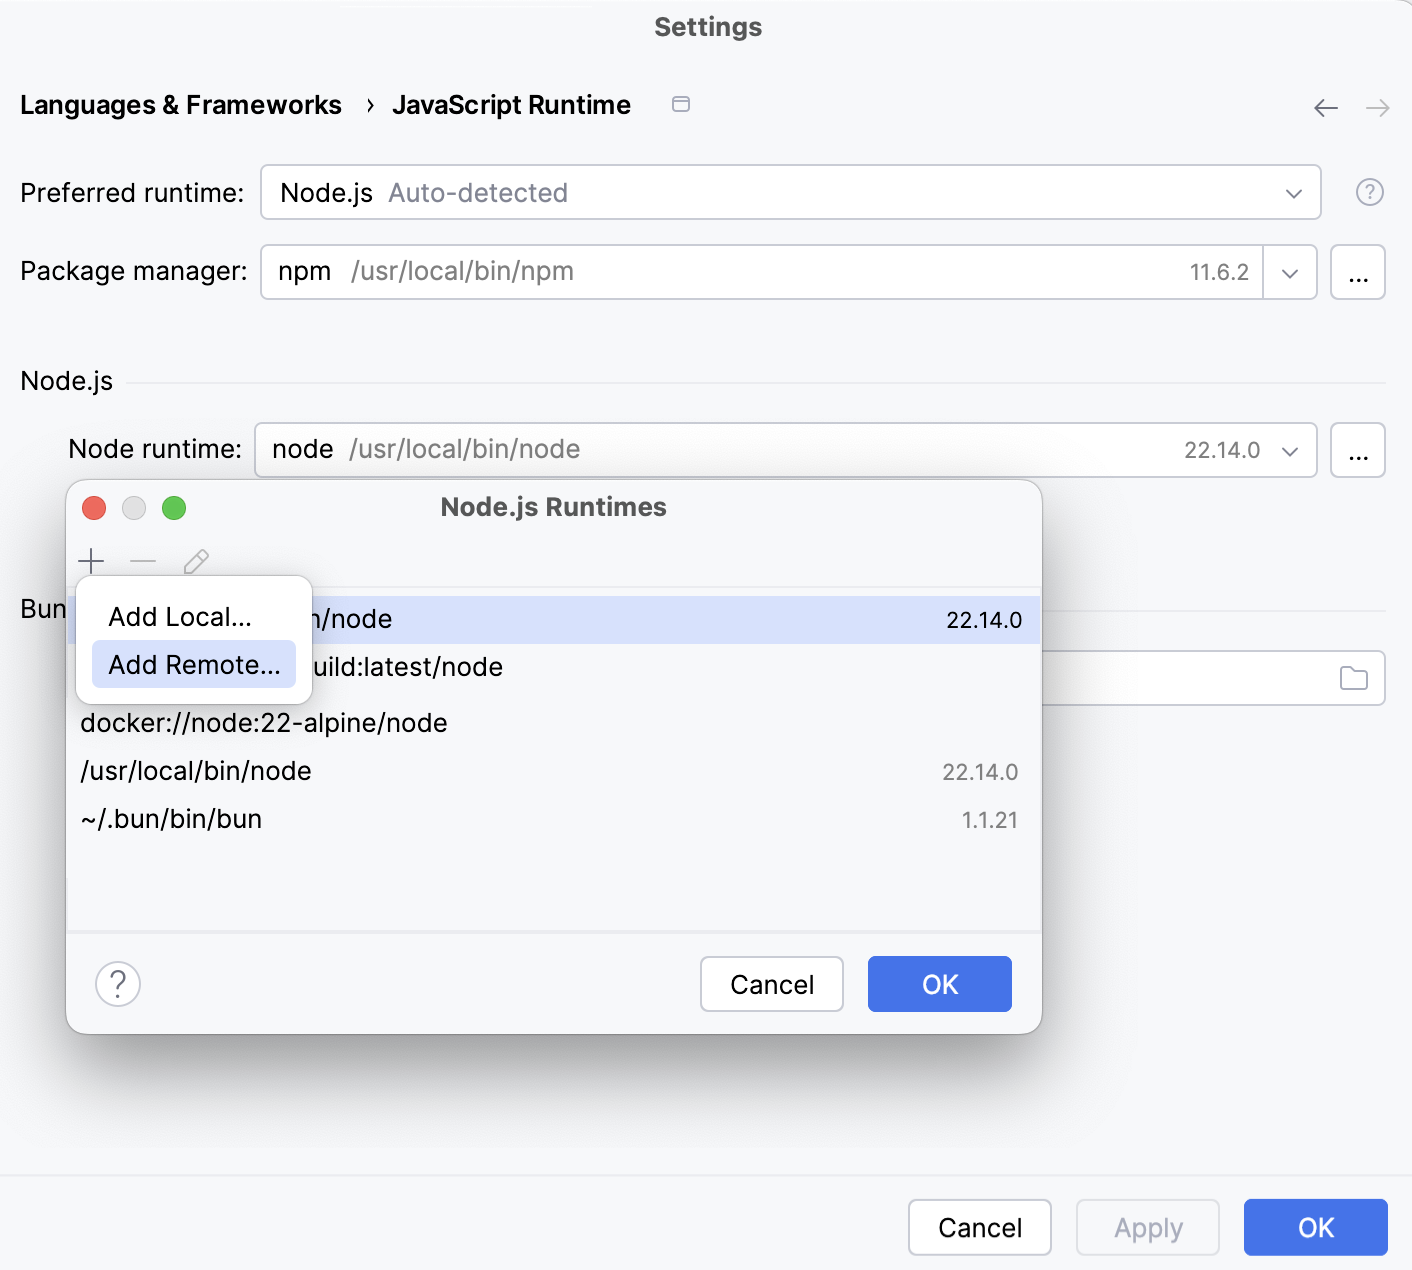
In the Node.js Runtimes dialog with a list of all the currently configured runtimes, click
on the toolbar and select Add Remote from the context menu.
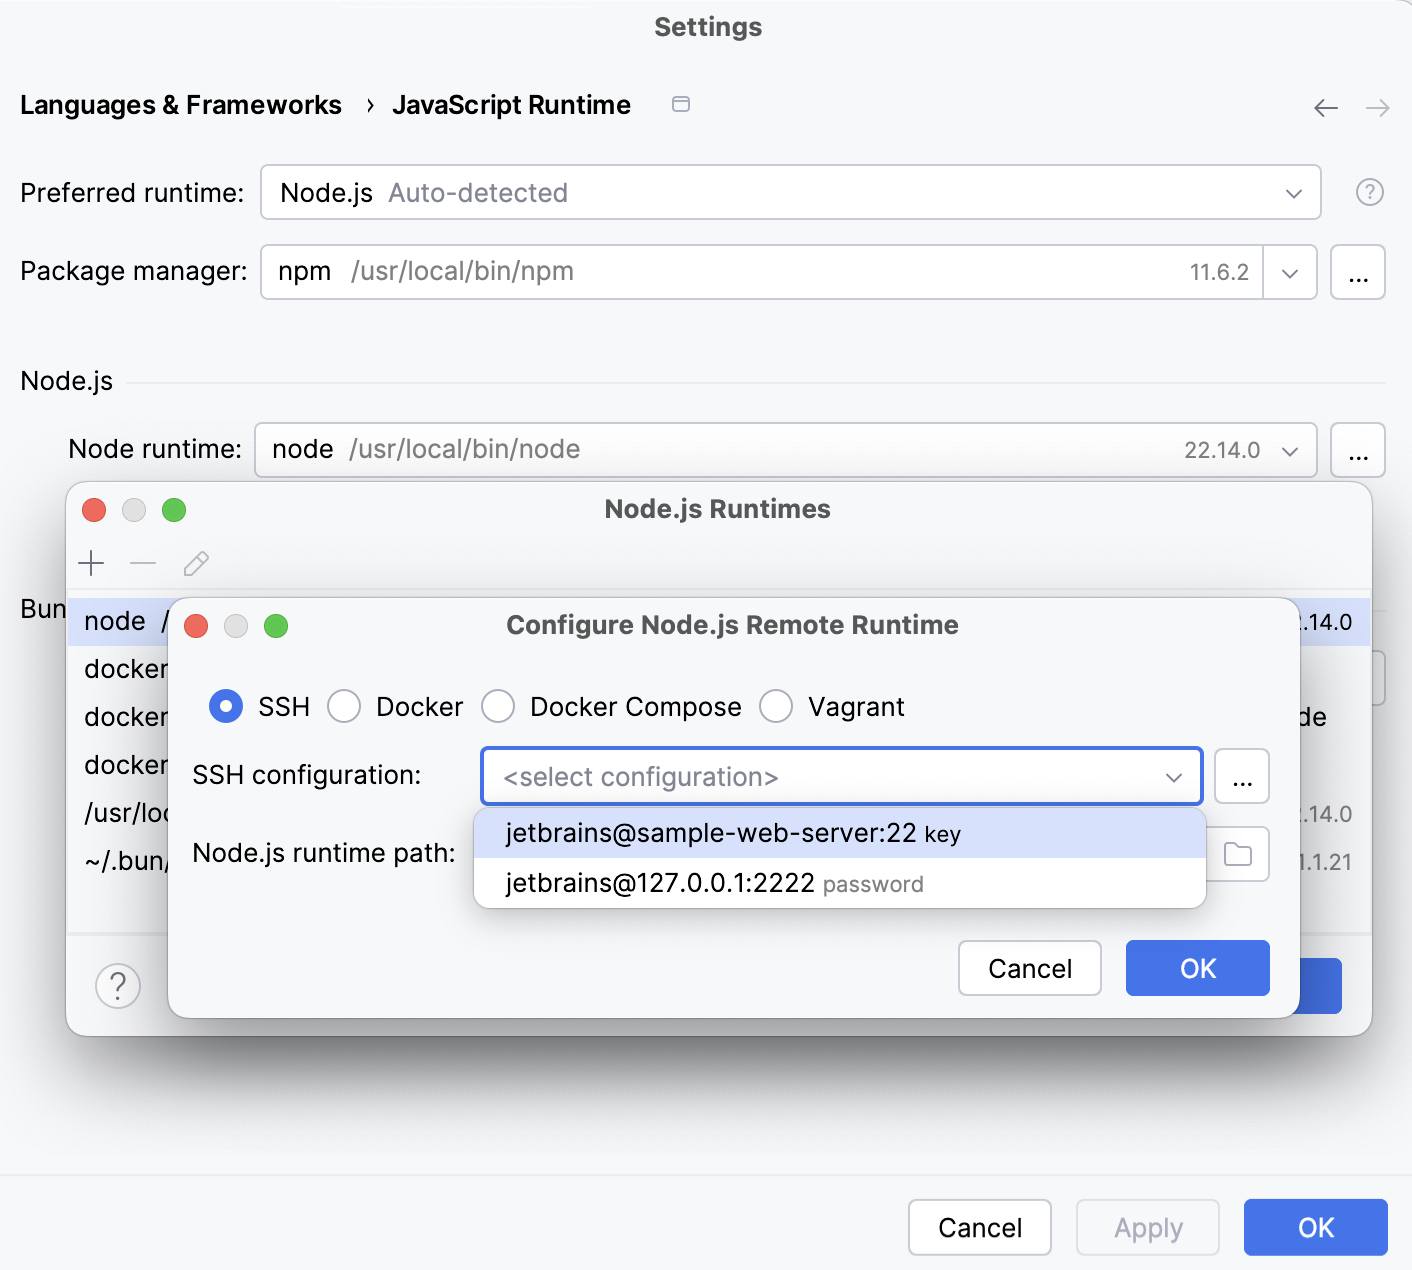
In the Configure Node.js Remote Runtime dialog that opens, select SSH.
Select an SSH configuration to use.
Alternatively, click
and create a new SSH configuration as described in Create SSH configurations.
Click OK to return to the Node.js Interpreters dialog where the new runtime is added to the list.
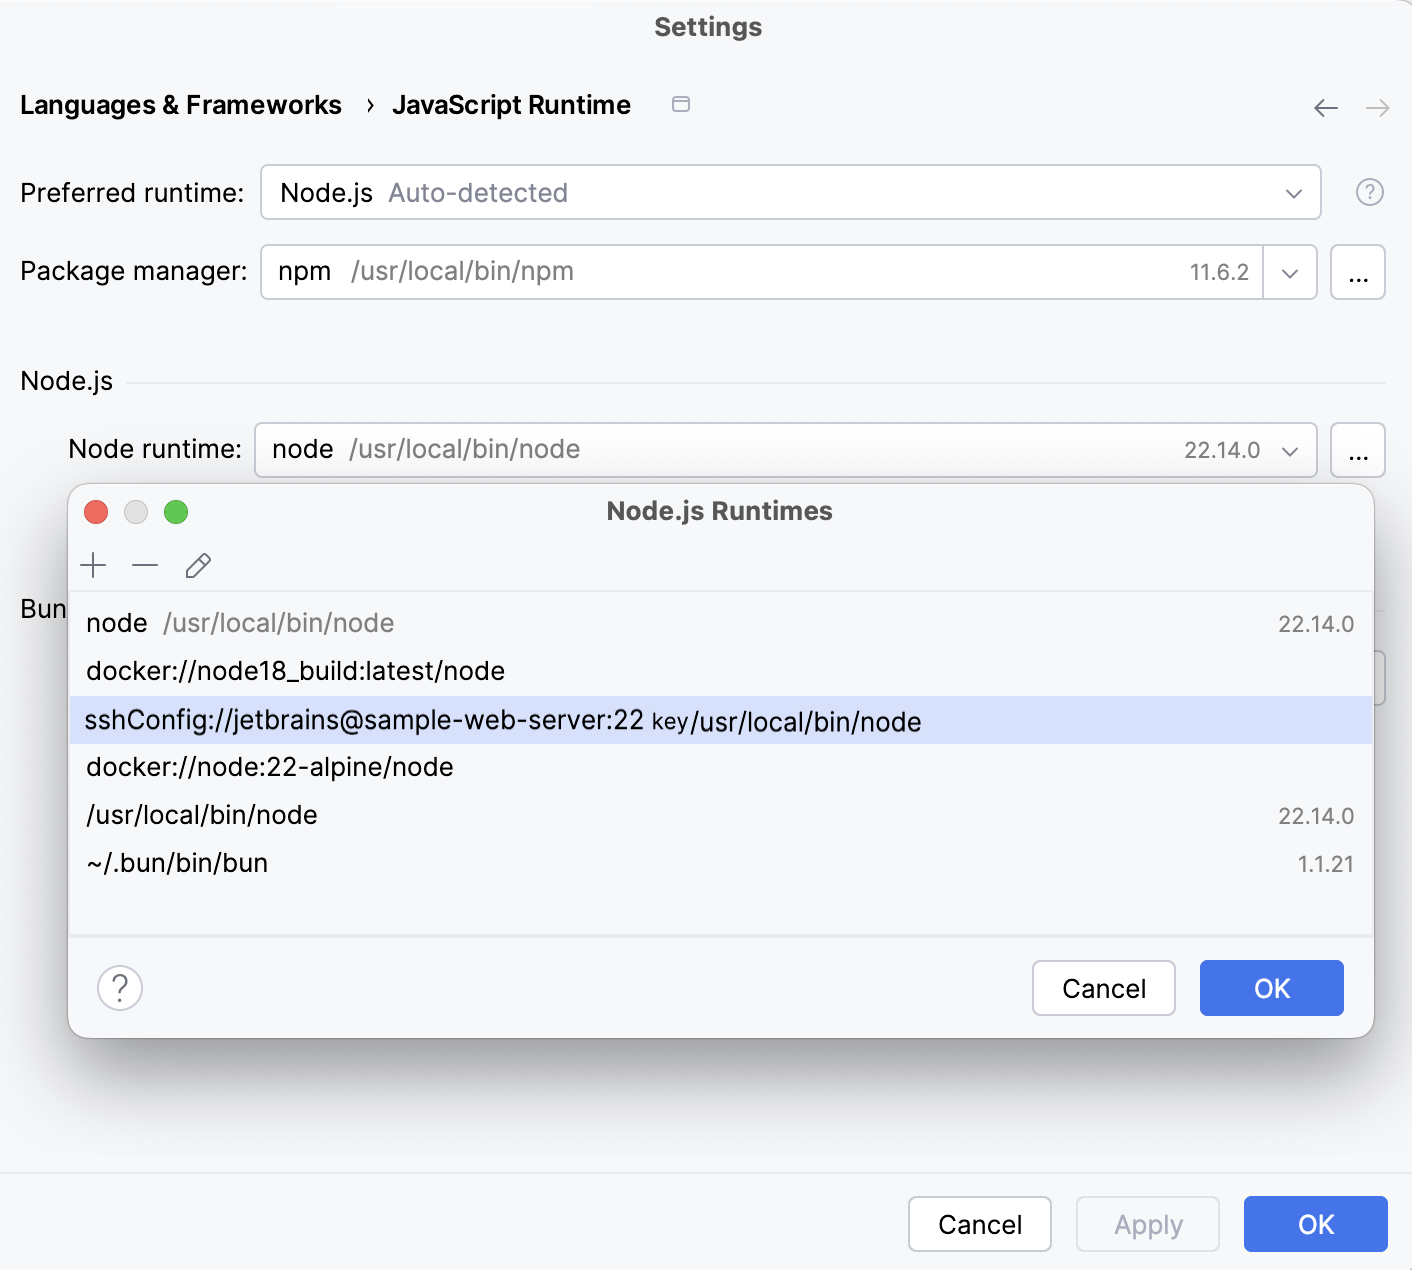
To set the newly configured runtime as project default, select it in the list and click OK to return to the JavaScript Runtime dialog.
IntelliJ IDEA automatically uses this interpreter every time you select the
Projectalias from Node runtime lists, for example, when creating run/debug configurations.To use the package manager associated with the new runtime for managing your project dependencies, set this package manager as default in your project. To do that, specify the location of the package manager in the Package manager field.
The default location for npm executable is
/usr/local/lib/node_modules/npm.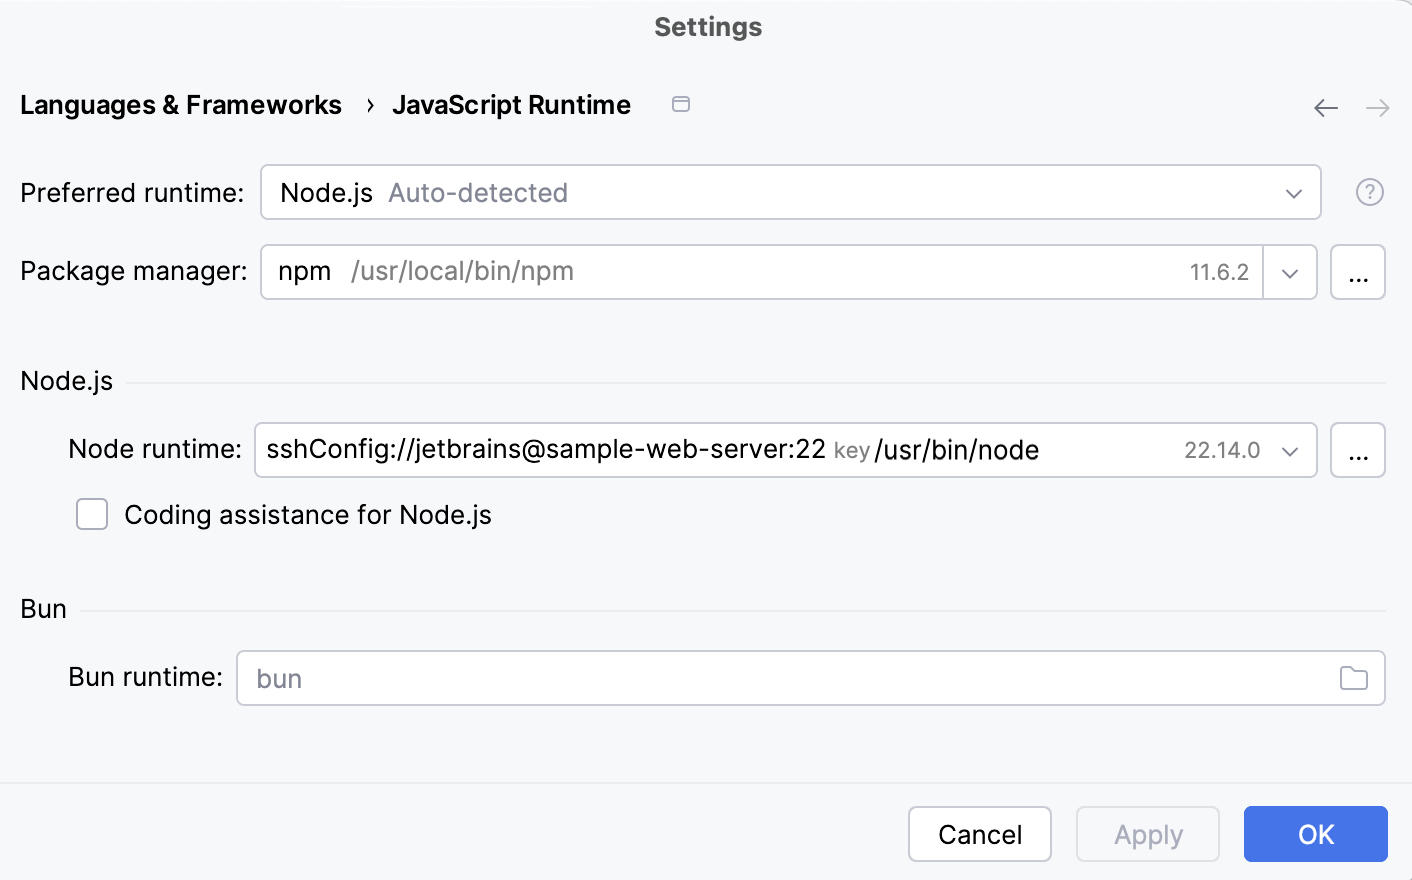
Configure a remote Node.js runtime via SSH in a run/debug configuration
Go to . In the Edit Configuration dialog that opens, click
on the toolbar and select Node.js from the context menu. The Run/Debug Configuration: Node.js dialog opens.
Click
next to the Node runtime field.
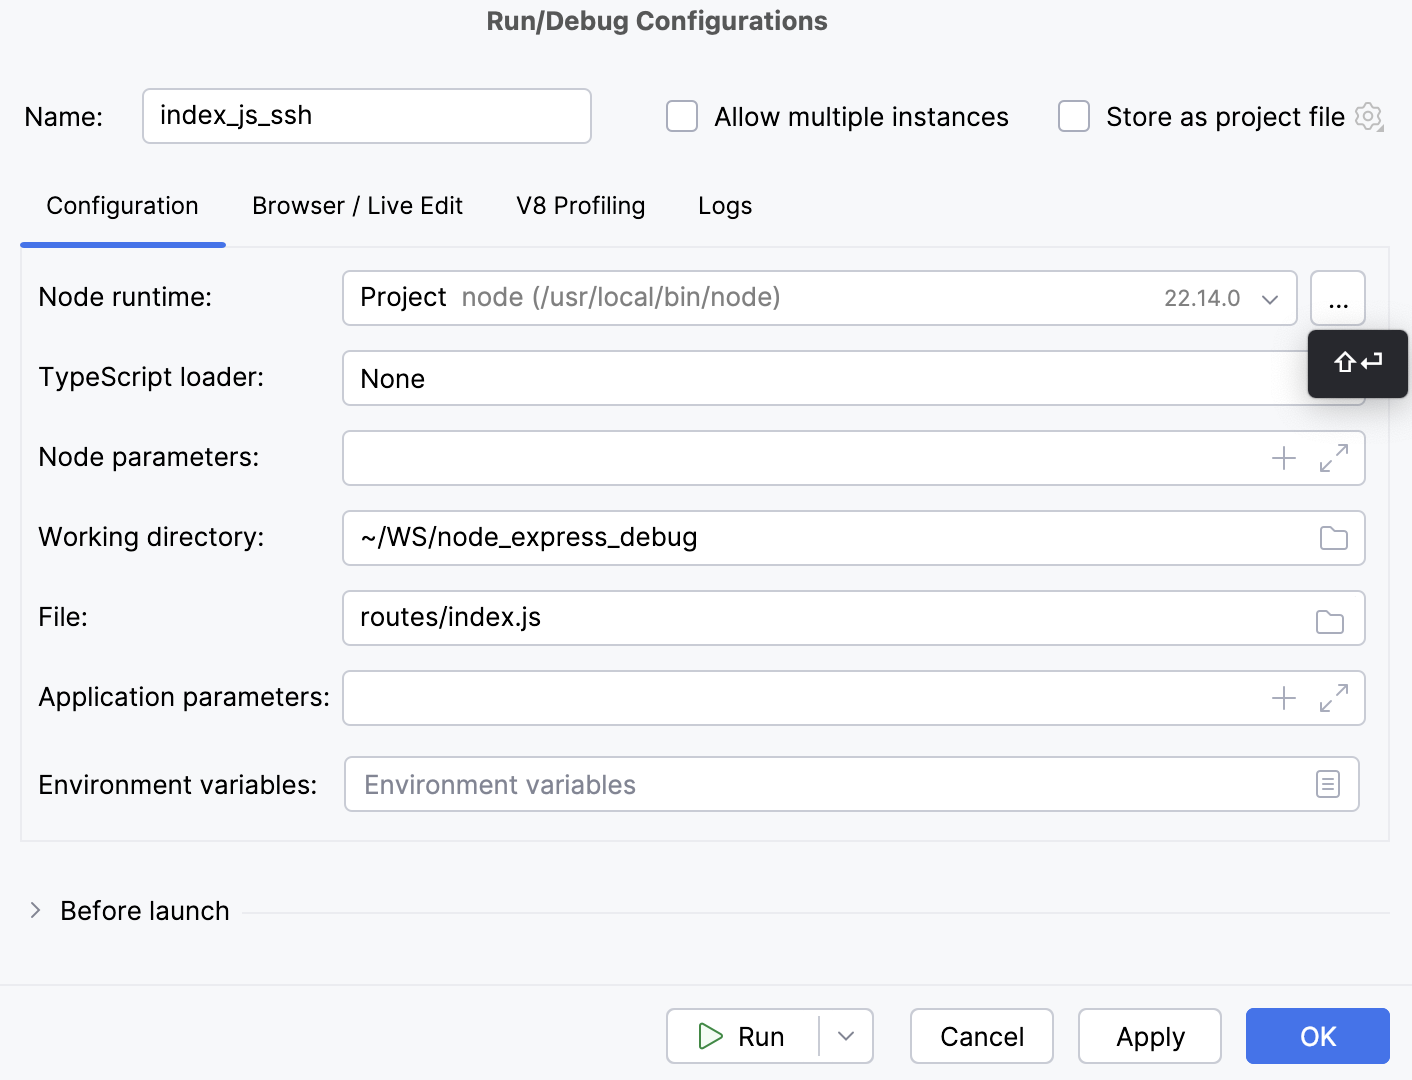
The Node.js Runtimes dialog opens.
Click
on the toolbar and select Add Remote from the context menu.
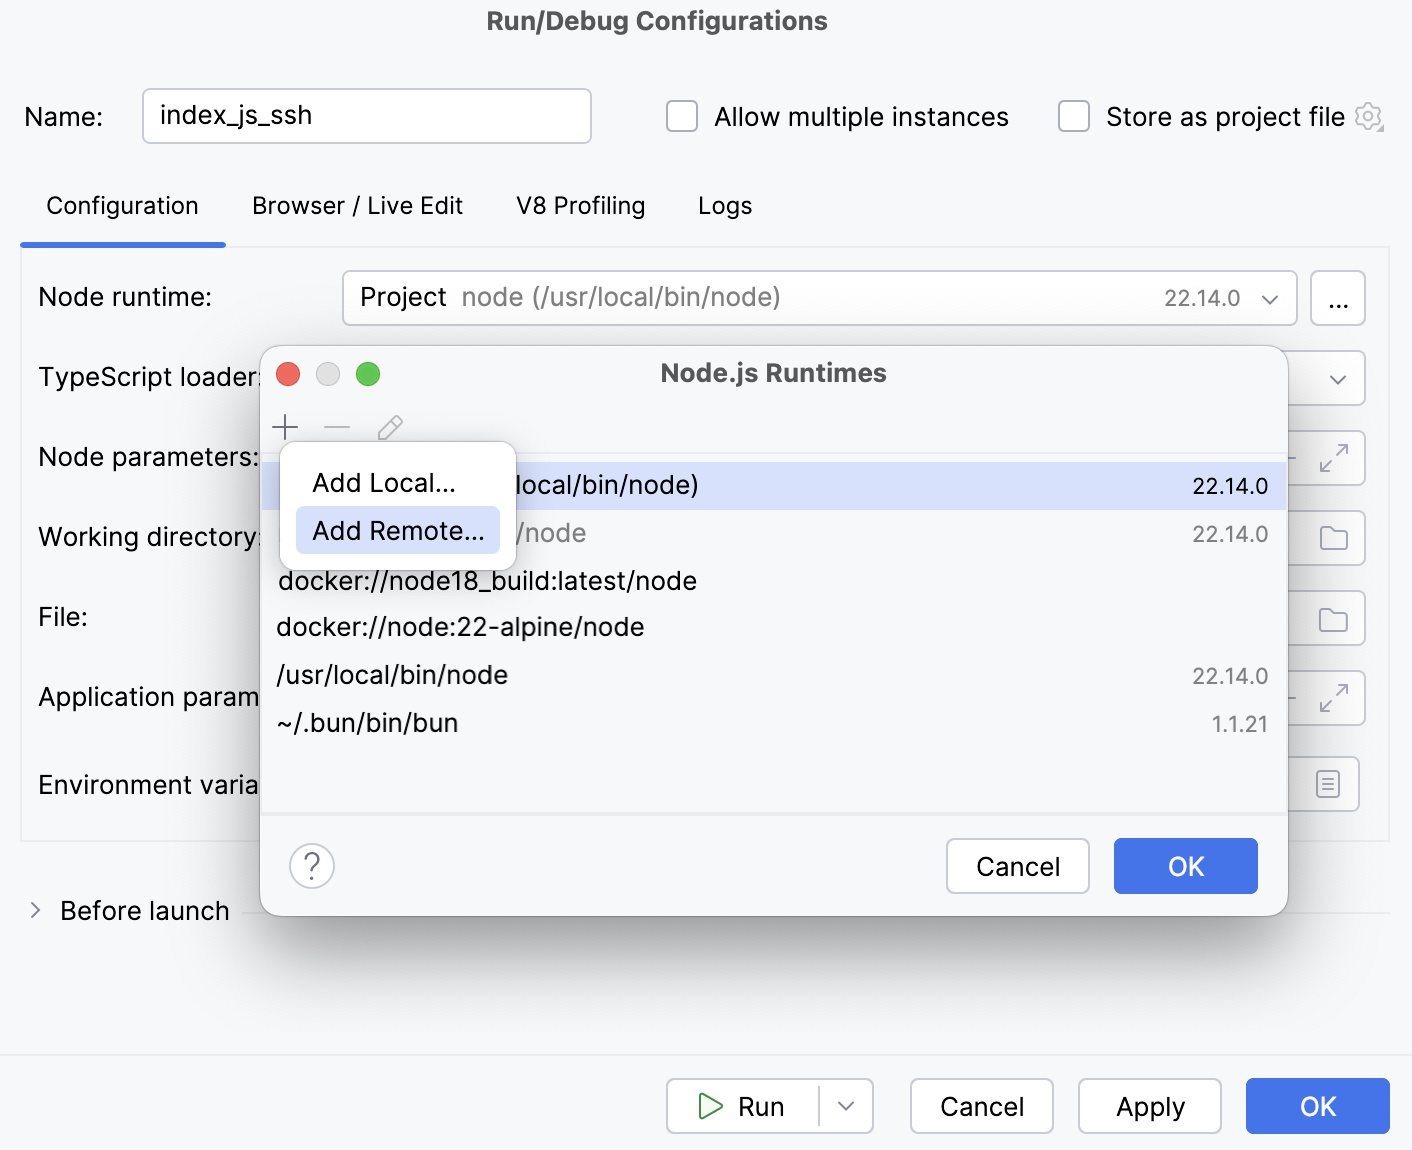
Configure a remote Node.js runtime via SSH as described above.
Remote Node.js runtime in a Docker container
Before you start
Install and enable the Node.js Remote Interpreter plugin on the Settings | Plugins page, tab Marketplace, as described in Installing plugins from JetBrains Marketplace.
Make sure the Node.js and Docker required plugins are enabled on the Settings | Plugins page, tab Installed. For more information, refer to Managing plugins.
Download, install, and configure Docker as described in Docker
Node.js runtimes in Docker are configured in the Configure Node.js Remote Interpreter dialog. You can open this dialog from the JavaScript Runtime page of the Settings dialog or later, when you create or edit a Node.js run/debug configuration for running or debugging your application in Docker.
The recommended way is to configure a remote Node.js runtime in the Settings dialog. In this case you can set the runtime and the associated package manager as default for your project. As a result, you can not only run and debug your app with configured Node.js runtime in Docker but also manage your project dependencies, run tests, and lint your code.
A remote Node.js runtime that you configure right in the Node.js run/debug configuration can be used only with this run/debug configuration.
Configure a Node.js runtime in the Settings dialog
Go to . In the Edit Configuration dialog that opens, click
on the toolbar and select Node.js from the context menu.
In the Run/Debug Configuration: Node.js dialog that opens, click
next to the Node runtime field.
In the Node.js Runtimes dialog with a list of all the currently configured runtimes, click
on the toolbar and select Add Remote from the context menu.
In the Configure Node.js Remote Runtime dialog that opens, select the Docker option.
In the Server field, specify the Docker configuration to use. For more information, refer to Configure the Docker daemon connection settings. Select a configuration from the list or click
and create a new configuration on the Docker page that opens.
In the Image name field, specify the base Docker image to use. Choose one of the previously downloaded or your custom images from the list or type the image name manually, for example,
node:argonormhart/alpine-node. When you later launch the run configuration, Docker will search for the specified image on your machine. If the search fails, the image will be downloaded from the Docker Official Images repository on the Docker Registry page.The Node.js runtime path field shows the location of the default Node.js runtime from the specified image.
When you click OK, IntelliJ IDEA closes the Configure Node.js Remote Interpreter dialog and brings you to the Node.js Runtimes dialog where the new runtime configuration is added to the list. Click OK to return to the run configuration.
Configure a Node.js runtime in the Node.js run/debug configuration
Go to . In the Edit Configuration dialog that opens, click
on the toolbar and select Node.js from the context menu. The Run/Debug Configuration: Node.js dialog opens.
Click
next to the Node runtime field. The Node.js Runtimes dialog opens.
Click
on the toolbar and select Add Remote from the context menu.
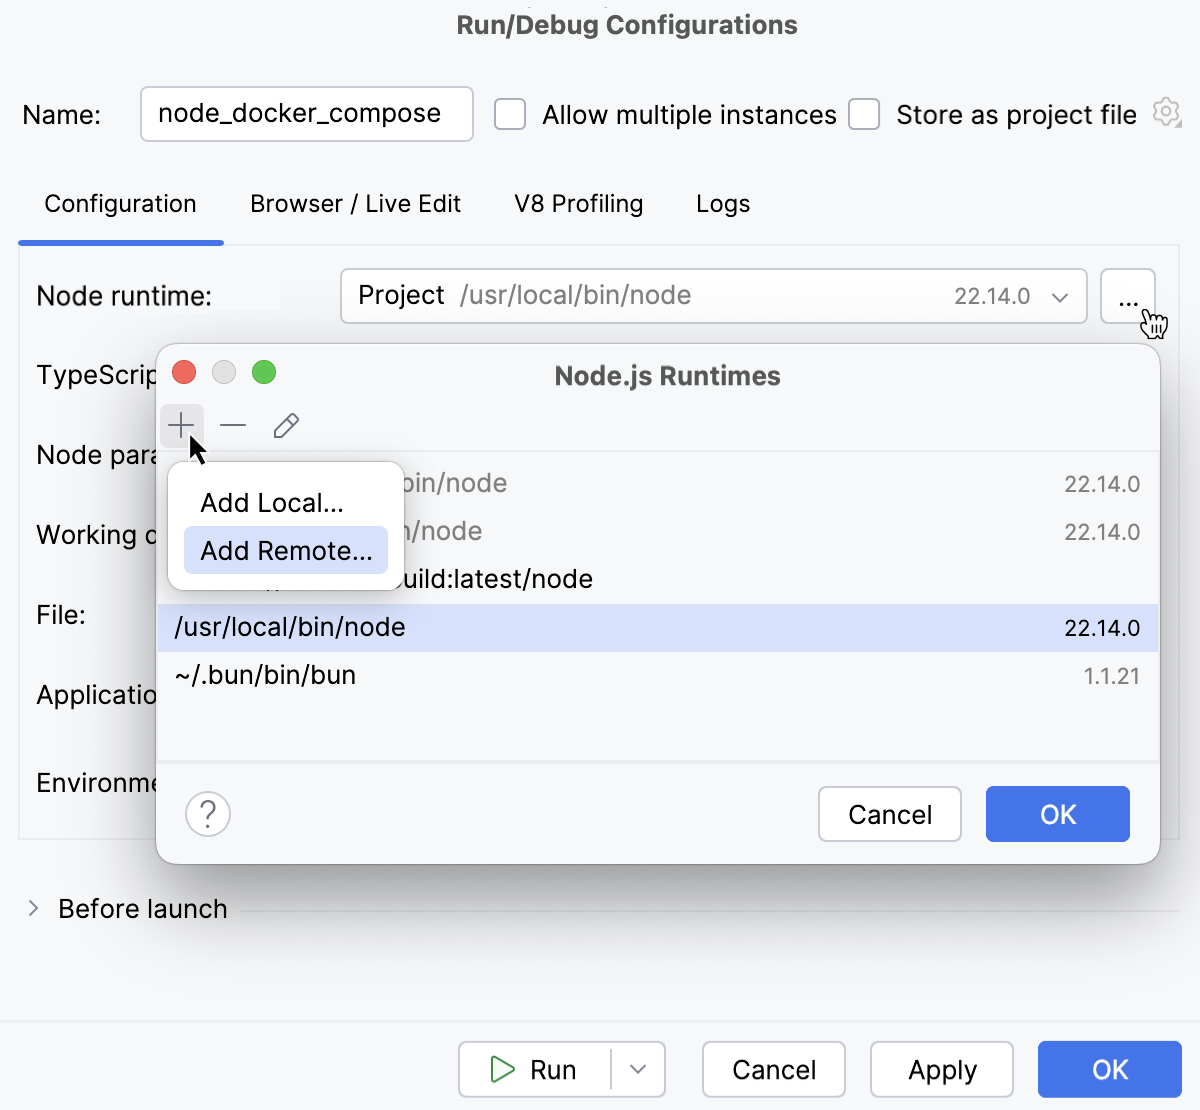
Configure a remote Node.js runtime as described above.
Using a remote Node.js runtime in a Docker container with a Docker Compose definition
With Docker Compose, you can run a Node.js server and your application code as separate services. Each service can be scaled by adding more containers if necessary. This enables you to perform efficient development and testing in a dynamic environment that is similar to production one.
Before you start
Install and enable the Node.js Remote Interpreter plugin on the Settings | Plugins page, tab Marketplace, as described in Installing plugins from JetBrains Marketplace.
Make sure the Node.js and Docker required plugins are enabled on the Settings | Plugins page, tab Installed. For more information, refer to Managing plugins.
Download, install, and configure Docker as described in Docker
Node.js runtimes in multi-container Docker application are configured in the Configure Node.js Remote Interpreter dialog. You can open this dialog from the JavaScript Runtime page of the Settings dialog or later, when you create or edit a Node.js run/debug configuration for running or debugging your application in a Vagrant environment.
The recommended way is to configure a remote Node.js runtime in the Settings dialog. In this case you can set the runtime and the associated package manager as default for your project. As a result, you can not only run and debug your app with configured Node.js runtime in Docker but also manage your project dependencies, run tests, and lint your code. See npm, pnpm, and yarn with Docker, Test your application, and ESLint with Docker below.
A remote Node.js runtime that you configure right in the Node.js run/debug configuration can be used only with this run/debug configuration.
Open the Settings dialog (Ctrl+Alt+S) and go to .
Click
next to the Node runtime field.

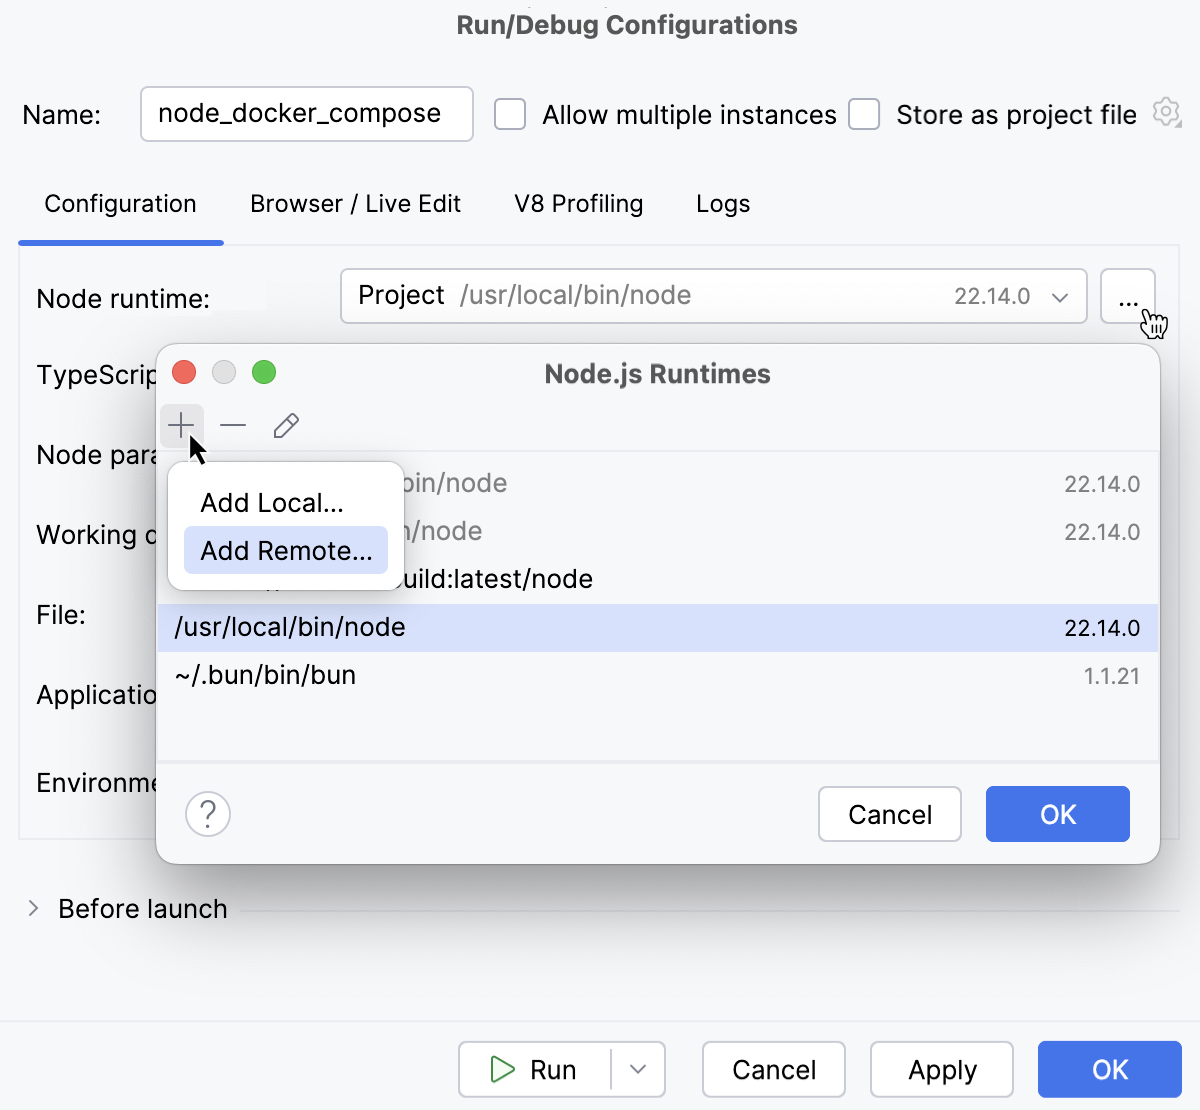
In the Node.js Runtimes dialog with a list of all the currently configured runtimes, click
on the toolbar and select Add Remote from the context menu.

In the Configure Node.js Remote Runtime dialog that opens, select Docker Compose.
From the Server list, select the Docker configuration to use.
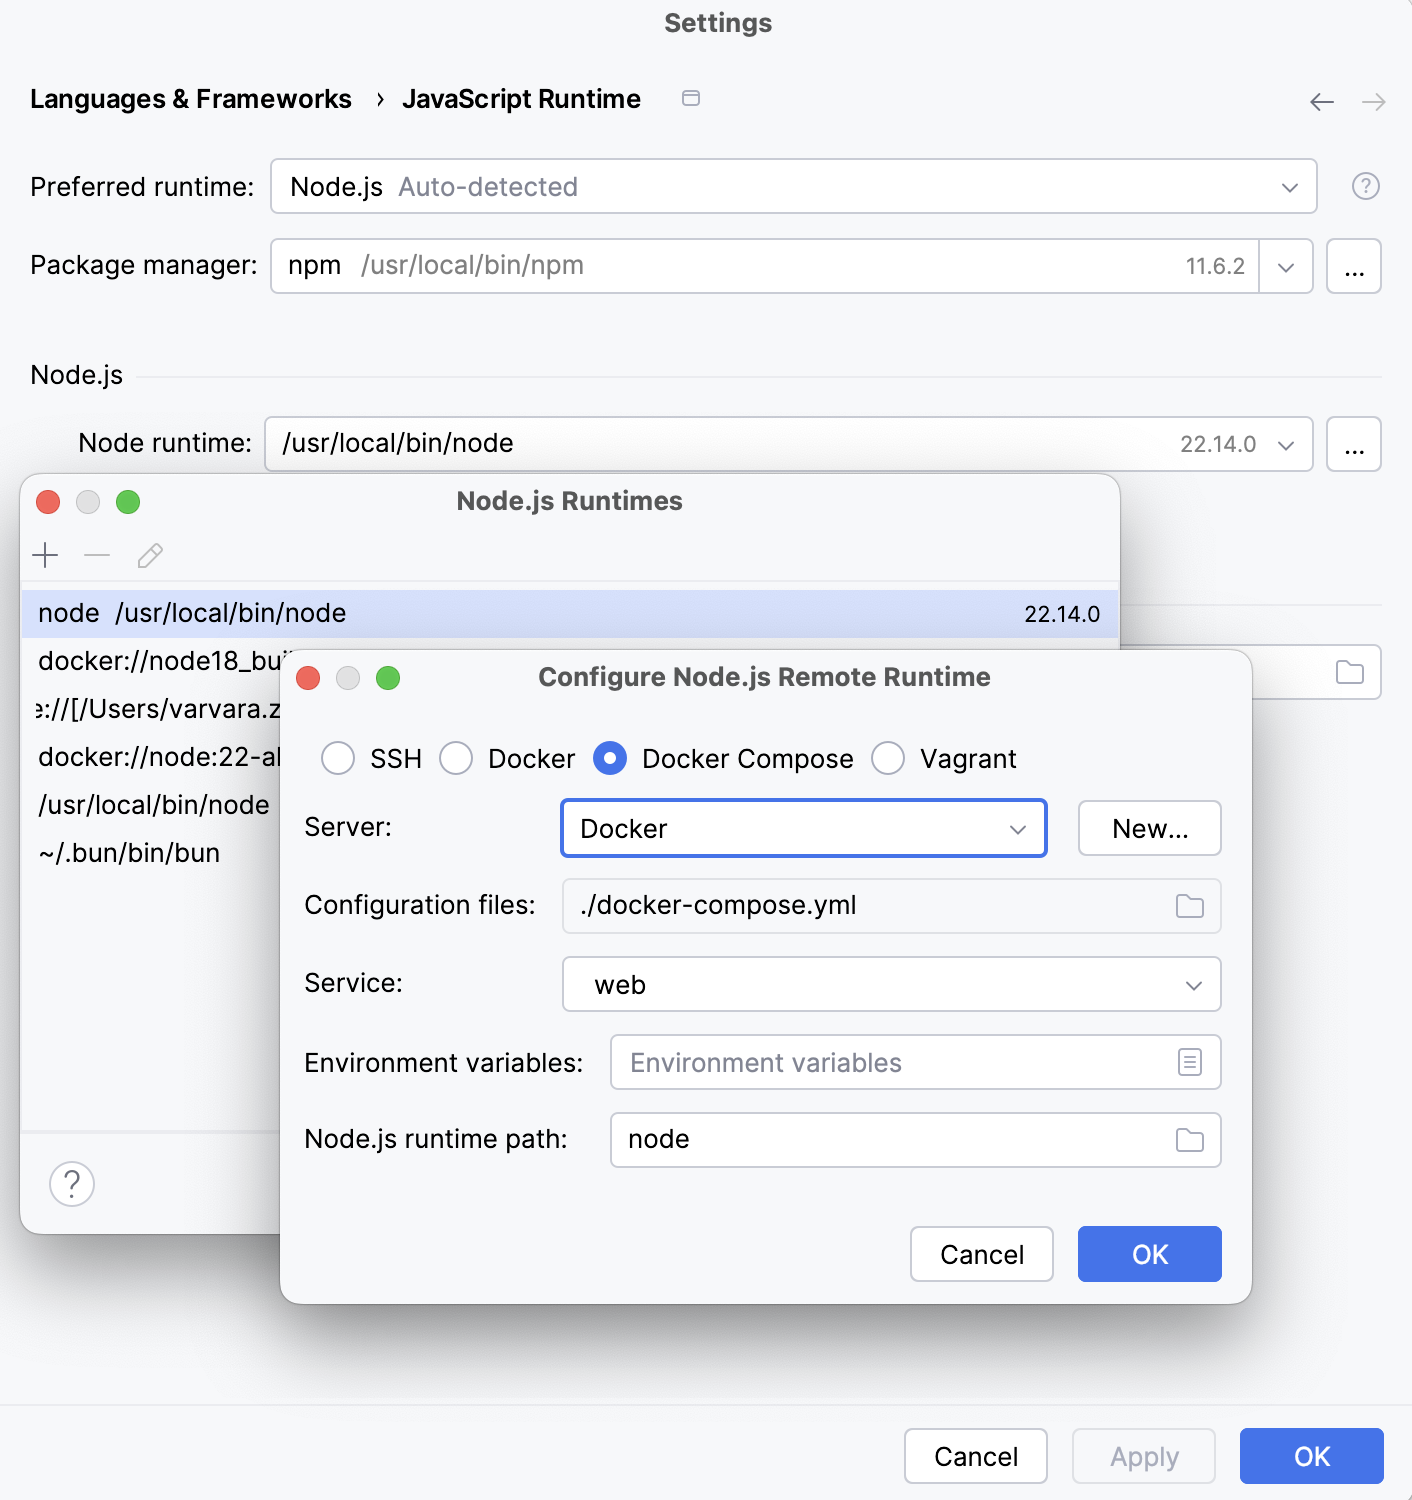
Alternatively, click New next to the field and configure a Docker server as described in Enable Docker support.
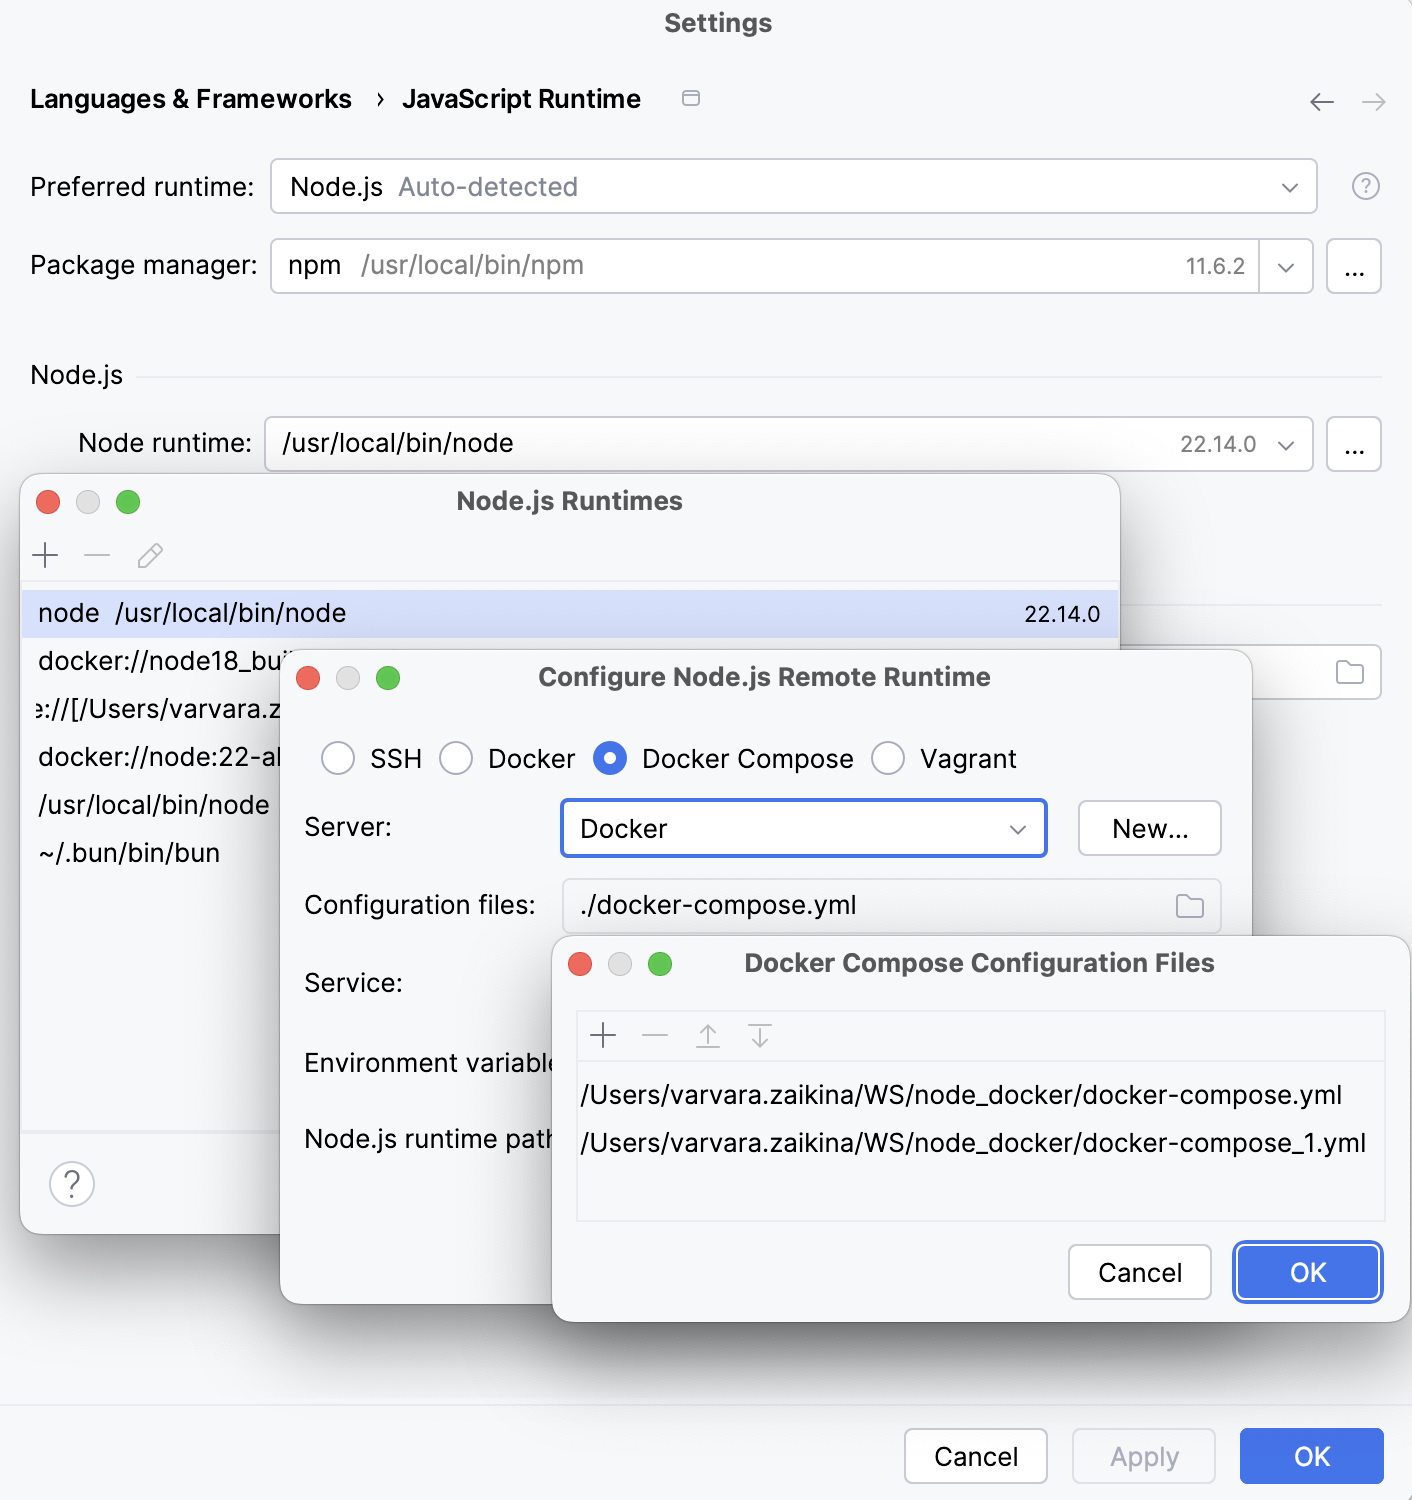
In the Configuration files field, specify the docker-compose configuration files to use. Click Browse and create a list of configuration files in the Docker Compose Configuration Files dialog that opens.
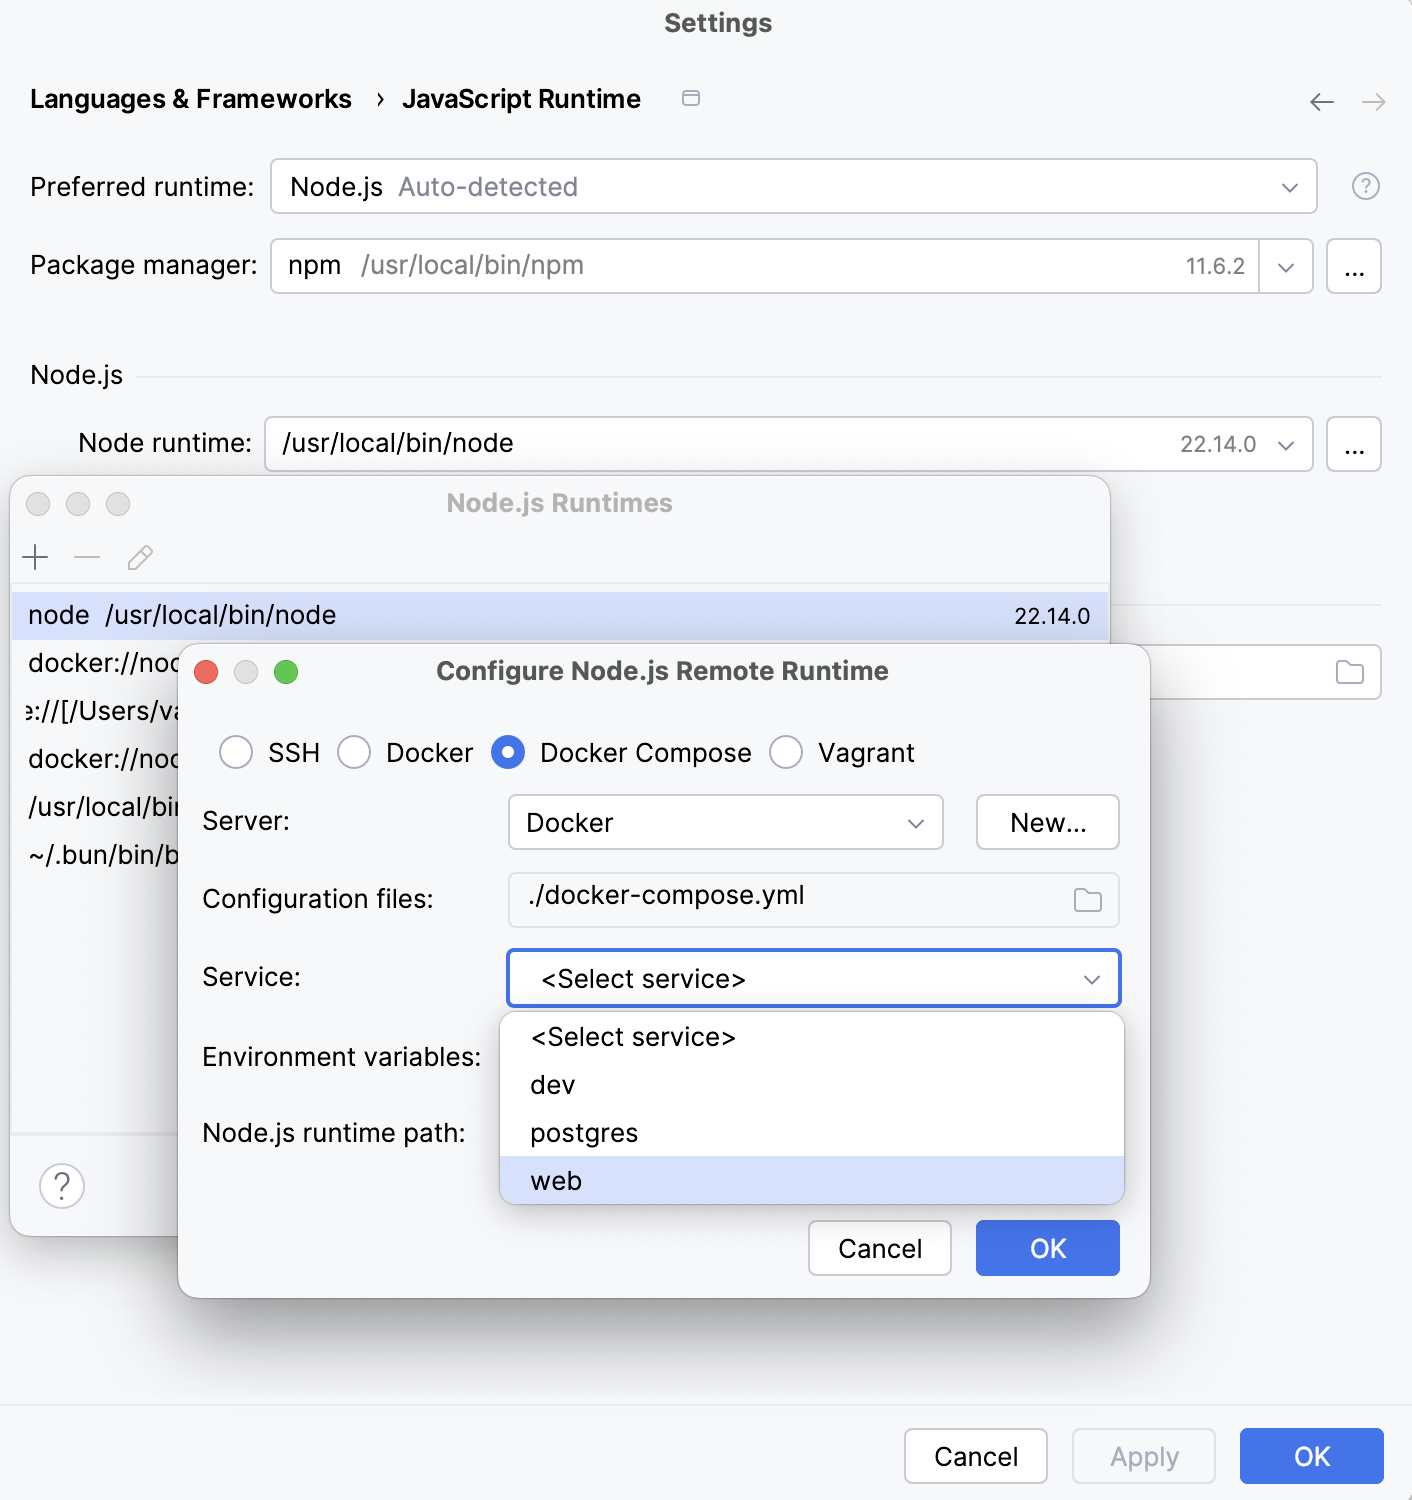
From the Service list, select the service to use:
Click OK to return to the Node.js Interpreters dialog where the new runtime is added to the list. To set the newly configured runtime as project default, select it in the list and click OK to return to the JavaScript Runtime dialog.
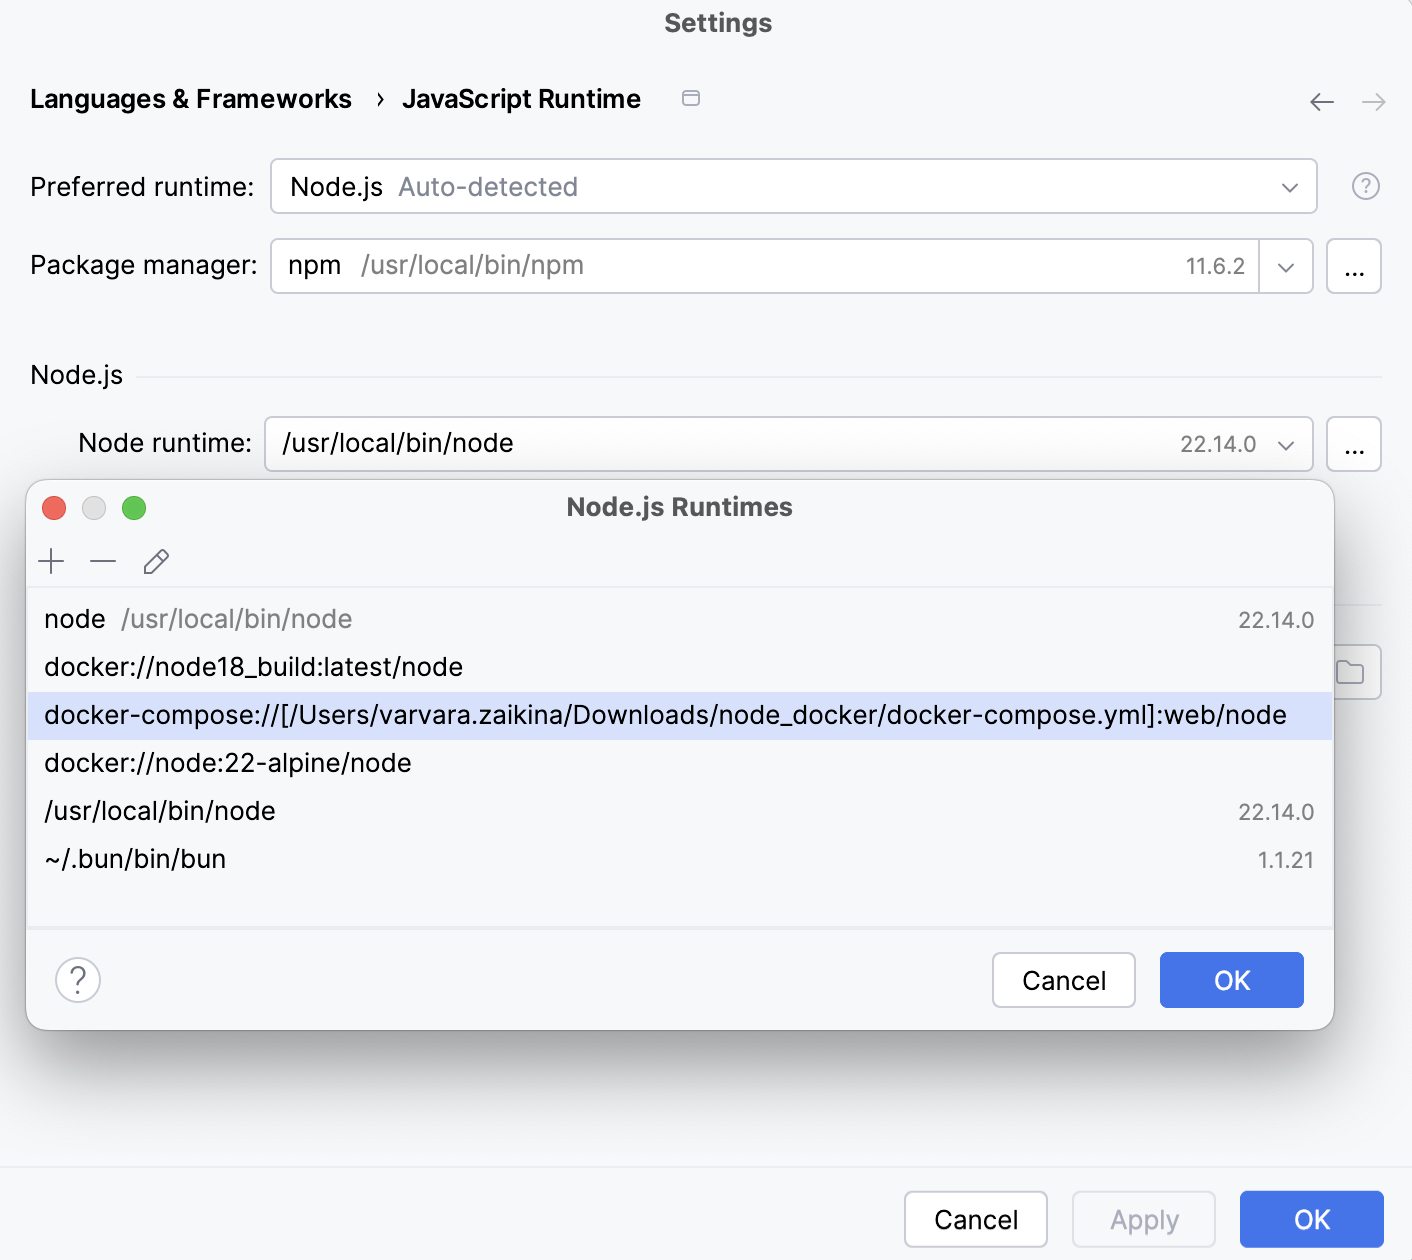
IntelliJ IDEA automatically uses this interpreter every time you select the Project alias from Node runtime lists, for example, when creating run/debug configurations.
To use the package manager associated with the new runtime for managing your project dependencies, set this package manager as default in your project. To do that, specify the location of the package manager in the Package manager field. Learn more from Specify the default Node.js runtime and package manager in a project.
Specify the default Node.js runtime and package manager in a project
IntelliJ IDEA automatically uses the default project interpreter every time you select the Project alias from Node runtime lists, for example, when creating run/debug configurations.
The default project package manager is used automatically for managing dependencies, for example, when you run <package manager> install from a package.json file or install third-party tools, such as ESLint, Prettier, and so on.
Open the Settings dialog (Ctrl+Alt+S) and go to .
Make sure Node.js is selected in the Preferred runtime list.
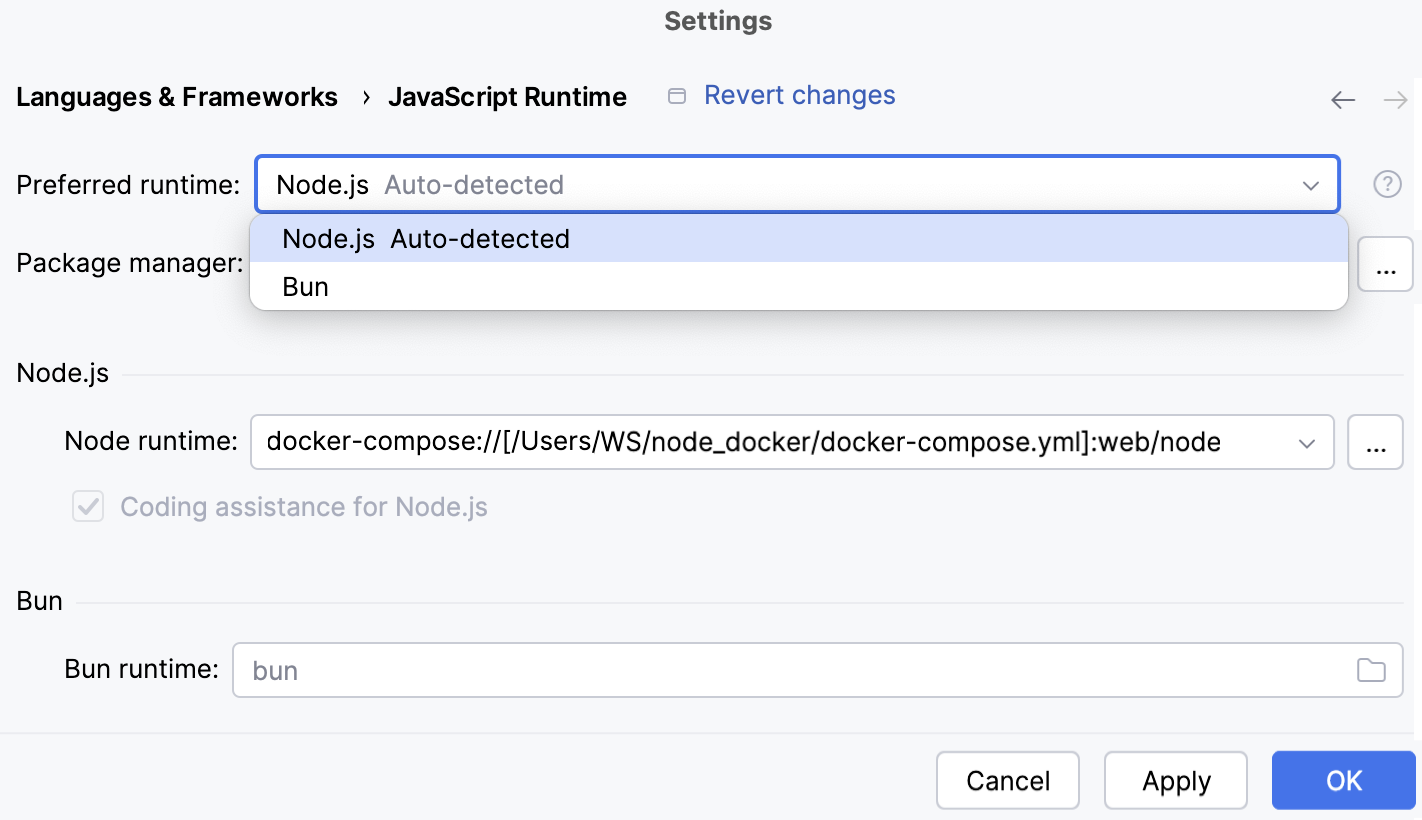
From the Node runtime list, select the configuration to use by default in the current project.
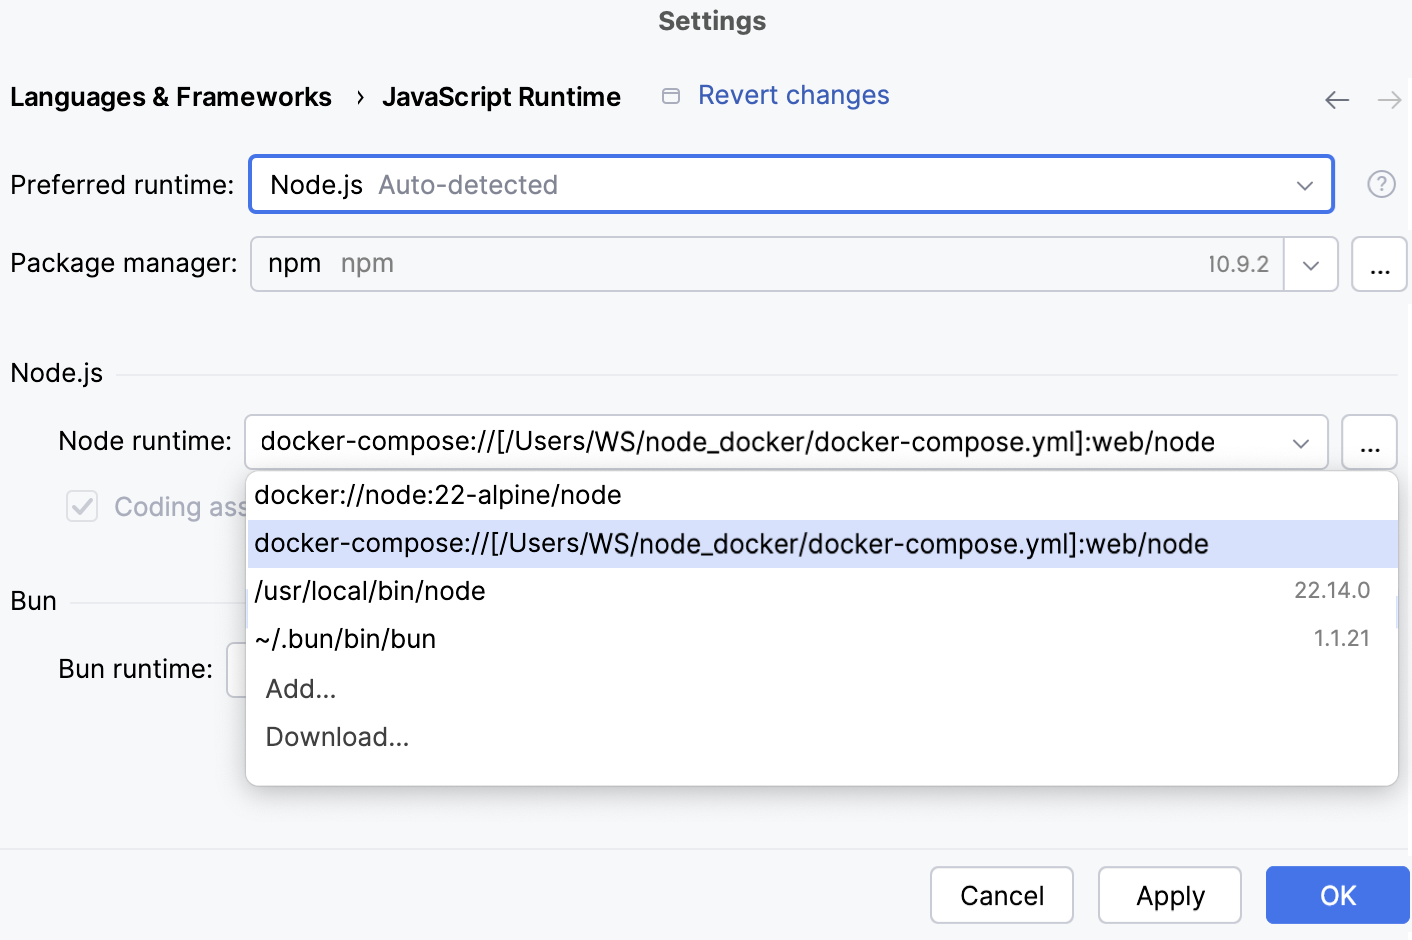
From the Package manager list, select the alias associated with the package manager to use. IntelliJ IDEA detects its location automatically.
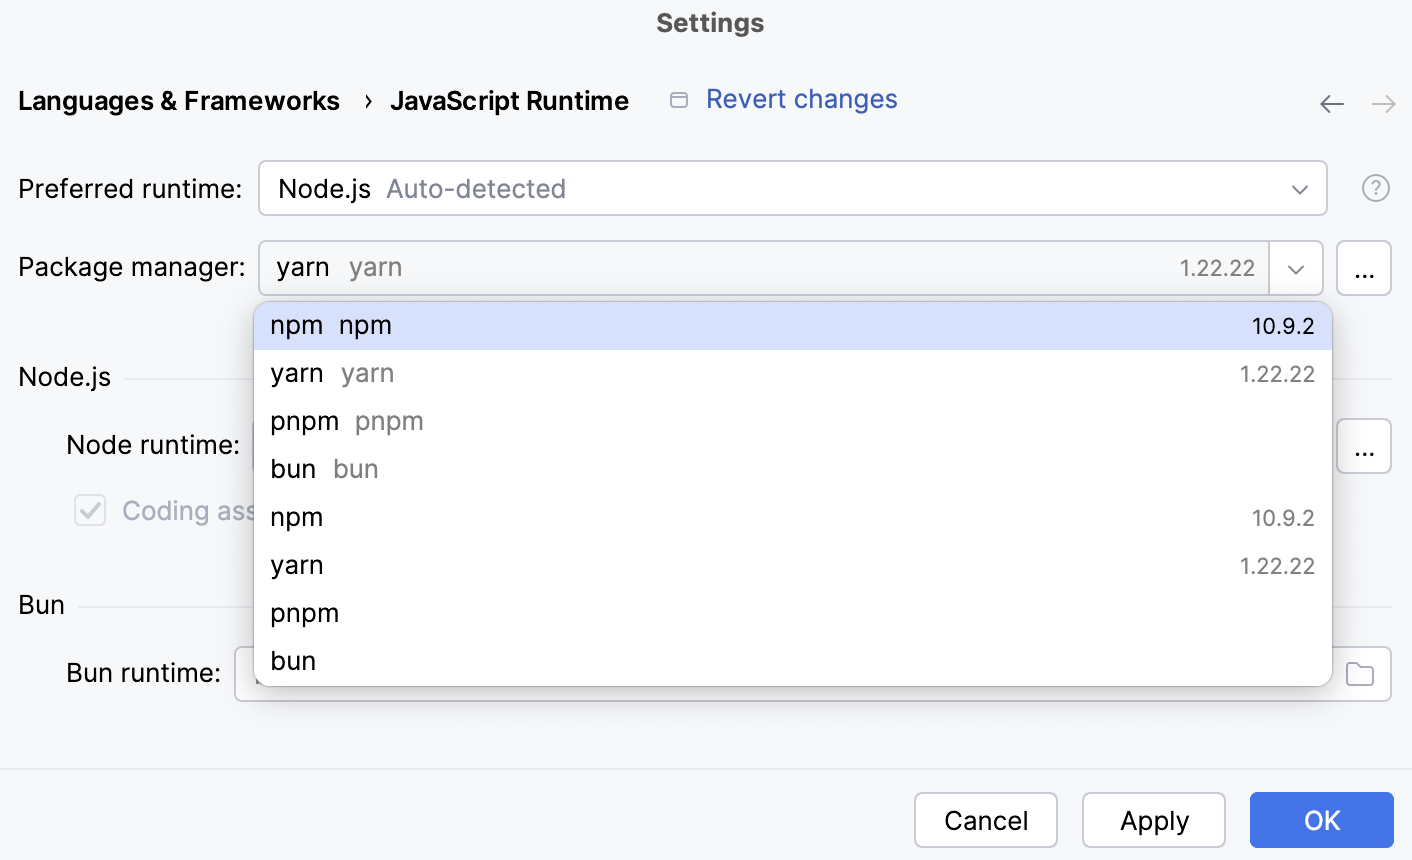
Alternatively, specify the location of the required package manager manually.
The default location for npm executable is
/usr/local/lib/node_modules/npm.The default location for pnpm depends on the installation method:
/usr/local/lib/node_modules/pnpm for installation through npm.
/usr/local/pnpm-global/<version>/node_modules/pnpm for installation through curl (
curl -f https://get.pnpm.io/<version>.js | node - add --global pnpm).
Learn more from the pnpm official website.
The default location for yarn is /opt/yarn-<version>5, for example, /opt/yarn-v1.22.5.
Configure a Node.js runtime with a Docker Compose definition in the Node.js run/debug configuration
Go to . In the Edit Configuration dialog that opens, click
on the toolbar and select Node.js from the context menu. The Run/Debug Configuration: Node.js dialog opens.
In the File field, specify the path to the main file of the application that starts it (for example, bin/www for Express applications).
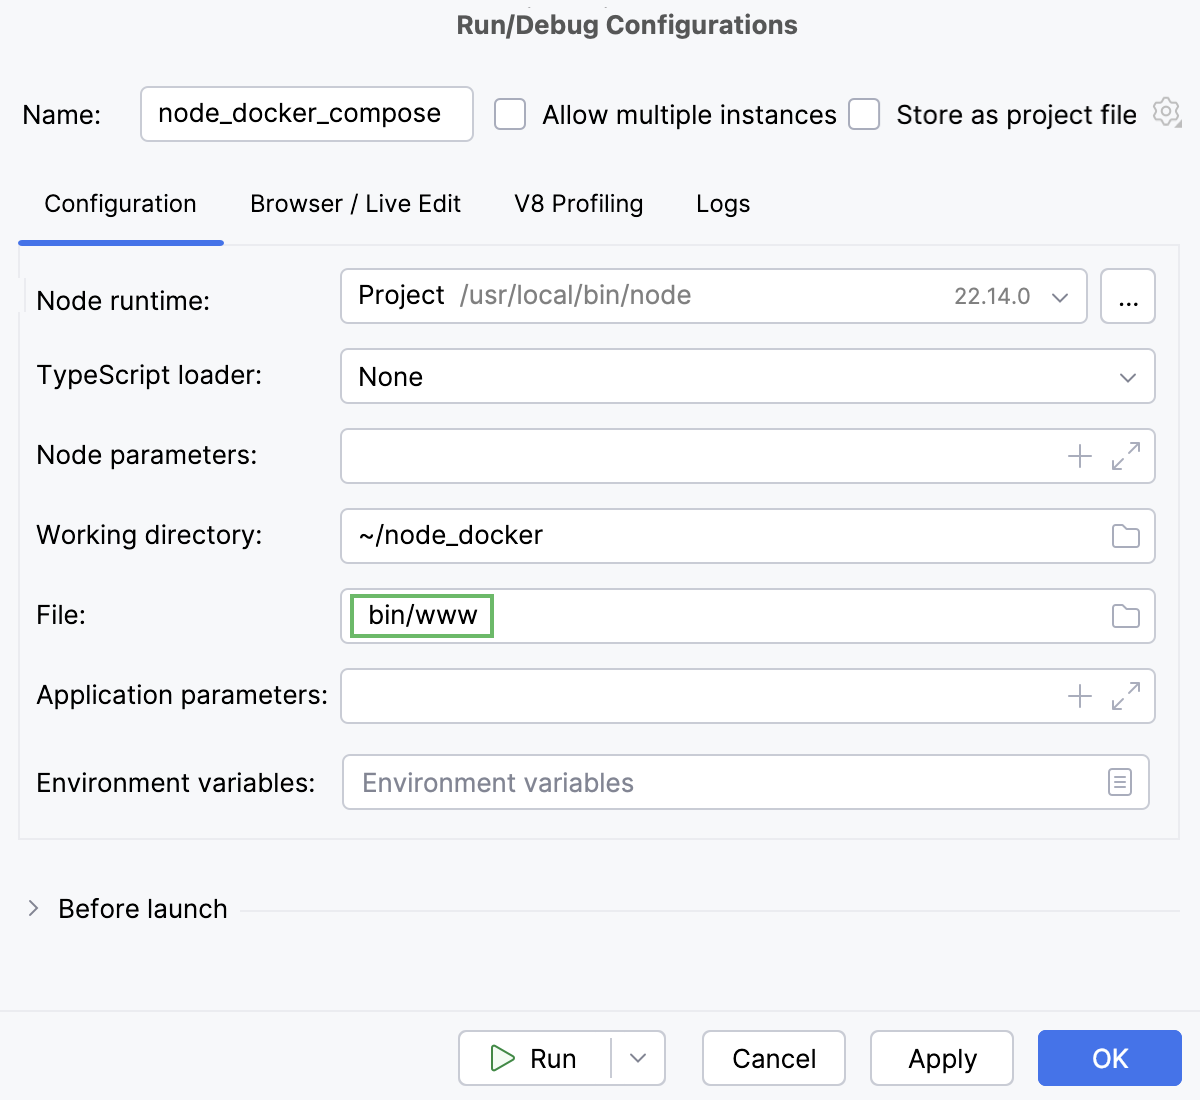
If necessary, specify some optional settings as described in Running and debugging Node.js applications.
From the Node runtime list, select the relevant remote Node.js runtime via Docker Compose.
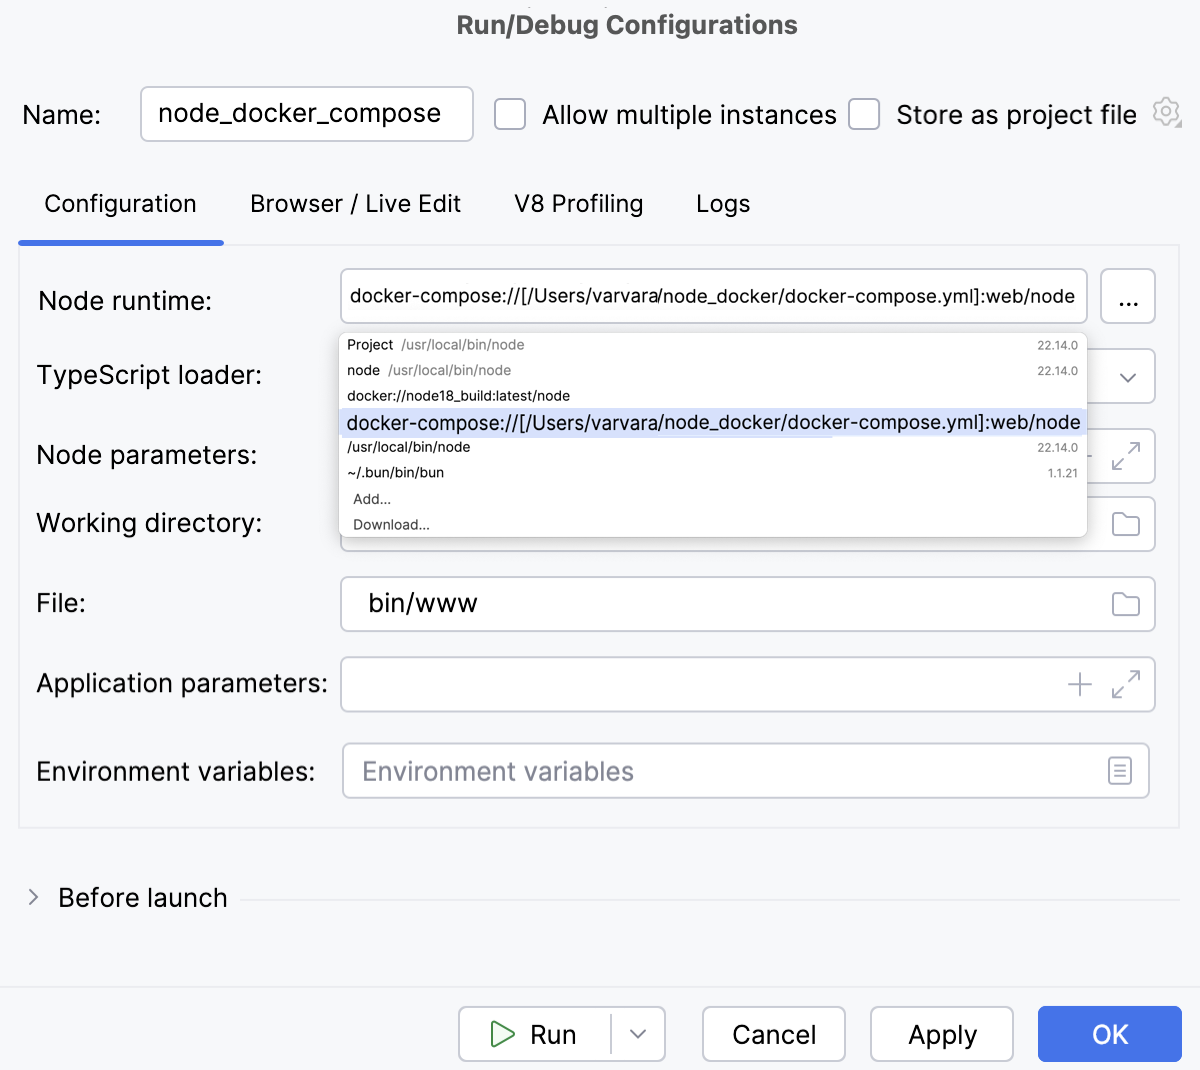
Alternatively, click
next to the Node runtime field. and configure a remote Node.js runtime as described above.
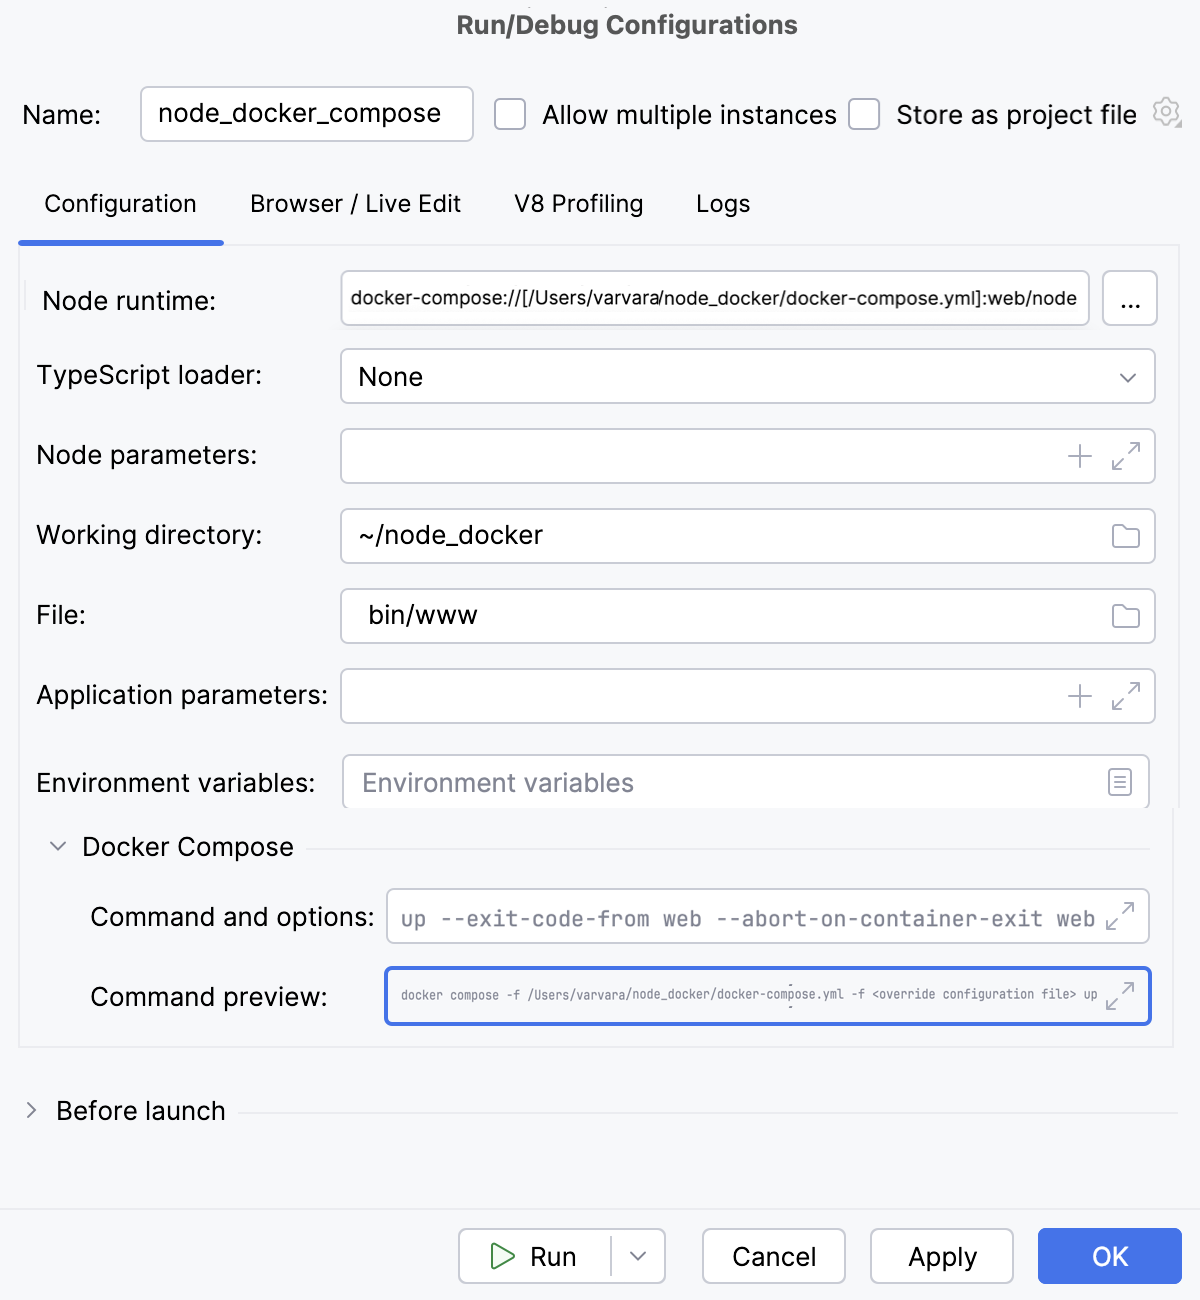
In the Docker Compose area, specify the commands and options to be passed to Docker Compose. Accept the default settings or click
and specify custom ones, for example, custom Docker Compose flags, like
--rmor--service-ports. Learn more from the Docker official website.Check the Command Preview.
Node.js runtime in a Vagrant instance
With Vagrant, you can quickly bootstrap your Node.js application to run, debug, and profile it from IntelliJ IDEA.
Before you start
Install the Node.js, Node.js Remote Interpreter, and Vagrant plugins on the Settings | Plugins page, tab Marketplace, as described in Installing plugins from JetBrains Marketplace.
Make sure Vagrant and Oracle's VirtualBox are downloaded, installed, and configured on your computer. For more information, refer to Vagrant.
Make sure that the parent folders of the following executable files are added to the system PATH variable:
vagrant.bat or vagrant from your Vagrant installation. This should be done automatically by the Vagrant installer.
VBoxManage.exe or VBoxManage from your Oracle's VirtualBox installation.
Node.js runtimes in Vagrant environments are configured in the Configure Node.js Remote Interpreter dialog. You can open this dialog from the JavaScript Runtime page of the Settings dialog or later, when you create or edit a Node.js run/debug configuration for running or debugging your application in a Vagrant environment.
The recommended way is to configure a remote Node.js runtime in the Settings dialog. In this case you can set the runtime and the associated package manager as default for your project.
A remote Node.js runtime that you configure right in the Node.js run/debug configuration can be used only with this run/debug configuration.
Configure a Node.js runtime in the Settings dialog
Open the Settings dialog (Ctrl+Alt+S) and go to .
Click
next to the Node runtime field.

In the Node.js Runtimes dialog with a list of all the currently configured runtimes, click
on the toolbar and select Add Remote from the context menu.

In the Configure Node.js Remote Runtime dialog that opens, select Vagrant.
Specify the Vagrant instance folder that points at the environment you are going to use.
Technically, it is the folder where the VagrantFile configuration file for the desired environment is located. Based on this setting, IntelliJ IDEA detects the Vagrant host and shows it as a link in the Vagrant Host URL read-only field.
By default, the field shows the current project folder.
In the Node.js interpreter path field, specify the location of the Node.js executable file.
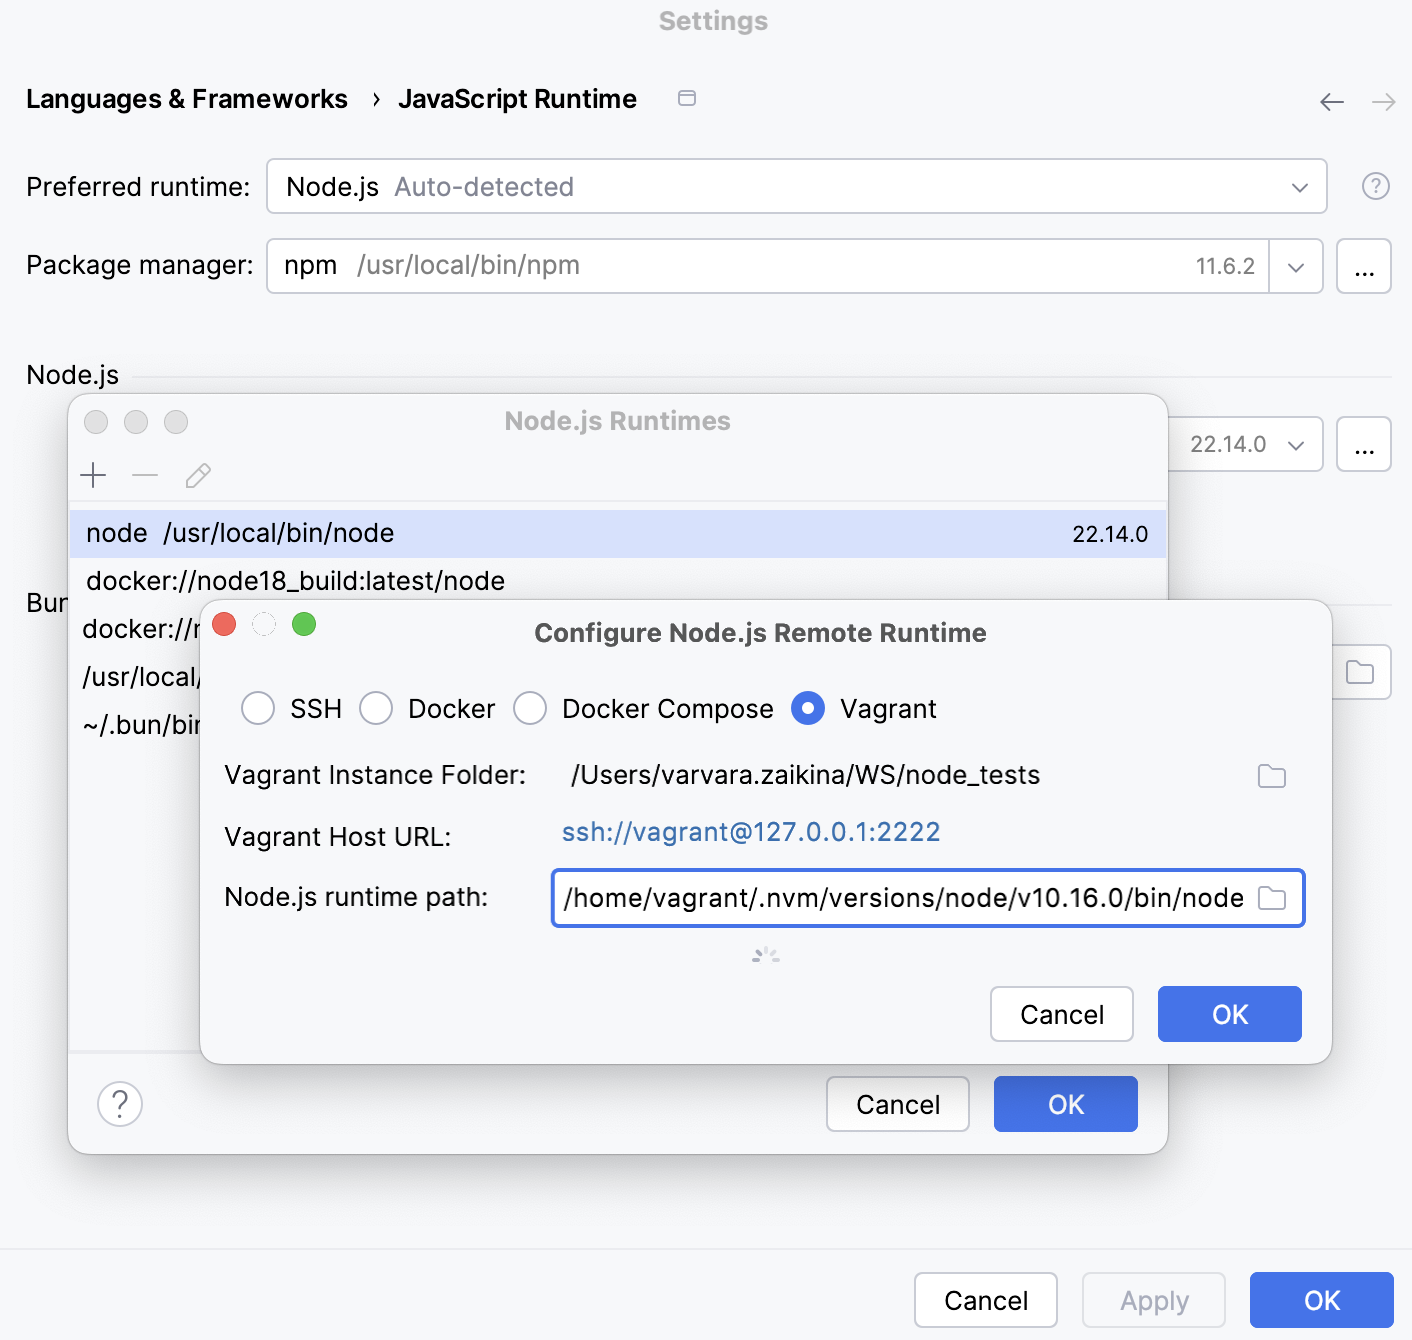
To locate the Node.js executable, open the embedded Terminal (Alt+F12) and type:
vagrant ssh whereis node exit
Click OK to return to the Node.js Interpreters dialog where the new runtime is added to the list.
To set the newly configured runtime as project default, select it in the list and click OK to return to the JavaScript Runtime dialog.
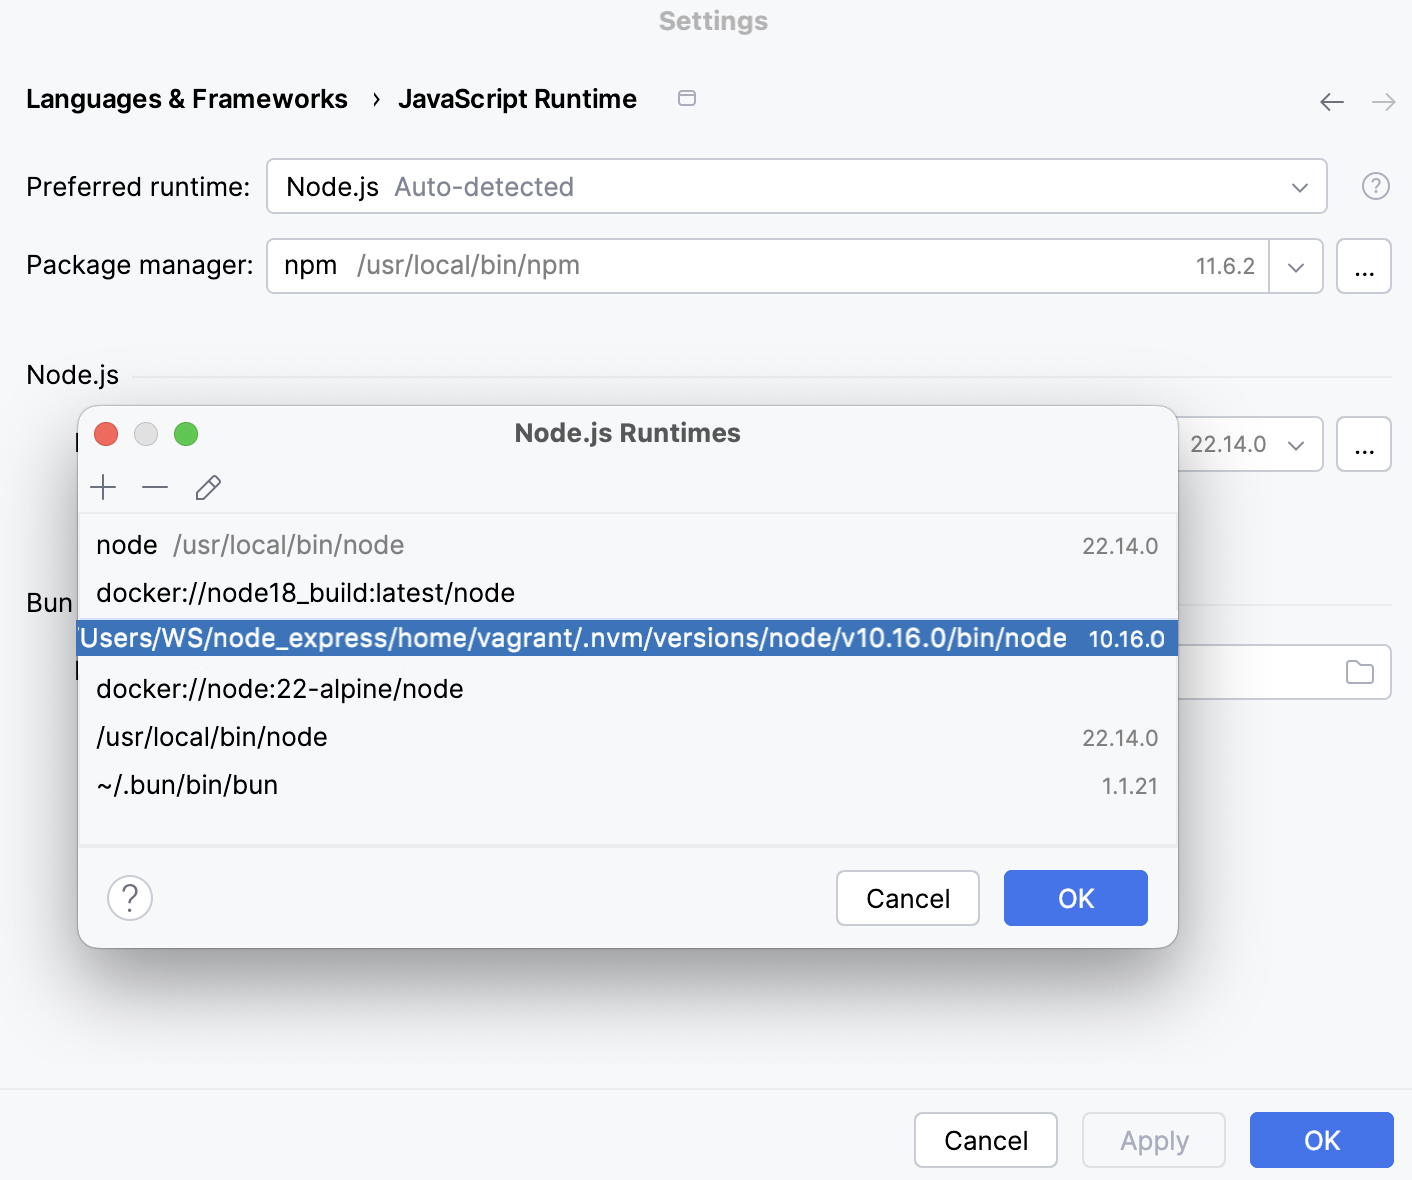
IntelliJ IDEA automatically uses this interpreter every time you select the
Projectalias from Node runtime lists, for example, when creating run/debug configurations.Specify the path to the package manager to use.
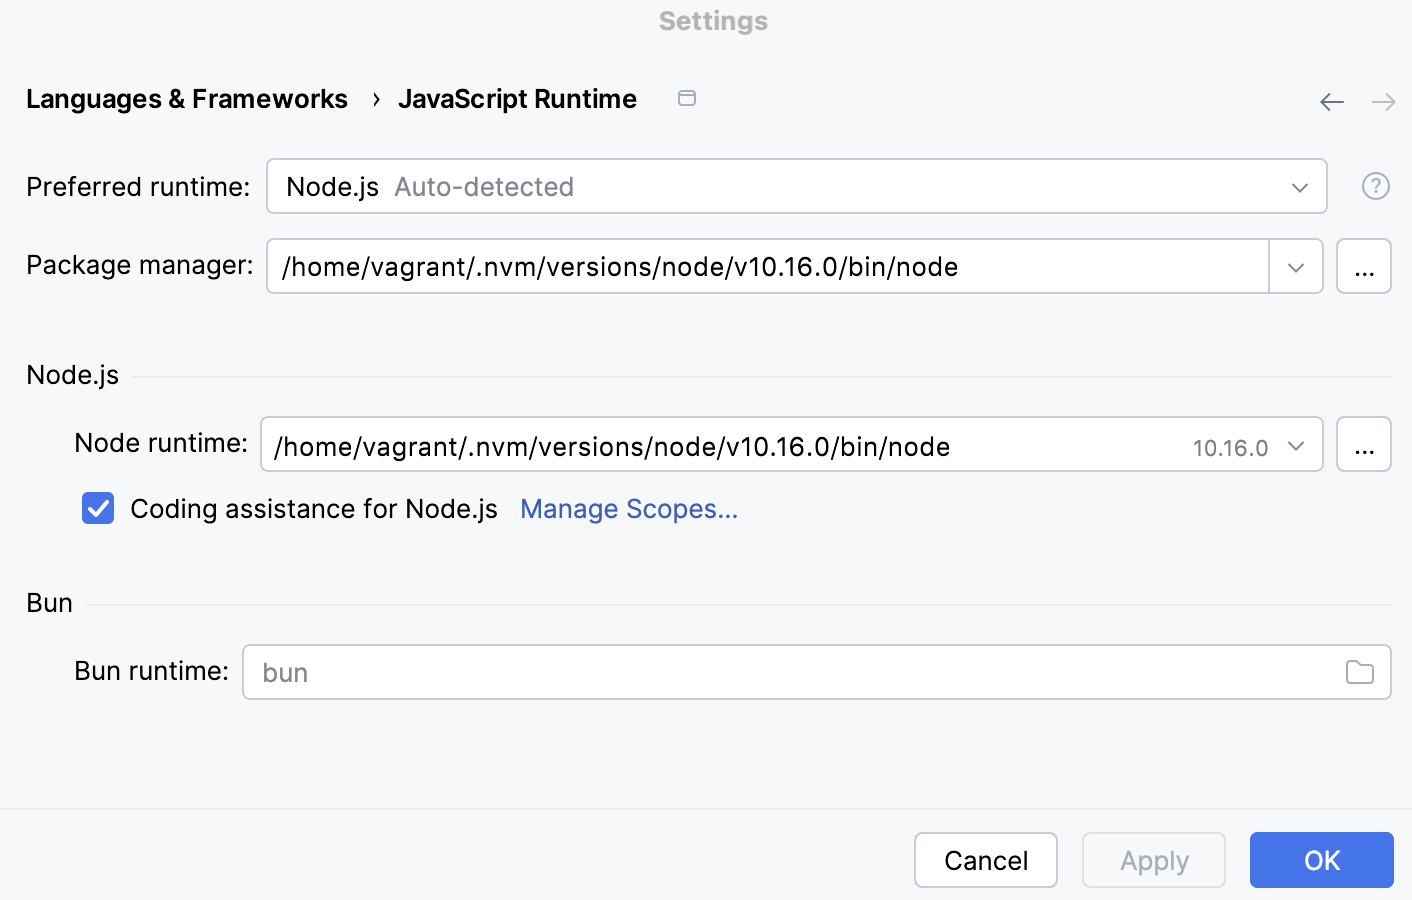
To locate the package manager, open the embedded Terminal (Alt+F12) and type:
vagrant ssh whereis <package manager> exit
Configure a Node.js runtime in the Node.js run/debug configuration
Go to . In the Edit Configuration dialog that opens, click
on the toolbar and select Node.js from the context menu. The Run/Debug Configuration: Node.js dialog opens.
Click
next to the Node runtime field. The Node.js runtimes dialog opens.
Click
on the toolbar and select Add Remote from the context menu.
Configure a remote Node.js runtime in a Vagrant environment as described above.