Configure Web application deployment
A Web application can be deployed to the server as an exploded directory where files and folders are presented in the file system as separate items or as a Web archive (WAR file) which contains all the required files. Therefore, you need to configure the layout of your project output, so it can be deployed to the server in one of these forms. In IntelliJ IDEA, the layout of a project output is defined through artifacts.
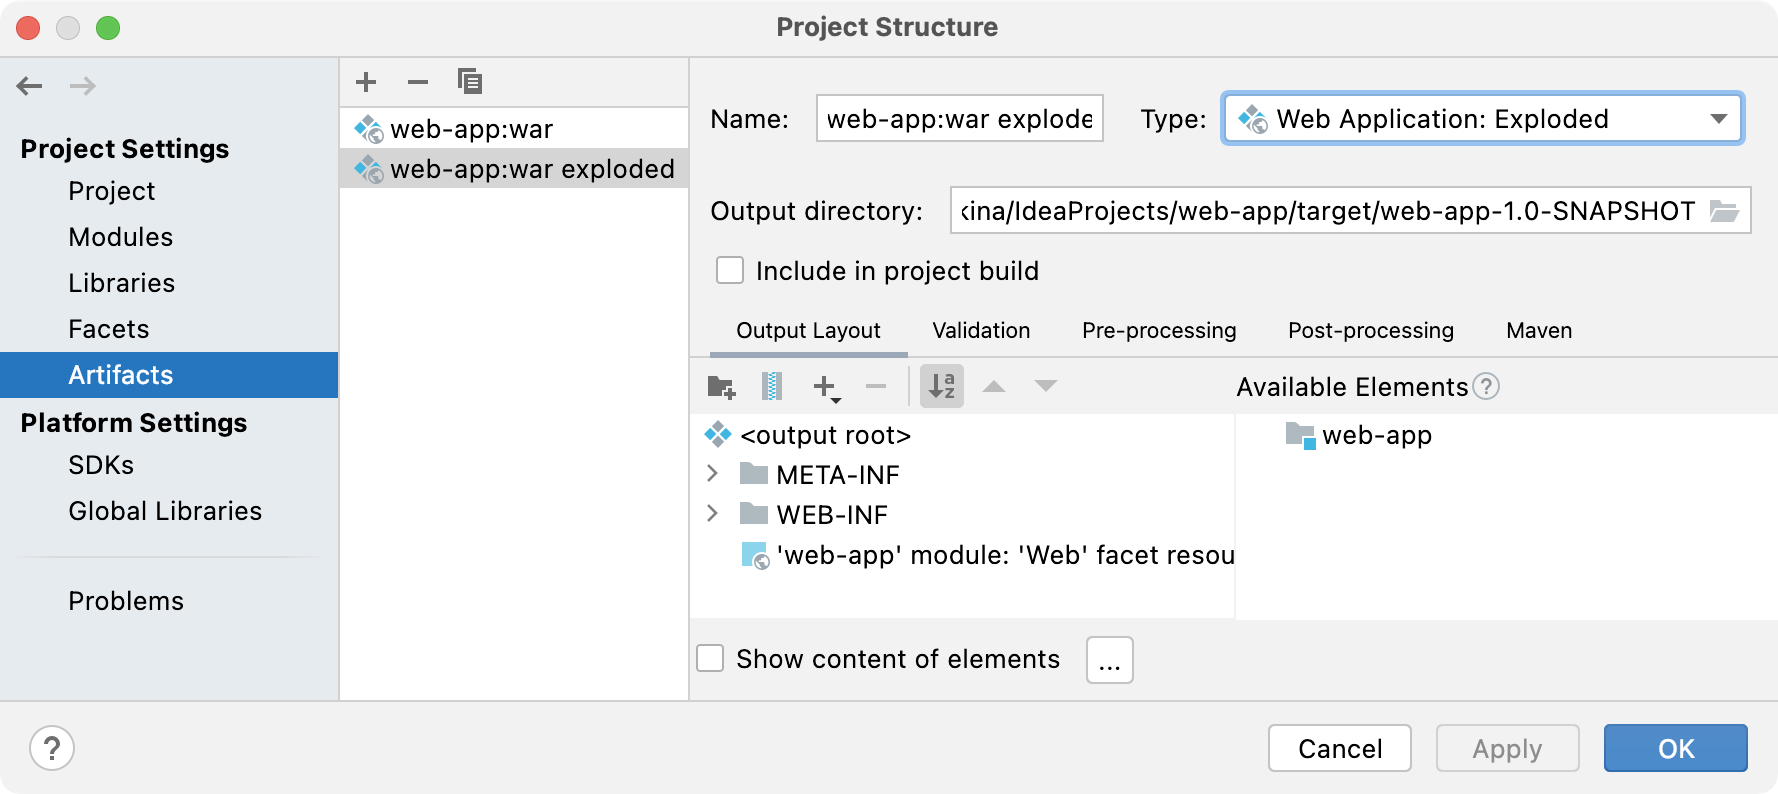
When you enable Web development in a module, IntelliJ IDEA configures an artifact of the type exploded with the following basic structure:

You can use this pre-defined artifact, possibly with necessary customization, or configure a new artifact.
Configuring an artifact to deploy involves:
The suggested deployment configuration procedure reflects the basic workflow which can be flexibly customized depending on your preferences and the requirements to a specific Web application.
Configure the basic artifact settings
Open the Project Structure dialog (e.g. Ctrl+Alt+Shift+S).
Click Artifacts to open the Artifacts page.
Do one of the following:
To use a pre-defined exploded directory artifact, select the <module name>war:exploded artifact from the list on the left-hand pane. If necessary, change the name and output directory of the artifact in the corresponding fields on the right-hand pane.
To create a new artifact, click New
on the left-hand pane and choose the artifact type from the New list.
To have the application deployed as a directory, choose Web Application: Exploded.
To have the application deployed in the packed form, choose Web Application: Archive.
On the right-hand pane, specify the general settings of the artifact, such as name and output directory, in the corresponding fields.
Add static Web content resources
Open an artifact and switch to the Output Layout tab on the right pane.
With the select the output root node selected, choose the Create Directory item from the context menu or click the Create Directory toolbar button
. In the dialog that opens, specify the name of the new folder, for example, Resources:
With the new folder selected, choose the Add Copy of item from the context menu or click the Add Copy of toolbar button
.
From the context menu, choose the Directory Content item. In the dialog that opens, choose the directory where the required Web content resources are stored.