Scratch files
Sometimes you may need to create temporary notes or draft up some code outside the project context. Instead of switching to a different application, you can use scratch files and scratch buffers.
Scratch files are fully functional, runnable, and debuggable files that support syntax highlighting, code completion, and all other features for the corresponding file type. For example, while working on one project, you may come up with an idea for a method that you could later use in another project. You can create a scratch file with a draft of the method, which is not stored in your project directory but can be opened when you're working on any other project. You can use scratch files to draft code constructs, HTTP requests, JSON documents, and so on.
Scratch buffers are simple text files without any coding assistance features. Scratch buffers can be used for simple task lists and notes to yourself. They are also not stored in the project directory and can be opened from any other project. You can create up to five scratch buffers with default names, which are rotated and reused by clearing the content.
Create a scratch file
Go to or press Ctrl+Alt+Shift+Insert.
Alternatively, in the Project tool window (Alt+1), click
on the toolbar and select .
Select the language of the scratch file.
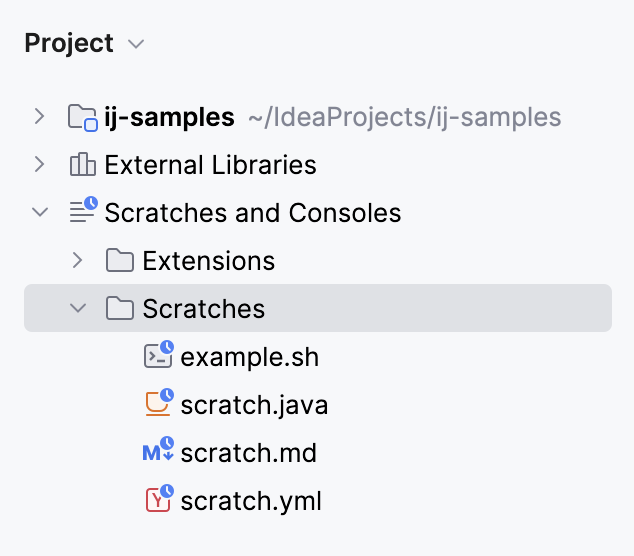
Scratch files of the same type are automatically numbered and added to the Scratches and Consoles directory of the Project view.
When you create a Java scratch file, IntelliJ IDEA automatically adds a class declaration and a
main()method. You can run it the same way you would run an ordinary Java file: either click the Runicon in the gutter or press Shift+F10. For more information, refer to Java Scratch run configuration.
Alternatively, you can create a new scratch file with the contents of the current selection in the editor. Select some text or code, press Alt+Enter and then select Create new scratch file from selection. IntelliJ IDEA will attempt to detect the language of the selected fragment and use the appropriate type and extension. If it can't detect the language of the selection, IntelliJ IDEA will create the file with the same type and extension as the original file.
Create a scratch buffer
There is no dedicated menu item for the action to create a new scratch buffer, but you can use the Find Action popup Ctrl+Shift+A and run the New Scratch Buffer action.

You can also add a shortcut for the New Scratch Buffer action as described in Configure keyboard shortcuts.
IntelliJ IDEA creates a text file named buffer1.txt.
The next scratch buffer you create is named buffer2.txt, and so on up to buffer5.txt. When IntelliJ IDEA reaches that limit, it will recreate buffer1.txt and suggest clearing the content for it. If you want to make sure IntelliJ IDEA does not clear the scratch buffer after you have five, you can rename it.
View all scratch files and buffers
Open the Project view and expand .

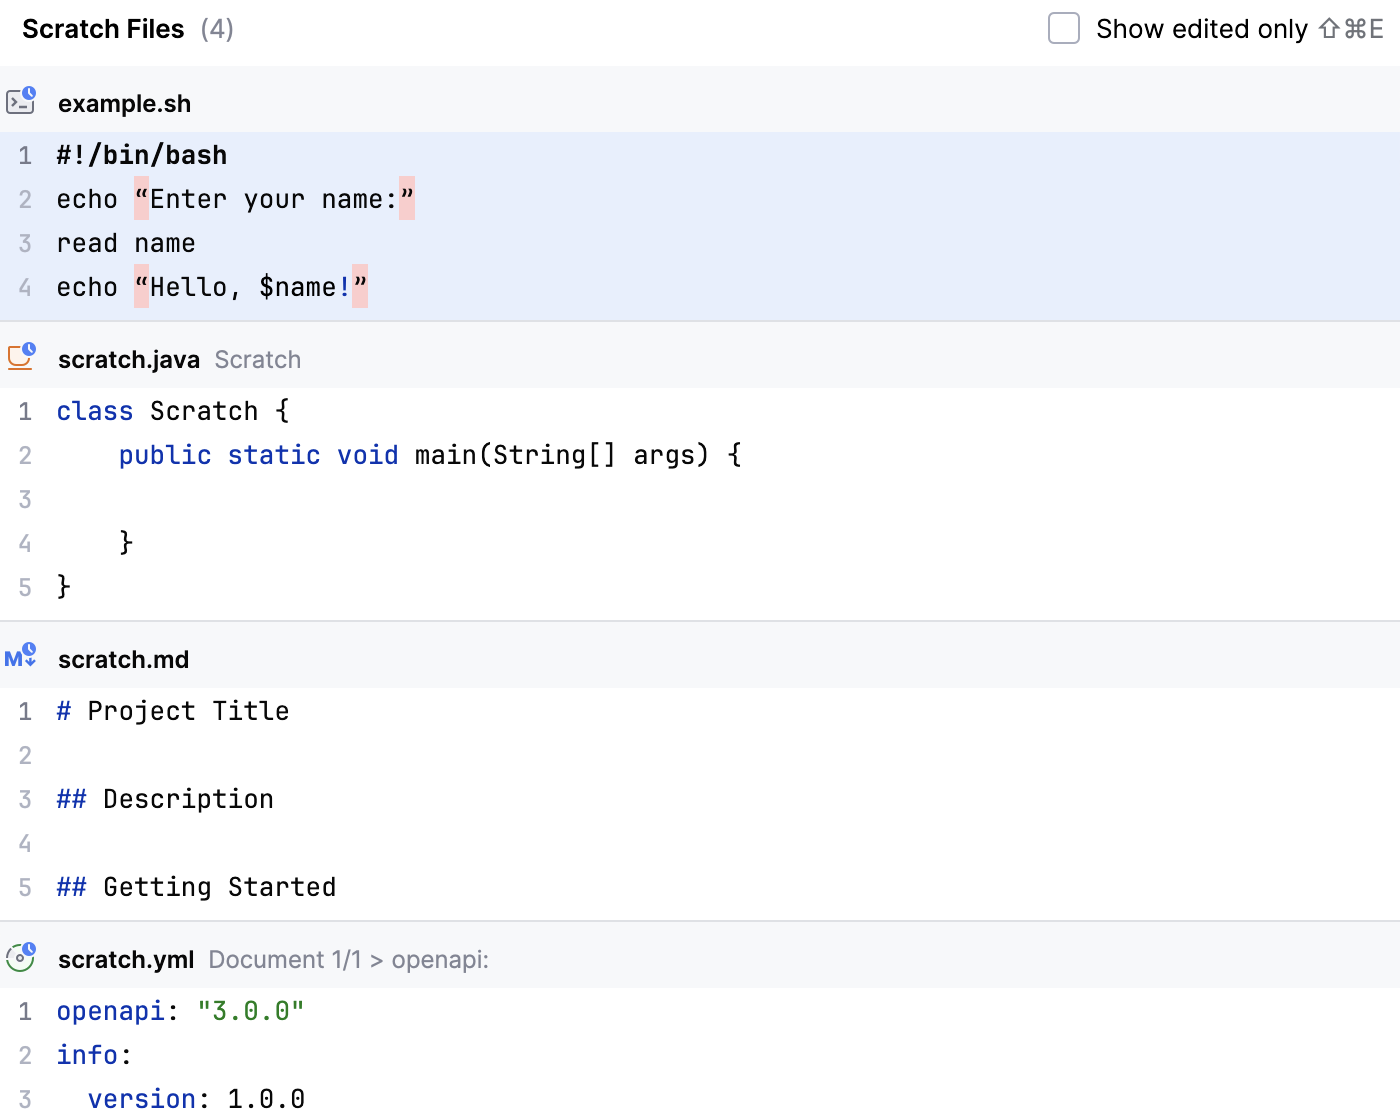
Use the Find Action popup Ctrl+Shift+A to invoke the Show Scratch Files action and view all available scratch files in a popup:

Use dependencies in a scratch file
Add a dependency to a module.
In the Project tool window, right-click the scratch file and select .
From the Use classpath of module list, select the module with the required dependency.
Apply the changes and close the dialog.
Interactive scratch files in Kotlin
In Kotlin, scratch files support an Interactive mode. This feature allows you to see results instantly as you type and modify code, enabling a faster and more efficient feedback loop during experimentation and prototyping. You can leverage this mode directly in the scratch file editor without needing to compile or explicitly run the code. Learn more from Scratches.
Location of scratch files and buffers
By default, IntelliJ IDEA stores scratch files and buffers in the IDE configuration directory under scratches. They are available from any IDE and project that uses this configuration directory.
- Syntax
%APPDATA%\JetBrains\<product><version>
- Example
C:\Users\JohnS\AppData\Roaming\JetBrains\IntelliJIdea2025.3
- Syntax
~/Library/Application Support/JetBrains/<product><version>
- Example
~/Library/Application Support/JetBrains/IntelliJIdea2025.3
- Syntax
~/.config/JetBrains/<product><version>
- Example
~/.config/JetBrains/IntelliJIdea2025.3
To change the location of the Scratches and Consoles directory, use the idea.scratch.path platform property. To change the location of just the Scratches directory, use the idea.scratch.path/scratches platform property. For more information, refer to Advanced configuration.
Include a scratch file into your project
If a scratch file grows into something that you want to use in your project, move it into the desired directory of your project structure.
Open a scratch file in the editor or select it under the directory in the Project view, press F6, and select the target directory in your project.
Drag a scratch file from the directory in the Project view to the target directory in your project.
Select a scratch file in the directory in the Project view and press Ctrl+X, then select the target directory in your project and press Ctrl+V.
Change the language of a scratch file or buffer
In the Project tool window, open the .
Right-click a scratch file or buffer and then click Change Language.
Select the desired language. You can start typing the name of the language to narrow down the list.
View documentation for scratches
Select any scratch file or buffer in the Project tool window and press Ctrl+Q to view quick documentation with the location, type, size, creation, and modification date of the file.