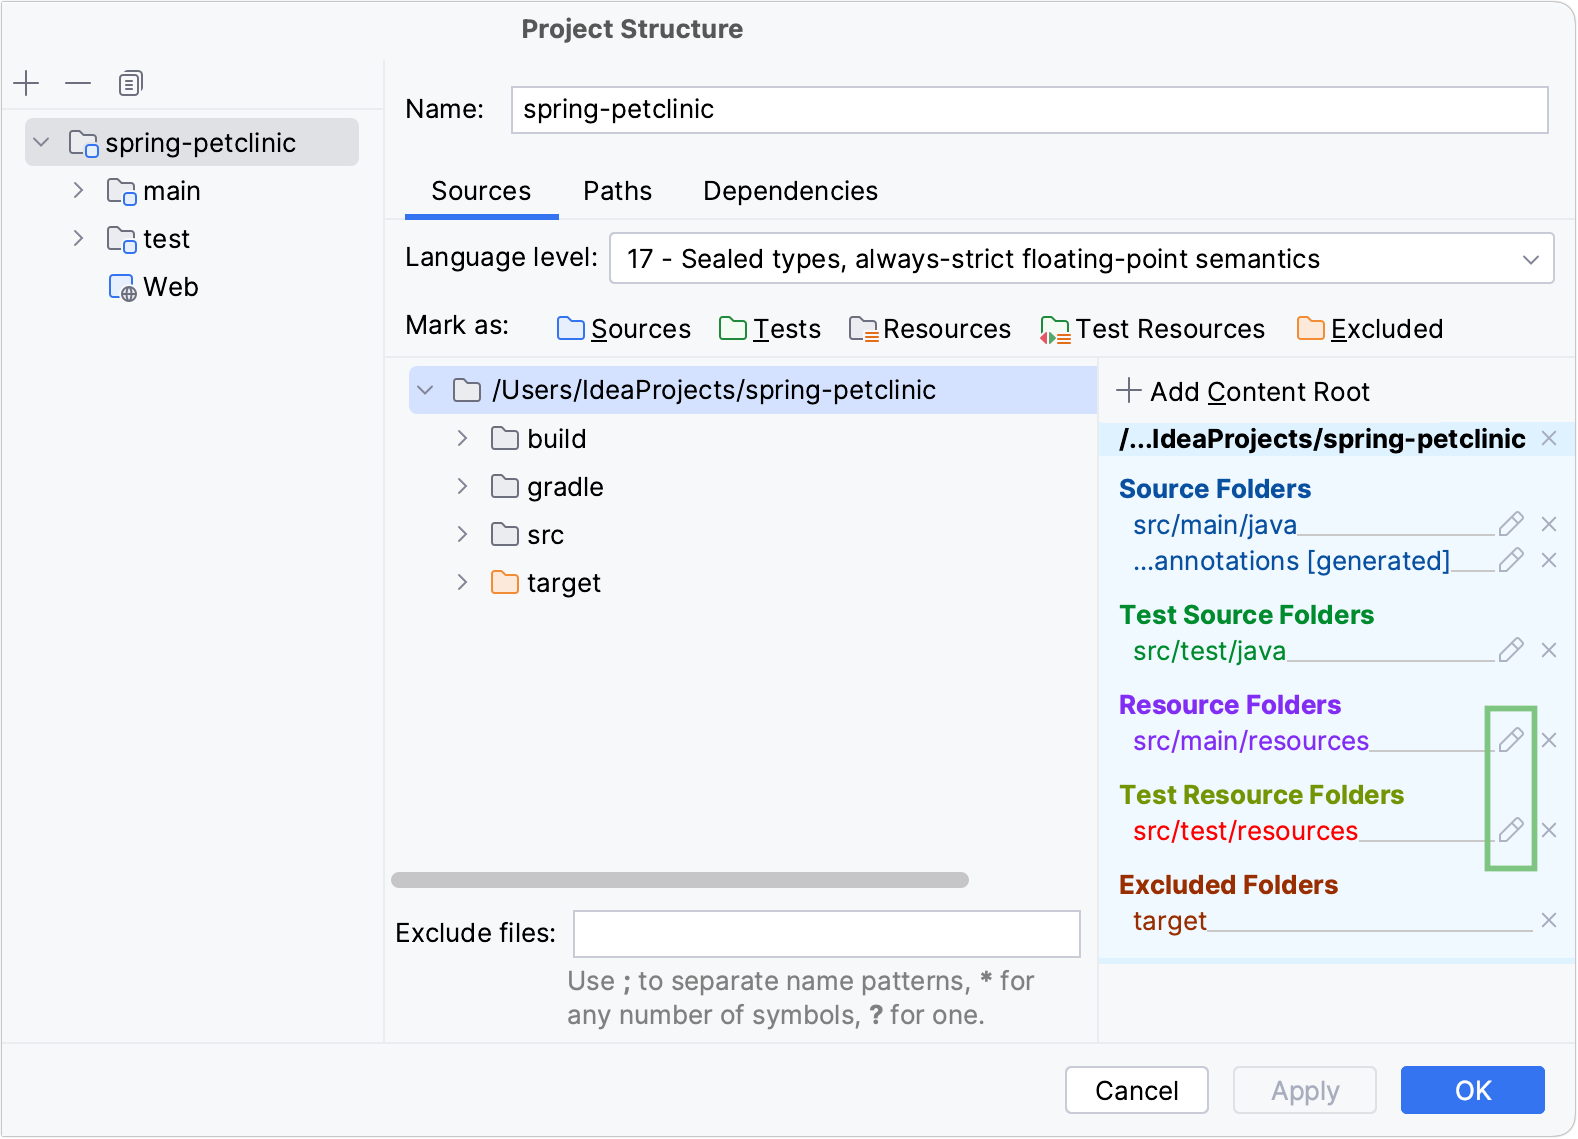
Content roots
Content in IntelliJ IDEA is a group of files that contain your source code, build scripts, tests, and documentation. These files are usually organized in a hierarchy. The top-level folder is called a content root.
Modules normally have one content root. You can add more content roots. For example, this might be useful if pieces of your code are stored in different locations on your computer.
At the same time, modules can exist without content roots. In this case, you can use them as a collection of dependencies for other modules.
Configure folder structure
Folders within a content root can be assigned to several categories depending on the content that they keep.
Configure folders in the Project tool window
In the Project tool window (Alt+1), right-click a folder and select Mark Directory as.
Select the necessary category. This way you can assign categories to subfolders as well.
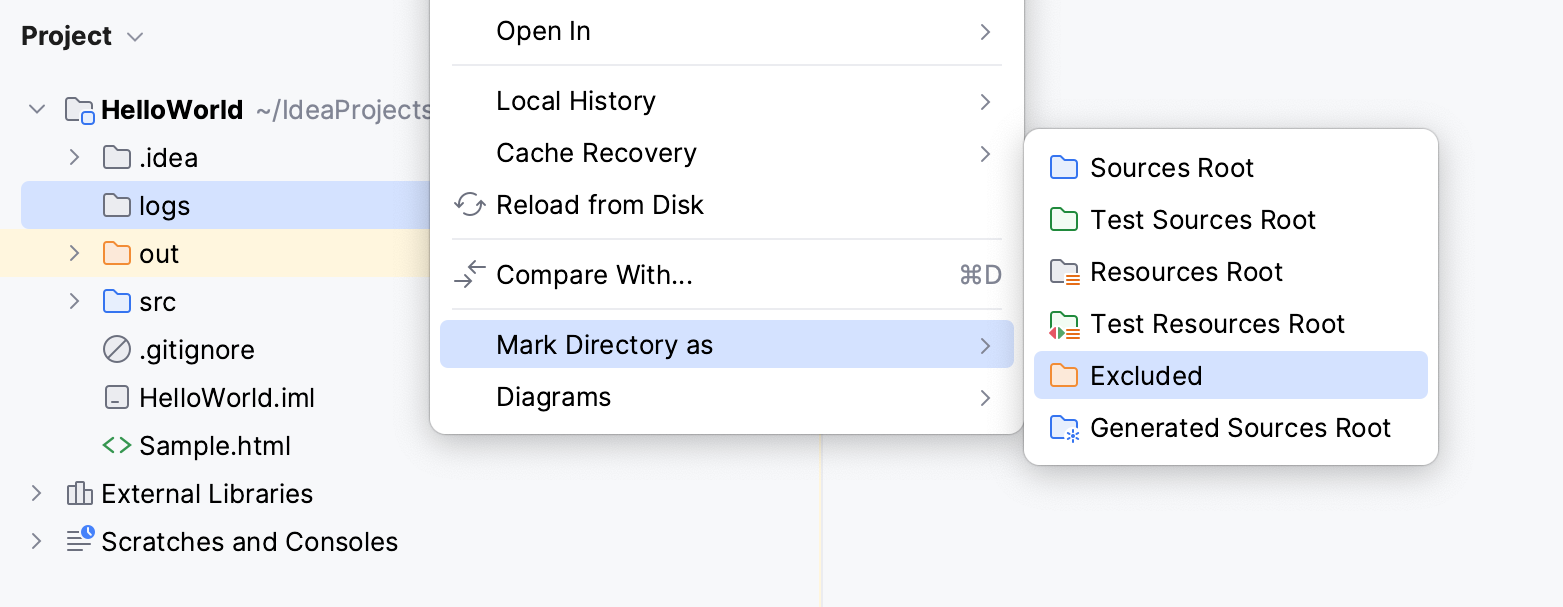
To restore the previous category of a folder, right-click this folder again, select Mark Directory as, and then select Unmark as <folder category>. For excluded folders, select Cancel Exclusion.
Configure folders in Project Structure
Use these steps if you want to configure multiple folders.
In the main menu, go to or press Ctrl+Alt+Shift+S to open the Project Structure dialog.
From the list on the left, select Modules.
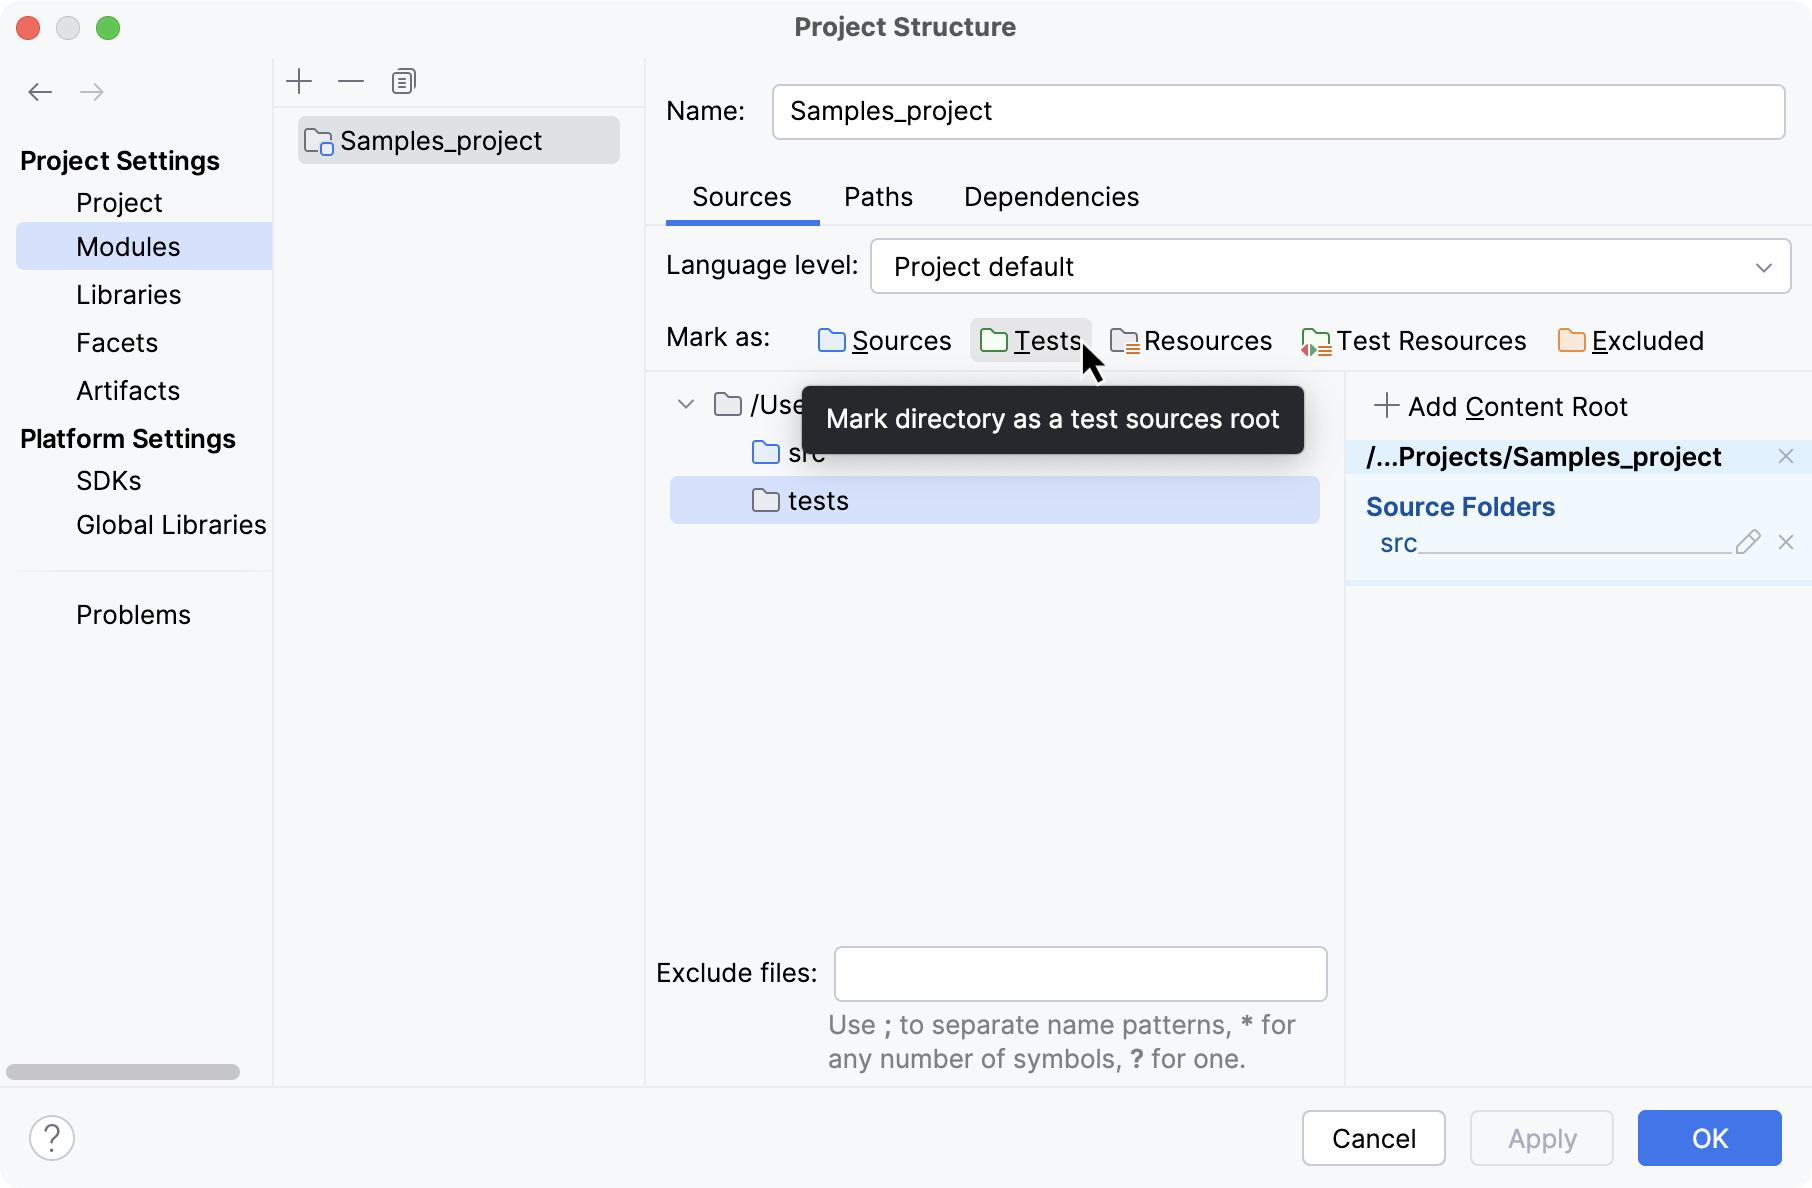
In the middle section of the dialog, select the module for which you want to configure the folder structure. Then make sure that you are on the Sources tab.
Select the folders for which you want to assign a category and then click the corresponding button on the toolbar above the module tree.
Folder categories
Sources
This folder contains production code that should be compiled.
Generated Sources
The IDE considers that files in the Generated Sources folder are generated automatically rather than written manually, and can be regenerated.
Test Sources
These folders keep code related to testing separately from production code. Compilation results for sources and test sources are normally placed into different folders.
Generated Test Sources
The IDE considers that files in this folder are generated automatically rather than written manually, and can be regenerated.
Resources
(Java only) Resource files used in your application: images, configuration XML and properties files, and so on. During the build process, resource files are copied to the output folder as is by default. You can Change the output path for resource files in your project.
Similarly to sources, you can specify that your resources are generated. You can also specify which folder within the output folder your resources should be copied to.
Test Resources
These folders are for resource files associated with your test sources.
Excluded
Files in excluded folders are ignored by code completion, navigation and inspection. That is why when you exclude a folder that you don't need at the moment, you can increase the IDE performance. Normally, compilation output folders are marked as excluded.
Apart from excluding the entire folders, you can also exclude specific files.
Add a new content root
In the main menu, go to or press Ctrl+Alt+Shift+S and click .
Select the necessary module and then open the Sources tab in the right-hand part of the dialog.
Click Add Content Root and specify the folder that you want to add as a new content root.
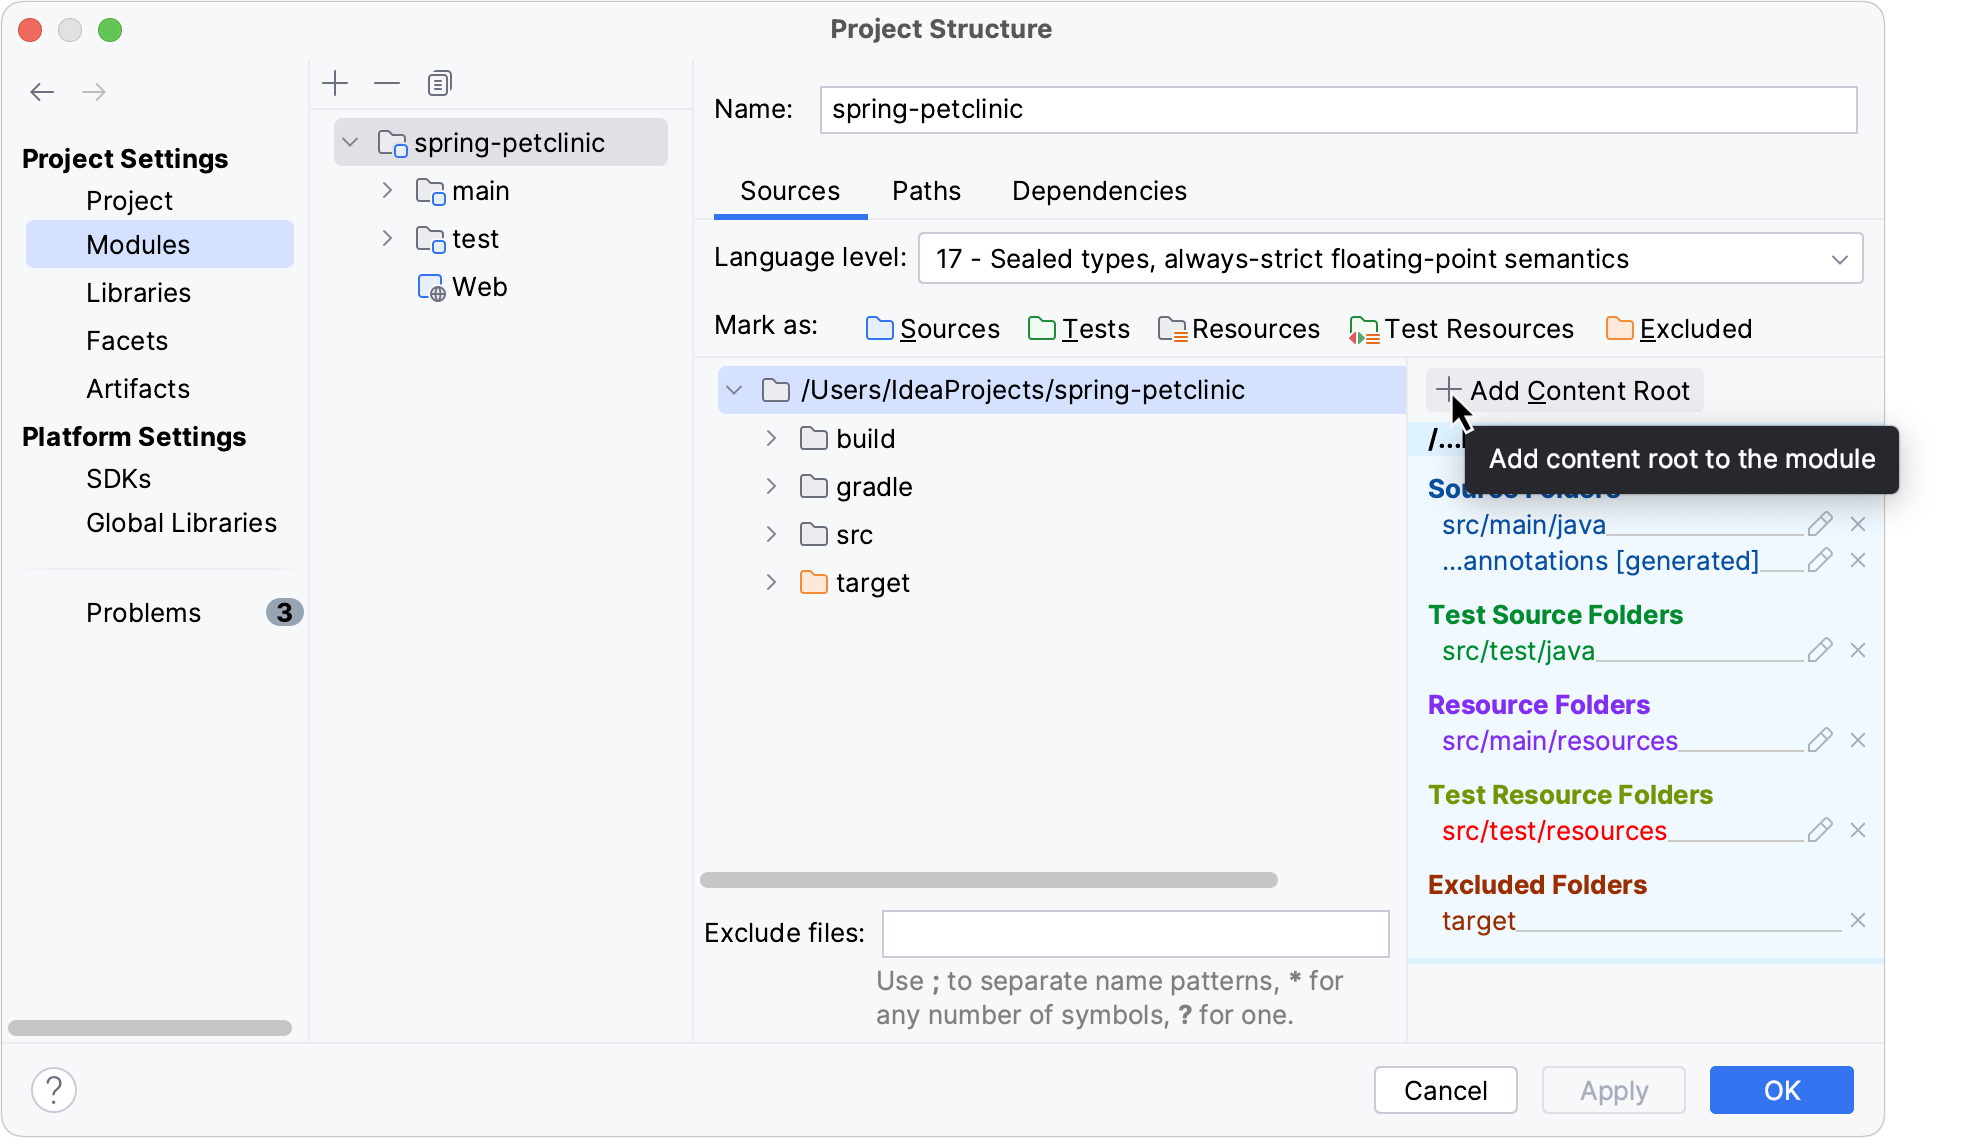
To remove a content root, click the Remove content entry button (). IntelliJ IDEA marks the selected root as a regular folder. The folder itself and its contents will not be deleted.
Exclude files and folders
Exclude files
If you don't need specific files, but you don't want to completely remove them, you can temporarily exclude these files from the project. Excluded files are ignored by code completion, navigation, and inspections.
To exclude a file, you need to mark it as a plain text file. You can always return excluded files to their original state.
Go to the Project tool window (Alt+1).
Right-click a file and select .
Plain text files are marked with the
icon.
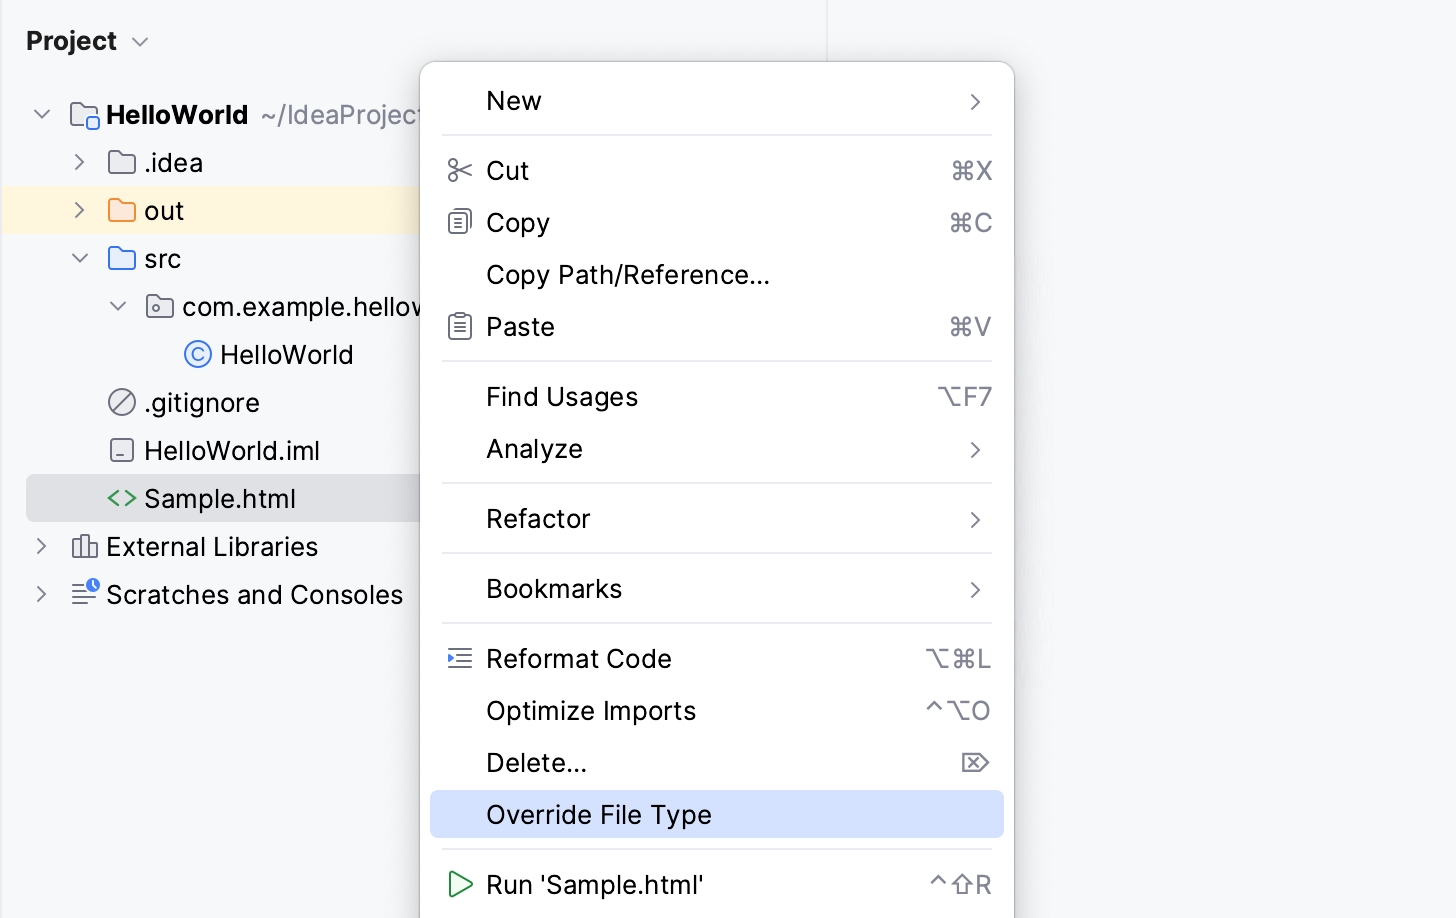
To revert the changes, right-click the file and select Revert File Type Override. from the menu.
Exclude folders
Go to the Project tool window (Alt+1).
Right-click a folder and select .
Excluded folders are marked with the
icon.

To restore the previous category of a folder, right-click this folder again, select Mark Directory as, and then select Cancel Exclusion.
Exclude files and folders by name patterns
In some cases, excluding files or folders one by one is not convenient. For example, this may be inconvenient if your source code files and files that are generated automatically (by a compiler, for instance) are placed in the same directories, and you want to exclude the generated files only. In this case, you can configure one or several name patterns for a specific content root.
If a folder or a filename located inside the selected content root matches one of the patterns, it will be marked as excluded. Objects outside the selected content root won't be affected.
All files within excluded folders will be excluded as well.
In the main menu, go to or press Ctrl+Alt+Shift+S
Click Modules under the Project Settings section, and then select a module.
If there are several content roots in this module, select the one that you want to exclude files or folders from.
In the Exclude files field located at the bottom of the dialog, enter a pattern. For example, enter
*.aj*_test.goto exclude AspectJ files.You can configure multiple patterns and separate them with the semicolon symbol (
;).
Assign a package prefix to Java sources
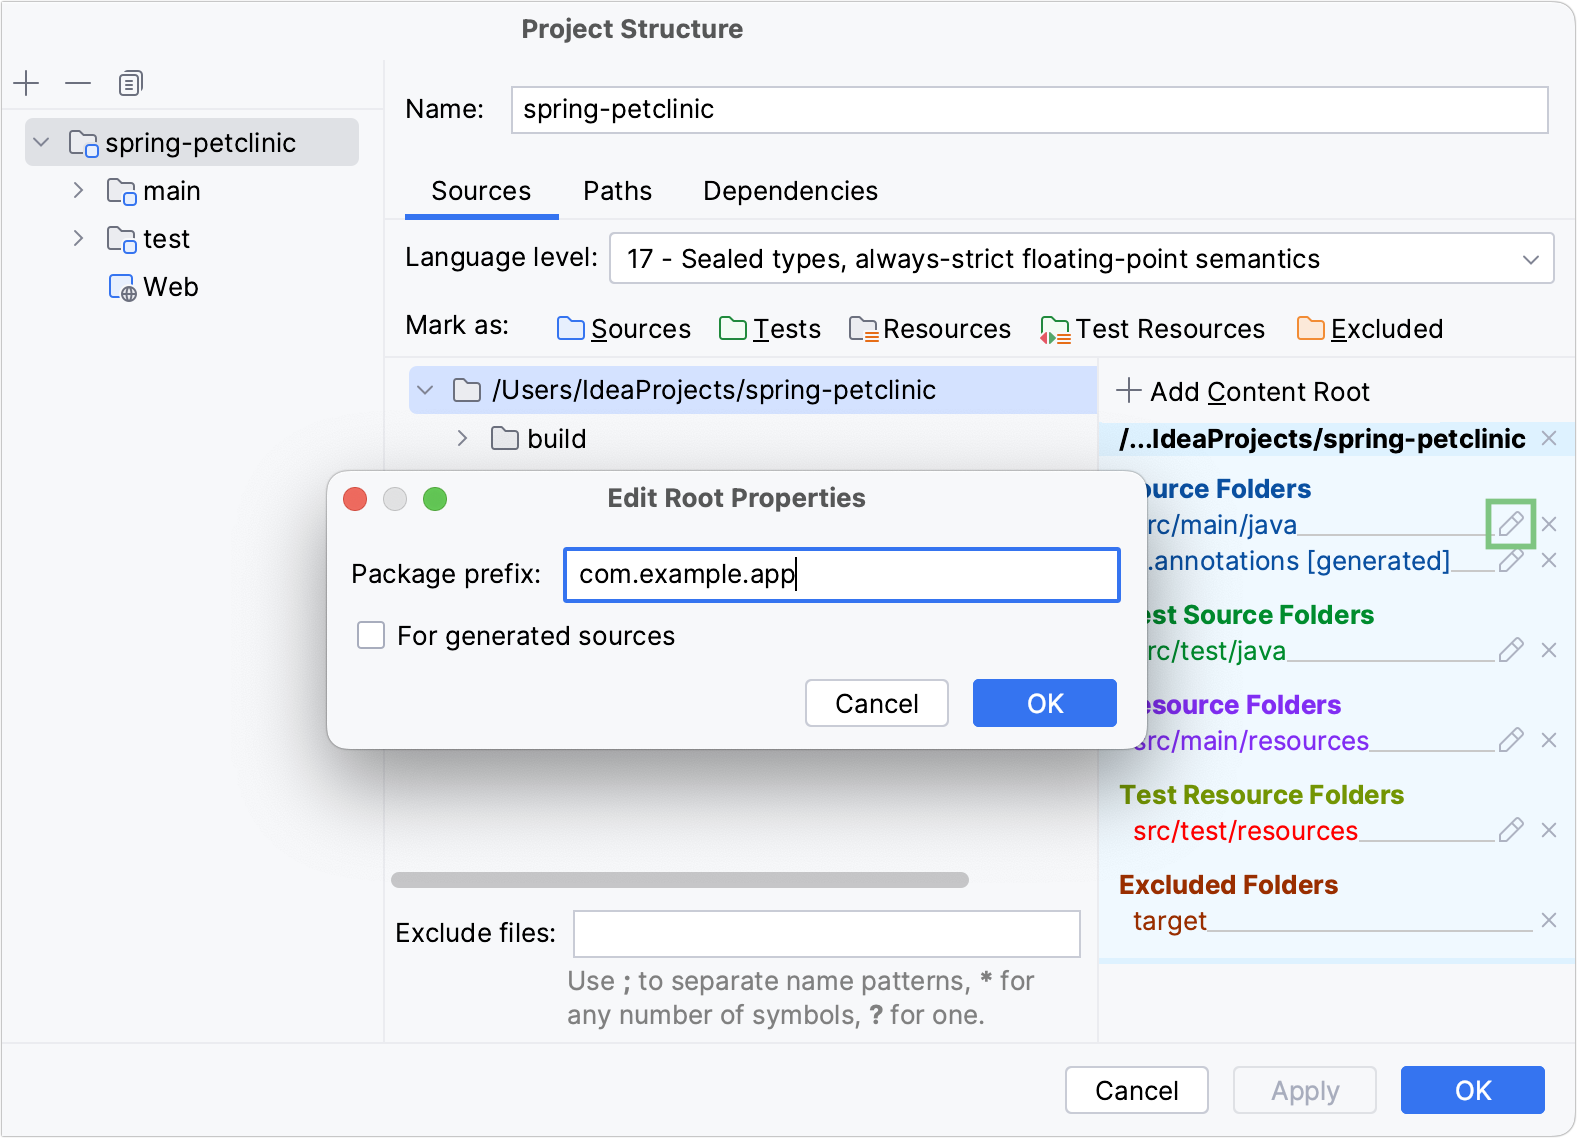
In Java, you can assign a package prefix to a folder instead of configuring a folder structure manually. A package prefix can be assigned to source folders, generated source folders, test source folders and generated test source folders.
In the main menu, go to or press Ctrl+Alt+Shift+S and click Modules.
Select the necessary module and open the Sources tab.
In the right-hand pane, click
next to Source Folders or Test Source Folders.
Specify the package prefix and click OK.
Change the output path for resources
When you're building a project, the resources are copied into the compilation output folder by default. You can specify a different directory within the output folder to place resources.
In the main menu, go to or press Ctrl+Alt+Shift+S and click Modules.
Select the necessary module and open the Sources tab.
In the right-hand pane, under Resource Folders or Test Resource Folders, click
to the right of the necessary folder (folder path).
Specify the path relative to the output folder root, and click OK.
