Defining Pageflow
This feature is supported in the Ultimate edition only.
On this page:
Introduction
Enabling Seam facet in a module makes it possible to a create pageflow definition using jPDL. IntelliJ IDEA provides a dedicated graphic Designer, completely synchronized with the source code. In the Designer, you can create a stub pageflow, which is immediately reflected in the source code of the pageflow file. To make the pageflow definition usable, you have to additionally edit the source code of the pageflow file.
It is very important to properly configure the Web resource directories for a Web facet of your module. In particular, the directories that contain pages to be included in the pageflow, should be added to the list of Web resources.
Creating pageflow definition
To create a pageflow definition
- In the Project tool window, right-click the directory where you want to create the pageflow definition file, for example,
WEB-INFdirectory, choose on the context menu, and specify the file name. IntelliJ IDEA creates pageflow definition stub xml file, and opens it in a separate tab in the editor. - Click the Designer tab of the pageflow definition file.
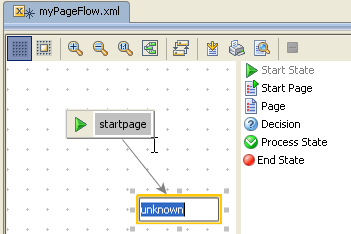
- Click the desired button in the toolbox of the Designer, and drag it to the Designer area. Add other nodes, and change their names as required. This way you can create start and end state, pages, decisions, and process states.

- Draw links between nodes.
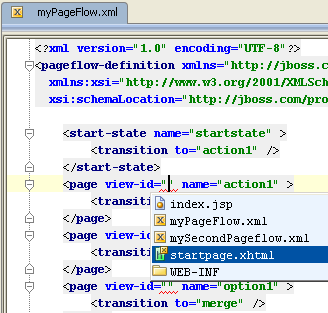
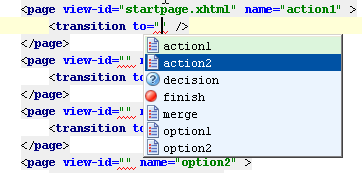
- In the Text tab, edit the source code to associate it with specific views, add attributes and subelements (specifying action and decision expressions, transitions names, events, adding subprocesses to process states etc). Note the code completion for the attributes and values:


Actions, available in the Designer
The following actions are available in the Designer:
- Navigation: you can jump from the visual presentation of a pageflow in the Designer to the underlying source code. To do that, right-click an element, and choose on the context menu, or press .
- Show Usages and Find Usages: select a node, and press Ctrl+Alt+F7 or Alt+F7.
- Rename refactoring: select a node, press Shift+F6, and specify the new name in the Rename dialog box. So doing, the corresponding reference in the underlying xml file is also updated. Note that if you rename a node using the in-place editor, its reference in the source code is not changed, and an error is highlighted.
- Deleting nodes and links: when a node or link is deleted from the graph, the corresponding element is deleted from the underlying xml file.