Managing Code Coverage Suites
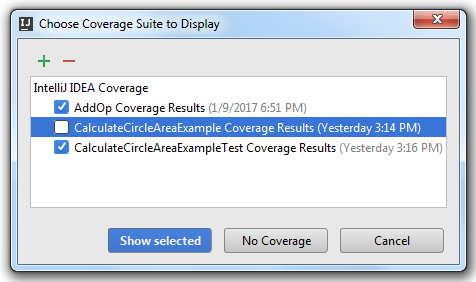
IntelliJ IDEA provides a tool to select coverage suites for showing or hiding, adding and removing suites.
On this page:
- Accessing the Choose Coverage Suite
- Selecting coverage suites to show
- Hiding coverage suites
- Adding coverage suites from disk
Accessing the Choose Coverage Suite
To open the Choose Coverage Suite to Display dialog box, do one of the following
- On the main menu, choose .
- Press Ctrl+Alt+F6.
Selecting coverage suites to show
To select coverage suites to show
- Open the Choose Coverage Suite to Display dialog box, as described above.
- In the Choose Coverage Suite to Display dialog box, select the check boxes next to the desired suites.

- Click Show selected. The dialog box closes.
- Open in the editor the classes, for which the coverage suites have been selected, and explore the coverage results.
Hiding coverage suites
To hide coverage suites
- Open the Choose Coverage Suite to Display dialog box, as described above.
- In the Choose Coverage Suite to Display dialog box, select the check boxes next to the suites you want to hide.
- Click No coverage. The dialog box closes. The coverage results are not shown for the target classes.
Adding coverage suites from disk
To add or delete a coverage suite
Consider a situation when a file that contains code coverage information, has been obtained from the build server. You can load this file from disk and make it available for review. Also, you can bring for examination the coverage suite that has been produced some time ago.
On the other hand, IntelliJ IDEA allows you to remove unnecessary coverage suites.
- Open the Choose Coverage Suite to Display dialog box, as described above.
- Add new suites or delete the existing ones:
- Click
 , and select the desired
 *.esfile in the file chooser dialog. - Select one or more suites in the list, and click
 . The selected suite will be deleted from the list, and from storage.
- Click
Last modified: 29 November 2017