Composer Dependency Manager
This feature is only supported in the Ultimate edition.
The following is only valid when PHP Plugin is installed and enabled!
IntelliJ IDEA integrates with the Composer Dependency Manager, which allows you to declare your project's dependencies and manage them right from the IDE.
IntelliJ IDEA provides a dedicated user interface for the common Composer commands:
- Creating a new project with Composer,
- Initializing Composer in an existing IntelliJ IDEA project,
- Managing project dependencies.
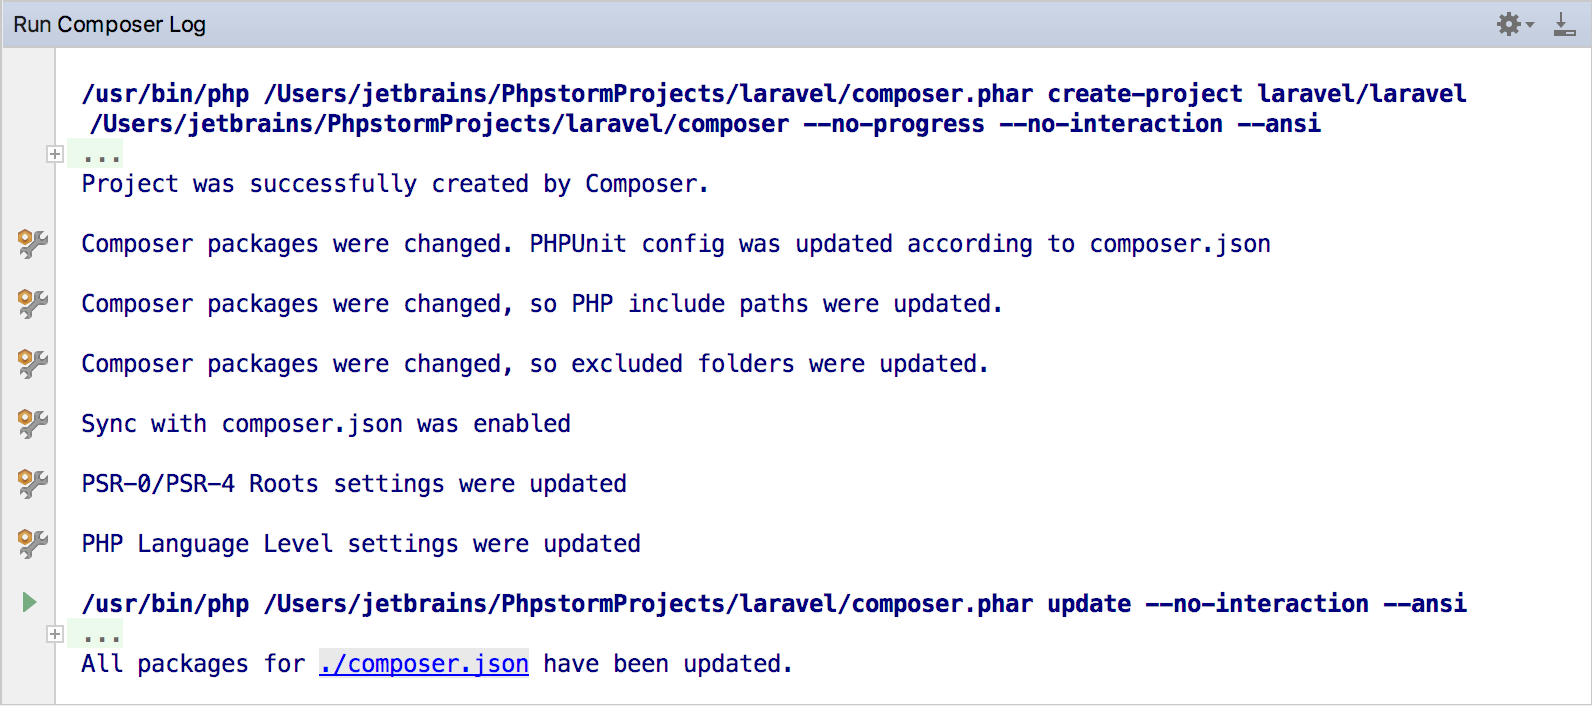
When executing these commands, you can view the output via the Composer Log console.
To use the full range of Composer commands in a IntelliJ IDEA project, you need to configure and run it as an external command-line tool.
Downloading and installing Composer
You can download and install Composer manually as described in the Composer official documentation.
Alternatively, Composer can be downloaded and installed automatically when you create a new Composer project or initialize Composer in an existing IntelliJ IDEA project.
Creating a new Composer project
When you create a new Composer project, IntelliJ IDEA creates a project based on the Composer package of your choice, resolves the dependencies and installs them under the project's vendor directory.
To create a new Composer project:
-
Choose or click Create New Project on the Welcome screen.
The New Project dialog opens:
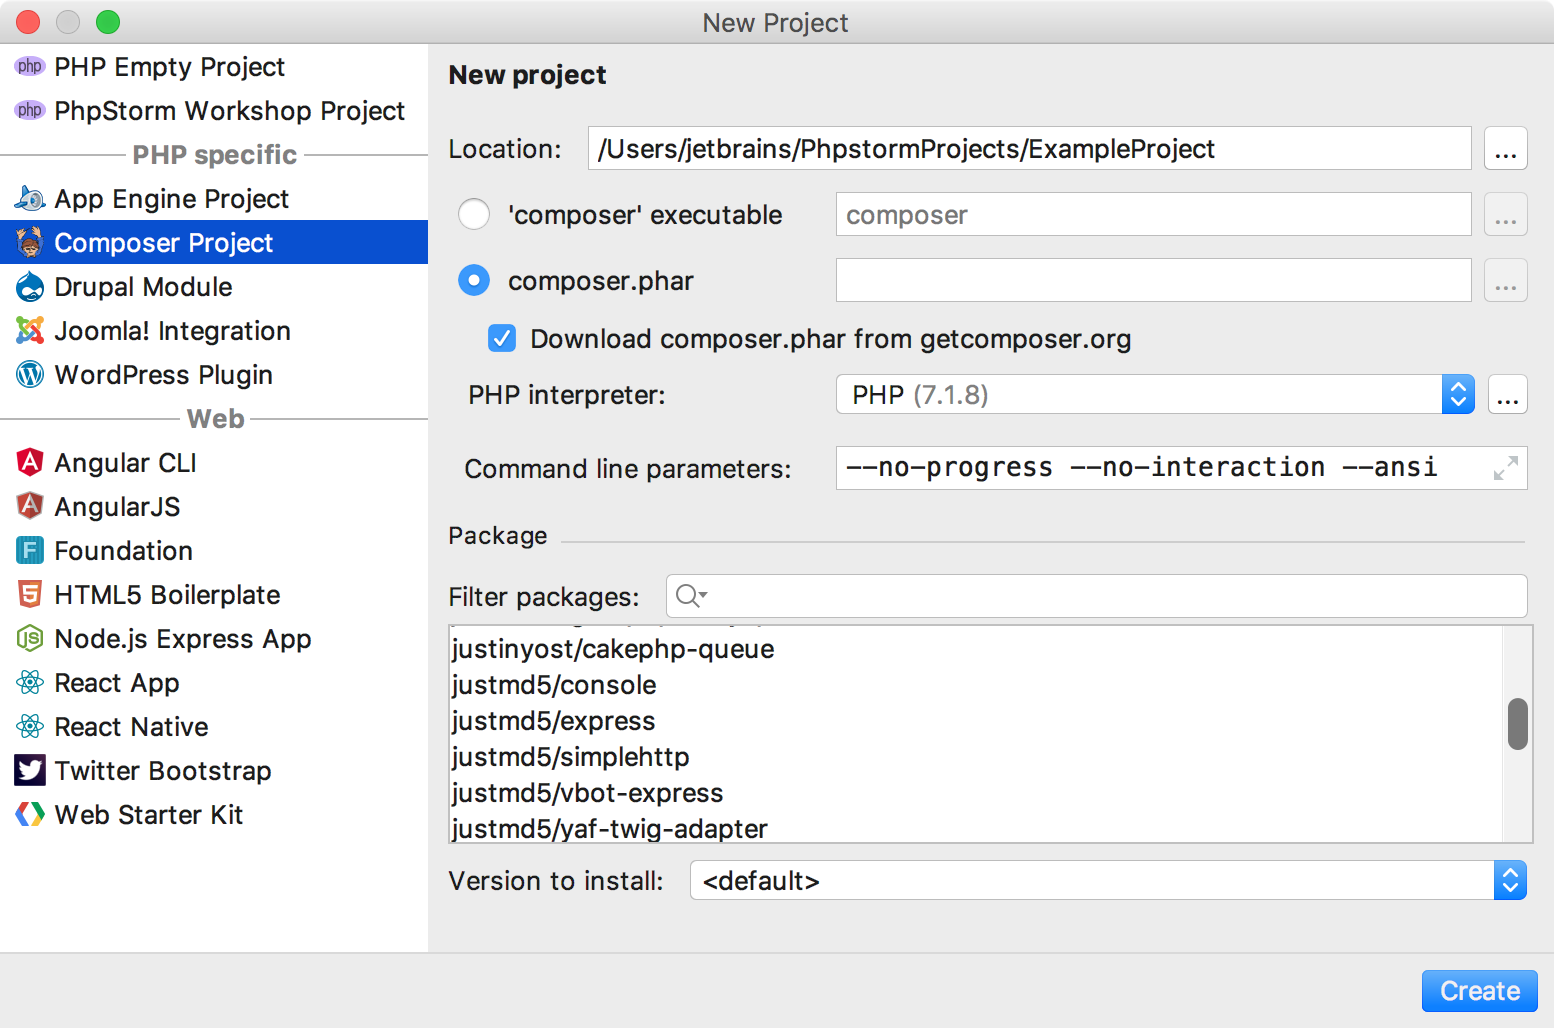
- In the dialog, specify the project's parameters:
- Choose the project type and location:
- In the left-hand pane, click PHP from the list, then choose Composer Project in the right-hand pane, and then click Next.
- On the second page of the wizard, specify the project name and the folder where it will be created.
- Choose how the Composer commands will be executed:
- To run commands via a globally installed
composerexecutable, choose 'composer' executable and specify its location in the text box. -
To run commands through the PHP interpreter, choose composer.phar. Then, either specify the location of the existing
composer.pharfile in the text box or select the Download composer.phar from getcomposer.org checkbox to download a new instance of the file. Thecomposer.pharfile will be saved under the project root folder specified in the Location text box.Then, choose one of the configured local PHP interpreters from the PHP interpreter list. Refer to Configuring Local PHP Interpreters for details.
require-devsection instead of the defaultrequiresection, type--dev. For more information about using the Composer command line options during installation, refer to the Composer official documentation. - To run commands via a globally installed
- In the Package area, select the package from the list, and choose the relevant version from the Version to install list. To search for a package, use the Filter packages search field.
- Choose the project type and location:
-
Click Finish. The
create-projectComposer command will be invoked with the selected package. As a result, the Composer project will be created, whose configuration and structure depends on the selected package. After that, the created IntelliJ IDEA project opens.
Initializing Composer in an existing project
When you initialize Composer in a project, a composer.json file is created. This file lists the project dependencies and may contain other metadata.
To initialize Composer in an existing project:
-
On the main menu, choose .
The Composer Settings Dialog opens:
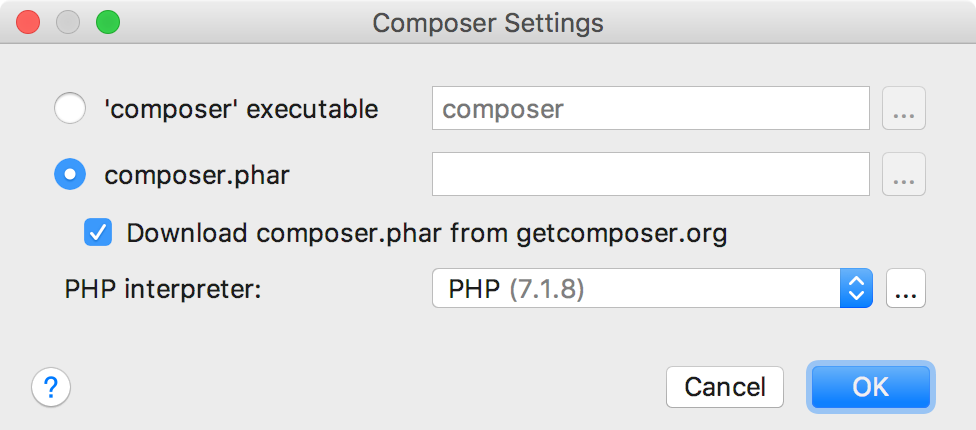
- Choose how the Composer commands will be executed:
- To run commands via a globally installed
composerexecutable, choose 'composer' executable and specify its location in the text box. -
To run commands through the PHP interpreter, choose composer.phar. Then, either specify the location of the existing
composer.pharfile in the text box or select the Download composer.phar from getcomposer.org checkbox to download a new instance of the file. Thecomposer.pharfile will be saved under the project root folder specified in the Location text box.Then, choose one of the configured local PHP interpreters from the PHP interpreter list. Refer to Configuring Local PHP Interpreters for details.
- To run commands via a globally installed
-
Click OK to close the Composer Settings dialog. IntelliJ IDEA creates a stub of the
composer.jsonfile and opens it in the editor: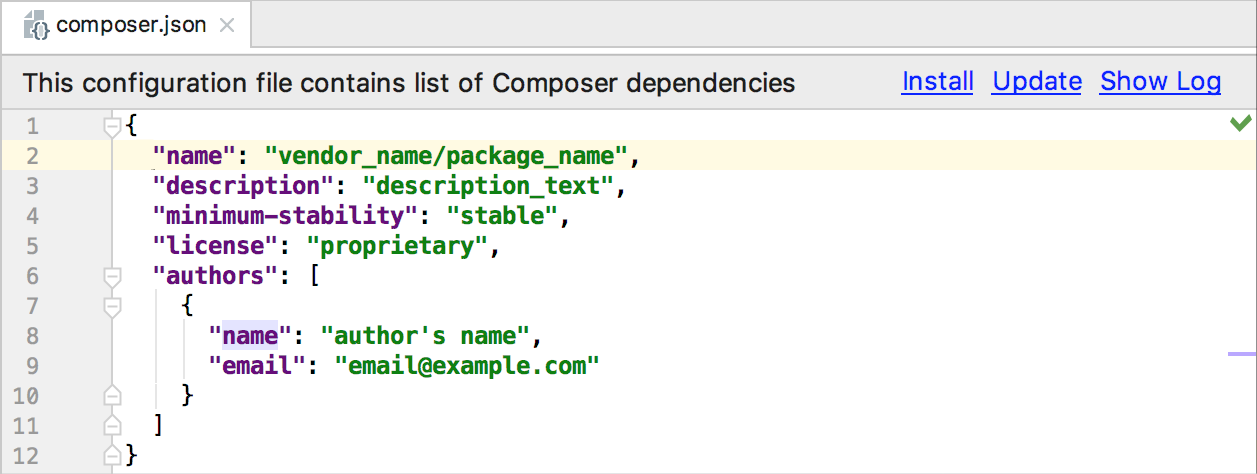
Complete the code or accept the generated values. For details on working with the
composer.jsonfile, refer to Composer.json: Project Setup.
Opening an existing Composer project in IntelliJ IDEA
When you open an existing Composer project, IntelliJ IDEA uses the information contained in the composer.json file to automatically apply the certain configuration options, e.g. the project's content roots and PHP language level.
- Click Open on the Welcome screen or choose on the main menu, then choose the folder where your Composer project is stored.
IntelliJ IDEA will show a notification:

- Click . In the Composer dialog that opens, specify the location of the
composer.jsonfile. If IntelliJ IDEA detects an existing file, the field will be filled automatically: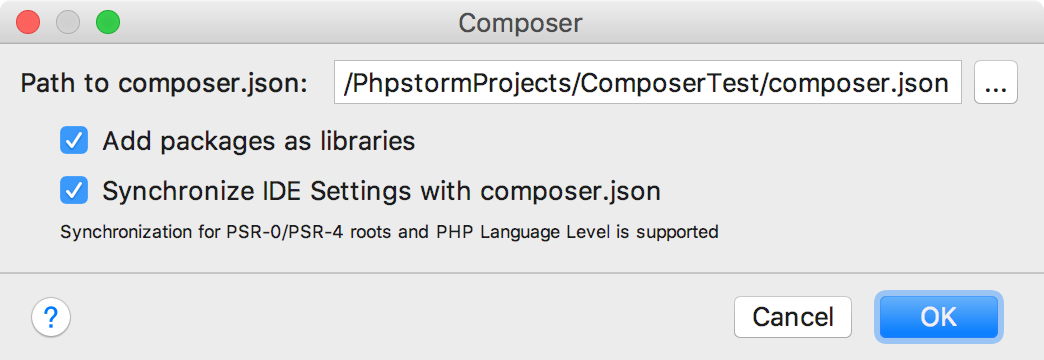
-
Configure the project settings:
By default, all packages under the
vendor/*/*directory are excluded from the project and added as write-protected libraries. To protect them from editing, leave the checkbox selected. Otherwise, if you want to edit Composer packages undervendor/*/*, clear the checkbox.Make sure the checkbox is selected to automatically detect the PHP language level and configure project Source and Test roots based on the configuration from
composer.json.IntelliJ IDEA is aware of PSR-0/PSR-4 source roots and of their namespace prefixes declared in the
autoloadandautoload-devsections incomposer.json. IntelliJ IDEA also detects the PHP language level based on thephpsetting in therequiresection.Because
composer.jsoncontains the most up-to-date information about the project configuration, this automatic synchronization ensures that the Source and Test folder exactly match the project structure and the correct PHP language level is set automatically.To learn more about PSR and autoload, refer to the Composer official website. For examples and details on synchronizing settings, refer to the PhpStorm blog post.
Click OK to apply the specified project settings and close the dialog.
- Set up Composer commands execution:
- Do one of the following:
- Open the page ( for Windows and Linux or for macOS).
- If you have a single
composer.jsonfile in your project, choose on the main menu to open the Composer Settings Dialog.
- Choose how the Composer commands will be executed:
- To run commands via a globally installed
composerexecutable, choose 'composer' executable and specify its location in the text box. -
To run commands through the PHP interpreter, choose composer.phar. Then, either specify the location of the existing
composer.pharfile in the text box or select the Download composer.phar from getcomposer.org checkbox to download a new instance of the file. Thecomposer.pharfile will be saved under the project root folder specified in the Location text box.Then, choose one of the configured local PHP interpreters from the PHP interpreter list. Refer to Configuring Local PHP Interpreters for details.
- To run commands via a globally installed
- Do one of the following:
Install the project dependencies:
- If you have a single
composer.jsonfile in your project, choose on the main menu. - Otherwise, if you have several
composer.jsonfiles, choose from the context menu of the relevant one. See also Appointing a default composer.json in a IntelliJ IDEA project.
composer.jsonfile in the code editor and click the Install shortcut link on top of the editor panel.- If you have a single
Appointing a default composer.json in a IntelliJ IDEA project
You can have several composer.json files in one IntelliJ IDEA project. For each composer.json, actions are invoked from its context menu in the editor or in the Project view, or using the shortcut links on top of the editor panel. You can also appoint the default composer.json for your IntelliJ IDEA project. Composer actions for it are invoked from on the main menu.
To appoint a default composer.json:
- Choose for Windows and Linux or for macOS.
- Specify the location of the default
composer.json. If you have a single Composer configuration file in your IntelliJ IDEA project, the field is filled automatically. -
By default, all packages under the
Otherwise, if you want to edit Composer packages undervendor/*/*directory are excluded from the project and added as write-protected libraries. To protect them from editing, leave the checkbox selected.vendor/*/*, clear the checkbox. - Make sure the checkbox is selected to automatically detect the PHP language level and configure project Source and Test roots based on the configuration from
composer.json.IntelliJ IDEA is aware of PSR-0/PSR-4 source roots and of their namespace prefixes declared in the
autoloadandautoload-devsections incomposer.json. IntelliJ IDEA also detects the PHP language level based on thephpsetting in therequiresection.Because
composer.jsoncontains the most up-to-date information about the project configuration, this automatic synchronization ensures that the Source and Test folder exactly match the project structure and the correct PHP language level is set automatically.To learn more about PSR and autoload, refer to the Composer official website. For examples and details on synchronizing settings, refer to the PhpStorm blog post.
Managing dependencies
Installing dependencies
You can install specific packages individually, and IntelliJ IDEA will update your composer.json automatically. Alternatively, you can list the packages you need in the require and require-dev sections of the composer.json and then install them all at once.
Learn more about adding dependencies on the Composer Official website.
Installing a specific package
- Do one of the following:
- On the context menu of
composer.json, choose . - To install a package from the default composer.json, choose on the main menu.
- On the context menu of
- In the Manage Composer Dependencies dialog that opens, select the required package from the list. To find a package, use the search field. The list shows all the available packages, the packages that are already installed are marked with a tick.
Choose the relevant version from the Version to install list.
- Optionally, customize the package installation. Expand the Settings hidden area and specify the advanced installation options. In the Command line parameters text box, type the additional command line parameters. For example, to have a dependency added to the
require-devsection instead of the defaultrequiresection, type--dev. For more information about using the Composer command line options during installation, refer to the Composer official documentation. Click Install to start installation. To exit the dialog, click Close.
When the installation is completed, IntelliJ IDEA creates a new subfolder under vendor, stores the new package in this subfolder, and adds the corresponding package record to the require or require-dev section of composer.json.
Installing all packages at once
Do any of the following:
- On the context menu of
composer.json, choose . - Open
composer.jsonin the editor the and click the Install shortcut link on top of the editor panel. - To install all packages listed in the default composer.json, choose on the main menu.
IntelliJ IDEA installs all the packages listed in the require and require-dev sections of the composer.json file.
Updating dependencies
You can update specific packages to their latest versions individually, and IntelliJ IDEA will update your composer.json automatically. Alternatively, you can update all the packages listed in the require and require-dev sections of the composer.json file at once.
Updating a specific package
- Do one of the following:
- On the context menu of
composer.json, choose . - To update a package from the default composer.json, choose on the main menu.
- On the context menu of
- Select the required package from the Available Packages list among the packages marked with a tick and click Update.
Updating all packages at once
- On the context menu of
composer.json, choose . - Open
composer.jsonin the editor the and click the Update shortcut link on top of the editor panel. - To update all packages listed in the default composer.json, choose on the main menu.
IntelliJ IDEA updates all the packages listed in the require and require-dev sections of the composer.json file.
Uninstalling dependencies
To uninstall a package:
- Do any of the following:
- On the context menu of
composer.json, choose . - To uninstall a package listed in the default composer.json, choose on the main menu.
- On the context menu of
- In the Available Packages list, select the package to uninstall among the packages marked with a tick and click Remove.
When the package is uninstalled, IntelliJ IDEA updates the require or the require-dev section of composer.json automatically.
Composer Log
When you execute a Composer-related action via the IntelliJ IDEA interface, the corresponding command's output is displayed in the dedicated Composer Log console:
To open Composer Log, do any of the following:
- Open the
composer.jsonfile in the editor and click the Show Log shortcut link on top of the editor panel. - After executing a command, click the Show in log shortcut link in the Event Log notification message with the command execution result:

Useful tips
- Composer Log folds the details of successfully executed commands. To view the folded message, either click the plus icon in the left gutter to unfold it or hover them mouse over the ellipsis to view the execution details in a tooltip:

- To re-run a command, click the Run icon
 in the left gutter.
 - When appointing a default composer.json in a project, you can enable IntelliJ IDEA's settings synchronization with
composer.json. Composer Log will highlight such a change in the settings as it occurs. Click the Settings icon in the left gutter it to quickly navigate to the corresponding , PHP, or Test Frameworks settings pages.
 - Click the link to the
composer.jsonfile in the log to open it in the editor.
Running Composer from the command line
Command-line mode provides you with the full range of Composer commands. To use Composer in this mode, you need to configure it as an external command-line tool.
To integrate Composer with IntelliJ IDEA as an external command-line tool:
- Choose for Windows and Linux or for macOS.
On the Command Line Tool Support page that opens, click
 .
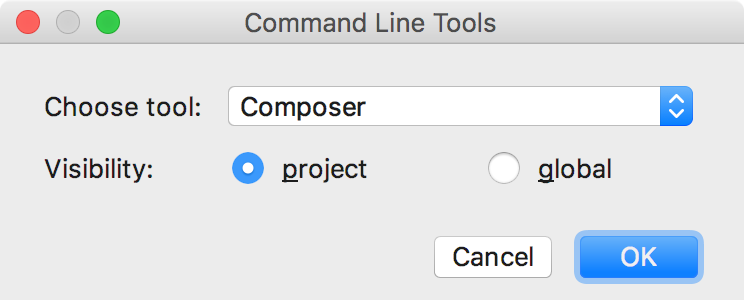
. - In the Command Line Tools dialog that opens, choose Composer from the list. Using the Visibility option button, specify whether the tool will be available globally, i.e. in any IntelliJ IDEA project, or in the current project only:
Click OK to apply your changes.
- In the Command Line Tool Support: Composer dialog that opens, specify how you want to launch Composer by choose one of the options: composer.phar or php script or composer executable. Depending on your choice, specify the paths to the PHP installation folder and
composer.pharor to thecomposerexecutable file.IntelliJ IDEA parses the contents of the specified
.phararchive or executable file for Composer commands. When the file analysis is completed, IntelliJ IDEA returns to the Command Line Tools Support page where the specified file is added to the list of command line tools available in IntelliJ IDEA.Click OK to apply your changes. The Composer tool will be added to the list of tools on the Command Line Tools Support page.
- Select the Enable checkbox next to the added tool, specify the alias to use in calls, customize the command set if necessary, and choose where to show the Input pane for running commands. Refer to How do I customize a tool? and Input pane location for details.
The Composer command-line tool is now added, and you can run commands with it. Open the Input pane (Tools | Run Command) and type <alias> (c by default) and press Ctrl+Space to invoke completion. The command execution result is displayed in the Output tab with the name of the command. Learn more from How do I run a command?.