Configure a Ruby interpreter
To work with your Ruby code in IntelliJ IDEA, you need to configure at least one Ruby interpreter. You can set up the interpreter for the currently opened project or when creating a new project.
Configuration of the Ruby interpreter depends on the way you installed it:
If you installed Ruby using a package manager (apt for Ubuntu, Homebrew for macOS, and so on) or Ruby installer (for example, RubyInstaller for Windows), you need to add it manually.
If you installed Ruby using a version manager, IntelliJ IDEA should detect interpreters automatically. In this case, you can select the desired version.
If you installed Ruby directly from IntelliJ IDEA, the installed interpreter is set as the default for the current project.
If you are using Ruby installed in an isolated environment (Docker, Vagrant, WSL, and so on), IntelliJ IDEA allows you to configure it as a remote interpreter.
Add a local interpreter
Add an interpreter
Open the Project Structure dialog Ctrl+Alt+Shift+S and select Modules on the left.
On the Ruby Interpreters page, click the
button and select Interpreter:
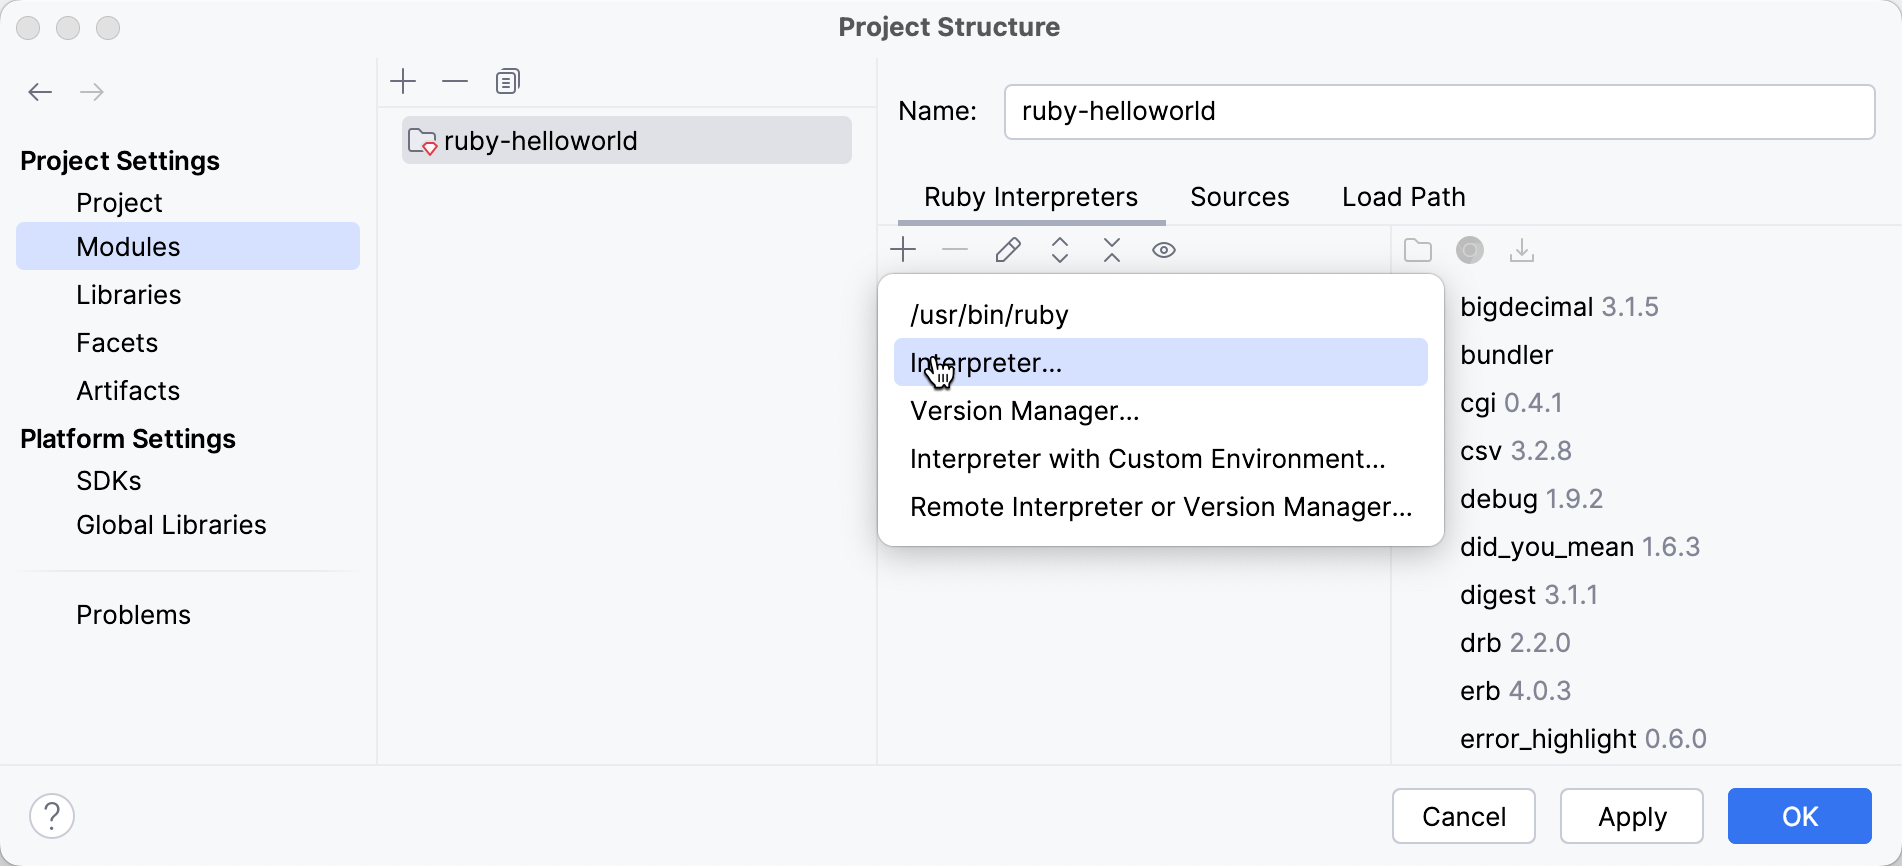
Provide a path to the Ruby executable, for example:
/usr/local/bin/ruby for Ruby installed on macOS using Homebrew.
/usr/bin/ruby for Ruby installed on Linux using apt.
C:\Ruby26-x64\bin\ruby.exe for Ruby installed on Windows using RubyInstaller.
IntelliJ IDEA will display the added interpreter along with automatically detected interpreters.
To remove the interpreter from the list, select it, and click the
button.
Add an interpreter with custom environment
IntelliJ IDEA allows you to use your custom environment for running any Ruby command from within IntelliJ IDEA. To do this, you need to provide environment variable values or a path to a configuration script when adding a local interpreter.
Open the Project Structure dialog Ctrl+Alt+Shift+S and select Modules on the left.
On the Ruby Interpreters page, click the
button and select Interpreter with Custom Environment:
In the invoked dialog, provide a path to the Ruby executable as described in Add an interpreter. Then, configure the Custom environment in one of the following ways:
Specify the environment variable values directly.
Example:
env API_KEY=123If you use a shell script to load environment variables, you need to provide an absolute path to this script.
Example:
/bin/bash /Users/jetbrains/sample_app/env.shIf you use direnv to load and unload environment variables, pass a path to the directory with the .envrc file to the
direnv execcommand.Example:
direnv exec /Users/jetbrains/sample_appIf you use Shadowenv to customize your project environment, pass a path to the project directory to the
shadow execcommand.Example:
shadowenv exec --dir /Users/jetbrains/sample_app --
Click OK to add an interpreter.
Select the added interpreter and click OK in the Settings dialog.
Select an auto-detected interpreter
Select an interpreter on the Ruby Interpreters page
To select the auto-detected Ruby interpreter maintained by the version manager, follow the steps below:
Invoke the Project Structure dialog Ctrl+Alt+Shift+S and select Modules on the left.
Choose the required Ruby interpreter. You can also choose the gemset for the RVM and rbenv version managers.
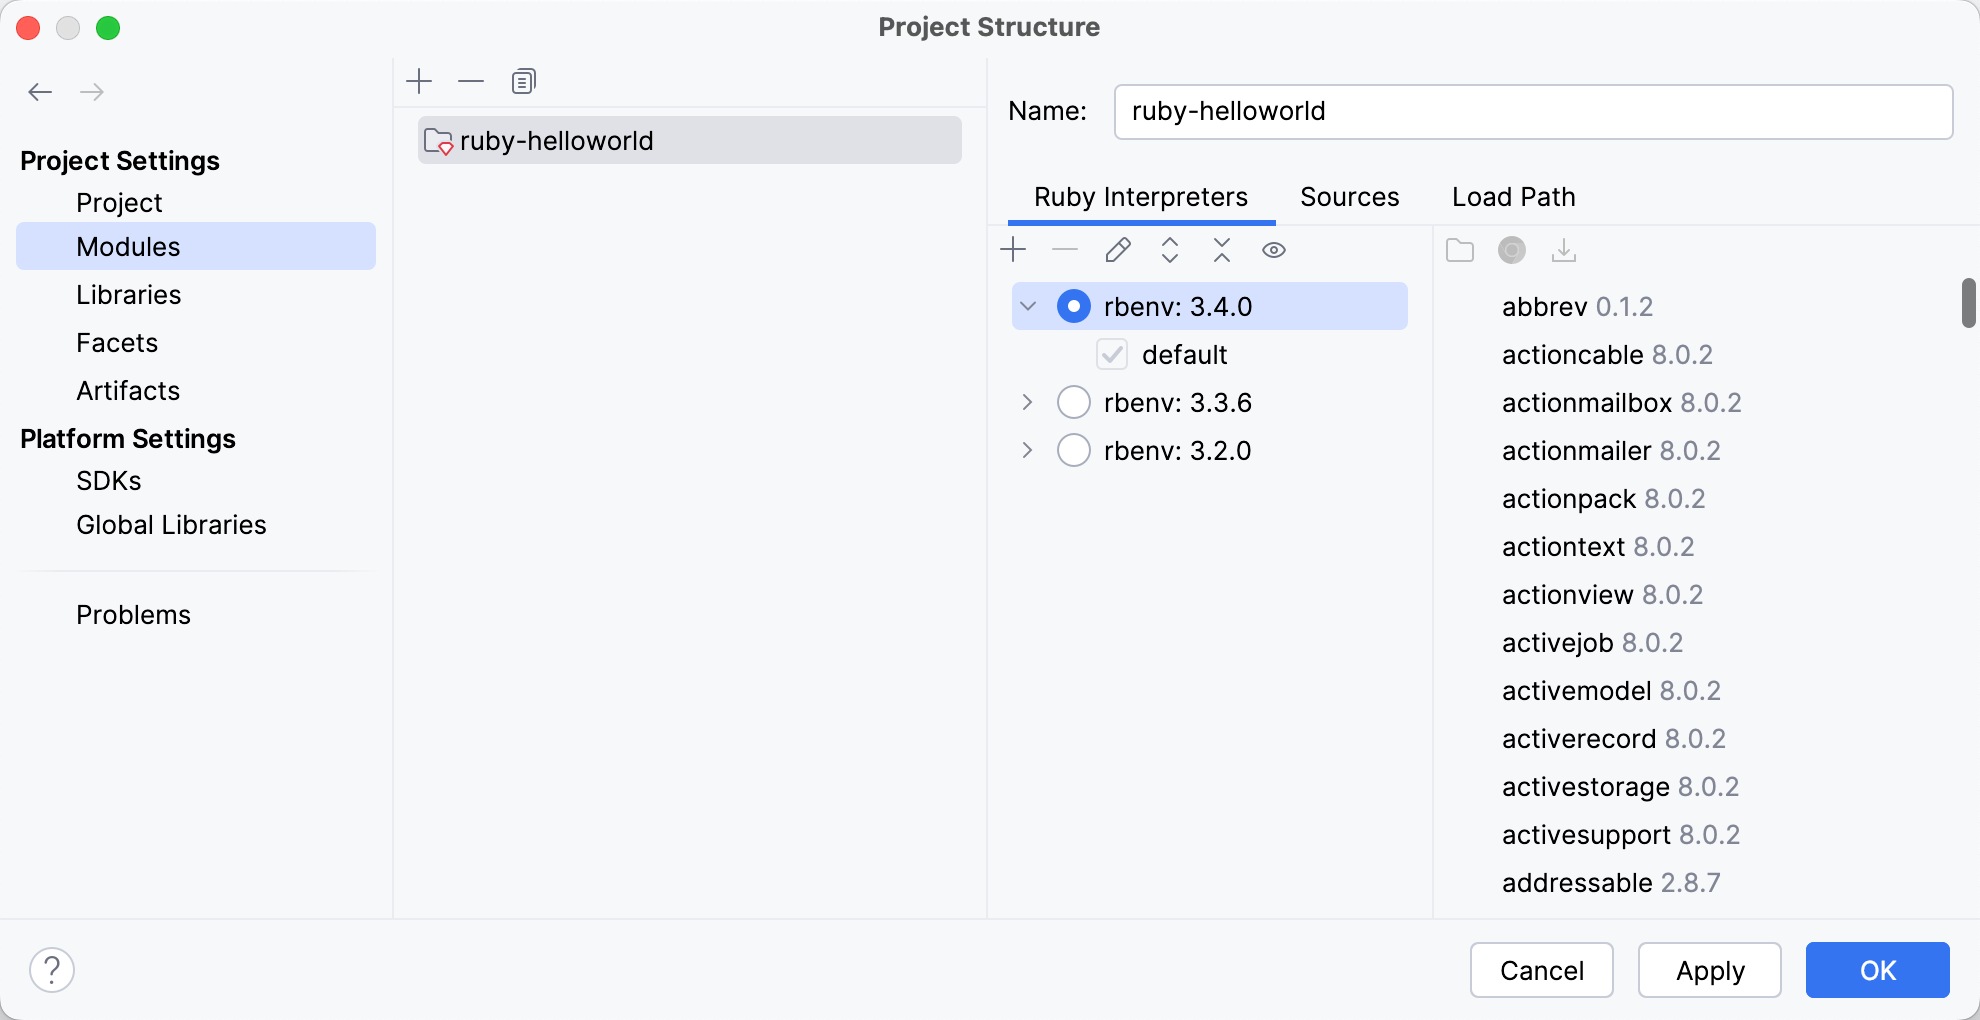
For the selected Ruby interpreter/gemset, you can see the installed gems on the right.
Switch an interpreter using Run Anything
If you use RVM or rbenv to manage local Ruby interpreters, you can quickly set the required interpreter using Run Anything:
Press Ctrl twice.
In the invoked popup, start typing
rvm useorrbenv shell, select the required interpreter and press Enter.(Optional) If necessary, click the Rollback button in the popup that informs about the changed interpreter.
Add a remote interpreter
Various remote development tools, such as Docker, Vagrant, or Windows Subsystem for Linux (WSL), allow you to use an isolated environment for developing your applications. This can be useful in multiple cases, for example, if you want to:
Develop in an isolated environment to avoid impacting your local machine configuration.
Run, debug, and test your application on the same operating system you deploy.
Develop Linux-deployed applications using the Windows Subsystem for Linux.
You can prepare the desired Ruby/Rails setup in a remote environment using Docker Compose, Vagrant box, or WSL. Then, you can add the remote Ruby interpreter in IntelliJ IDEA and run, debug, and test your application in an isolated environment right from the IDE.
Note that when you are using a remote interpreter, IntelliJ IDEA downloads gems from a remote machine to a local cache to be able to use code insight features. In this case, you may encounter a situation when new gems were installed on a remote machine outside the IDE. To update a set of gems stored in a local cache, click the Synchronize gems button in the Ruby Interpreters page.
To configure a remote Ruby interpreter, follow these steps:
On the toolbar, click
, and choose Remote Interpreter or Version Manager.
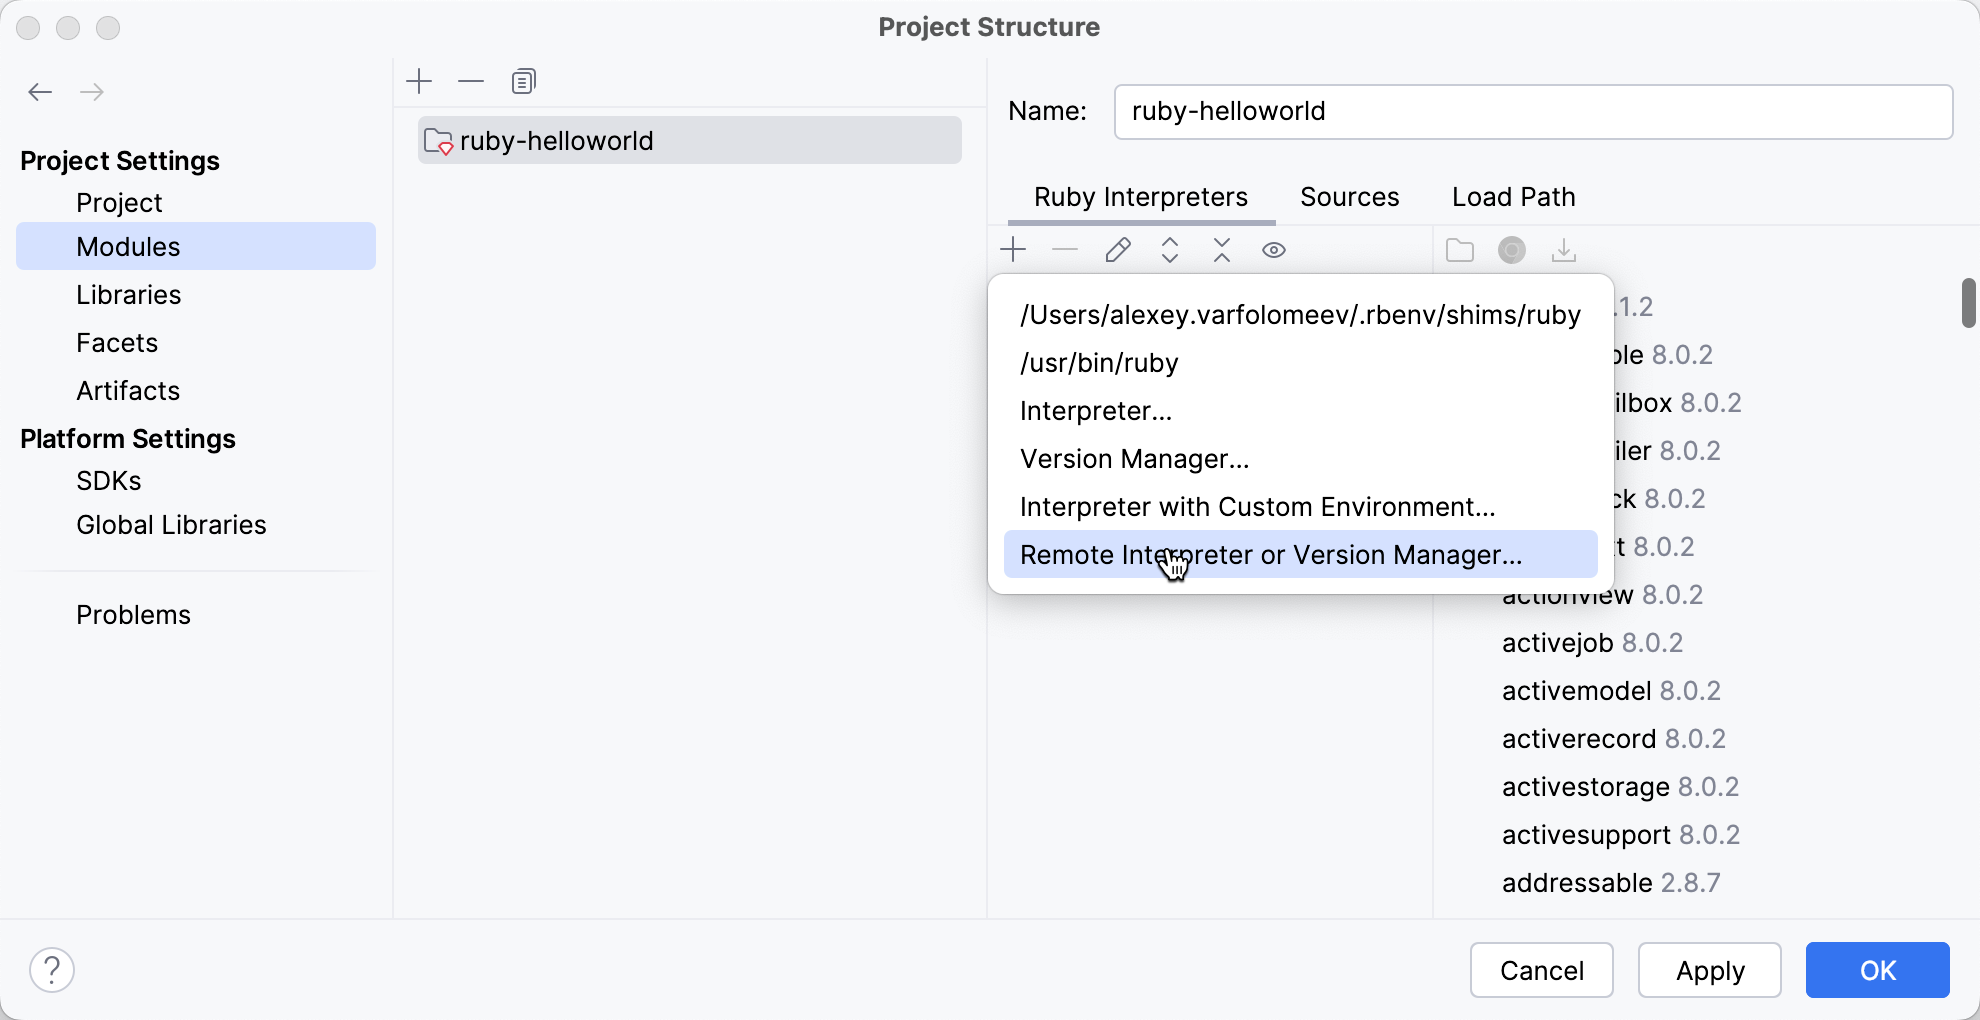
In the Configure Remote Ruby Interpreter dialog, perform the steps provided on the respective tab below.
Specify the following options:

SSH configuration: Expand the list of existing SSH configurations or click the ellipsis button and create a new one.
Ruby or version manager path: Specify the path to the Ruby interpreter or the version manager executable.
Click OK. If you specified a path to the version manager executable on the previous step, IntelliJ IDEA suggests selecting the Ruby interpreter used to run a remote application.
On the Ruby Interpreters page, select the added interpreter and click OK.
In the invoked dialog, select Docker and specify the following options:
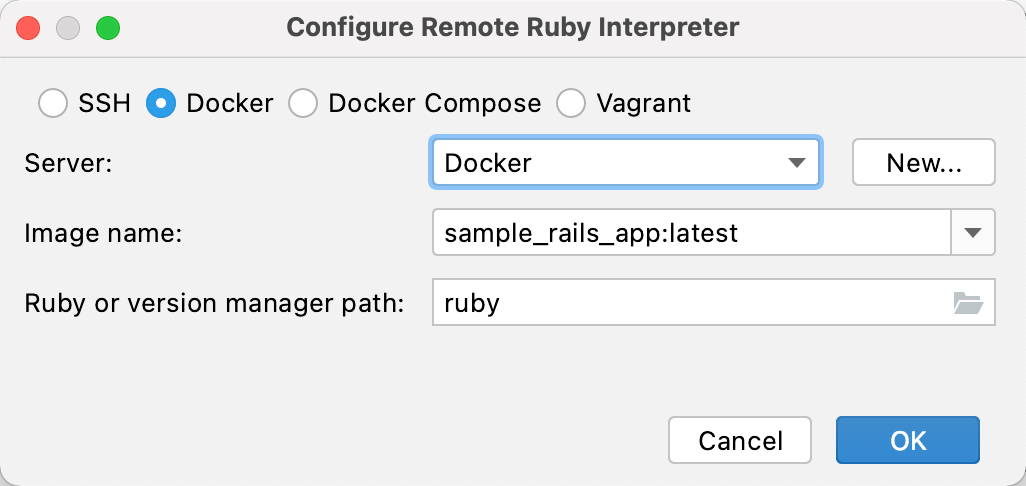
Server: Specify a Docker server used to run a container.
Image name: Select the previously built image.
Ruby or version manager path: Leave the default ruby value to detect a path to the Ruby interpreter automatically.
Click OK. If you specified a path to the version manager executable on the previous step, IntelliJ IDEA suggests selecting the Ruby interpreter used to run a remote application.
The added interpreter is now available on the Ruby Interpreters page.
Select the added interpreter and click OK in the Ruby Interpreters dialog.
Wait until IntelliJ IDEA finishes the indexing process and creates helper Docker images and containers.

In the invoked dialog, select Docker Compose and specify the following options:
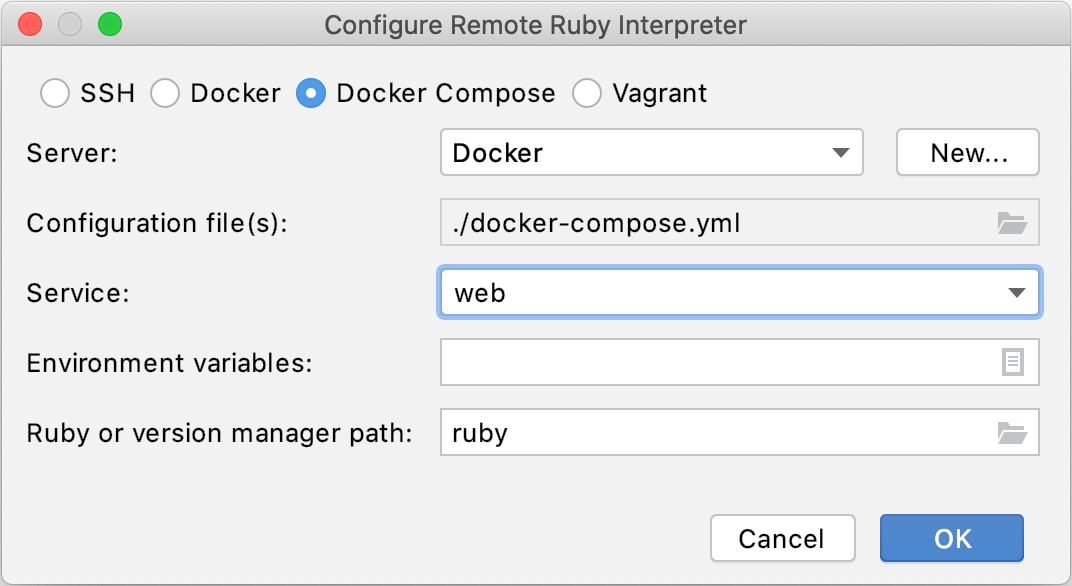
Server: this option specifies a Docker server used to run a container.
Configuration files: leave the docker-compose.yml file.
Service: select the web service.
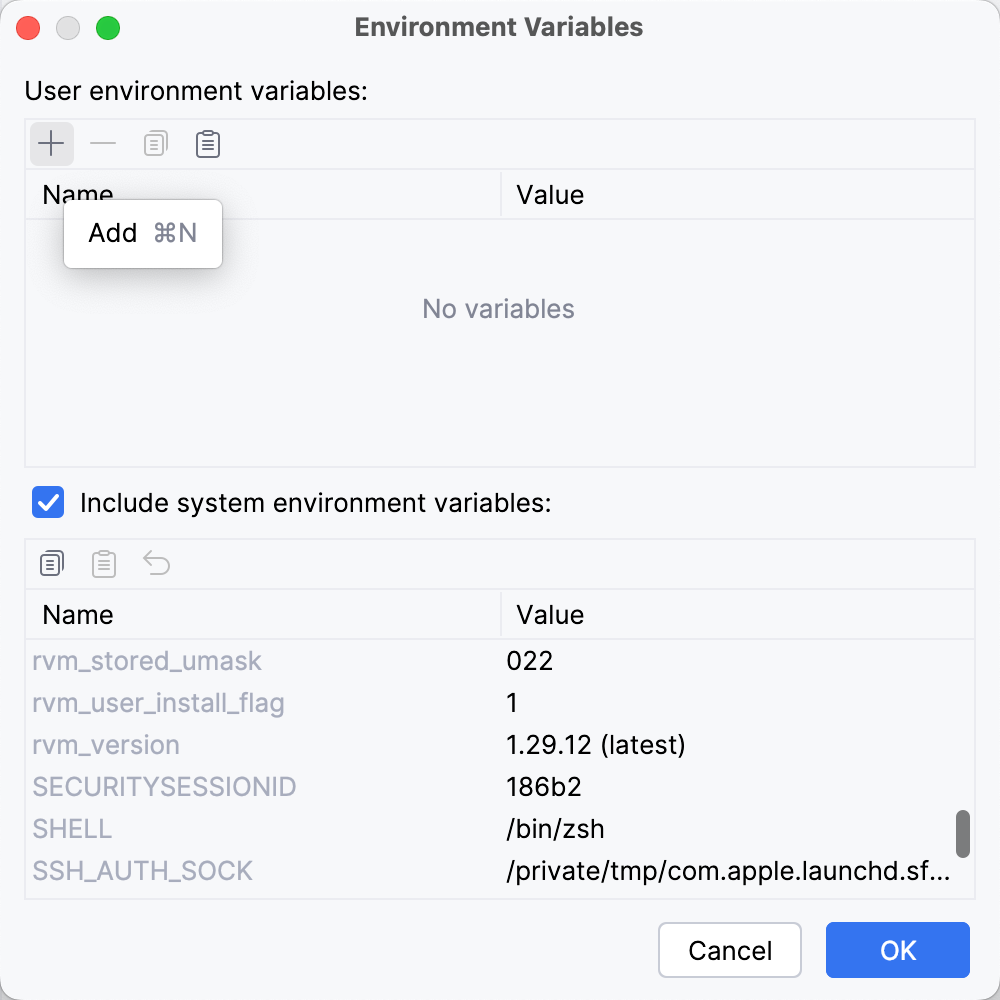
Environment variables: Normally, does not need to be changed.
If you do want to customize them, click the Edit environment variables icon to open the Environment Variables dialog.
You can either add a new variable (click the + icon) or edit system environment variables, which are included by default.
Ruby or version manager path: Leave the default ruby value to detect a path to the Ruby interpreter automatically. You can also manually specify the path to the interpreter or the version manager executable.
Click OK. If you specified a path to the version manager executable on the previous step, IntelliJ IDEA suggests selecting the Ruby interpreter used to run a remote application.
The added interpreter is now available on the Ruby Interpreters page.
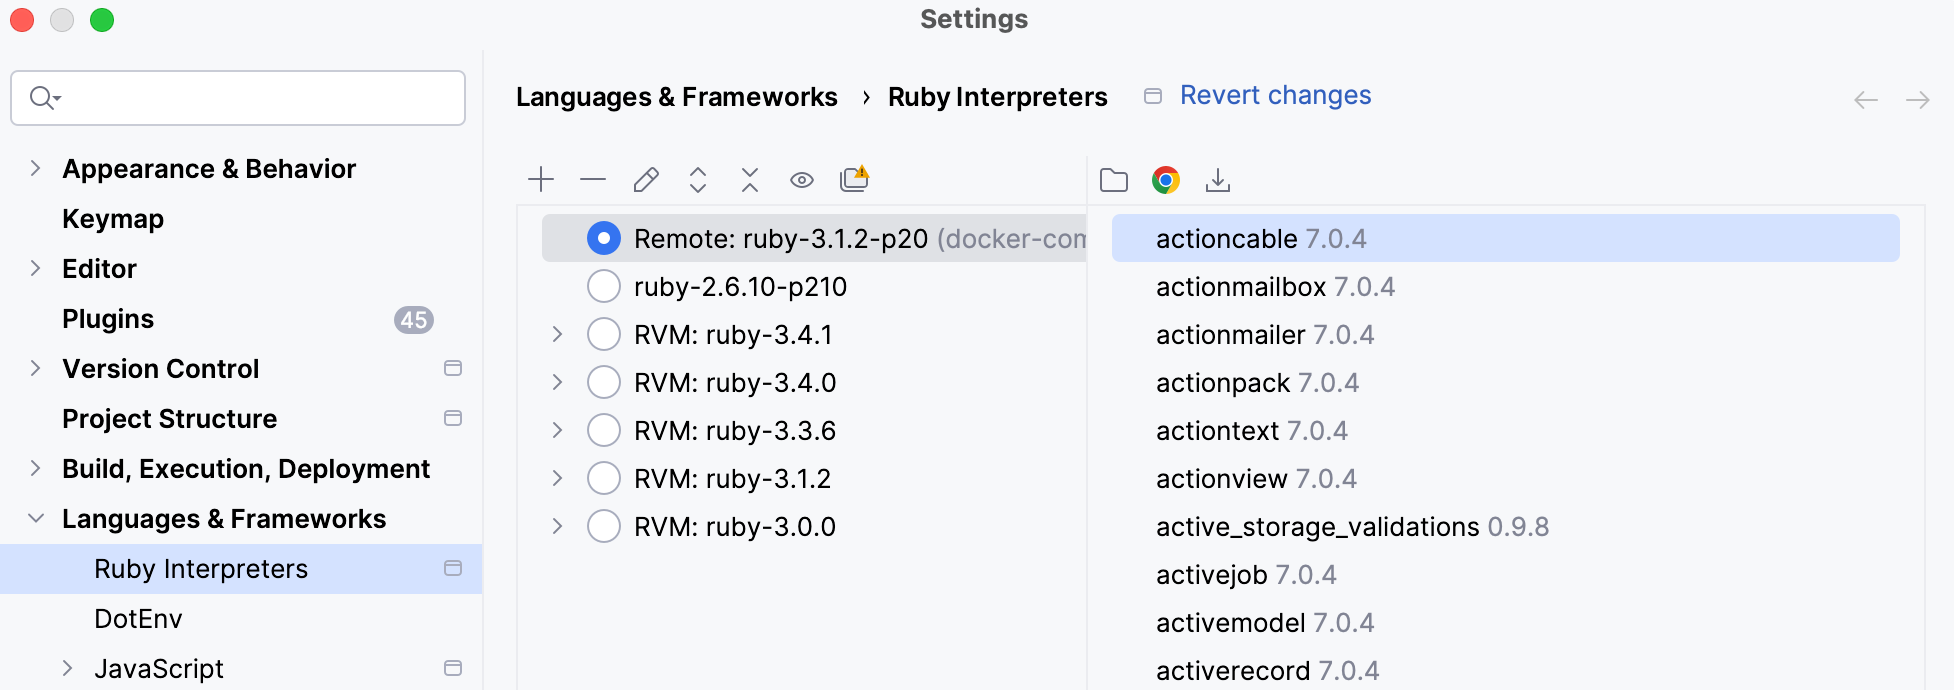
Select the added interpreter and click OK in the Ruby Interpreters dialog.
Wait until IntelliJ IDEA finishes the indexing process and creates helper Docker images and containers.

In the invoked dialog, select Vagrant.
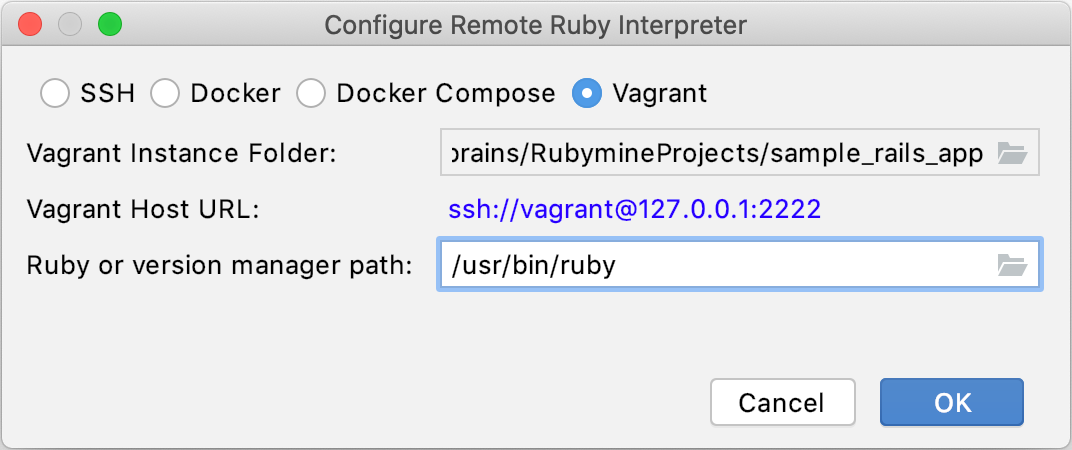
If a project root folder contains a Vagrantfile pointing to a running virtual machine, IntelliJ IDEA detects the Vagrant Instance Folder automatically and displays the Vagrant Host URL used to access the virtual machine. If necessary, you can change the Vagrant Instance Folder to use another virtual machine.
In Ruby or version manager path, specify the path to the Ruby interpreter or the version managerexecutable. Click OK.
(Optional) If you specified a path to the version manager executable on the previous step, IntelliJ IDEA suggests selecting the Ruby interpreter used to run a remote application.
Select the added interpreter on the Ruby Interpreters page and click OK.
Wait until IntelliJ IDEA downloads gems from the remote machine to local caches. This is required for indexing.
IntelliJ IDEA allows you to use the remote Ruby interpreter installed on Windows Subsystem for Linux (WSL and WSL 2) for your local projects.
In the invoked dialog, select WSL:
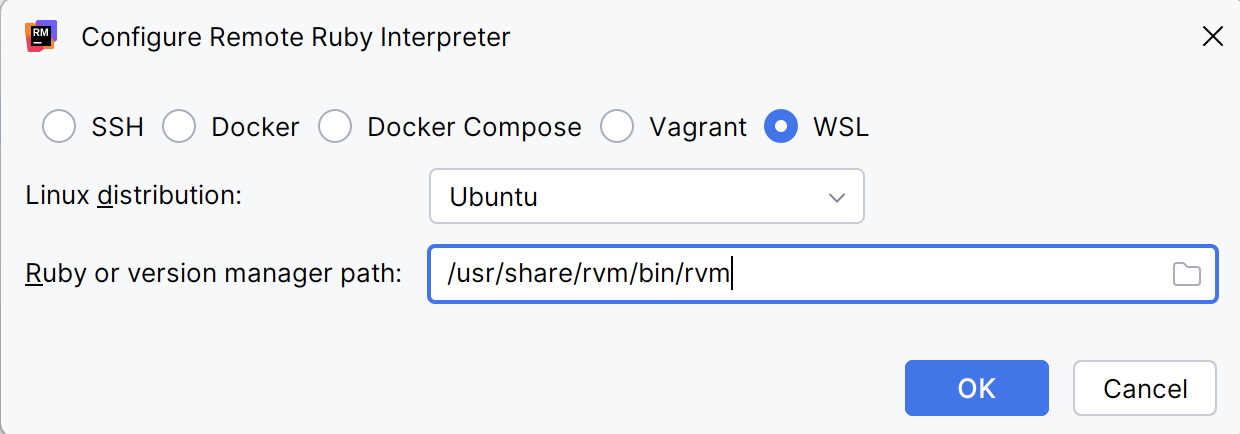
Choose the desired Linux distribution.
In Ruby or version manager path, specify the path to the Ruby interpreter or the version managerexecutable. Click OK.
(Optional) If you specified a path to the version manager executable in the previous dialog, IntelliJ IDEA suggests selecting the Ruby interpreter used to run a remote application:
Select the added interpreter in the Ruby Interpreters dialog and click OK.
(Optional) Edit mappings between local and remote project files
Specify mappings between files of a local and remote project. To do this, click the
button.
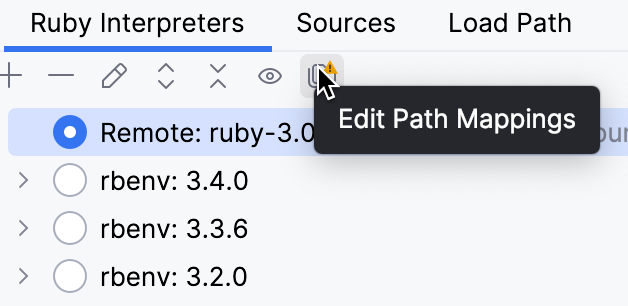
In the Edit Project Path Mappings dialog, specify the local and remote project root paths.
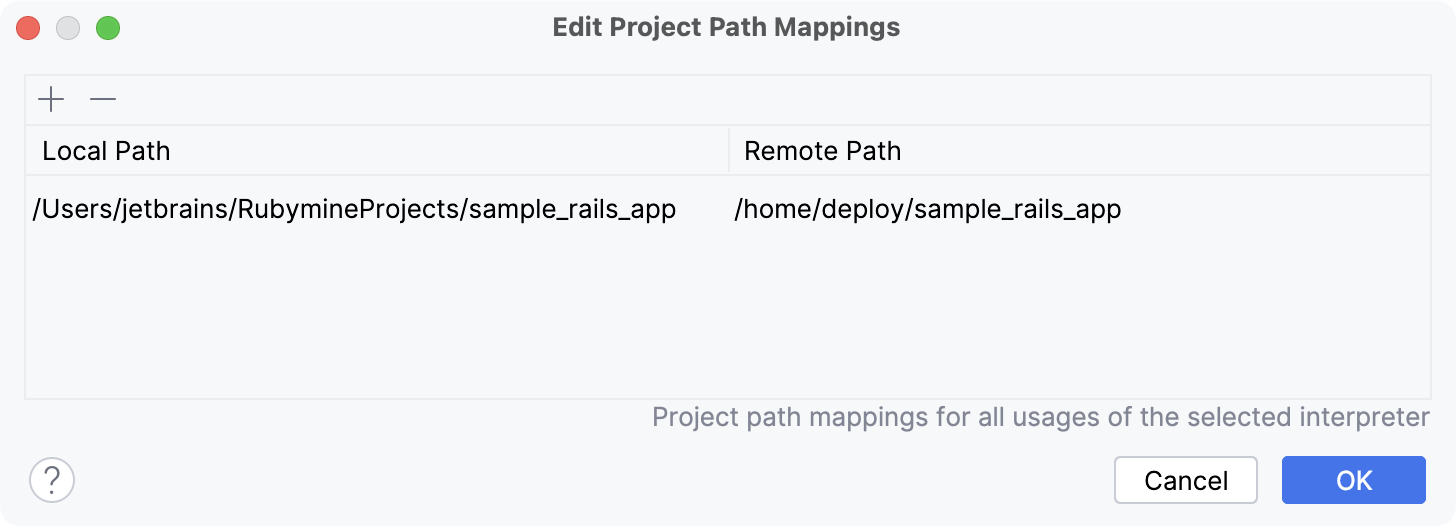
Note that IntelliJ IDEA detects Vagrant synced folders, WSL mappings, and so on. These mappings are listed in this dialog and cannot be changed.
Edit an interpreter
You can customize the names of Ruby interpreters to distinguish them quickly and avoid duplication.
Open the Project Structure dialog Ctrl+Alt+Shift+S and select Modules on the left.
Right-click the required Ruby interpreter and select Edit name.
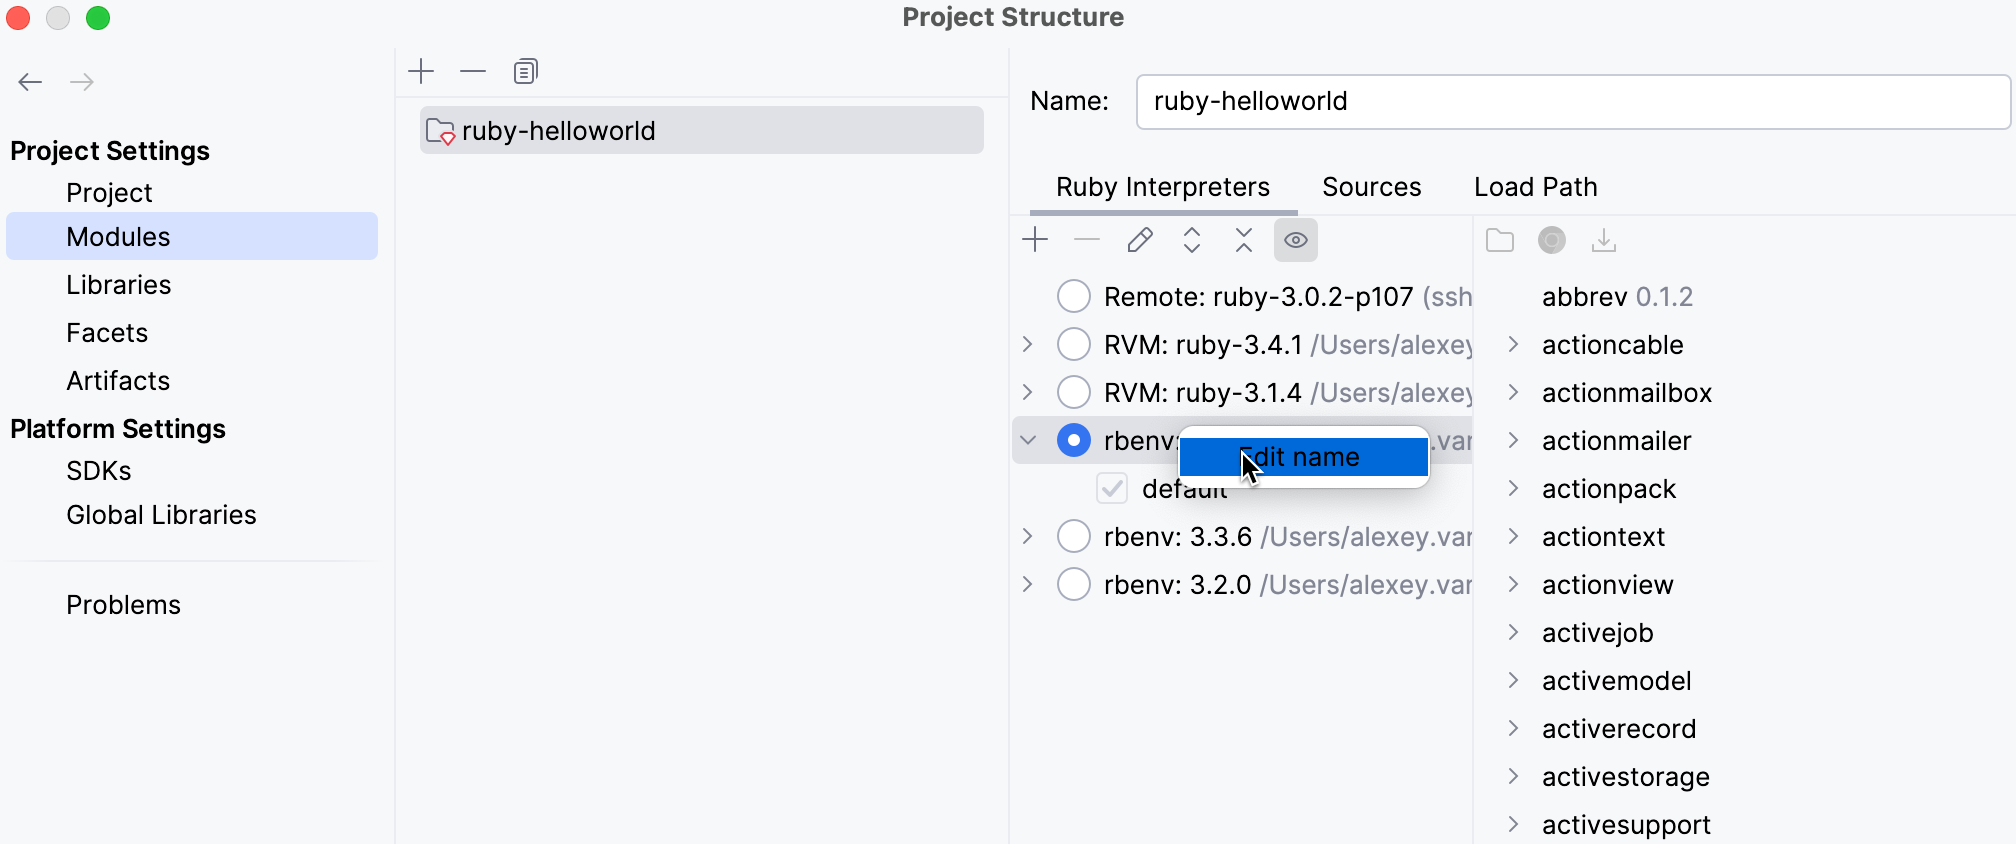
Alternatively, you can select the required Ruby interpreter and use the
icon or press Enter.
In the Edit interpreter dialog, provide a new name for the interpreter and click OK.

Create RVM gemsets
To create an RVM gemset, open the Product Structure dialog (Ctrl+Alt+Shift+S), go to Modules | Ruby Interpreters, and perform the following steps:
Right-click the required interpreter and select New RVM gemset
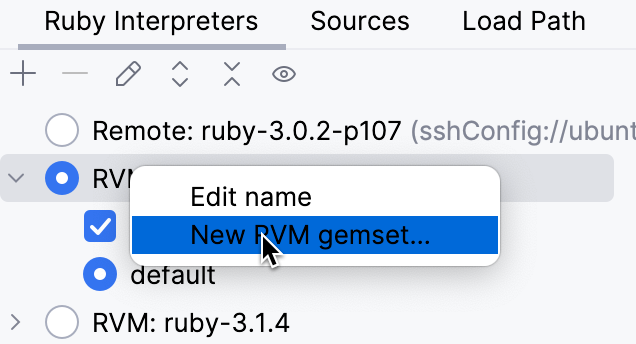
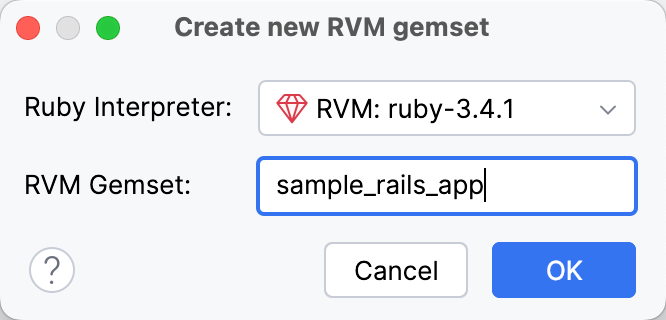
In the dialog that opens, select the Ruby interpreter, for which the gemset will be created. Then, specify the gemset name and click OK:
The Ruby Interpreters page will show the gemset as a child of the selected interpreter:
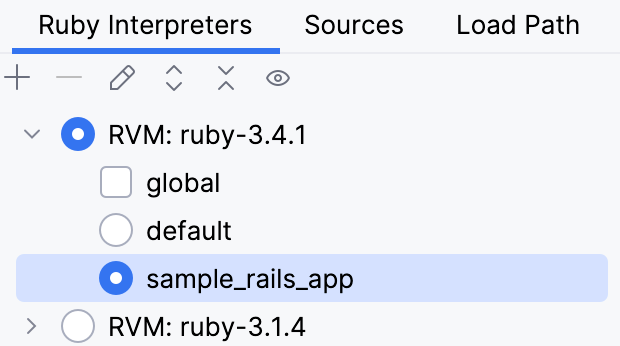
Note that the asterisk is appended to the gemset name. This means that gemset is not created yet. To create it, click Apply or OK in the Product Structure dialog.
Troubleshooting
Configure a local interpreter for a Ruby project
If you encounter issues when configuring a local interpreter for a newly-cloned Ruby project (for example, the Ruby Interpreters page is not displayed), try opening this project from existing sources.
In the main menu, go to .
Provide the path to your project.
In the Import Project dialog, select the Create project from existing sources option and click Next.
Specify the project name and path to the directory in which you want to create the project. Click Next.
Select the directories that you want to add to the project roots and click Next.
Select the frameworks that you want to use in your project. Click Finish.
Once IntelliJ IDEA opens your project, follow the steps described in Add an interpreter to configure a local interpreter.
Remove an interpreter
Go to
From the list of interpreters, select the manually added interpreter you want to remove.
Click the
button from the toolbar on top of the Ruby Interpreters page.
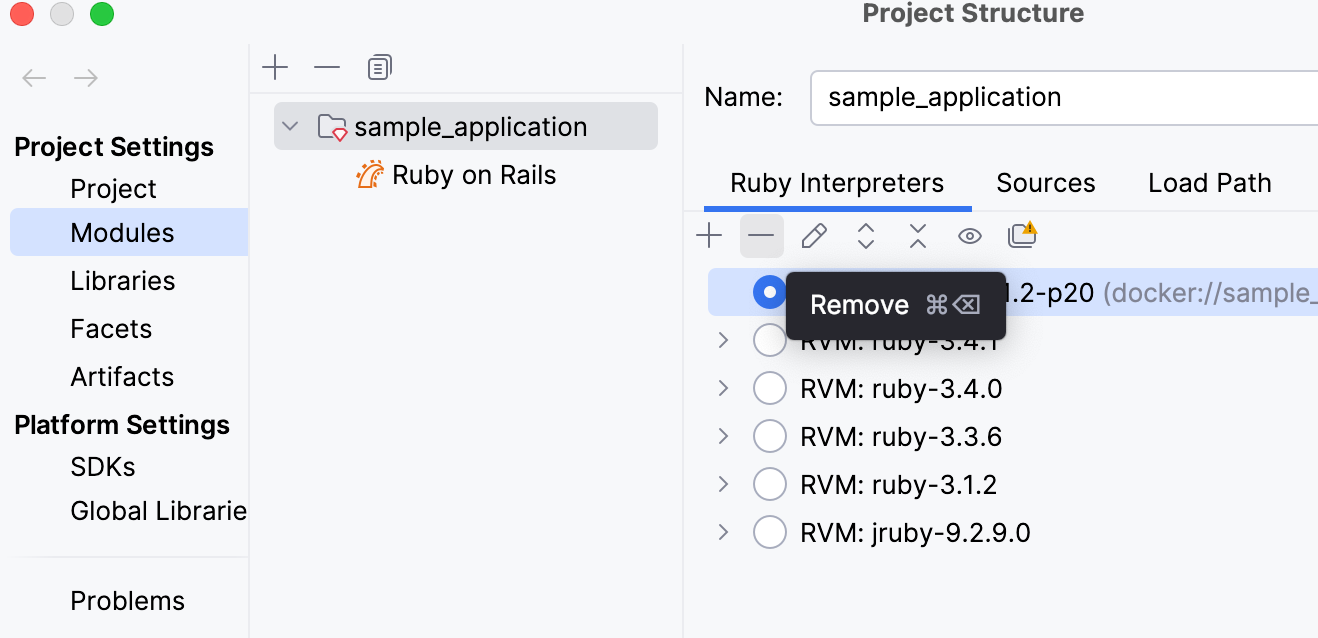
Click OK in the invoked dialog.