ESLint
IntelliJ IDEA integrates with ESLint which brings a wide range of linting rules that can also be extended with plugins. IntelliJ IDEA shows warnings and errors reported by ESLint right in the editor, as you type. With ESLint, you can also use JavaScript Standard Style.
Installing, enabling, and configuring ESLint in IntelliJ IDEA
- Open the built-in IntelliJ IDEA Terminal (Alt+F12) and type
npm install eslint --save-devornpm install eslint -gat the command prompt. - Optionally, install additional plugins, for example, eslint-plugin-react to lint React applications.
- In the Settings/Preferences dialog (Ctrl+Alt+S), choose JavaScript under Languages and Frameworks and then choose ESLint under Code Quality Tools. On the ESLint page page that opens, select the Enable checkbox. After that the controls on the page become available.
- In the Node Interpreter field, specify the path to Node.js. If you followed the standard installation procedure, IntelliJ IDEA detects the path and fills in the field itself.
- In the ESLint Package field, specify the location of the
eslintorstandardpackage. - Choose the configuration to use.
- With Automatic search, IntelliJ IDEA looks for a
.eslintrcfile or tries to detect a configuration defined undereslintConfigin apackage.json. IntelliJ IDEA first looks for a.eslintrcorpackage.jsonin the folder with the file to be linted, then in its parent folder, and so on up to the project root. If the search fails, ESLint uses its default embedded configuration file. - Choose Configuration File to use a custom file and specify the file location in the Path field.
- With Automatic search, IntelliJ IDEA looks for a
- Optionally:
- In the Extra ESLint Options field, specify additional command line options to run ESLint with, use spaces as separators.
- In the Additional Rules Directory field, specify the location of the files with additional code verification rules. These rules will be applied after the rules from
.eslintrcor the above specified custom configuration file and accordingly will override them.
Importing code style from ESLint
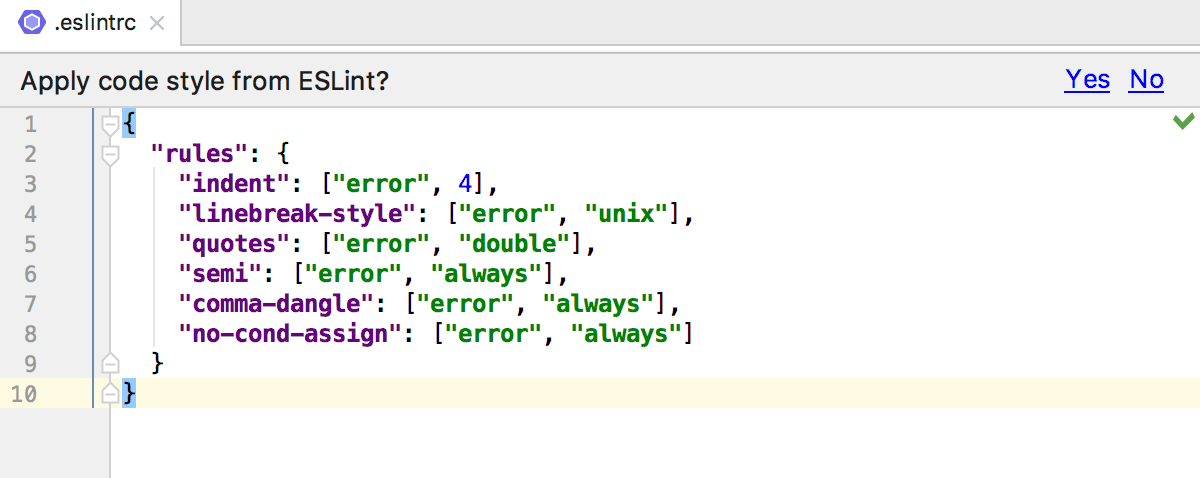
You can import some of the ESLint code style rules to the IntelliJ IDEA JavaScript code style settings. This integration makes it easier for you to configure the IntelliJ IDEA code formatter so it no longer breaks properly formatted code from the ESLint perspective.
To import ESLint code style rules
- Open an
.eslintrcJSON file or apackage.jsonwith theeslintConfigfield. IntelliJ IDEA shows the question Apply code style from ESLint? at the top of the editor. Click Yes to apply the matched rules to the Project code style scheme.
Please note that only the rules that have matching code style settings in IntelliJ IDEA are applied, for example, indent, curly or no-trailing-spaces. Complex object options for these rules are not always applied. Also note that IntelliJ IDEA does not apply rules from the configuration files listed in the extends field or rules from plugins.
Using JavaScript Standard Style
You can set JavaScript Standard Style as default JavaScript code style for your application so its main rules are applied when you type the code or reformat it. Since Standard is based on ESLint, you can also use Standard via the IntelliJ IDEA ESLint integration.
To install JavaScript Standard
- Open the built-in IntelliJ IDEA Terminal (Alt+F12) and type
npm install standard --save-devat the command prompt. Learn more from the JavaScript Standard Style Official website.
To enable linting with Standard via ESLint
- In the Settings/Preferences dialog (Ctrl+Alt+S), choose JavaScript under Languages and Frameworks and then choose ESLint under Code Quality Tools.
- On the ESLint page that opens, select the Enable checkbox, and specify the location of the
standardpackage in the ESLint Package field.
To set the JavaScript Standard Style as default
- In the Settings/Preferences dialog (Ctrl+Alt+S), choose ).
- On the Code Style. JavaScript page that opens, click Set from, and then choose Predefined Style | JavaScript Standard Style. The style will replace your current scheme.