Deploy a Java web application inside a Wildfly server container
You can use Docker to run a Wildfly server and deploy your Java web applications on it. This tutorial describes how to create a simple Java web application, build a deployable web application resource (WAR) file, and then deploy it inside a Wildfly server running as a Docker container.
Before you begin, make sure that Docker integration is properly configured.
Create a Java web application
Open the File menu, point to New and click Project.
Click Java, then select Web Application and click Next.
Specify the name SimpleJavaWebApp and click Finish.
Open the web/index.jsp file and paste the following HTML code as the entrypoint for the servlet:
<%@ page contentType="text/html;charset=UTF-8" language="java" %>
<html>
<head>
<title>Simple Java Web App Demo</title>
</head>
<body>
<h1>Hello, I am a Java web app!</h1>
<p>I am running from a WAR artifact.</p>
</body>
</html>
Select the top level node in the Project tool window, open the File menu, point to New and click Directory.
-
Enter the directory name docker-dir and click OK.
This directory will be used for the Dockerfile and WAR artifact.
Build a WAR artifact
Open project settings (Ctrl+Shift+Alt+S) and click Artifacts.
Click Add (
 ), point to Web Application: Archive, and then click For 'SimpleJavaWebApp:war exploded'. If necessary, create a manifest file.
 Change the output directory for the artifact to [PROJECT_PATH]/docker-dir/SimpleJavaWebApp_war.
Open the Build menu and click Build Artifacts. Select to build the SimpleJavaWebApp:war artifact. You should see the artifact in the specified output directory.
Run a Wildfly server container from a Dockerfile
In the Project tool window, right-click the docker-dir directory, point to New and then click File.
Enter the file name Dockerfile and click OK.
-
Paste the following code into the Dockerfile:
FROM jboss/wildfly
COPY SimpleJavaWebApp_war/SimpleJavaWebApp_war.war /opt/jboss/wildfly/standalone/deployments/
This will set the base image of the container to
jboss/wildflyand copy the WAR artifact to the Wildfly server default deployment directory. -
Click the green arrows in the gutter next to the
FROMcommand and then click Run on Docker.
This will start a run configuration with the default settings. The application will be deployed inside the Wildfly server running in a container, but you will not be able to access it from the host, because port 8080 in the container is not published to the host.
-
Click the green arrows in the gutter next to the
FROMcommand and then click Edit 'docker-dir/Dockerfile'.
-
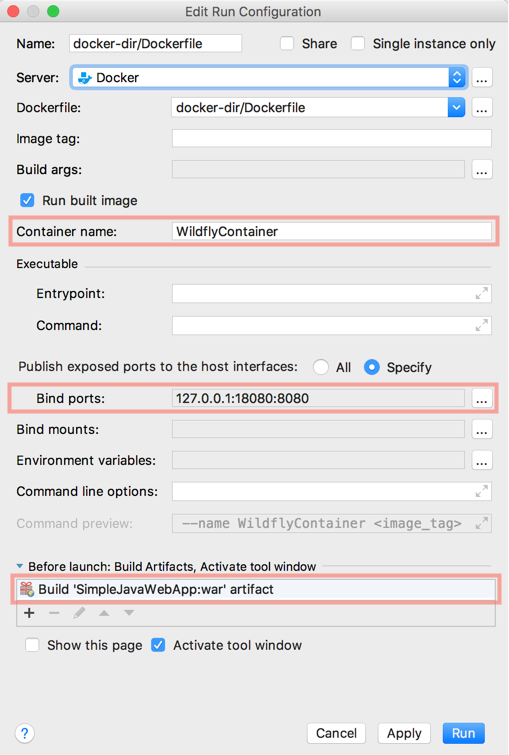
In the Edit Run Configuration dialog, you can optionally specify the name of the container for convenience (otherwise, Docker uses a default name).
Set the following port bindings:
Container port:
8080Host IP:
127.0.0.1Host port:
18080Protocol:
tcp
Add a task in the Before launch section to build the SimpleJavaWebApp_war artifact every time you start this run configuration.

Click Run to recreate the container with the new settings.
-
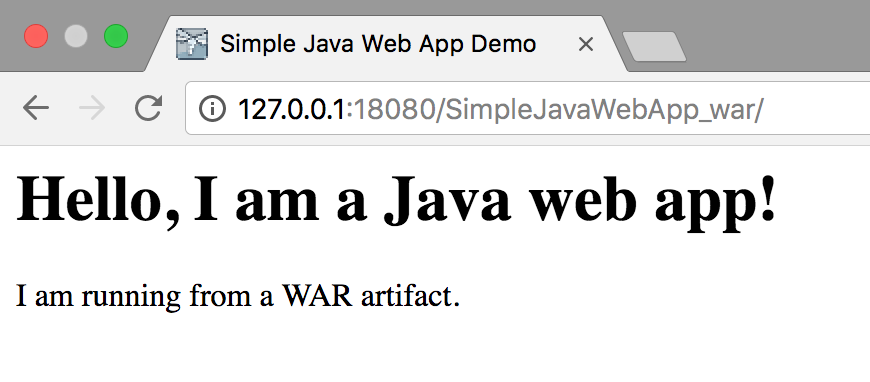
When the container starts, open the following address in your web browser:
http://127.0.0.1:18080/SimpleJavaWebApp_war/.You should see the following page:
