Using auto import
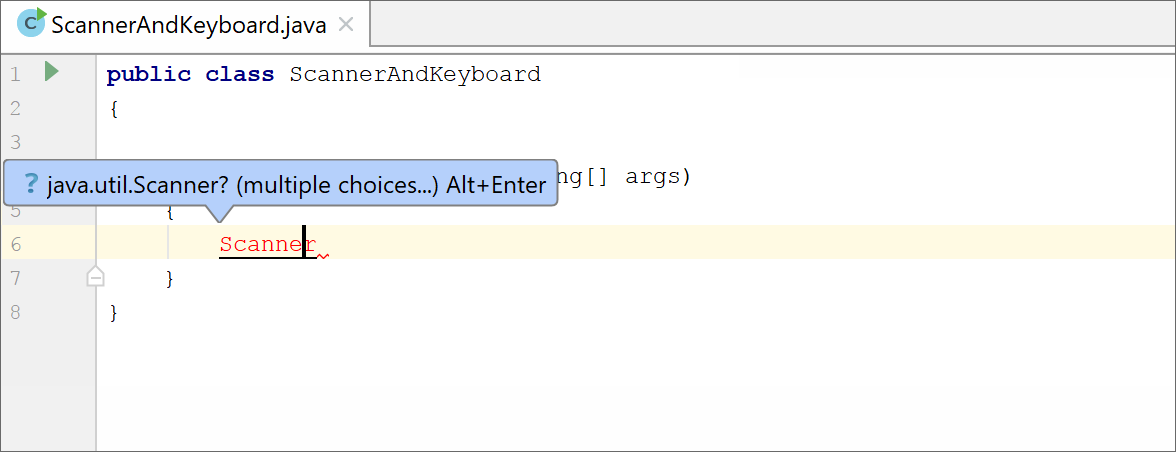
If you're using a class, a static method, or a static field that you haven't imported yet, the IDE shows you a popup suggesting to add a missing import statement so that you don't have to add it manually. Press Alt+Enter to accept the suggestion.
If there's more than one possible source of import, pressing Alt+Enter will open the list of suggestions.
Automatically add import statements
You can configure the IDE to automatically add import statements if there are no options to choose from.
-
In the Settings/Preferences dialog (Ctrl+Alt+S), click .
-
Select the Add unambiguous imports on the fly checkbox, and apply the changes.
If you paste blocks of code that contain references to classes or static methods and fields that are not yet imported, the IDE asks you how to process these references. If you want IntelliJ IDEA to automatically add missing imports, select All from the Insert imports on paste list as well.
Disable import popups
Click
 Hector in the Status bar in the bottom right-hand corner.
Clear the Import popup checkbox.
You can also choose whether you want to show import popups for classes or for static methods and fields:
In the Settings/Preferences dialog (Ctrl+Alt+S), click .
Make sure the necessary options are selected for the Show import popup for setting (both checkboxes, classes and static methods and fields, are enabled by default).
When popups are disabled, unresolved references are underlined and marked with the red bulb icon ![]() . To view the list of suggestions, click this icon (or press Alt+Enter) and select Import class.
. To view the list of suggestions, click this icon (or press Alt+Enter) and select Import class. 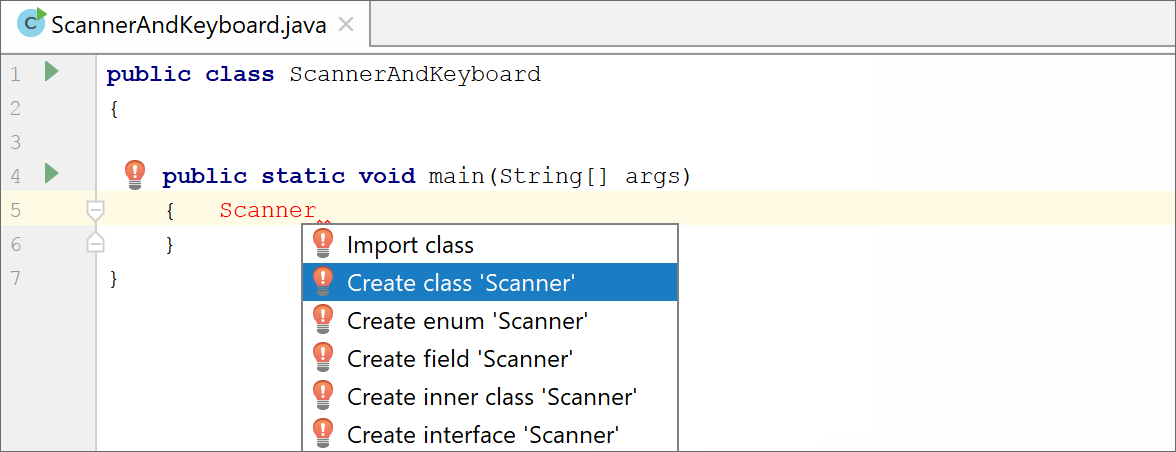
Import packages instead of single classes
IntelliJ IDEA suggests to import single classes by default. You can change the settings to import entire packages instead.
In the Settings/Preferences dialog (Ctrl+Alt+S), select .
Clear the Use single class import checkbox, and apply the changes.
Disable wildcard imports
When the number of classes that IntelliJ IDEA has imported from the same package reaches the limit (5 by default), the IDE modifies the statements in order to import the entire package instead of importing several single classes from this package. 
You can disable wildcard imports to always import single classes:
In the Settings/Preferences dialog (Ctrl+Alt+S), select .
Make sure that the Use single class import option is enabled.
In the Class count to use import with ‘*’ and Names count to use static import with ‘*’ fields, specify values that definitely exceed the number of classes in a package and the number of names in a class (for example,
999).
To replace an import statement with single class imports in a file without changing the settings, place the caret at the import statement, press Alt+Enter (or use the intention action ![]() icon), and select Replace with single class imports.
icon), and select Replace with single class imports.
Exclude classes and packages from auto import
The list of import suggestions may include classes and packages that you don't need. You can exclude redundant entries from automatic import so that the list of suggestions contains only relevant items.
In the Settings/Preferences dialog (Ctrl+Alt+S), click .
In the Exclude from Import and Completion section, click
 (Alt+Insert), and specify a class or a package that you want to exclude.
You can also select whether you want to exclude items from the current project or from all projects.
Exclude a class or a package on the fly
Press Alt+Enter on a missing class to open the list of import suggestions.
Click the right arrow next to a package and select an item (a class or an entire package) that you want to exclude.
In the Exclude from Import and Completion section of the Auto Import dialog, select whether you want to exclude items from the current project or from all projects, and apply the changes.
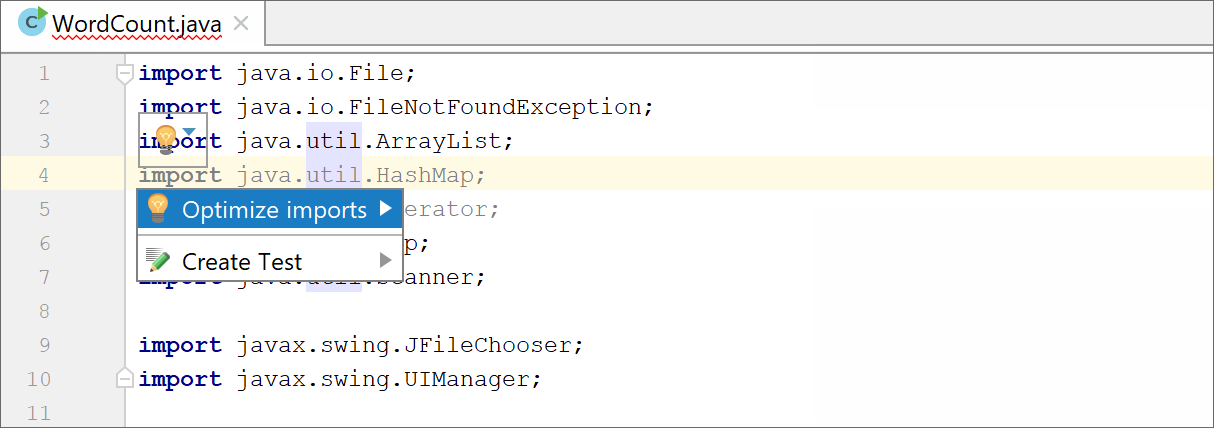
Optimize imports
The Optimize Imports feature helps you remove unused imports, add missing imports, and organize import statements in the current file, or in all files in a directory at once.
Select a file or a directory in the Project tool window.
-
Do any of the following:
From the main menu, select (or press Ctrl+Alt+O).
From the context menu, select Optimize Imports.
(If you've selected a directory) Choose whether you want to optimize imports in all files in the directory, or only in locally modified files (if yor project is under version control), and click Run.
Optimize imports in a single file
Place the caret at the import statement and press Alt+Enter (or use the intention action
 icon).
Select Optimize imports.
Automatically optimize imports in modified files
If your project is under version control, you can instruct IntelliJ IDEA to optimize imports in modified files before committing them to VCS.
From the main menu, select (or press Ctrl+K).
In the Before commit area of the Commit Changes dialog, select the Optimize imports checkbox.
Optimize imports on the fly
You can also configure the IDE to automatically optimize imports. IntelliJ IDEA will remove or modify import statements as you work in the editor.
In the Settings/Preferences dialog (Ctrl+Alt+S), click .
Enable the Optimize imports on the fly option and apply the changes.