Create your first Java application
In this tutorial, you will learn how to create, run, and package a simple Java application that prints Hello, World! to the system output. Along the way, you will get familiar with IntelliJ IDEA features for boosting your productivity as a developer: coding assistance and supplementary tools.
Create a new project
Install the JDK
To develop Java applications in IntelliJ IDEA, you need the Java SDK (JDK). If Java is not installed on your computer, you need to download a JDK package.
-
Open the jdk.java.net website.
There, you'll find the Oracle's OpenJDK binaries for Windows, macOS, and Linux as .tar.gz and .zip archives.
-
Select and download the necessary JDK version.
If you're not sure which version you need, select the latest stable version.
-
Unzip the archive and place the folder with Java to the Java home directory on your computer.
The default path on Windows: C:\Program Files\Java, on macOS: /Library/Java/JavaVirtualMachines.
On Linux, the default location for Java might differ depending on the distribution that you use.
Create a new Java project
In IntelliJ IDEA, a project helps you organize your source code, tests, libraries that you use, build instructions, and your personal settings in a single unit.
-
Launch IntelliJ IDEA.
If the Welcome screen opens, click Create New Project.
Otherwise, from the main menu, select .
In the New Project wizard, select Java from the list on the left.
-
From the Project SDK list, select the JDK that you want to use in your project.
If the list is empty, click New and specify the path to the Java home directory (for example, jdk-11.0.0.jdk).
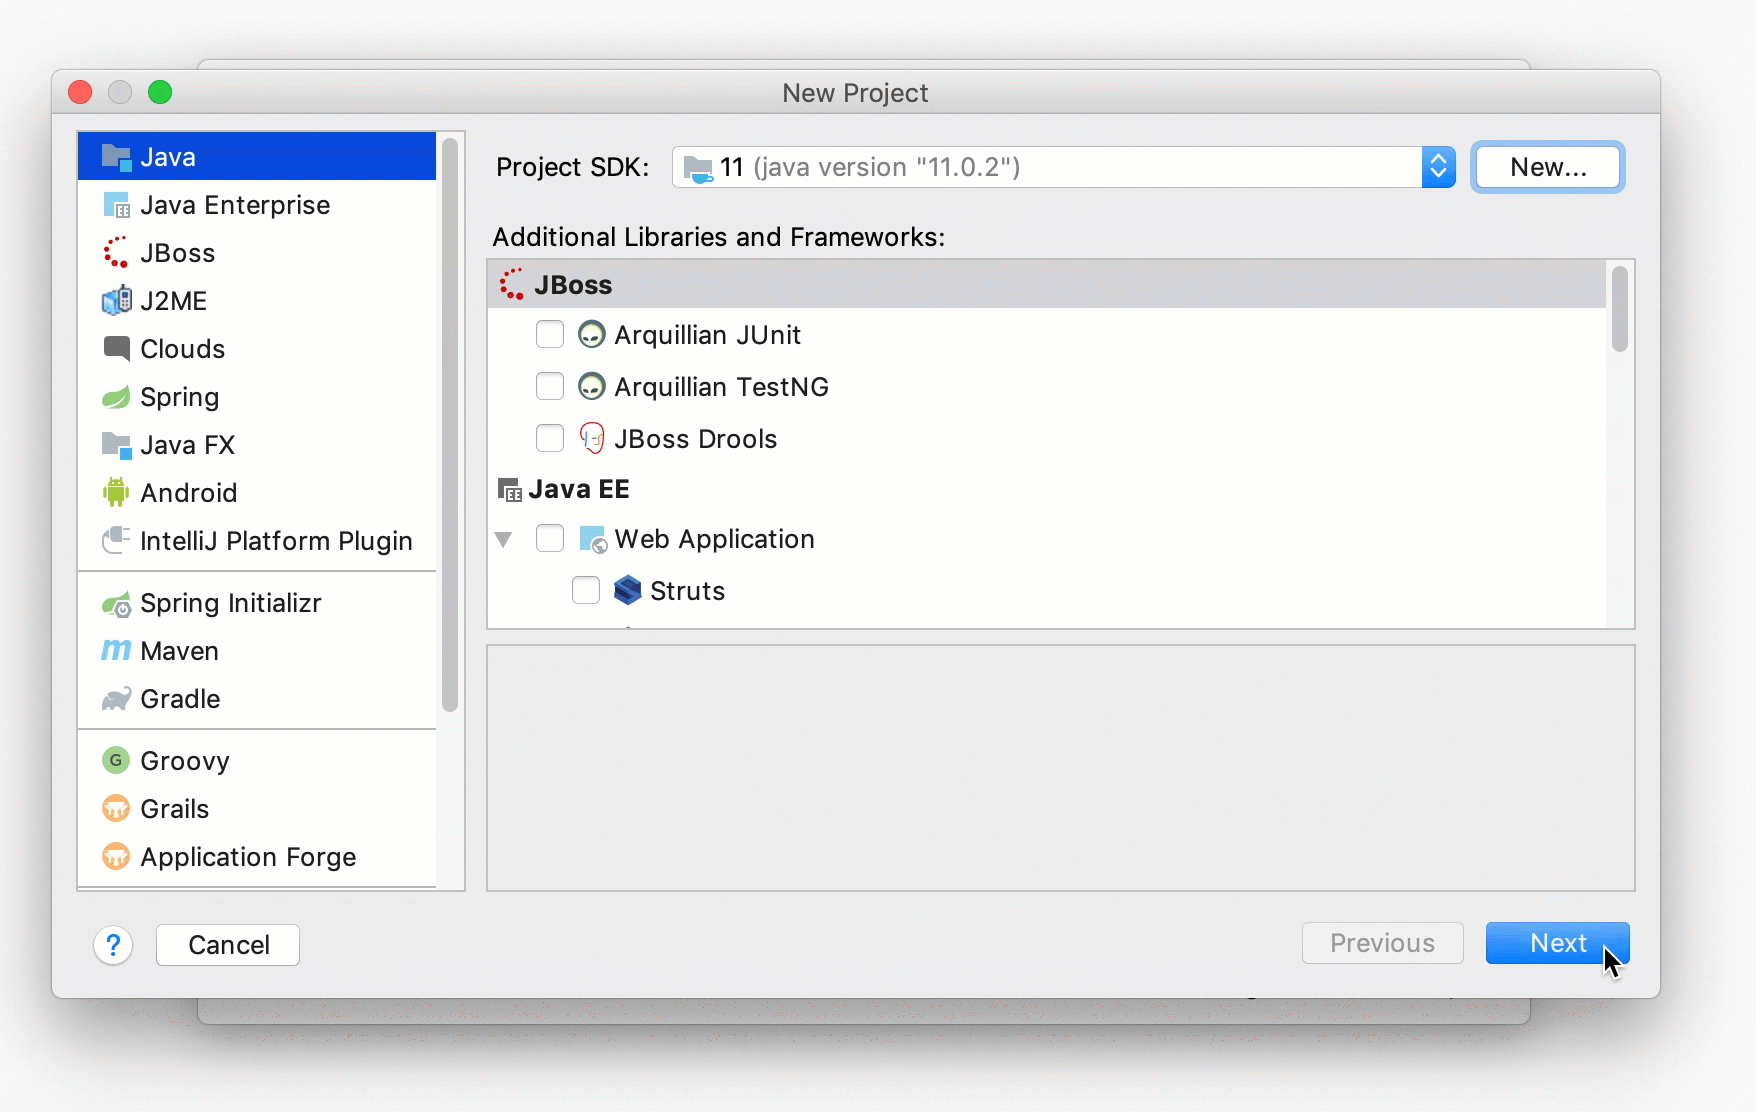
We're not going to use any additional libraries or frameworks for this tutorial, so click Next.
Don't create a project from the template. In this tutorial, we're going to do everything from scratch, so click Next.
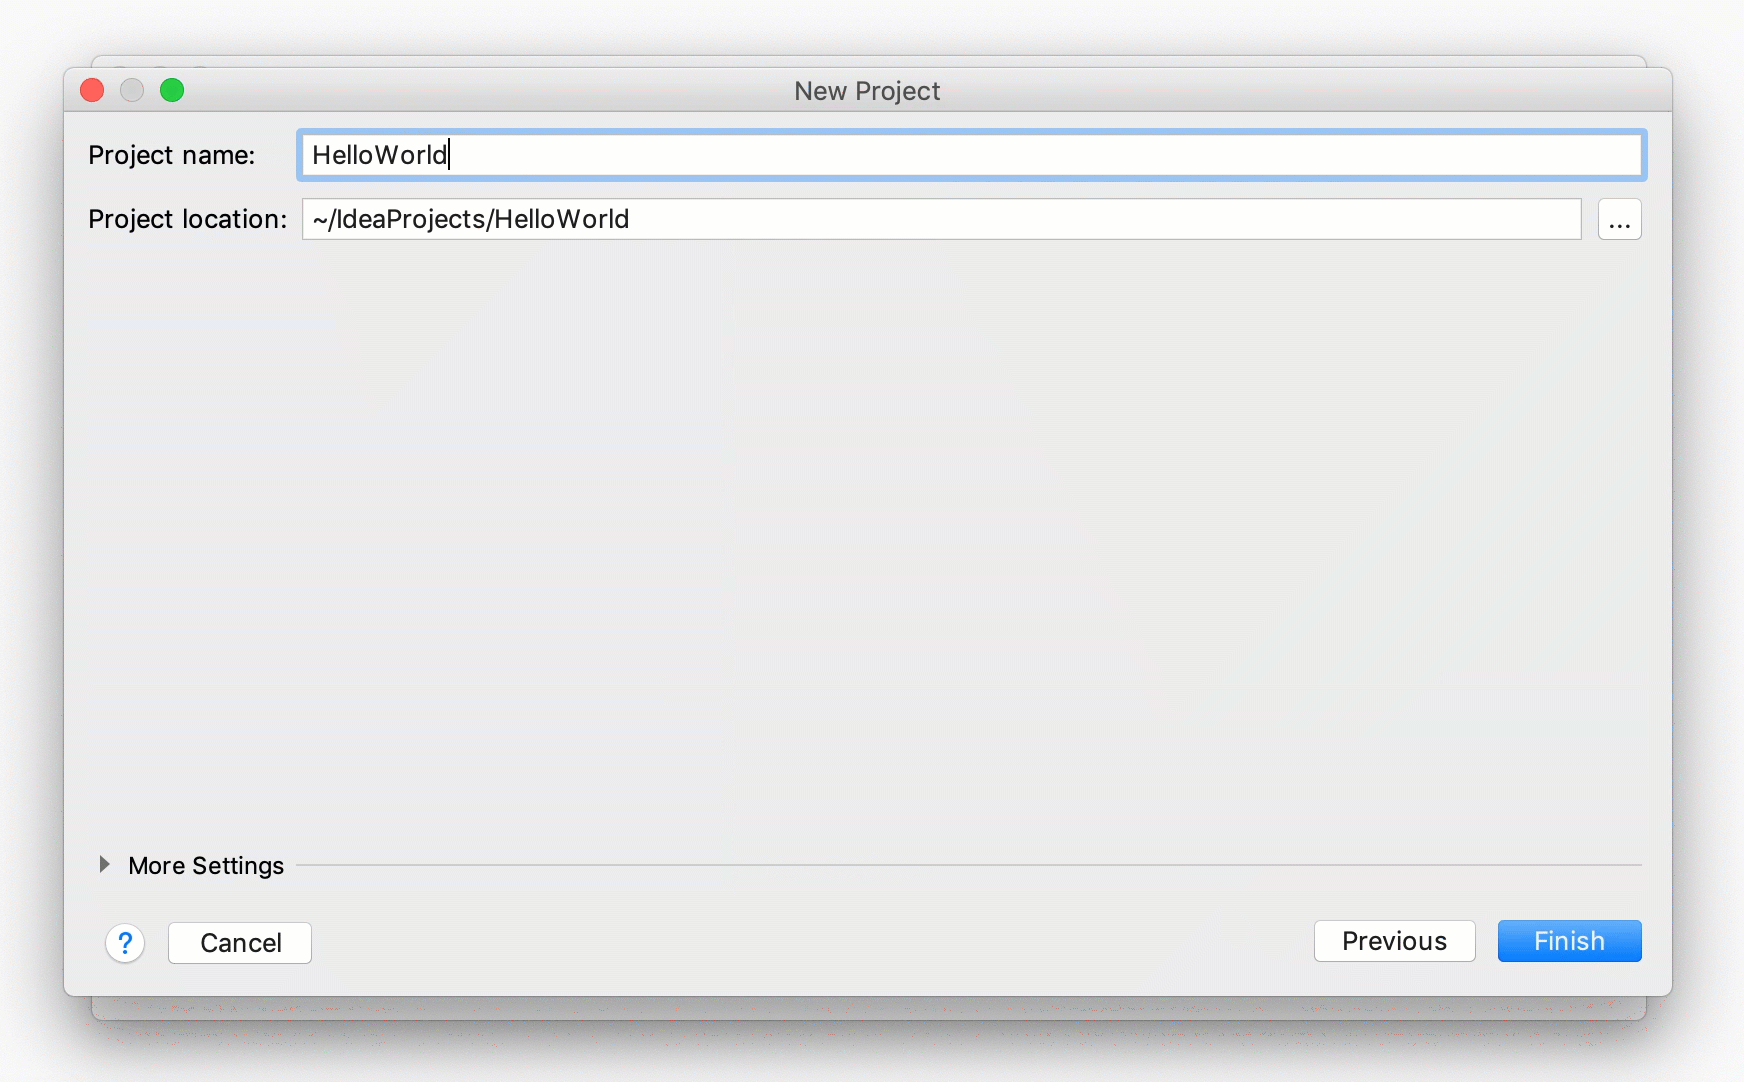
Name the project, for example:
HelloWorld.If necessary, change the default project location and click Finish.
Create a package and a class
Packages are used for grouping together classes that belong to the same category or provide similar functionality, for structuring and organizing large applications with hundreds of classes.
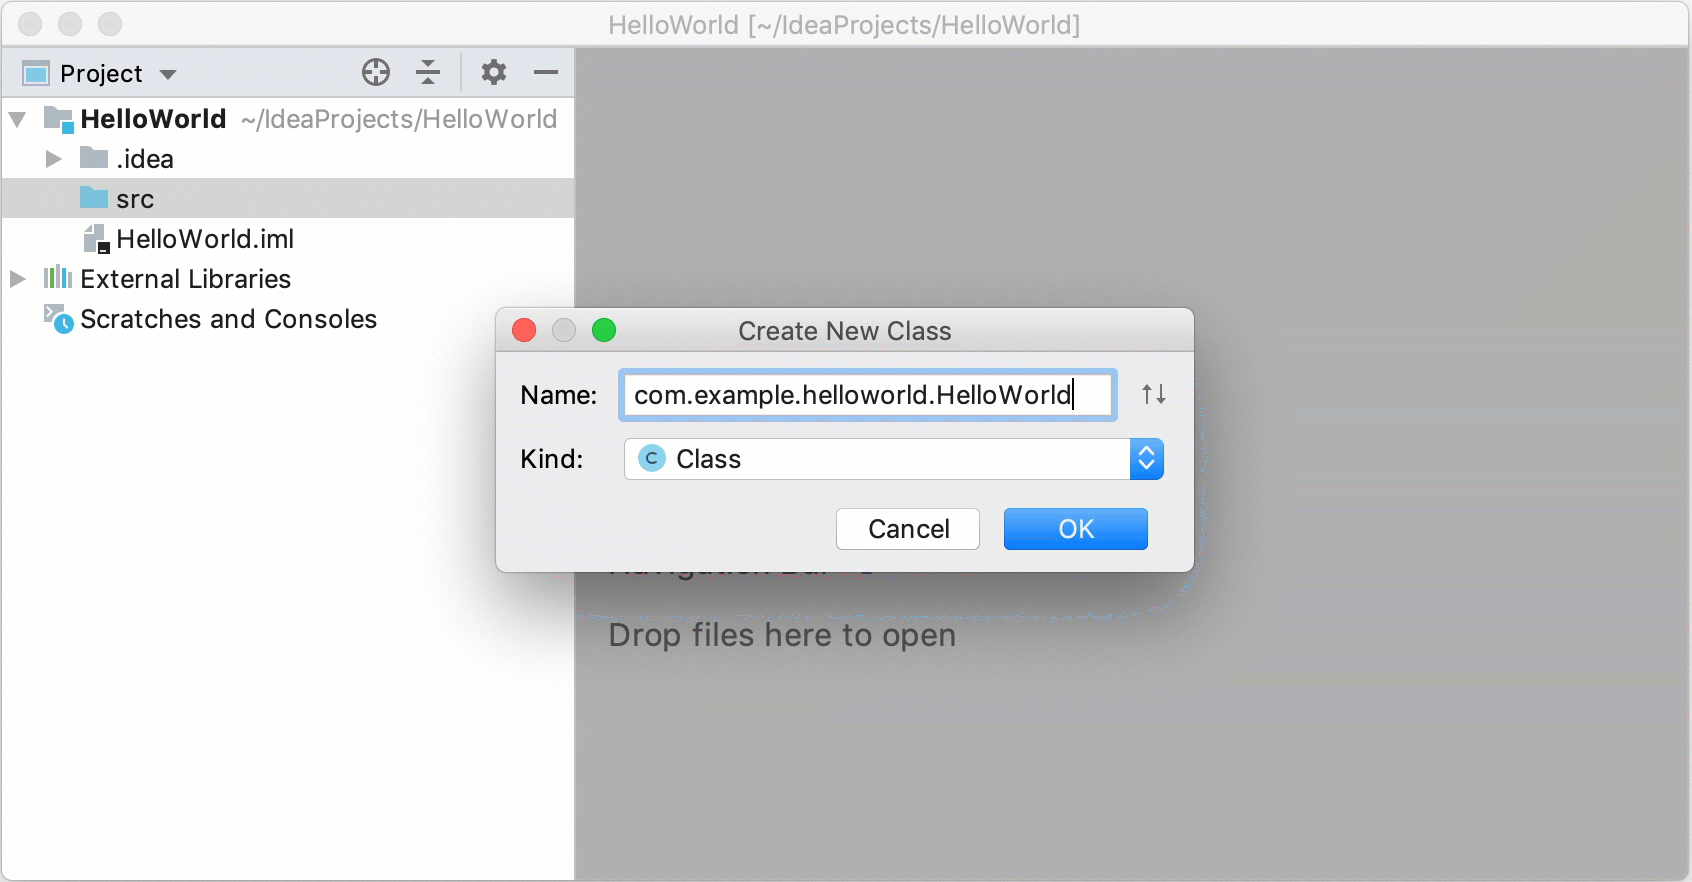
In the Project tool window, select the src folder, press Alt+Insert, and select Java Class.
-
In the Name field, type
com.example.helloworld.HelloWorldand click OK.IntelliJ IDEA creates the
com.example.helloworldpackage and theHelloWorldclass.
Together with the file, IntelliJ IDEA has automatically generated some contents for your class. In this case, the IDE has inserted the package statement and the class declaration.
This is done by means of file templates. Depending on the type of the file that you create, the IDE inserts initial code and formatting that is expected to be in all files of that type. For more information on how to use and configure templates, refer to File and code templates.
Write the code
Add the main() method using live templates
-
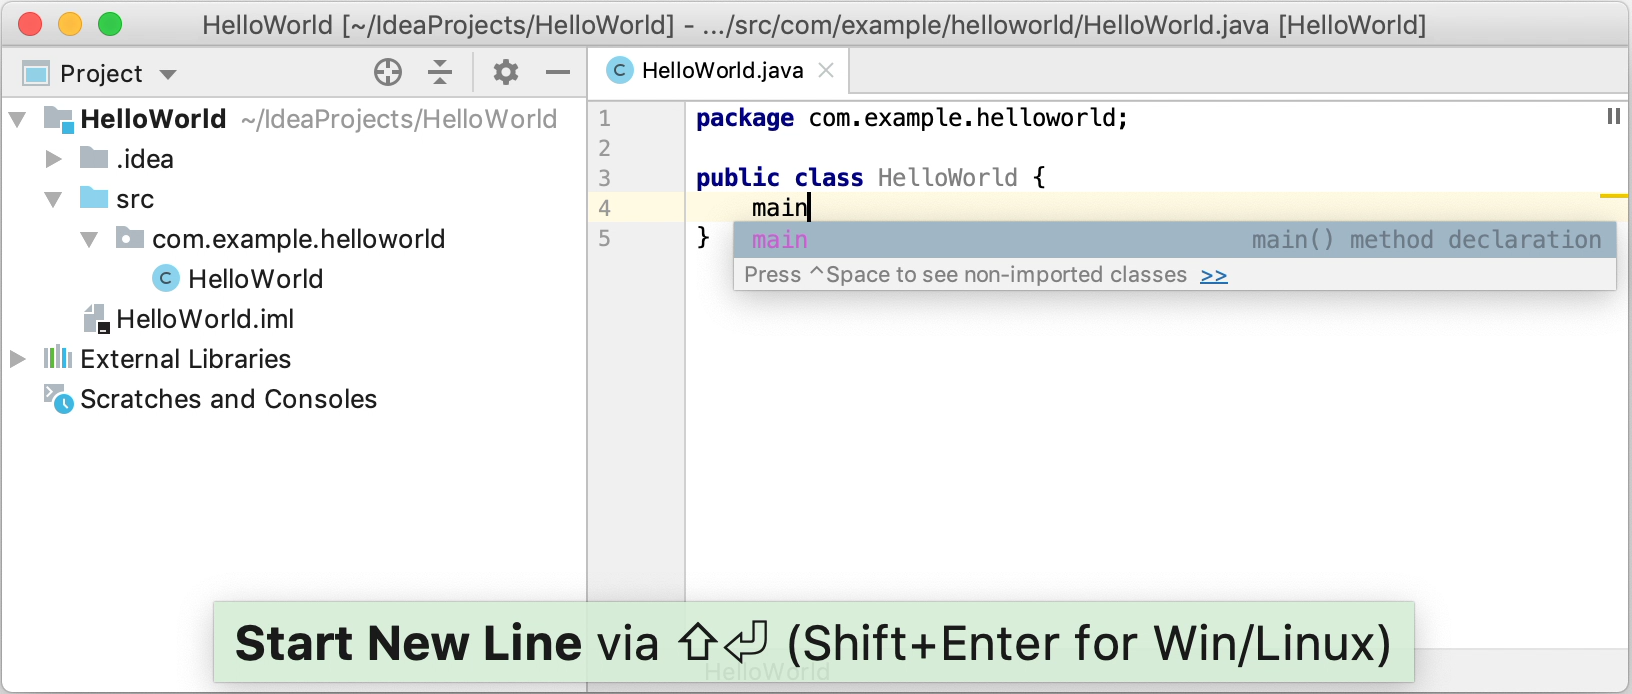
Place the caret at the class declaration string after the opening bracket
{and press Shift+Enter.In contrast to Enter, Shift+Enter starts a new line without breaking the current one.
-
Type
mainand select the template that inserts themain()method declaration.As you type, IntelliJ IDEA suggests various constructs that can be used in the current context. You can see the list of available live templates using Ctrl+J.
Live templates are code snippets that you can insert into your code. main is one of such snippets. Usually, live templates contain blocks of code that you use most often. Using them can save you some time as you don't have to type the same code over and over again.
For more information on where to find predefined live templates and how to create your own, refer to Live templates.
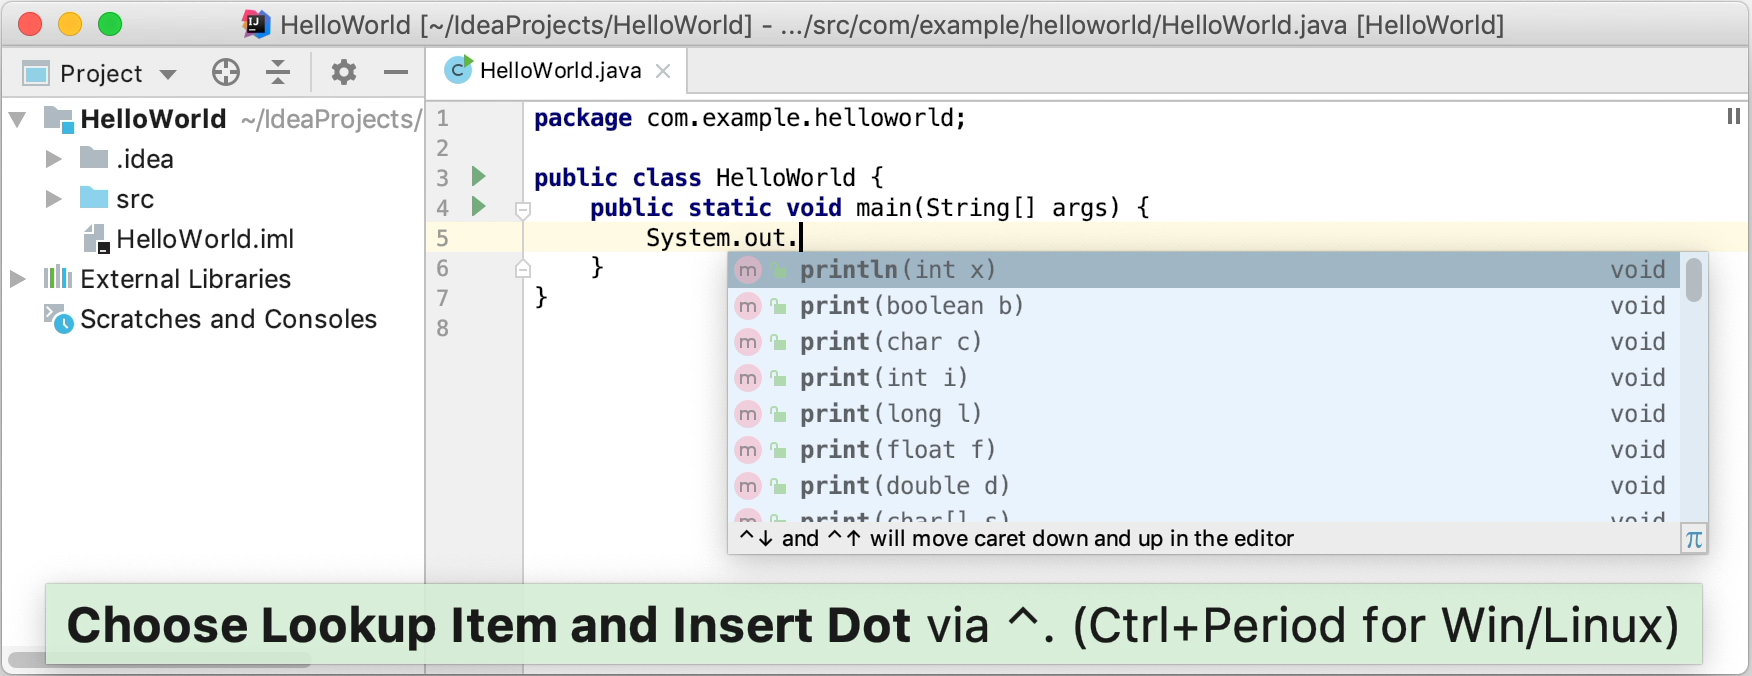
Call the println() method using code completion
After the main() method declaration, IntelliJ IDEA automatically places the caret at the next line. Let's call a method that prints some text to the standard system output.
-
Type
Syand select theSystemclass from the list of code completion suggestions (it's from the standardjava.langpackage).Press Ctrl+. to insert the selection with a trailing comma.
Type
o, selectout, and press Ctrl+. again.-
Type
p, select the println(String x) method, and press Enter.IntelliJ IDEA shows you the types of parameters that can be used in the current context. This information is for your reference.
Type
". The second quotation mark is inserted automatically, and the caret is placed between the quotation marks. TypeHello, World!
Basic code completion analyses the context around the current caret position and and provides suggestions as you type. You can open the completion list manually by pressing Ctrl+Space.
For information on different completion modes, refer to Code completion.
Build and run the application
Valid Java classes can be compiled into bytecode. You can compile and run classes with the main() method right from the editor using the green arrow icon ![]() in the gutter.
in the gutter.
Click
 in the gutter and select Run 'HelloWorld.main()' in the popup. The IDE starts compiling your code.
-
When the compilation is complete, the Run tool window opens at the bottom of the screen.
The first line shows the command that IntelliJ IDEA used to run the compiled class. The second line shows the program output:
Hello, World!. And the last line shows the exit code0, which indicates that it exited successfully.

When you click Run, IntelliJ IDEA creates a special run configuration that performs a series of actions. First, it builds your application. On this stage, javac compiles your source code into JVM bytecode.
Once javac finishes compilation, it places the compiled bytecode to the out directory, which is highlighted with yellow in the Project tool window.
After that, the JVM runs the bytecode.
Package the application in a JAR
When the code is ready, you can package your application in a Java archive (JAR) so that you can share it with other developers. A built Java archive is called an artifact.
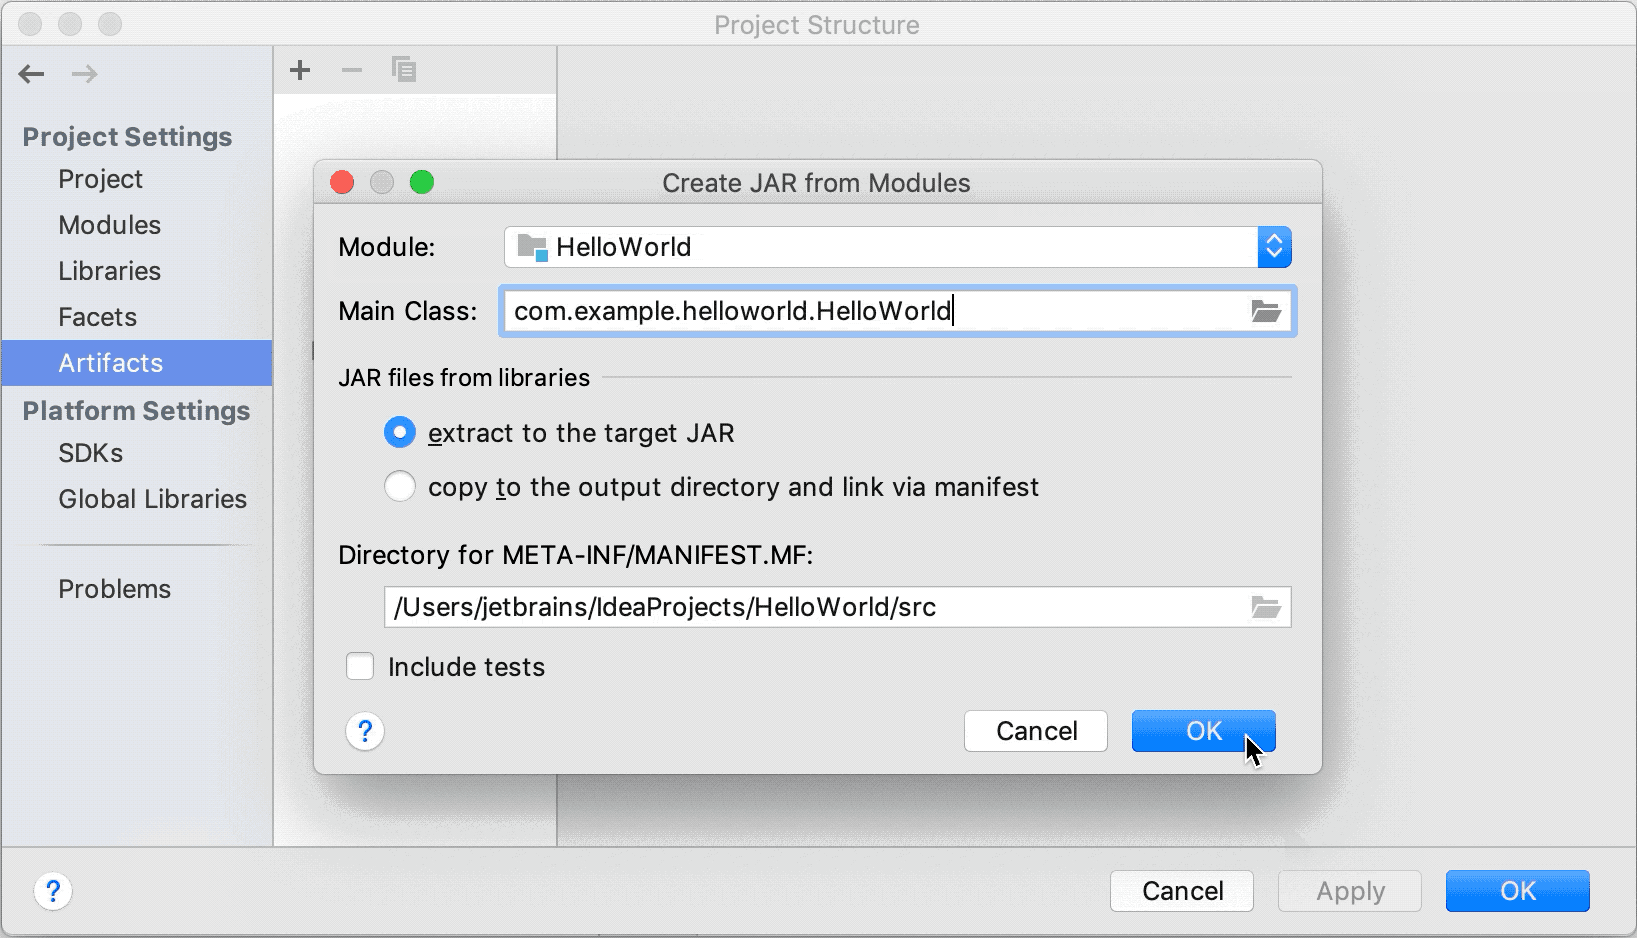
Create an artifact configuration for the JAR
From the main menu, select File | Project Structure (Ctrl+Shift+Alt+S) and click Artifacts.
Click
 , point to JAR and select From modules with dependencies.
-
To the right of the Main Class field, click
 and select HelloWorld (com.example.helloworld) in the dialog that opens.
IntelliJ IDEA creates the artifact configuration and shows its settings in the right-hand part of the Project Structure dialog.
Apply the changes and close the dialog.
Build the JAR artifact
From the main menu, select Build | Build Artifacts.
-
Point to HelloWorld:jar and select Build.
If you now look at the out/artifacts folder, you'll find your JAR there.

Run the packaged application
To make sure that the JAR artifact is created correctly, you can run it.
Create a run configuration for the packaged application
To run a Java application packaged in a JAR, IntelliJ IDEA allows you to create a dedicated run configuration.
Press Ctrl+Shift+A, find and run the Edit Configurations action.
In the Run/Debug Configurations dialog, click
and select JAR Application.Name the new configuration:
HelloWorldJar.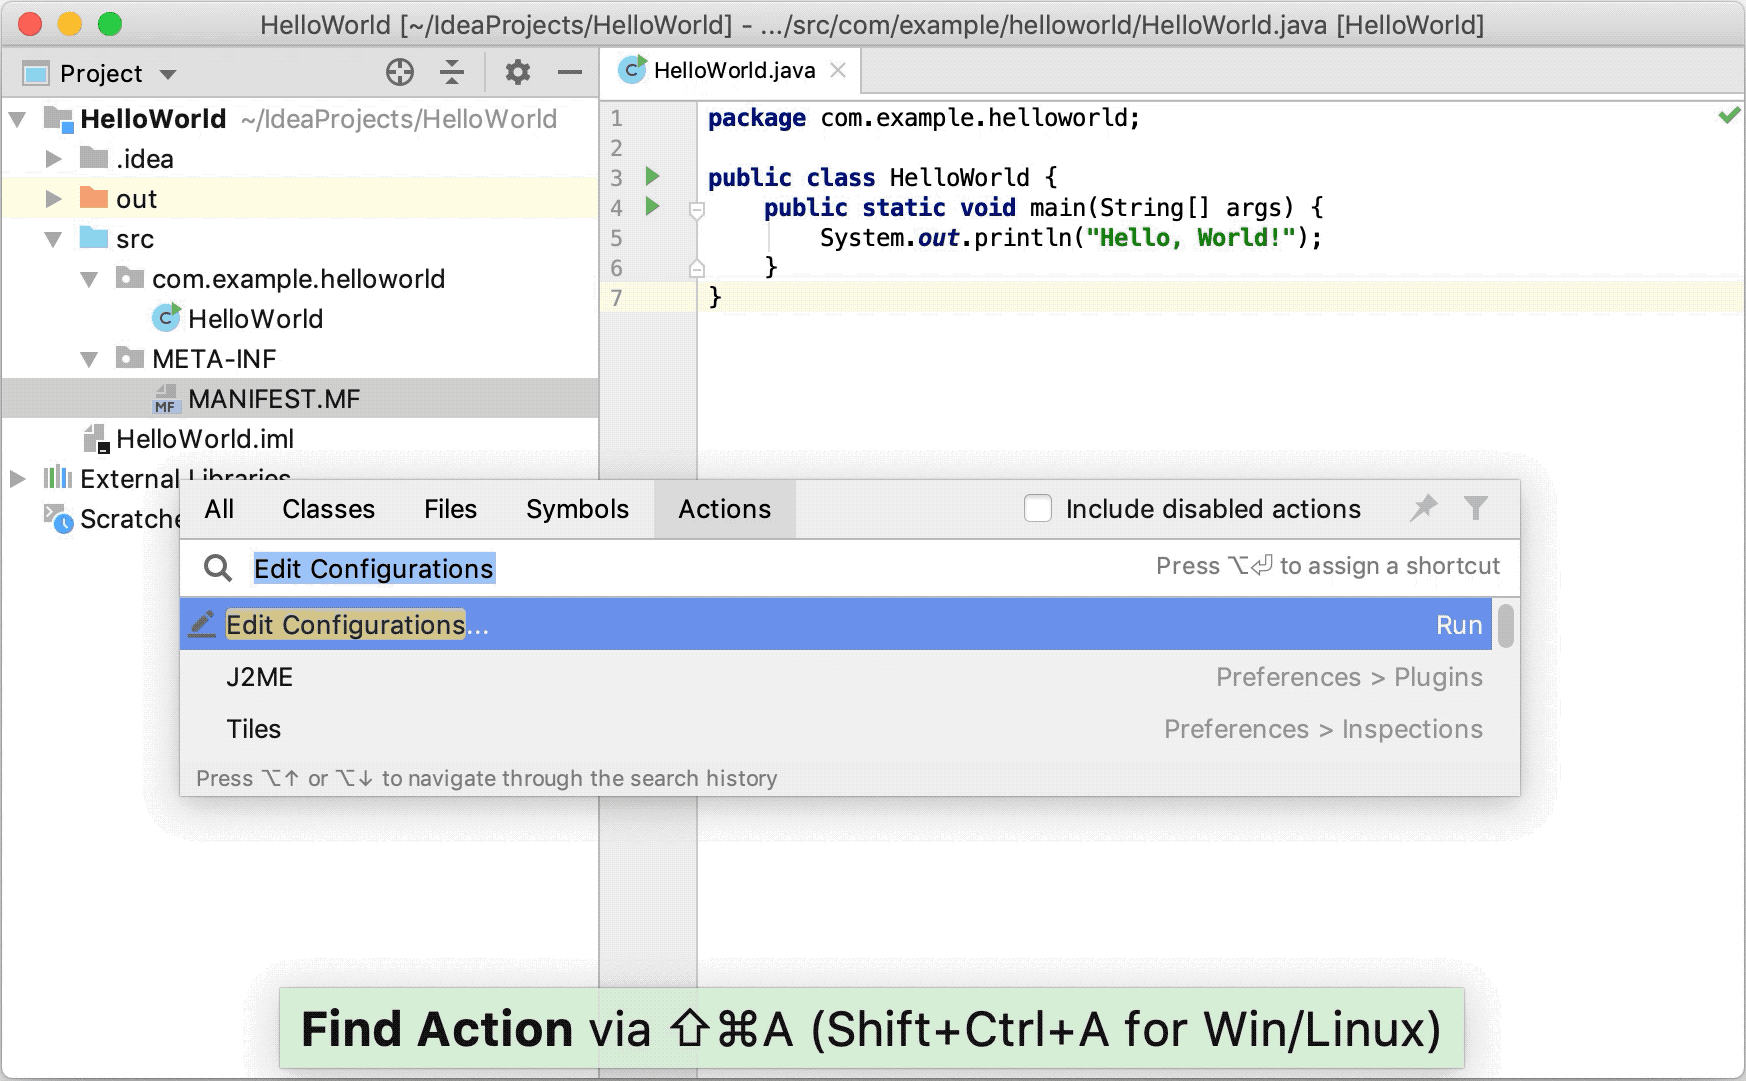
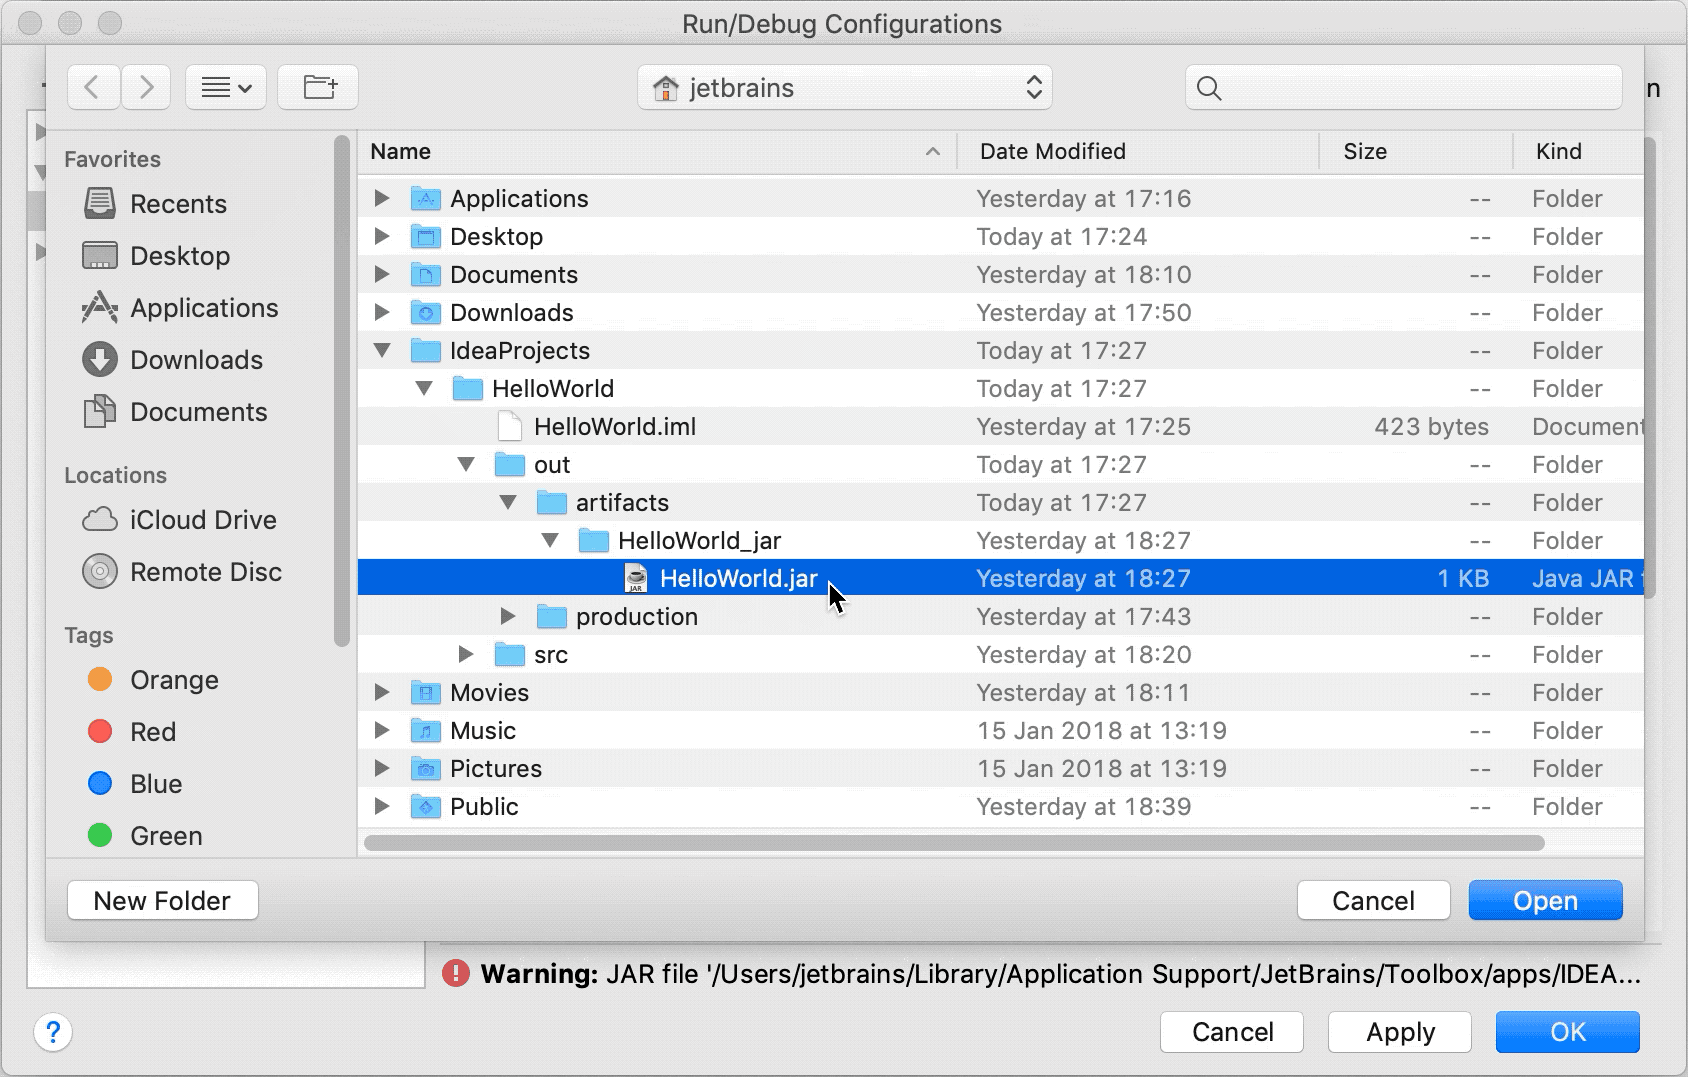
In the Path to JAR field, click
and specify the path to the JAR file on your computer.-
Under Before launch, click
, select in the dialog that opens.Doing this means that the HelloWorld.jar is built automatically every time you execute this run configuration.
Run configurations allow you to define how you want to run your application, with which arguments and options. You can have multiple run configurations for the same application, each with its own settings.
Execute the run configuration
-
On the toolbar, select the
HelloWorldJarconfiguration and click to the right of the run configuration selector. Alternatively, press Shift+F10 if you prefer shortcuts.As before, the Run tool window opens and shows you the application output.
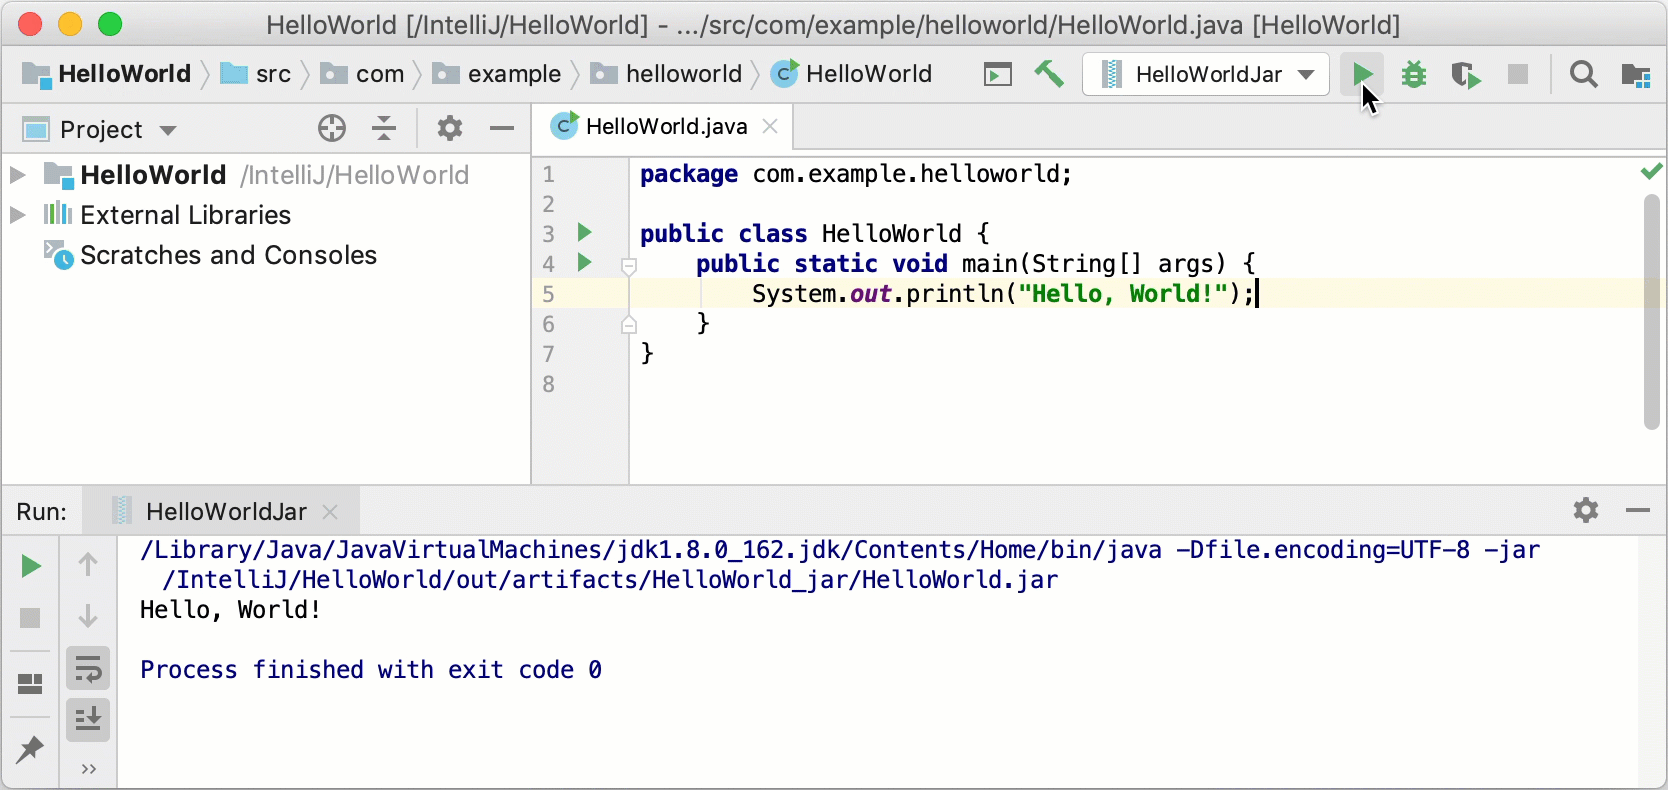
The process has exited successfully, which means that the application is packaged correctly.