Docker images
Docker images are executable packages for running containers. Docker uses registries to distribute images. By default, IntelliJ IDEA uses Docker Hub, which is a public registry with all the most common images, such as various Linux flavors, database management systems, web servers, and runtime environments. There are other public and private Docker registries, and you can also deploy your own registry server. For more information, refer to Configure a Docker registry.
Enable the Docker plugin
This functionality relies on the Docker plugin, which is bundled and enabled in IntelliJ IDEA by default. If the relevant features are not available, make sure that you did not disable the plugin.
Press Ctrl+Alt+S to open settings and then select .
Open the Installed tab, find the Docker plugin, and select the checkbox next to the plugin name.
To manage Docker images in IntelliJ IDEA, open the Services tool window ( or Alt+8), expand the configured Docker connection node , and then expand the Images node. For more information, refer to Images.

Depending on your development needs, you can use Docker for the following:
Pull pre-built images from a Docker registry
For example, you can pull an image that runs a PostgreSQL server container to test how your application will interact with your production environment.
Build images locally from a Dockerfile
For example, you can build an image that runs a container with a specific version of the Java Runtime Environment (JRE) that your application requires.
Push your images to a Docker registry
For example, if you want to demonstrate to someone how your application runs in some specific version of the JRE instead of setting up the proper environment, they can run a container from your image.
Configure a Docker registry
In the Services tool window, click
and select Docker Registry.

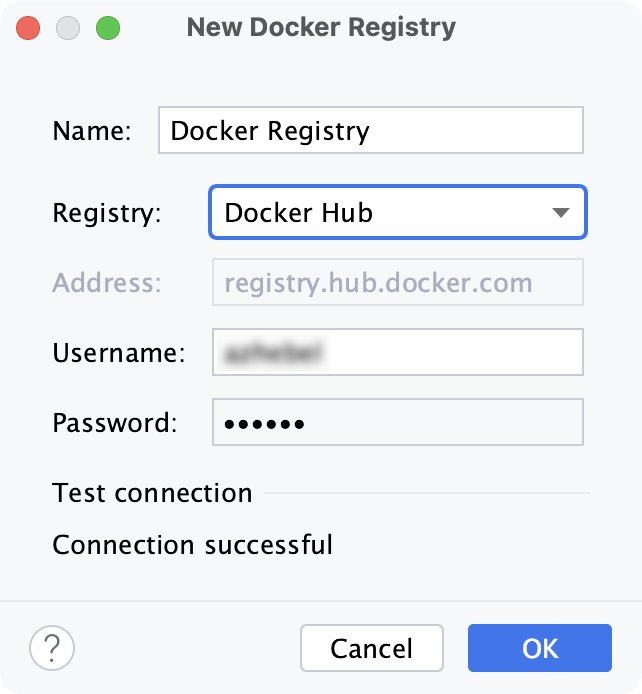
In the New Docker Registry dialog, select the type of registry and how to connect to the registry. When you specify the credentials, IntelliJ IDEA will automatically check the connection to the registry. The Connection successful message should appear at the bottom of the dialog.
For more information, see Docker Registry settings.

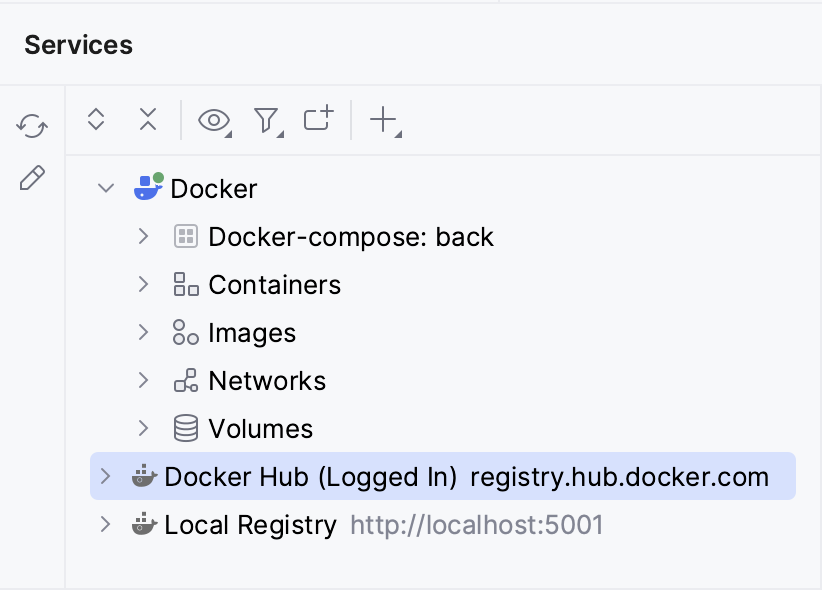
You can see the configured Docker registries in the Services tool window.

Alternatively, you can manage the list of configured Docker registries in Docker Registry settings.
Pull a public image from Docker Hub
In the Services tool window ( or Alt+8), select the Images node.
Under Images Console, type the name of the image to pull.
Use completion to select from the available suggestions of official images. Press Ctrl+Space again to see relevant images from all users.

Press Ctrl+Enter to run docker pull.
Specify the image as in the Docker CLI, for example: ubuntu:20.04.
Pull an image from a Docker registry
If you want to work with private images on Docker Hub or in some other Docker registry, configure a Docker registry connection.
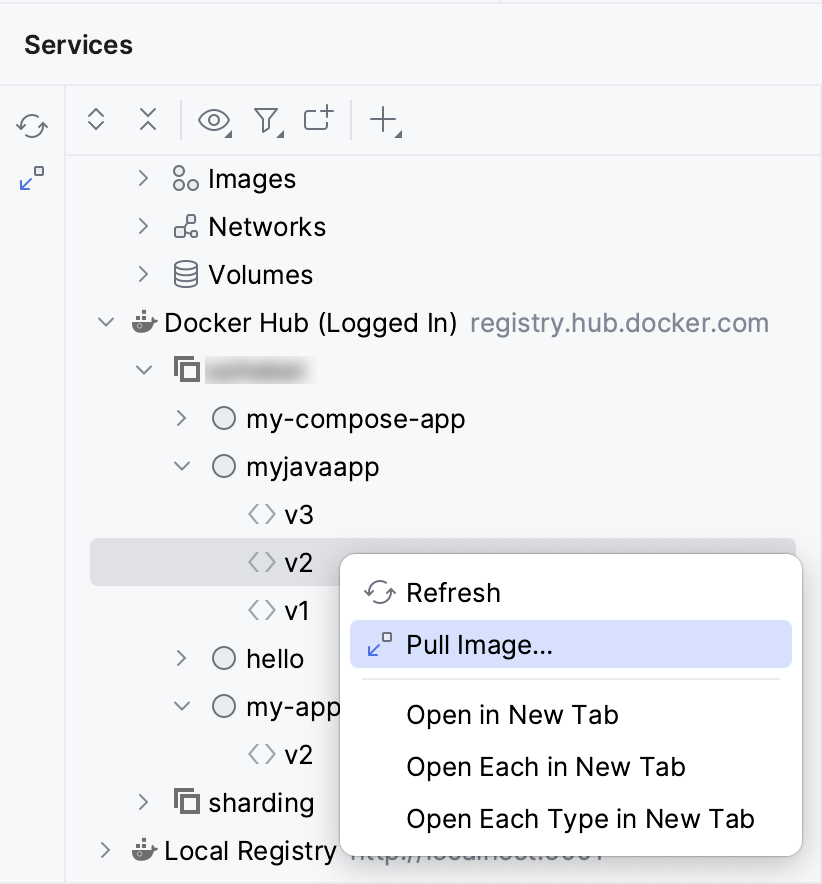
In the Services tool window ( or Alt+8), expand the node with the necessary Docker registry, right-click the image that you need, and select Pull Image.

Build an image from a Dockerfile
When you're editing a Dockerfile, IntelliJ IDEA provides completion for images from the configured registries.
Open the Dockerfile from which you want to build the image.
Click
in the gutter and select to build the image.

IntelliJ IDEA creates a Dockerfile run configuration that runs the docker build command.
Push an image to a Docker registry
You can push an image to a configured Docker registry.
In the Services tool window, select the image that you want to upload and click
on the toolbar or in the Dashboard or select Push Image from the context menu.
Select the Docker registry and specify the repository and tag (name and version of the image, for example,
my-app:v2).
Click OK to run the docker push command.
Copy image to another Docker daemon
If you have several Docker daemon connections, you can copy an image from one Docker daemon to another.
In the Services tool window, select the image that you want to copy and click
or select Copy Docker Image from the context menu.
In the Copy Docker Image dialog, select the Docker daemon to which you want to copy the image and click Copy.
This first runs the docker save command to save the image from the current Docker daemon as a file, and then the docker load command to load the image from the file on the target Docker daemon.
Manage Docker images in the Services tool window
IntelliJ IDEA lists all images that you pull or build locally in the Services tool window under the Images node of the corresponding Docker daemon connection. For more information, refer to Images.
Select an image to view its name, ID, size, tags, date of last changes, and containers that are using this image. You can create a new container from the selected image, push the image to a configured Docker registry, or view the layers used by the image. Click to see more actions: copy the image ID to the clipboard, run the docker image inspect command, or show labels applied to the image.

Images with no tags <none>:<none> can be one of the following:
Intermediate images that serve as layers for other images and don't take up any space.
Dangling images that remain when you rebuild an image based on a newer version of another image. You should regularly prune dangling images to preserve disk space.
To hide untagged images from the list, click on the Docker toolbar and remove the checkmark from Untagged Images.
To delete one or several images, select them in the list and click .
Explore Docker images
In the Services tool window, under Images, select the image you're interested in.
In the Dashboard tab, click Show Layers.
The Layers tab shows all layers that make up this image with details about each layer. Click Analyze image for more information to gather detailed information including changes to the image's file system.
You can double-click or right-click any file in an image's layer to open a copy of it in the editor if IntelliJ IDEA supports this file type, or download a copy of the file to your local file system if IntelliJ IDEA doesn't support this file type.
