OSGi
IntelliJ IDEA lets you create OSGi-based applications using OSGi plugin. IntelliJ IDEA also lets you import Bnd/Bndtools projects. You can create a project with the OSGi support, add a module with the OSGI support to the existing project, or add the OSGi support to an existing module.
Create a new project
-
Launch IntelliJ IDEA.
If the Welcome screen opens, click Create New Project.
Otherwise, from the main menu, select .
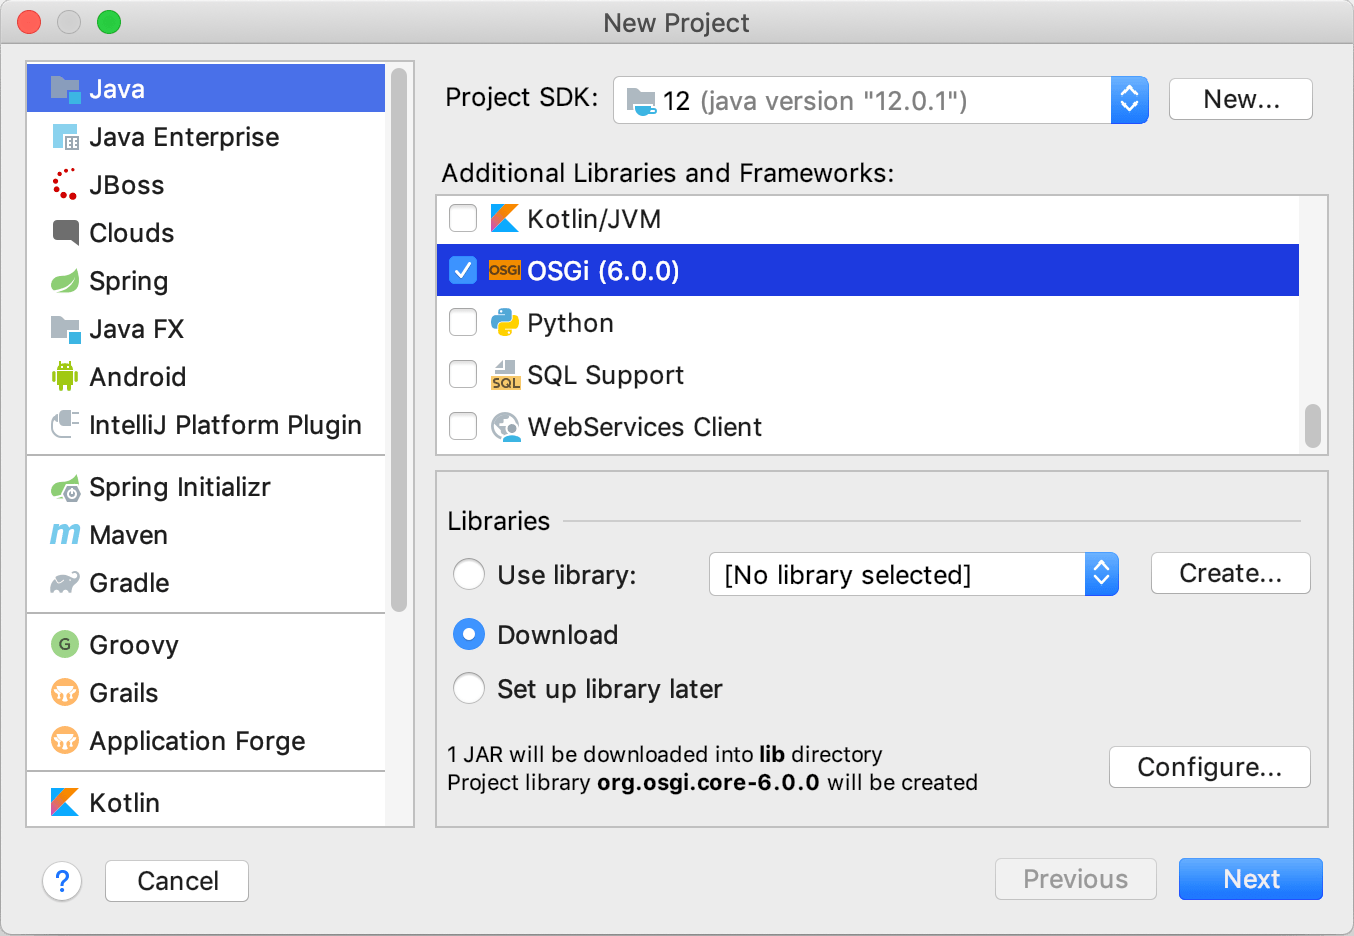
In the New Project wizard, select Java from the list on the left.
-
From the Project SDK list, select the JDK that you want to use in your project.
If the list is empty, click New and specify the path to the Java home directory (for example, /Library/Java/JavaVirtualMachines/jdk-12.0.1.jdk).
If you don't have Java on your computer, refer to Download a JDK package.
From the Additional Libraries and Frameworks list, select OSGi.
-
In the Libraries section, select Download if you don't have the necessary library on your computer.
Otherwise, select Use library, then click Create, and select the necessary files in the dialog that opens.
Click Next.

Name the project and change the default project location if necessary. Click Finish
Add OSGi support to the existing module
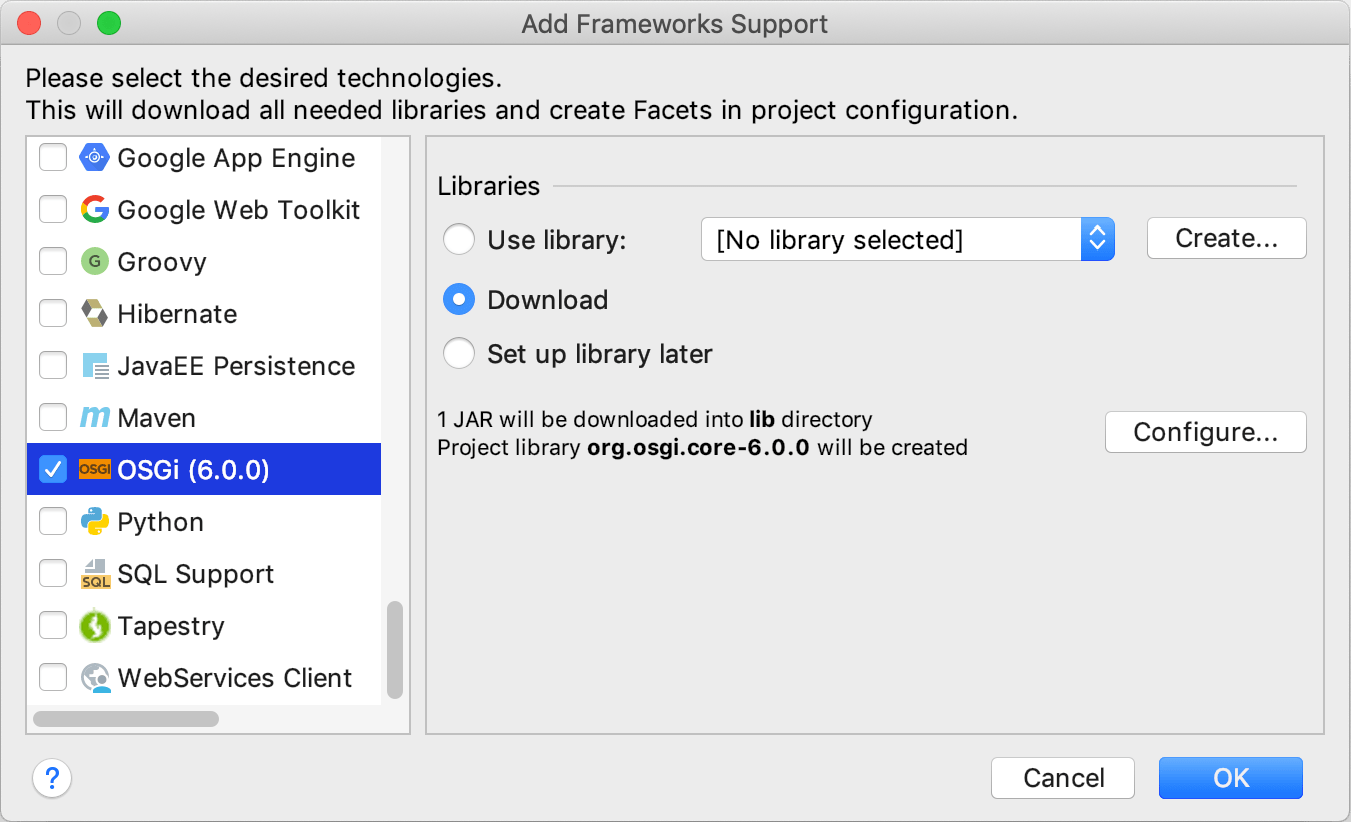
In the Project tool window, right-click the module to which you want to add the OSGi support and select Add Framework Support.
In the dialog that opens, from the left-hand pane, select OSGi.
-
In the Libraries section, select Download if you don't have the necessary library on your computer.
Otherwise, select Use library, then click Create, and select the necessary files in the dialog that opens.
Click OK.
