Export
Enable the Database Tools and SQL plugin
This functionality relies on the Database Tools and SQL plugin, which is bundled and enabled in IntelliJ IDEA by default. If the relevant features are not available, make sure that you did not disable the plugin.
Press Ctrl+Alt+S to open settings and then select .
Open the Installed tab, find the Database Tools and SQL plugin, and select the checkbox next to the plugin name.
You can use a variety of methods to export data and object structure from your databases. These methods include usage of various generators, data extractors, and shortcuts. Also, you can export data in TXT, CSV, JSON, XML, Markdown, Excel, and other formats. You can select a predefined data extractor or create your own.
In IntelliJ IDEA, you export object structure and data separately. It means that you can export a structure of a table or a view and then export data from these objects.
The full data dump is available for PostgreSQL and MySQL with the help of mysqldump and pg_dump. The full data dump includes the structure of all database objects and data of these objects in a single file. For more information, refer to Create a full data dump for MySQL and PostgreSQL.
Export object structure
Data definition language (DDL) defines the structure of a database, including rows, columns, tables, indexes, and other elements. In IntelliJ IDEA, you can generate data definition structure by using shortcuts with predefined settings or by using the SQL Generator and customize the export settings.
Generate DDL definitions for database objects
In the Database tool window, right-click a database object and select Ctrl+Alt+G.
On the right toolbar, you can find the following controls:
: copy output to the clipboard.
: save output to a file.
: open output in a query console.
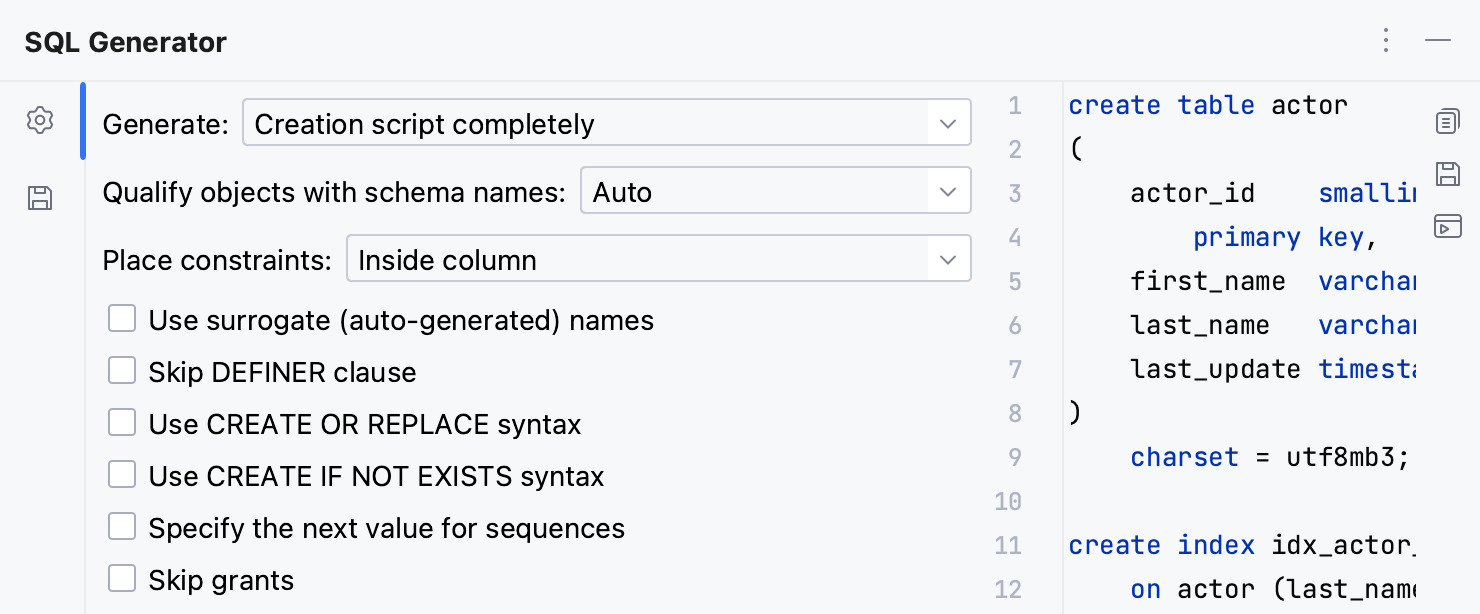
Change output settings of the SQL Generator
In the Database tool window, right-click a database object (for example, a table) and select Ctrl+Alt+G.
In the SQL Generator tool window, click the File Output Options icon (
).
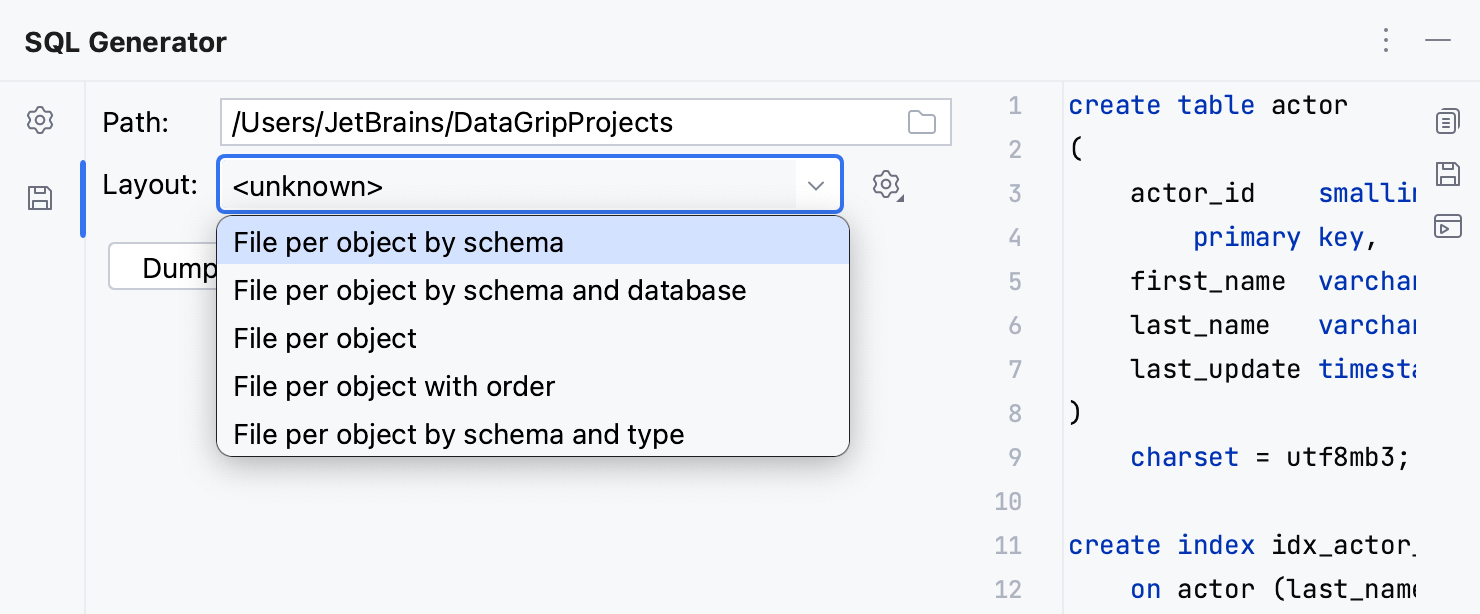
From the Layout list, select a method that you want to use:
File per object by schema: generates a set of SQL files sorted in folders by schemas.
File per object by schema and database: generates a set of SQL files sorted in folders by schemas and databases.
File per object: generates a set of SQL files.
File per object with order: generates a numbered set of SQL files.
File per object by schema and type: generates a set of SQL files sorted in folders by schemas and types.
Generate a DDL definition to the query console
In the Database tool window, right-click a database object and select .
Generate a DDL definition to the clipboard
In the Database tool window, right-click a database object and select .
If your database stores DDL of the object, you can retrieve DDL from the database by selecting the Request and Copy Original DDL.
Export data
IntelliJ IDEA uses data extractors to export data in various formats to a file or the clipboard. Each time you export or copy data, the copied data format is defined by the selected data extractor.

You can use a built-in data extractor, configure a custom extractor based on CSV or DSV format, and create a custom data extractor using a provided API.
The last selected extractor becomes the default one for newly opened editor tabs. For MongoDB, the default extractor is always JSON.
For more information about data extractors, refer to the corresponding page.
Export data from the Database tool window
In the Database tool window, right-click a database object and navigate to .
To export data from multiple database objects to files, select and right-click the objects, then navigate to .
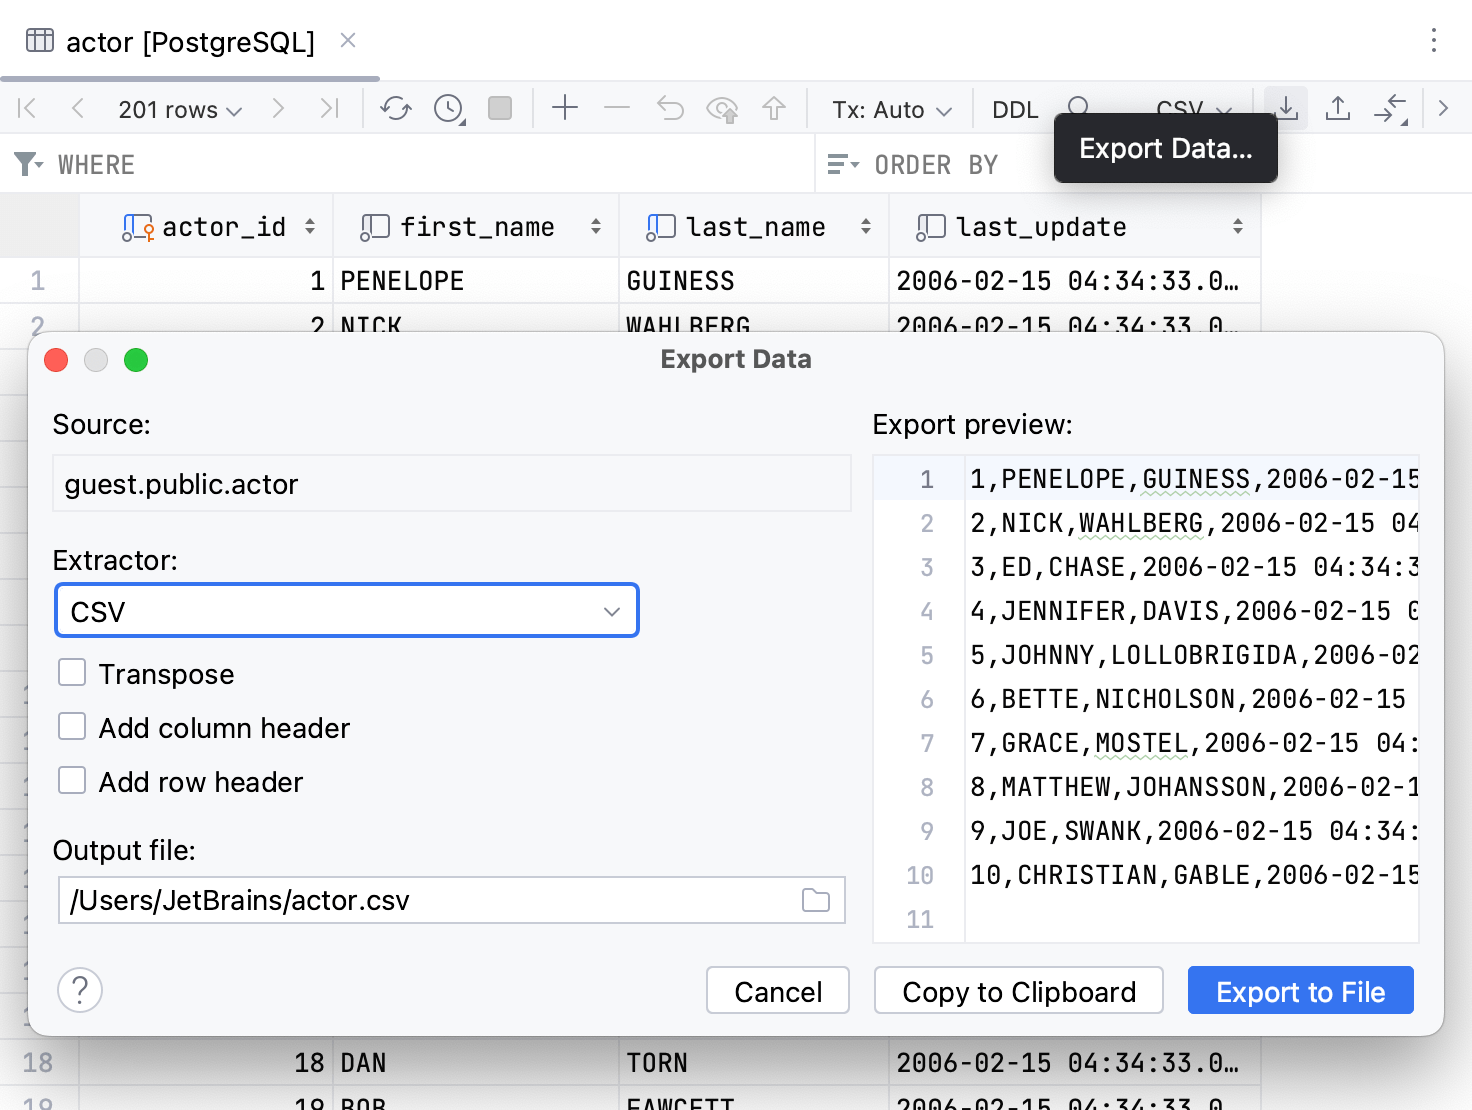
In the Export Data dialog, customize the following settings:
Extractor: select the export format (for example, Excel (xlsx)).
Transpose: select to export data in the transposed view. In this view, the rows and columns are interchanged.
Add column header: adds a row with column names at the beginning of the CSV list.
Add row header: adds a column with enumeration of rows.
Output file: select a file that will store the data.
To copy the generated script to the clipboard, click Copy to Clipboard. To save the script to a file, click Export to File.
Export data from the data editor and query results tab
You can open tables, views, and virtual views data in the data editor. Query result sets appear in the result tabs of Services tool window and in the In-Editor Results of query console.
To export full data to a file, open a table or a result set and click Export Data
on the toolbar. Configure export settings and click Export to File.
To export full data to the clipboard, open a table or a result set and click Export Data
on the toolbar. Configure the export settings and click Export Table to Clipboard.
Alternatively, right-click a cell and select Export Table to Clipboard. The data will be exported using currently selected data extractor.
In contrast to the Export Table to Clipboard action, the Copy Ctrl+C action only copies the selection of rows on the current page. To copy all the rows on the current page, click a cell, press Ctrl+A and then Ctrl+C. To configure a number of rows on a page, refer to Set a number of rows in the result set.
Export to the clipboard
To copy the selection of rows from the result set or the data editor, press Ctrl+C.
To copy the whole result or the whole table to the clipboard, do one of the following:
Click a cell, press Ctrl+A and then Ctrl+C.
Click the Select All button.

On the data editor toolbar:
Click the Export Data icon (
).
Select the export format from the Extractor list and configure the export settings.
Click Copy to Clipboard.
To export the whole result or the whole table to the clipboard, open a table or a result set, right-click a cell, and select Export Table to Clipboard.
To configure a number of rows on a page, refer to Set a number of rows in the result set.
Export data from a MongoDB collection
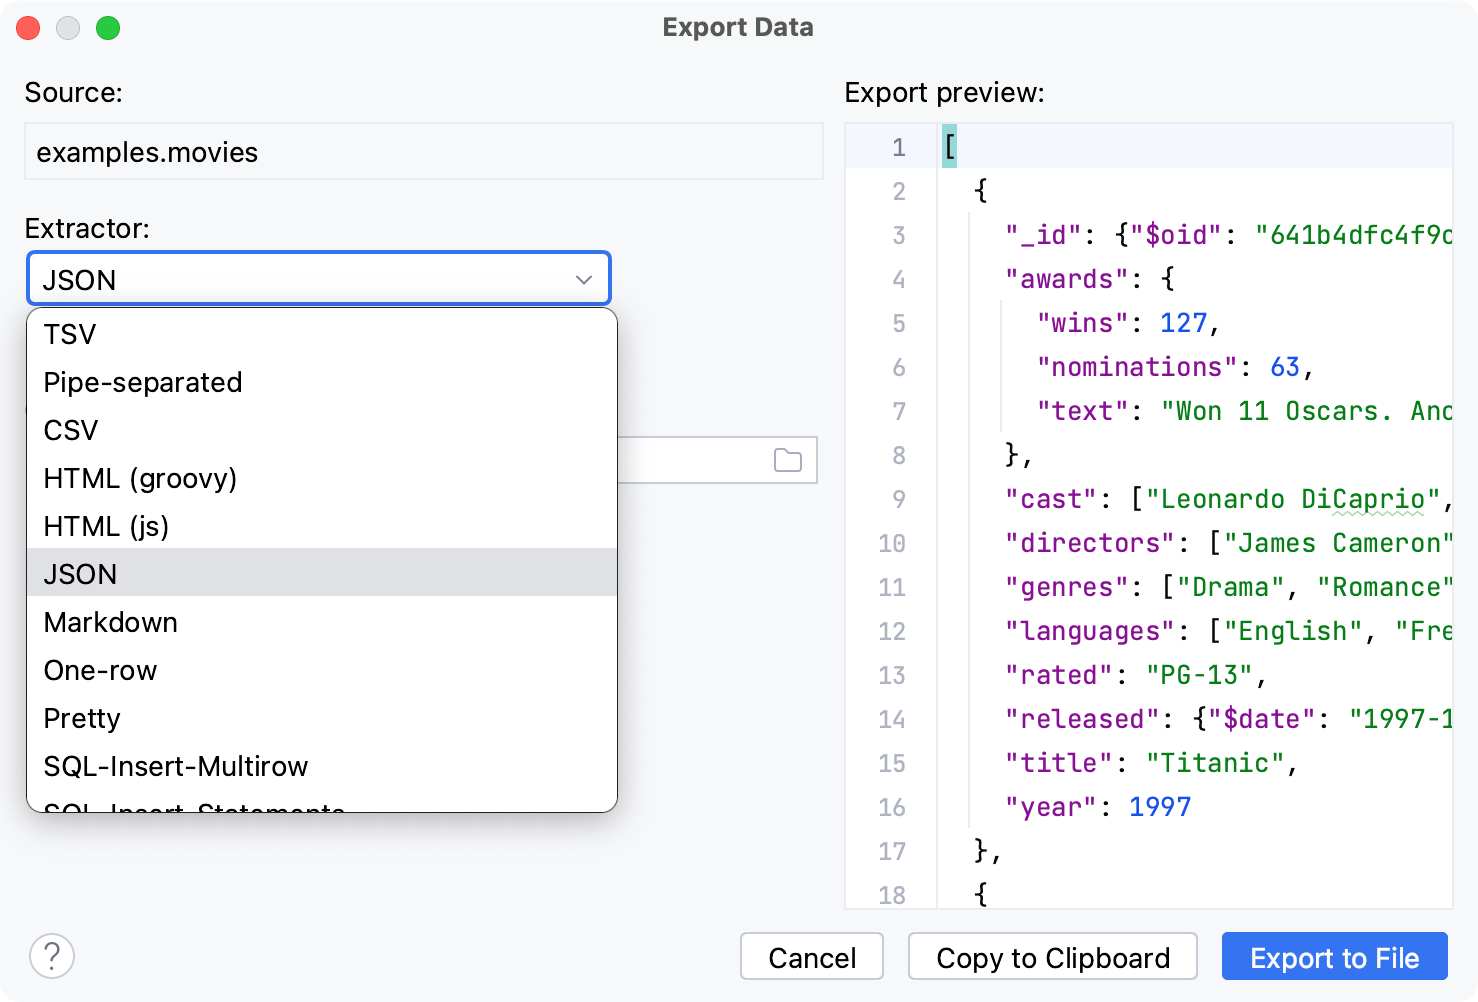
Right-click the collection that you want to export and select Export Data to File.
In the Export Data dialog, click the Extractor list and select JSON.
The output of this operation is MongoDB Extended JSON. Read about MongoDB Extended JSON in MongoDB Extended JSON (v2) at docs.mongodb.com.
Export data from a Microsoft SQL Server table
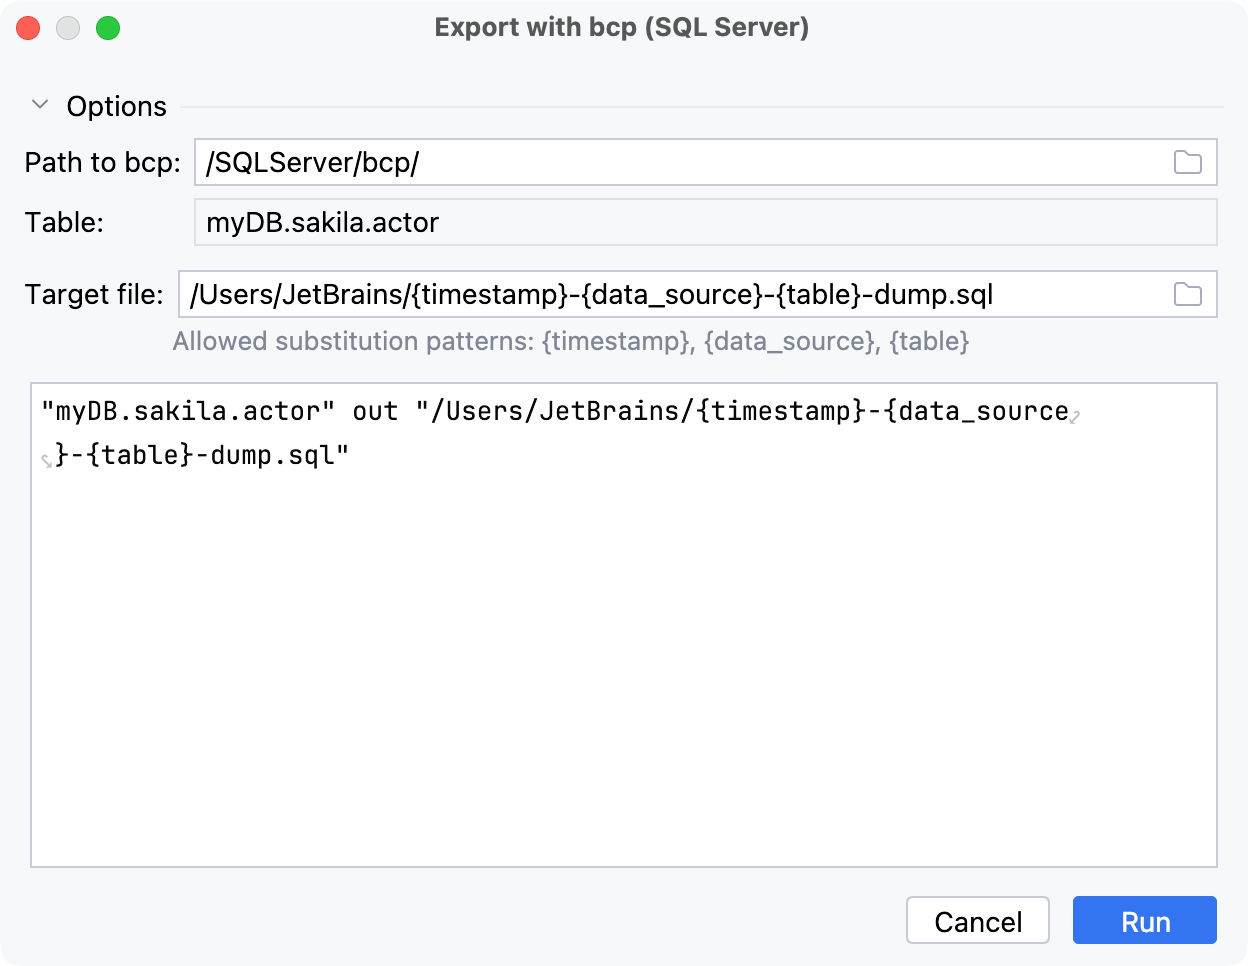
You can export a Microsoft SQL Server table data by using the bcp utility. The tool is not integrated into IntelliJ IDEA. You can read about it at learn.microsoft.com.
In the Database tool window, right-click the table that you want to export your data from and select .
In the Export with bcp (<data_source_name>) dialog, specify the path to the bcp executable in the Path to bcp field.
In the Target file, specify the path to the file that you want to export the data to.
Click Run.
Create a full data dump for MySQL and PostgreSQL
You can create backups for database objects (for example, a schema, a table, or a view) by running mysqldump for MySQL or pg_dump for PostgreSQL. mysqldump and pg_dump are native MySQL and PostgreSQL tools. They are not integrated into IntelliJ IDEA. You can read about them at dev.mysql.com and postgresql.org.
Export data with mysqldump or pg_dump
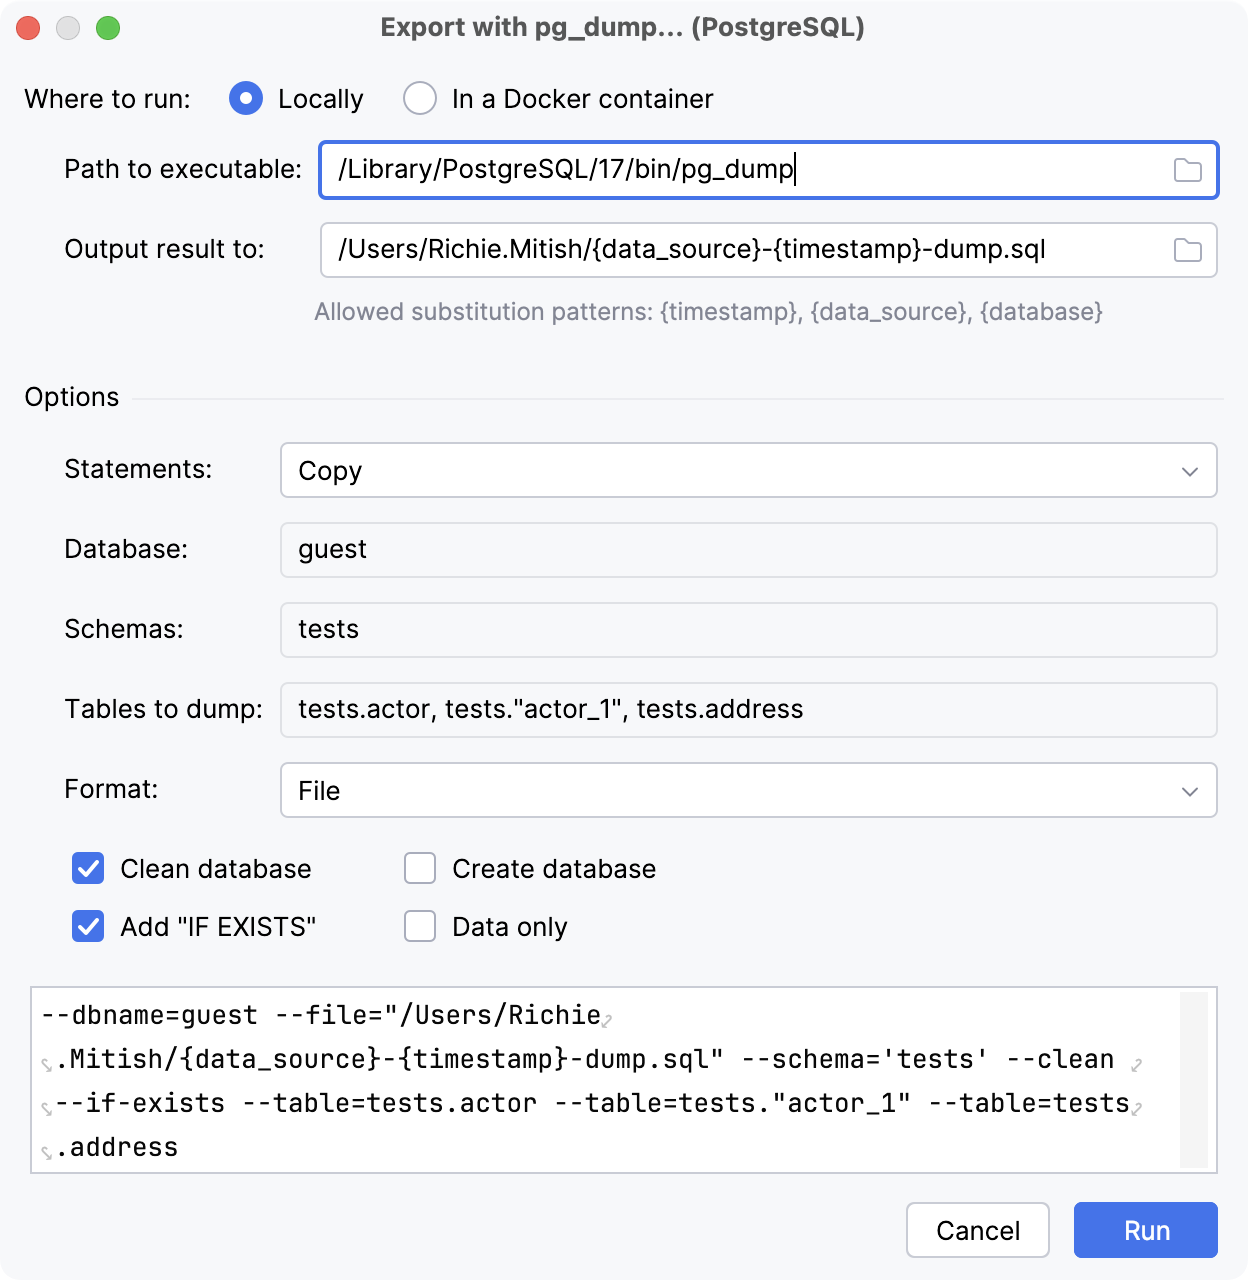
In the Database tool window, right-click a database object and navigate to:
Export with 'mysqldump': for MySQL data sources. The mysqldump tool is located in the root/bin directory of the MySQL installation directory.
Export with 'pg_dump': for PostgreSQL data sources. pg_dump, pg_dump_all, pg_restore tools are all located in the bin folder of the PostgreSQL.
In the Export with <dump_tool> dialog, specify the path to the dump tool executable in the Path to executable field.
IntelliJ IDEA supports using WSL Path to executable paths with these tools. For example,
//wsl$/Ubuntu-22.04/usr/bin/mysqldump.(Optional) Edit the command-line options in the lower part of the dialog.
Click Run.
'Export with' dialogs reference
Item | Description |
|---|---|
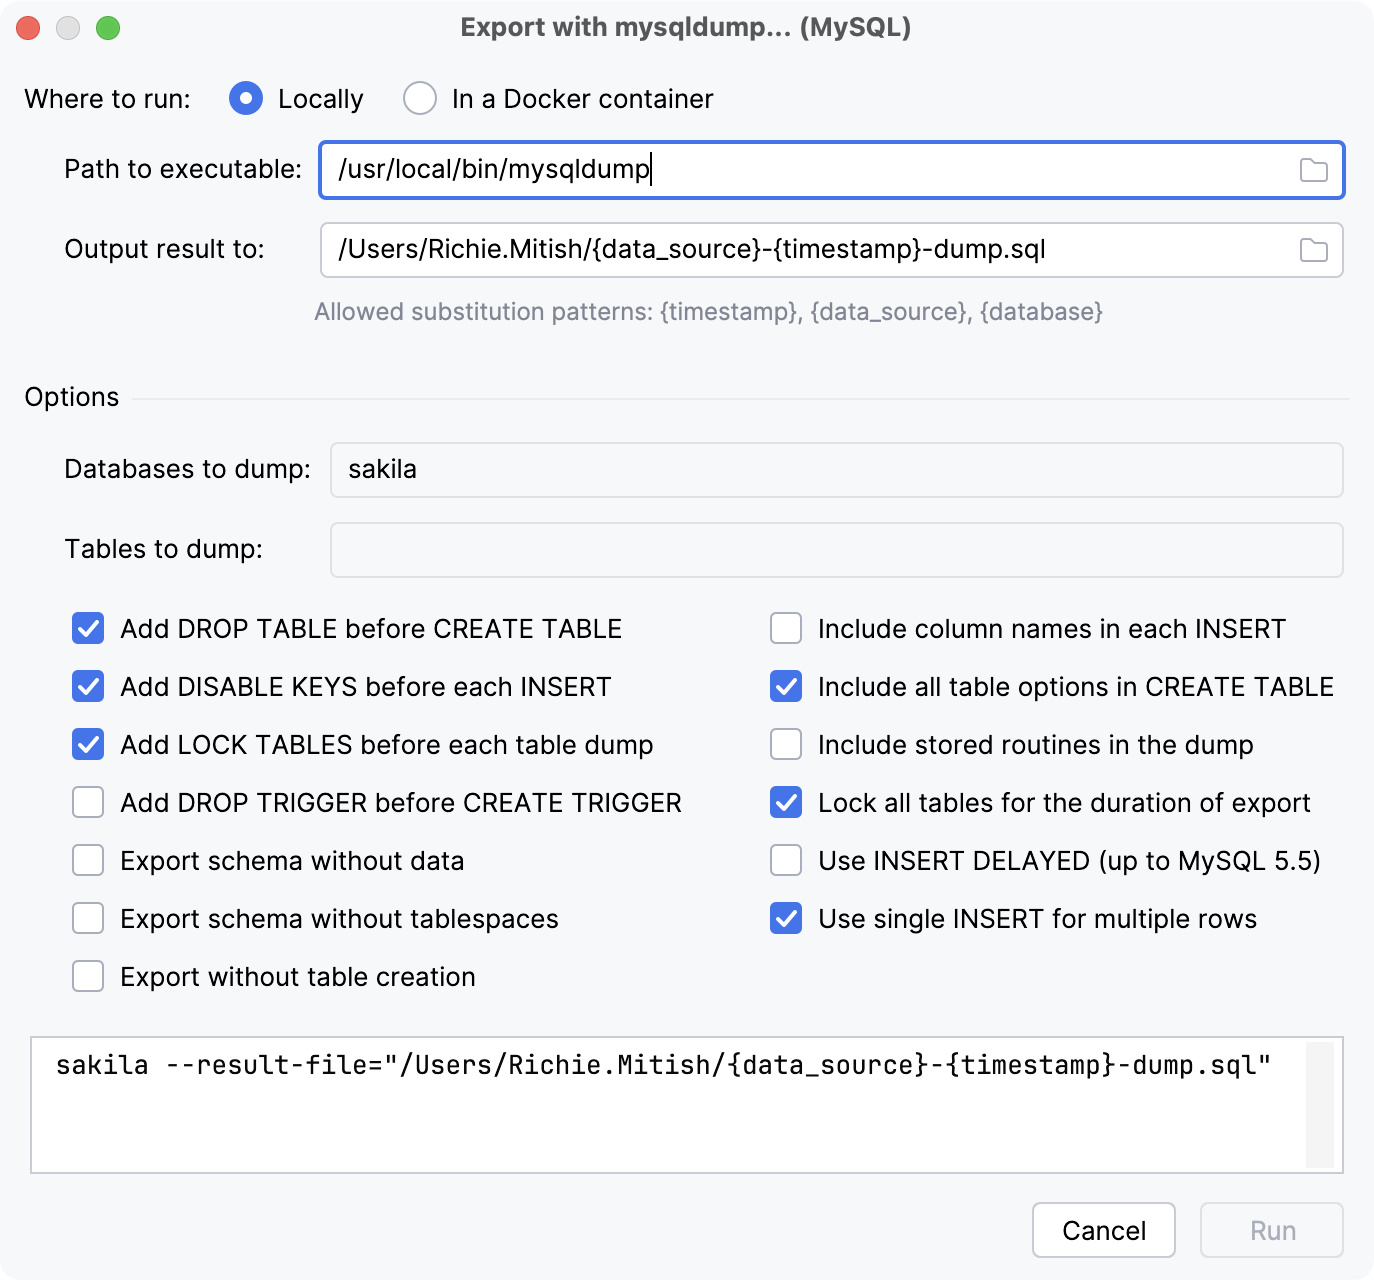
Where to run | Sets where to run the tool. You can either run it locally or in a Docker container.
|
Options | |
Databases to dump | Name of the database to connect to. |
Tables to dump | Database tables to dump from the specified databases. |
Add DROP TABLE before CREATE TABLE |
|
Add DISABLE KEYS before each INSERT |
|
Add LOCK TABLES before each table dump |
|
Add DROP TRIGGER before CREATE TRIGGER |
|
Export schema without data |
|
Export schema without tablespaces |
|
Export without table creation |
|
Include column names in each INSERT |
|
Include all table options in CREATE TABLE |
|
Include stored routines in the dump |
|
Lock all tables for the duration of export |
|
Use INSERT DELAYED (up to MySQL 5.5) |
|
Use single INSERT for multiple rows |
|
For more information about export options, refer to the mysqldump documentation.
Item | Description |
|---|---|
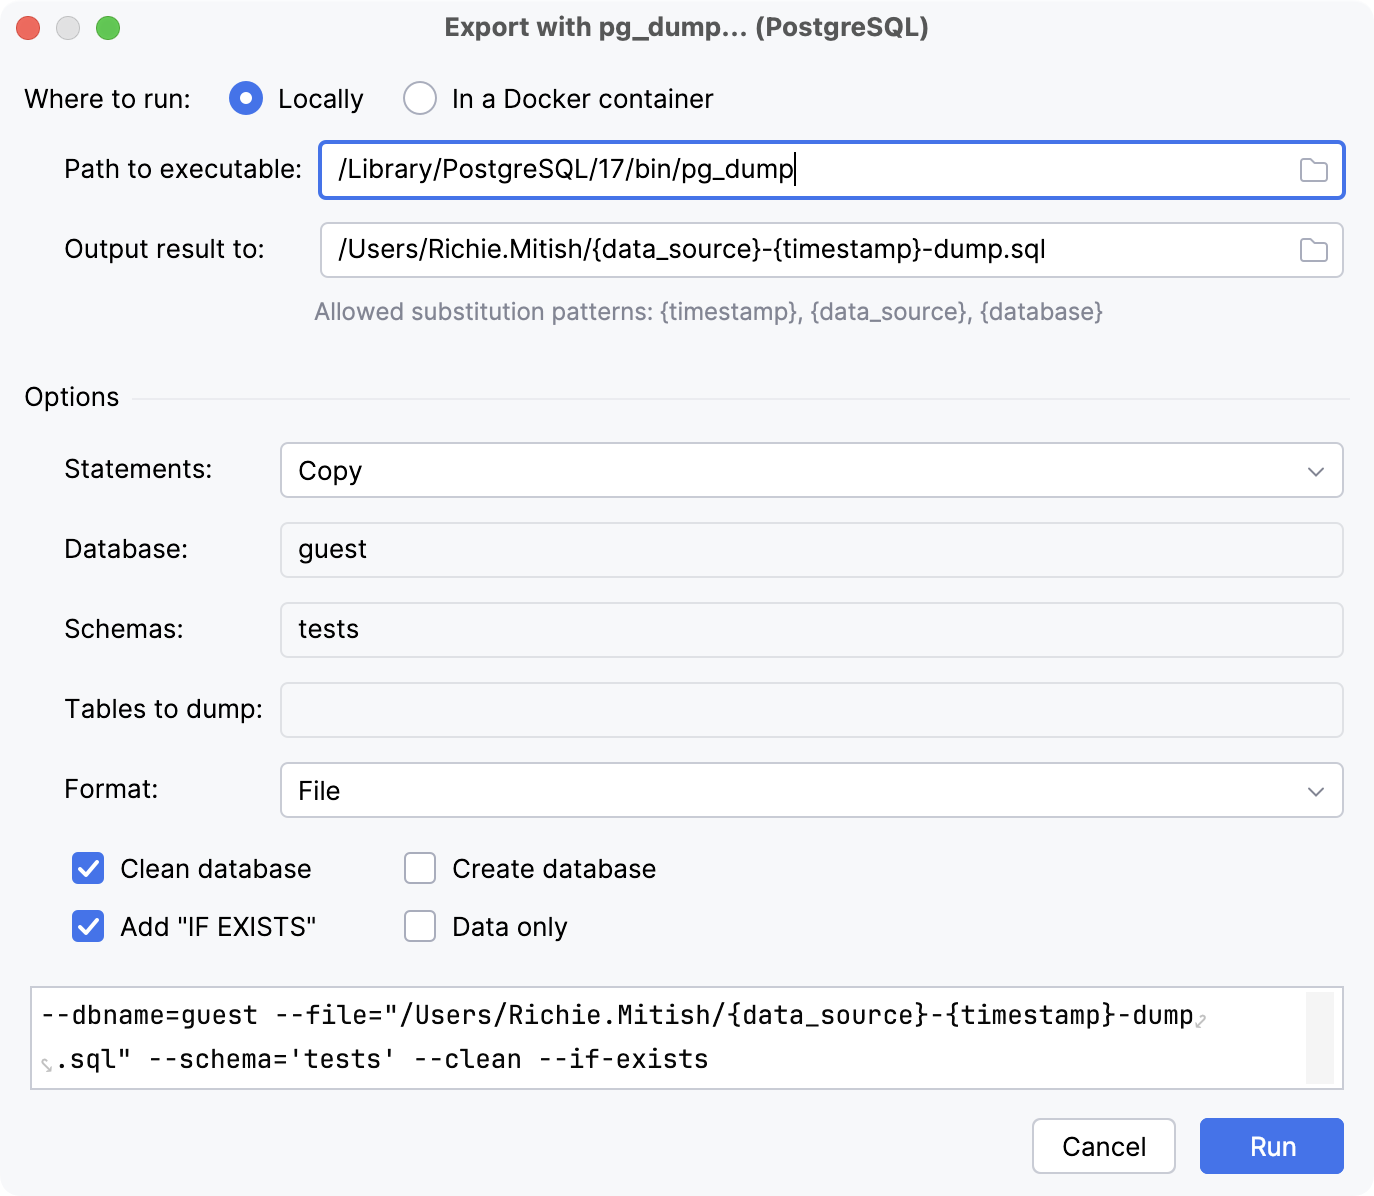
Where to run | Sets where to run the tool. You can either run it locally or in a Docker container.
|
Options | |
Statements |
|
Database |
Name of the database to connect to. |
Schemas |
Dump objects that are in the specified schema. |
Tables to dump |
Database tables to dump from the specified schemas. |
Format |
Format of the output:
|
Path to dump | Defines the path to the dump file on your machine. |
Clean database |
Drops all the dumped database objects before creating them. |
Add "IF EXISTS" |
Uses |
Create database |
Creates a new database first and then reconnects to it. If Clean database is enabled, drops and recreates the target database before reconnecting to it. |
Data only |
Dumps only the data, not the schema. |
For more information about export options, refer to the pg_dump documentation.
Reference
Export Data dialog
The settings in Export Data dialog depend on the selected data extractor.
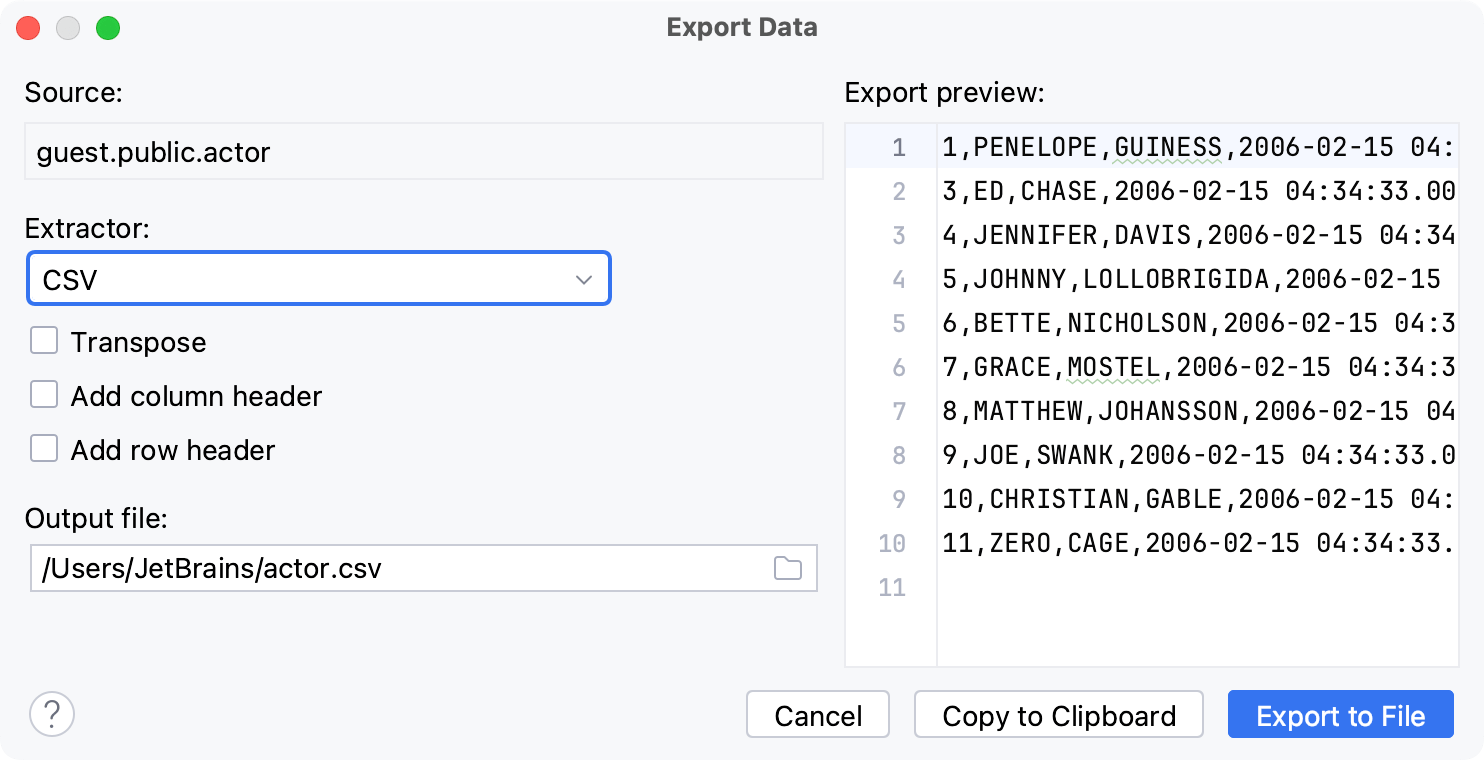
Item | Description |
|---|---|
Source | Displays the source of extracted data. |
Extractor | Sets the data extractor that will be used for extracting the data. |
Add column |
|
Transpose | Changes the exported data view. In this view, the rows and columns are interchanged. |
Add table definition (DDL) | Adds the DDL |
Add column header | Adds a row with column names at the beginning of the CSV list. |
Add row header | Adds a column with enumeration of rows. |
Output query to a separate sheet | Creates a separate Query sheet in the output Excel (xlsx) file. The sheet contains the query used to generate the extracted data. |
Output file | Path to the output file with extracted data. |