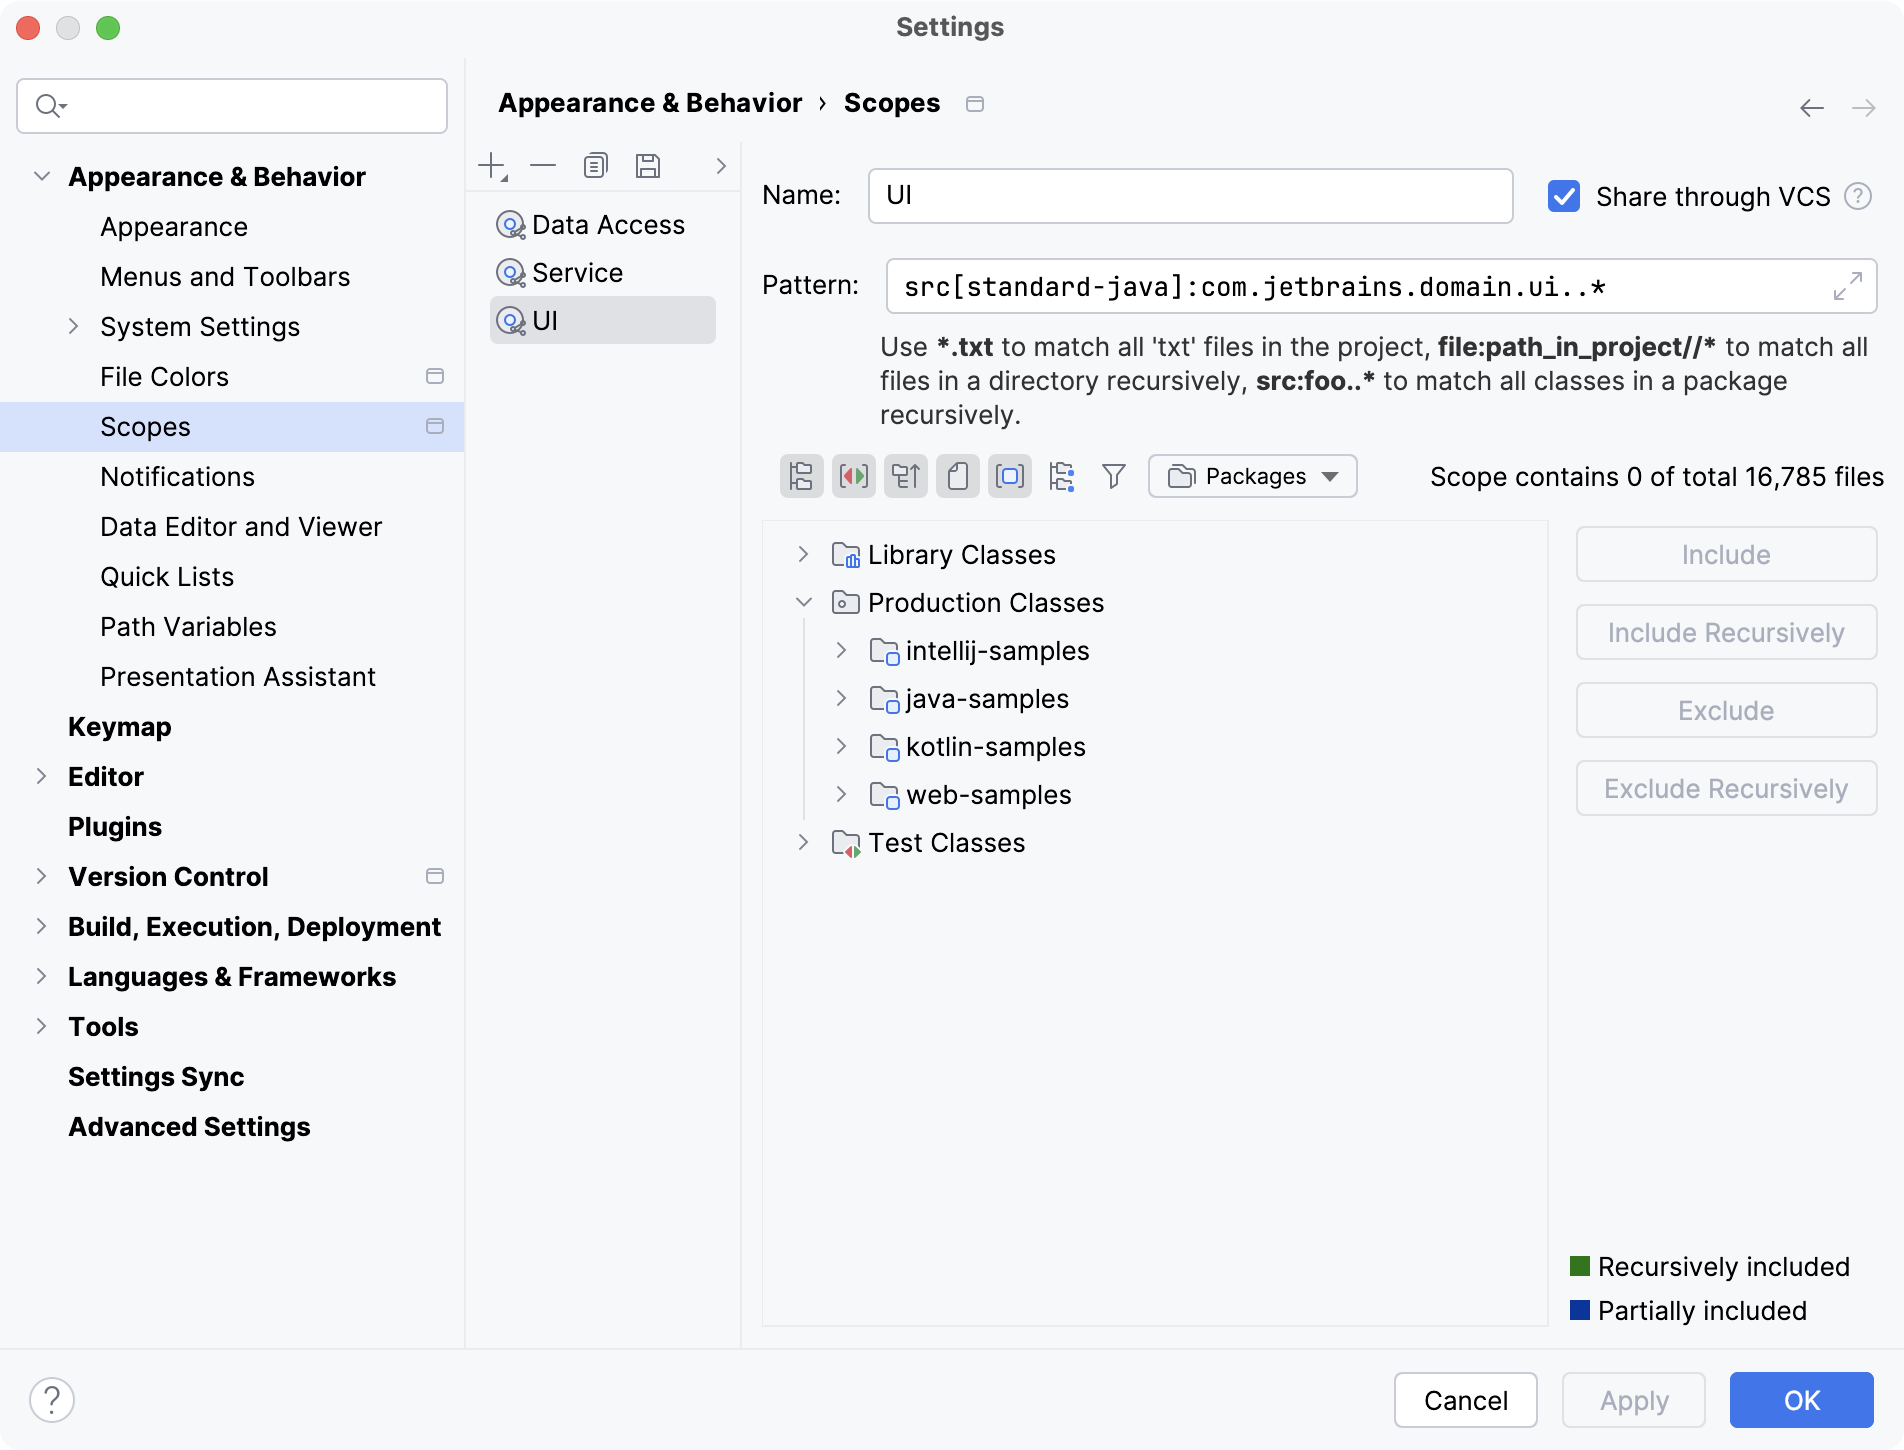
Scopes
Use this settings page to define scopes – sets of files to apply different operations to.

Main toolbar
Item | Tooltip | Description |
|---|---|---|
Add Scope Alt+Insert | ||
Delete Alt+Delete | Delete the selected scope from the list. | |
Copy Configuration Ctrl+D | Create a copy of the selected scope. | |
Save As | Save the selected local scope as shared or the selected shared scope as local. | |
| Move Up/Move Down | Move the scopes up and down in the list. |
Scope configuration controls
Item | Description |
|---|---|
Name | Specify the scope name. |
Pattern | Specify the pattern that defines the current scope. The following elements and structures can be used:
For more information, refer to Scope language syntax reference. Storing empty or incorrect patterns is not allowed. In such cases, IntelliJ IDEA shows a Syntax Error warning. |
Include | Included the selected item. If the current item is a folder, the nested subfolders are ignored. |
Include Recursively | Include the selected folder and all nested subfolders with their contents. |
Exclude | Exclude the selected item. If the current item is a folder, the nested subfolders remain in the scope. |
Exclude Recursively | Exclude the selected folder and all nested subfolders with their contents. |
Scope toolbar
Item | Tooltip | Description |
|---|---|---|
Project tree view | The tree view contains all the files available in your project. In the view, select the desired files to be included in the current scope and have the scope definition pattern generated automatically. | |
Flatten Packages | When this option is enabled, all the packages are displayed as a single-level tree view. This enables you to find a package somewhere deep within the project by its name without going through the entire tree hierarchy. | |
Group by Scope Type | When this button is pressed, the items in the tree-view are grouped below three nodes:
This button is only available for the Packages presentation of scopes. | |
| Compact Middle Packages | This option lets you specify how or whether empty packages are to be shown. (Empty packages are ones that contain nothing but other packages.) |
Show Files | When this option is enabled, source files are displayed explicitly in the tree view. When the files are shown, they can be selected for exclusion/inclusion into a pattern. If this option is not disabled, all files are hidden from the tree. | |
| Show Modules | When this option is enabled, items in the tree-view are shown below the corresponding module nodes. Otherwise, the project items are shown below the corresponding package (like a source path with packages). |
Flatten Modules | When this option is enabled, modules in module groups are shown on the same level with other modules. | |
Show Included Only | When this option is enabled, the tree shows only the elements that are included in the scope. | |
Packages Project | Define how you want the project files to be displayed in the tree view. The project tree view presentation, scopes language syntax and the available toolbar buttons differ depending on the selection. |
Legend of the project tree view
Item | Description |
|---|---|
| Folders and files included in a scope are marked with green. |
Black | Folders and files excluded from a scope. |
| Folders that contain both excluded and included files and subfolders are marked with dark blue. |