Submit changes to a database
A commit ends a transaction and makes all changes available to other users. In IntelliJ IDEA, you can select how you want to commit transactions: automatically or manually.
For more information about transaction modes and how to commit transactions automatically, refer to Transaction mode.
To change the commit mode manually, use the Tx drop-down menu on the data editor toolbar.
Submit changes manually
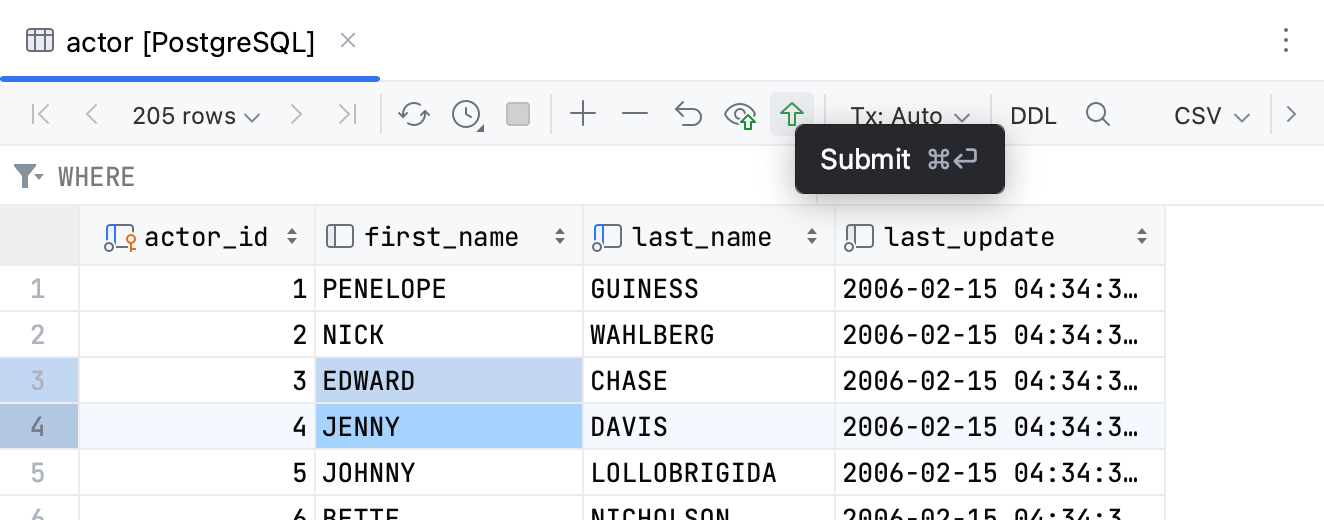
By default, changes in tables are not submitted automatically. At first, you make changes in your local copy of the table, then you need to submit all changes to a database.
To submit changes to a database, click
Submit, or press Ctrl+Enter.

Preview changes
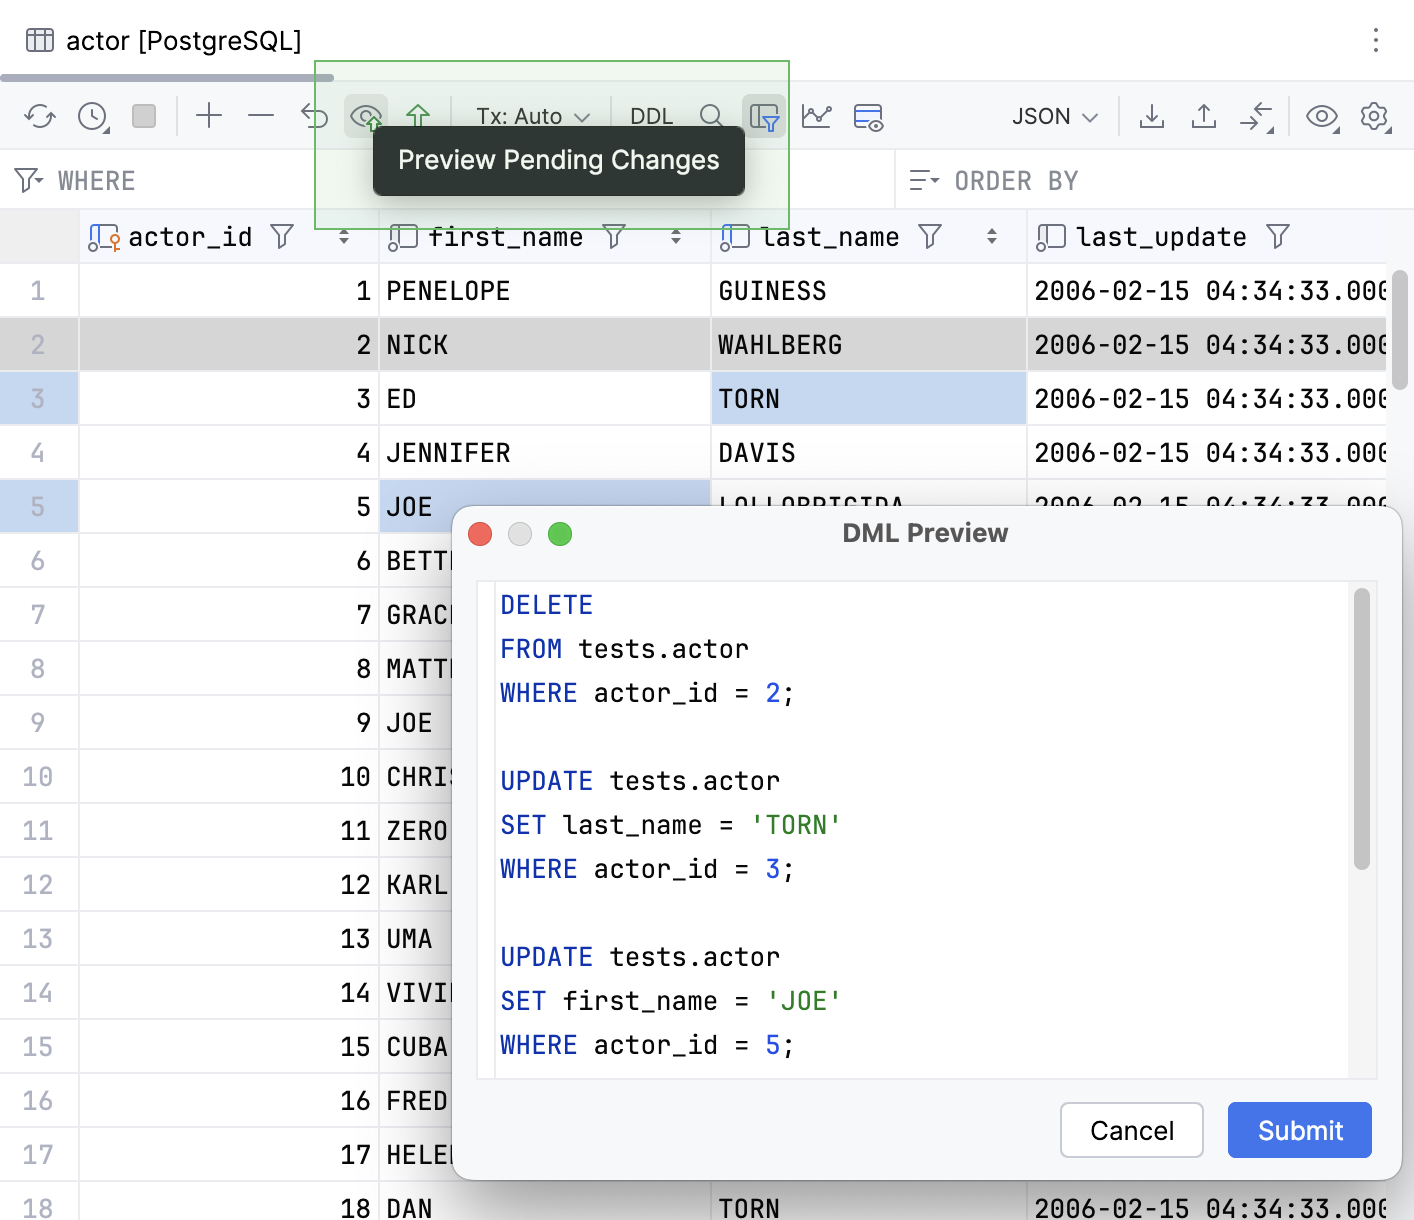
You can preview the DML script before submitting your changes.
To preview the DML script, click
Preview Pending Changes on the data editor toolbar.
IntelliJ IDEA will display the generated DML script with all the changes in a DML Preview popup for you to review.

Revert changes
Before you submit the changes, you can revert them.
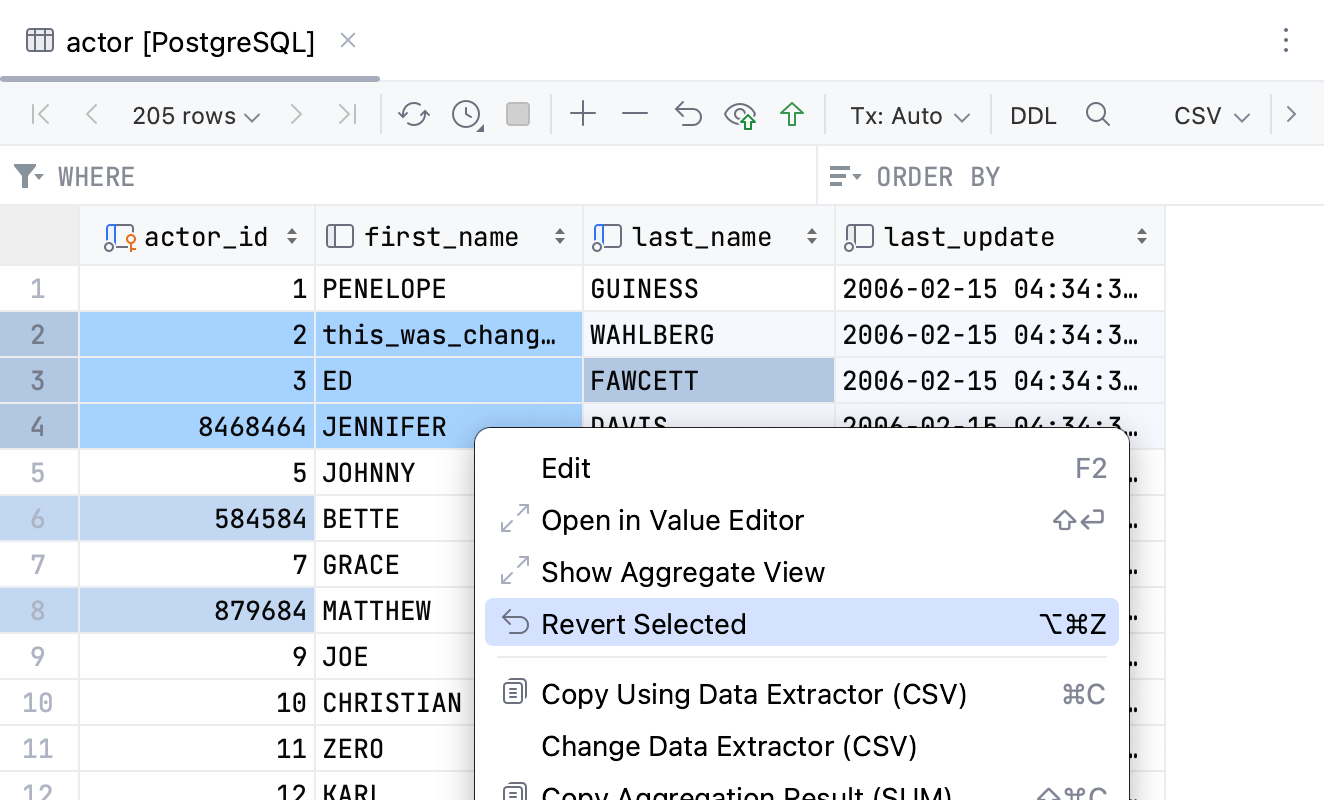
The scope of the revert command is defined by the current selection in a table: the command is applied only to the changes within the selection. So you can revert an individual change, a group of changes or all the changes. If nothing is currently selected, the revert command is applied to the whole table.
To revert non-submitted changes, select and right-click a cell or a number of cells. Select Revert Selected Ctrl+Alt+Z.

Resolving conflicts when submitting changes
It might happen that someone has changed the piece of code that you have been editing. In this case, when you try to submit your code to a database, IntelliJ IDEA displays a notification that there is a conflict, and you can resolve it by using a three-way merge.
Click Merge.
In the diff dialog, review your local changes and changes that were received from a server.
Use the Ignore (
) button to reject the change. Or, Accept (
or
) buttons to apply the change from the left or right pane. The middle pane shows the result of the merge operation.
Click Save changes and finish merging.
Productivity tips
Display a warning when you edit an outdated piece of DDL code
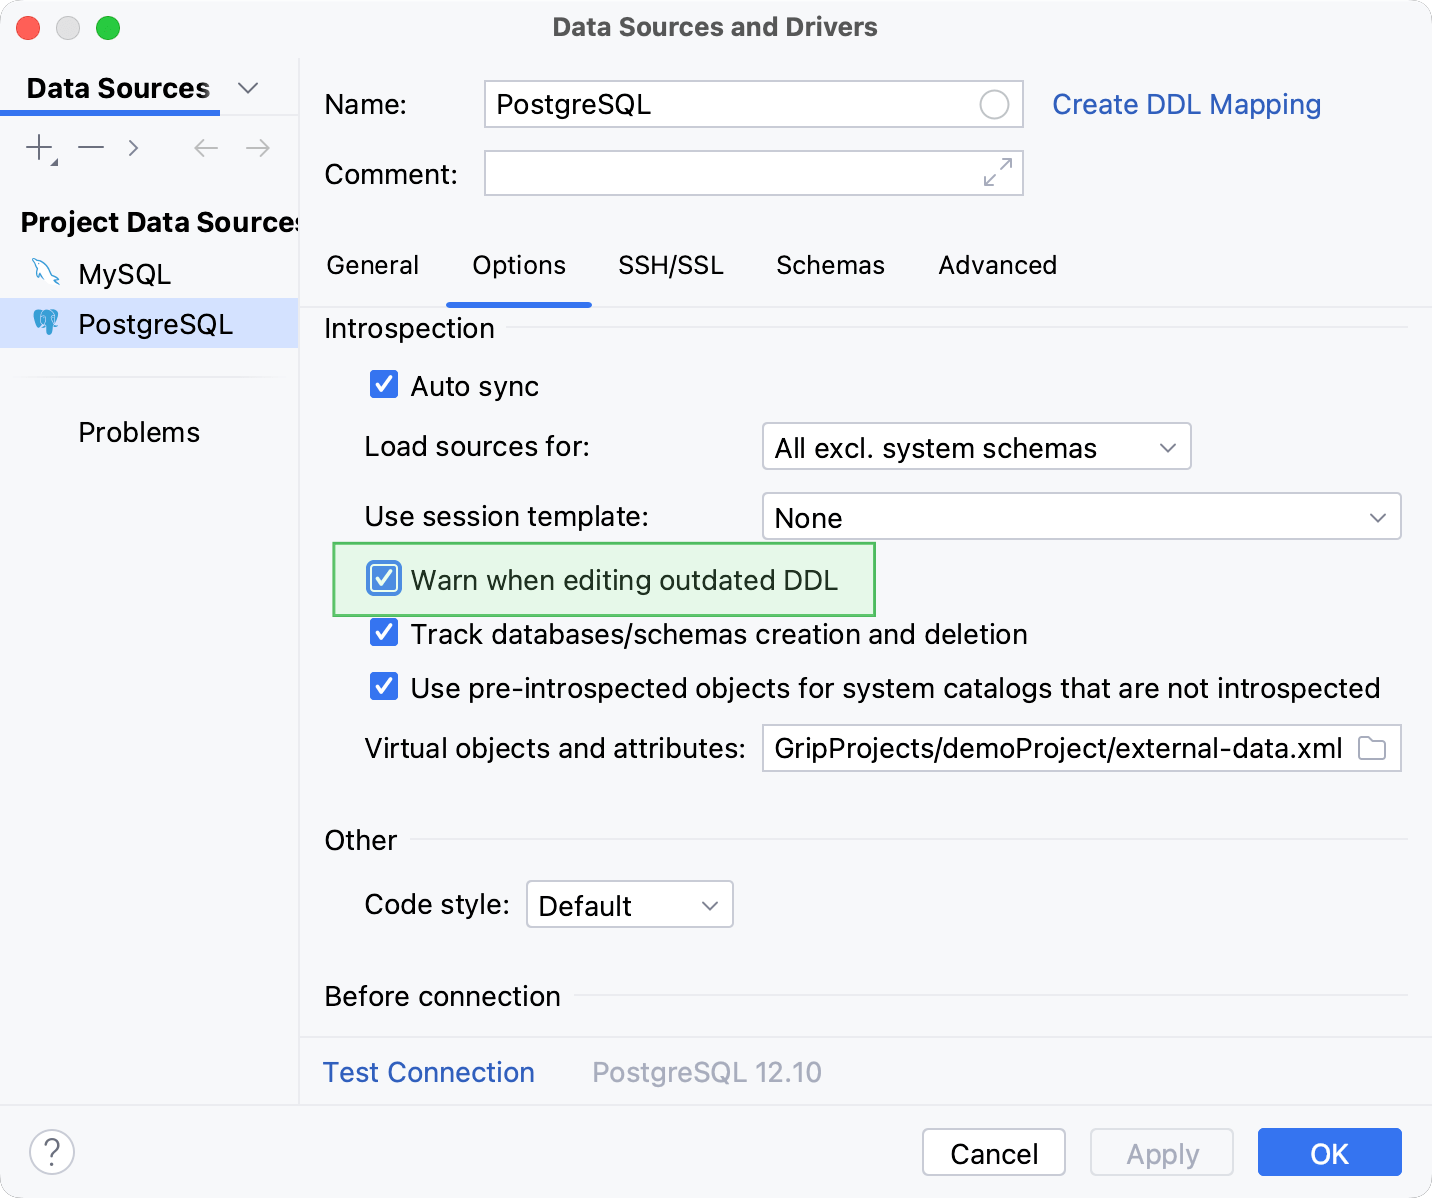
To ensure that you are not deleting someone's work by submitting an outdated object, turn the Warn when editing outdated DDL option on.
In the Database tool window, right-click a data source and select Properties.
In the Data Sources and Drivers dialog, click the Options tab.
In the Introspection section, select the Warn when editing outdated DDL checkbox.
