TypeScript
IntelliJ IDEA supports developing, running, and debugging TypeScript source code. IntelliJ IDEA recognizes .ts files and provides full range of coding assistance for editing them without any additional steps from your side. TypeScript files are marked with the ![]() icon.
icon.
TypeScript-aware coding assistance includes completion for keywords, labels, variables, parameters, and functions, error and syntax highlighting, formatting, numerous code inspections and quick-fixes, as well as common and TypeScript-specific refactoring. IntelliJ IDEA also verifies TypeScript code on the fly and shows syntax and potential compilation errors in a dedicated TypeScript tool window.
On this page you will find a short Getting Started Guide that will walk you step by step from creating a web application to debugging and testing it.
Before you start
-
Make sure the JavaScript and TypeScript bundled plugin is enabled on the Plugins page, see Managing plugins for details.
Creating a new application
-
Select from the main menu or click the New Project button on the Welcome screen.
-
In the New Project dialog, select Static Web in the left-hand pane.
In the right-hand pane, choose Static Web again and click Next.
-
On the second page of the wizard, specify the project name and the path to the folder where the project-related files will be stored. Click Finish.
If your application uses some tools, libraries, or frameworks, download the required packages. To manage your project dependencies, you can use npm, Yarn 1, or Yarn 2, see npm and Yarn for details.
Install project dependencies
Starting with an existing application
To continue developing an existing application, open it in IntelliJ IDEA and download the required dependencies.
Open the application sources that are already on your machine
Check out the application sources from your version control
-
Click Get from Version Control on the Welcome screen or select from the main menu.
-
In the invoked dialog, select your version control system from the list and specify the repository to check out the application sources from.
Download the dependencies
-
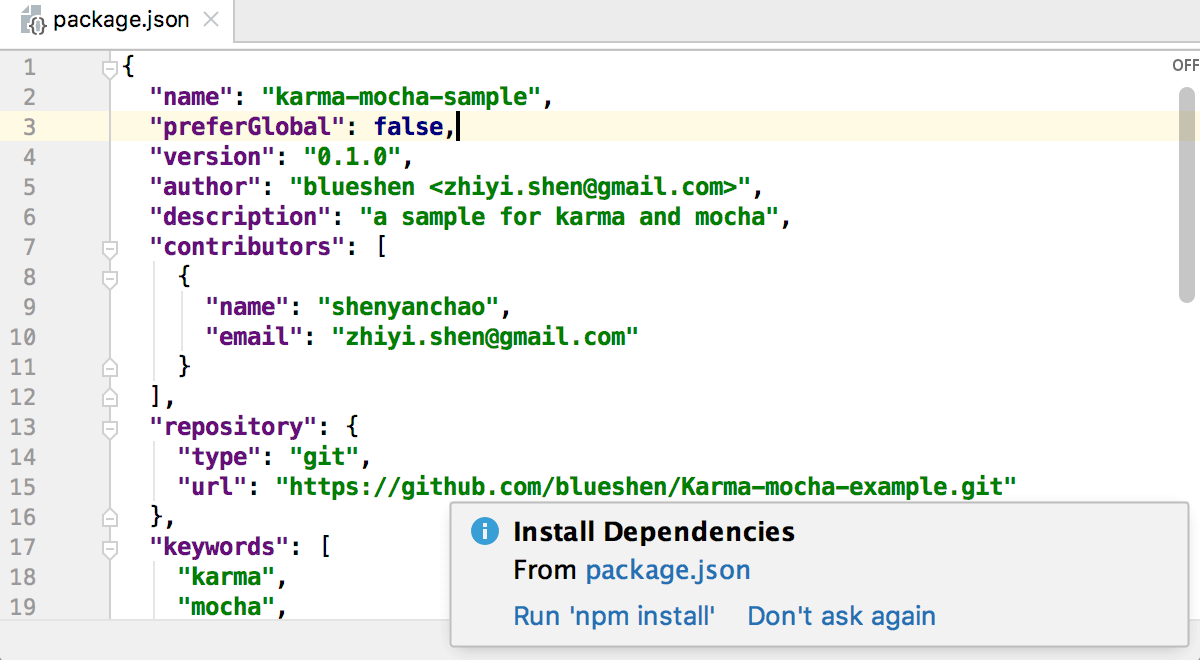
Click Run 'npm install' or Run 'yarn install' in the popup:

You can use npm, Yarn 1, or Yarn 2, see npm and Yarn for details.
Verifying TypeScript
IntelliJ IDEA verifies TypeScript code mainly based on the data from the TypeScript Language Service which also compiles TypeScript into JavaScript.
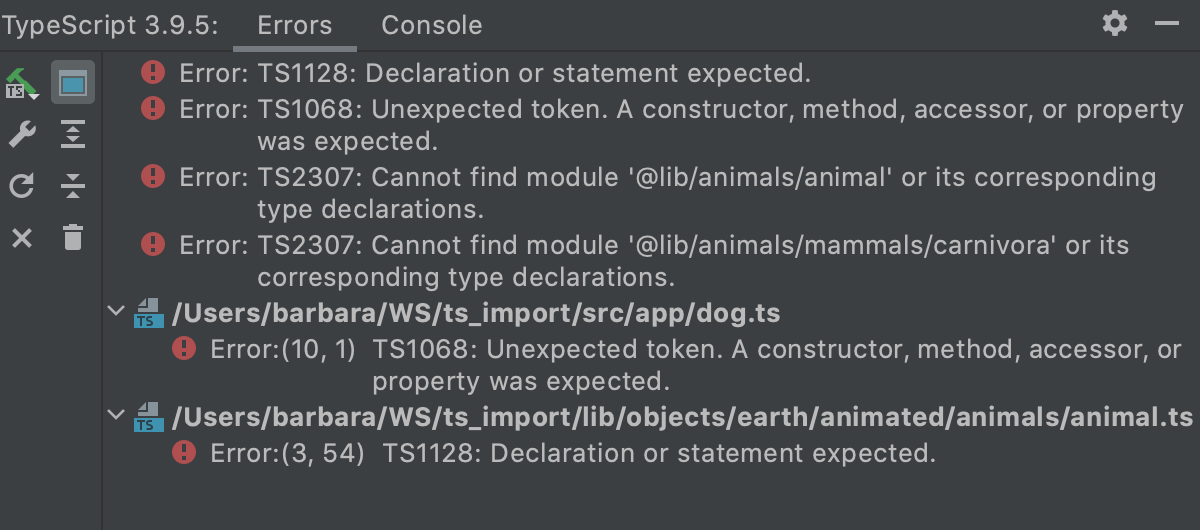
All the detected syntax and compilation errors are reported in the Errors and Compile errors tabs of the TypeScript Tool Window. For each error, IntelliJ IDEA provides a brief description and information about the number of the line where it occurred.
The Console tab shows the log of the TypeScript Language Service since the tool window was opened.
Configure integration with the TypeScript Language Service
-
In the Settings/Preferences dialog Ctrl+Alt+S, go to . The TypeScript page opens.
-
Specify the Node.js interpreter to use. This can be a local Node.js interpreter or a Node.js on Windows Subsystem for Linux.
-
In the TypeScript field, specify the version of the TypeScript to use (IntelliJ IDEA displays the currently chosen version).
-
By default, the
typescriptpackage from the project's node_modules folder is used. -
Bundled: choose this option to use the
typescriptpackage that is shipped with IntelliJ IDEA without attempting to find another one. -
Select: choose this option to use a custom typescript package instead of the one bundled with IntelliJ IDEA. In the dialog that opens, choose the path to the relevant package.
-
If your project package manager is Yarn 2, you have to use the
typescriptpackage installed via Yarn 2. In this case,yarn:package.json:typescriptis by default selected.Learn more about package managers from npm and Yarn
-
-
Make sure the TypeScript Language Service checkbox is selected.
-
Use the controls below to configure the behaviour of the TypeScript Language Service.
-
In the Options field, specify the command-line options to be passed to the TypeScript Language Service when the tsconfig.json file is not found. See the list of acceptable options at TSC arguments. Note that the
-wor--watch(Watch input files) option is irrelevant.
Monitor syntax errors
-
Open the TypeScript tool window () and switch to the Errors tab.
The tab lists the discrepancies in the code detected by the TypeScript Language Service. The list is updated dynamically as you change your code.
By default, the list contains only the errors from the file in the active editor tab and the full path to this file is displayed at the top. To show the errors across the entire project, press the Show project errors toggle button
 on the toolbar.
 Error messages are grouped by files in which they were detected.

To navigate to the code in question, double-click the corresponding error message or select it and choose Jump to Source from the context menu.

Monitor compilation errors
-
Open the TypeScript tool window () and switch to the Compile errors tab.
The tab opens when you click
 and choose the compilation scope from the list:
The tab lists all the compilation errors detected in the chosen scope. This list is not affected by changes you make to your code and is updated only when you invoke compilation manually again.
Error messages are grouped by files in which they were detected. To navigate to the code in question, double-click the corresponding error message or select it and choose Jump to Source from the context menu.

Editing TypeScript code
IntelliJ IDEA brings you smart coding assistance for TypeScript including context-aware code completion, auto import for symbols, documentation look-up, parameter hints, navigation, TypeScript-aware syntax highlighting and linting, refactoring and more.
Auto import
IntelliJ IDEA can generate import statements for modules, classes, components, and any other TypeScript symbols that are exported. By default, IntelliJ IDEA adds import statements when you complete TypeScript symbols.
See Auto import to learn how to optimize import statements and configure their style.
When you type your code or paste a fragment with a symbol that is not yet imported, IntelliJ IDEA can also generate an import statement for this symbol. If there is only one source to import the symbol from, IntelliJ IDEA inserts an import statement silently. Otherwise, use an import popup or a dedicated import quick-fix.
Add import statements on code completion
-
In the Settings/Preferences dialog Ctrl+Alt+S, go to . The Auto Import page opens.
-
In the TypeScript/JavaScript area, select the Add TypeScript imports automatically and On code completion checkboxes.
Add import statements on typing or pasting code
-
In the Settings/Preferences dialog Ctrl+Alt+S, go to . The Auto Import page opens.
-
In the TypeScript/JavaScript area, select the Add TypeScript imports automatically and Unambiguous imports on the fly checkboxes.
Use import popups
If for some reason an import statement for a TypeScript symbol was not added on completion or editing, IntelliJ IDEA shows you a popup that suggests importing the symbol.
-
To accept the suggestion, press Alt+Enter:

-
If there's more than one possible source of import, IntelliJ IDEA informs you about that:

Pressing Alt+Enter in this case opens a list of suggestions:

-
To hide import popups, open the Settings/Preferences dialog Ctrl+Alt+S, go to , and clear the With import popup checkbox.
Use import quick-fixes
If an import popup doesn't show up, you can always add an import statement via the dedicated quick-fix.
-
To generate an import, select Add import statement:

If there is only one source to import a symbol from, IntelliJ IDEA generates an import statement:

-
If there are several sources to import a symbol from, select the relevant one from the suggestion list:

-
If the TypeScript Language Service is enabled in your project, you can also use its suggestion:

If there are several sources to import a symbol from, select the relevant one from the list that the TypeScript Language Service shows:

Documentation look-up
IntelliJ IDEA lets you get reference for symbols from your project and from its dependencies, for symbols defined in external libraries, and for standard JavaScript APIs because TypeScript implements all of them.
The documentation is shown in a Documentation popup that helps navigate to the related symbols via hyperlinks, and provides a toolbar for moving back and forth through the already navigated pages.
View documentation for a symbol
-
Position the caret at the symbol and press Ctrl+Q or select from the main menu.
-
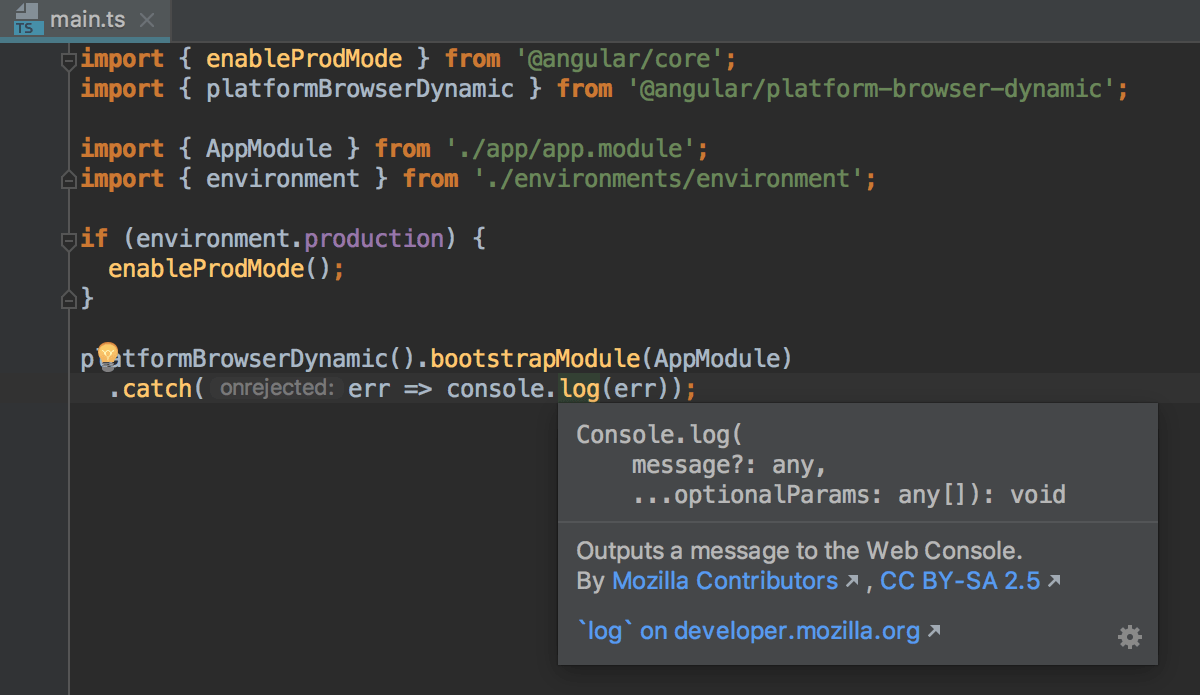
When you hover the mouse pointer over a symbol, IntelliJ IDEA immediately displays the reference for it in the Documentation popup.
You can turn off this behavior or configure the popup to appear faster or slower, see Configuring the behavior of Documentation popup below.
For standard JavaScript methods available in TypeScript, IntelliJ IDEA also shows a link to the corresponding MDN article.

Configure the behavior of Documentation popup
-
To turn off showing documentation automatically, open the Settings/Preferences dialog Ctrl+Alt+S, go to , and clear the Show quick documentation on mouse move checkbox.
-
To have the Documentation popup shown faster or slower, open the Settings/Preferences dialog Ctrl+Alt+S, go to , then select the Show the documentation popup checkbox and specify the delay time.
View the MDN documentation for a symbol at caret
In the Documentation window Ctrl+Q, click the MDN link.
Alternatively, press Shift+F1 or choose from the main menu.
IntelliJ IDEA opens the MDN article in the default IntelliJ IDEA browser.
Parameter hints
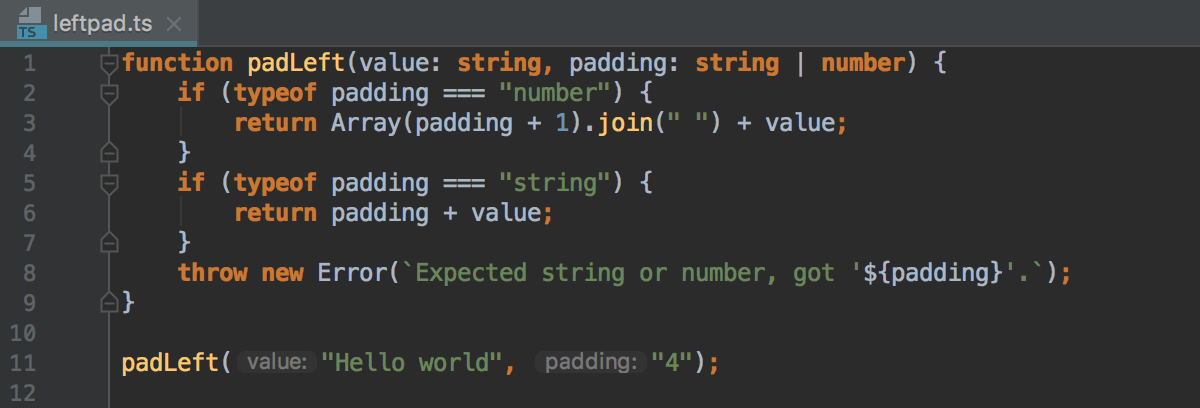
Parameter hints show the names of parameters in methods and functions to make your code easier to read. By default, parameter hints are shown only for values that are literals or function expressions but not for named objects. 
Configure parameter hints
-
Select Parameter hints from the list, make sure the Show parameter hints checkbox is selected, and then specify the context where you want parameter hints shown.
-
For some methods and functions, IntelliJ IDEA does not show parameter hints in any context. Click Black list... to view these methods and functions, possibly enable parameter hints for them, or add new items to the list.
Inferred type information
You can see the inferred type of an object in a tooltip or in the documentation popup.
View inferred type of an object in a tooltip
-
Hold Ctrl and hover the mouse pointer over the object.

View inferred type of an object in the documentation popup
-
When you hover the mouse pointer over a object, IntelliJ IDEA immediately displays the reference for it in the Documentation popup.

-
Position the caret at the object and press Ctrl+Q or select from the main menu.
Learn more from Documentation look-up above.
JavaScript libraries in TypeScript
When working with JavaScript libraries in TypeScript, you need to install type declarations for them. IntelliJ IDEA reminds you to install them via npm or yarn and updates your package .json file accordingly.
Install the type declarations
Position the caret at the warning and press Alt+Enter.
Select the suggestion and press Enter.

Syntax highlighting
You can configure TypeScript-aware syntax highlighting according to your preferences and habits.
Select the color scheme, accept the highlighting settings inherited from defaults or customize them as described in Configuring Colors and Fonts.
Refactoring your code
IntelliJ IDEA provides both common refactoring procedures, such as rename/move, and so on, and TypeScript-specific refactoring procedures, such as change signature, introduce parameter, introduce variable. See Rename refactorings, Move and copy refactorings, and Refactoring TypeScript for details.
Running and debugging your application
With IntelliJ IDEA, you can run and debug client-side TypeScript code and TypeScript code running in Node.js. Learn more from Running and debugging TypeScript.