Enable JPA support
Make sure the plugin is enabled
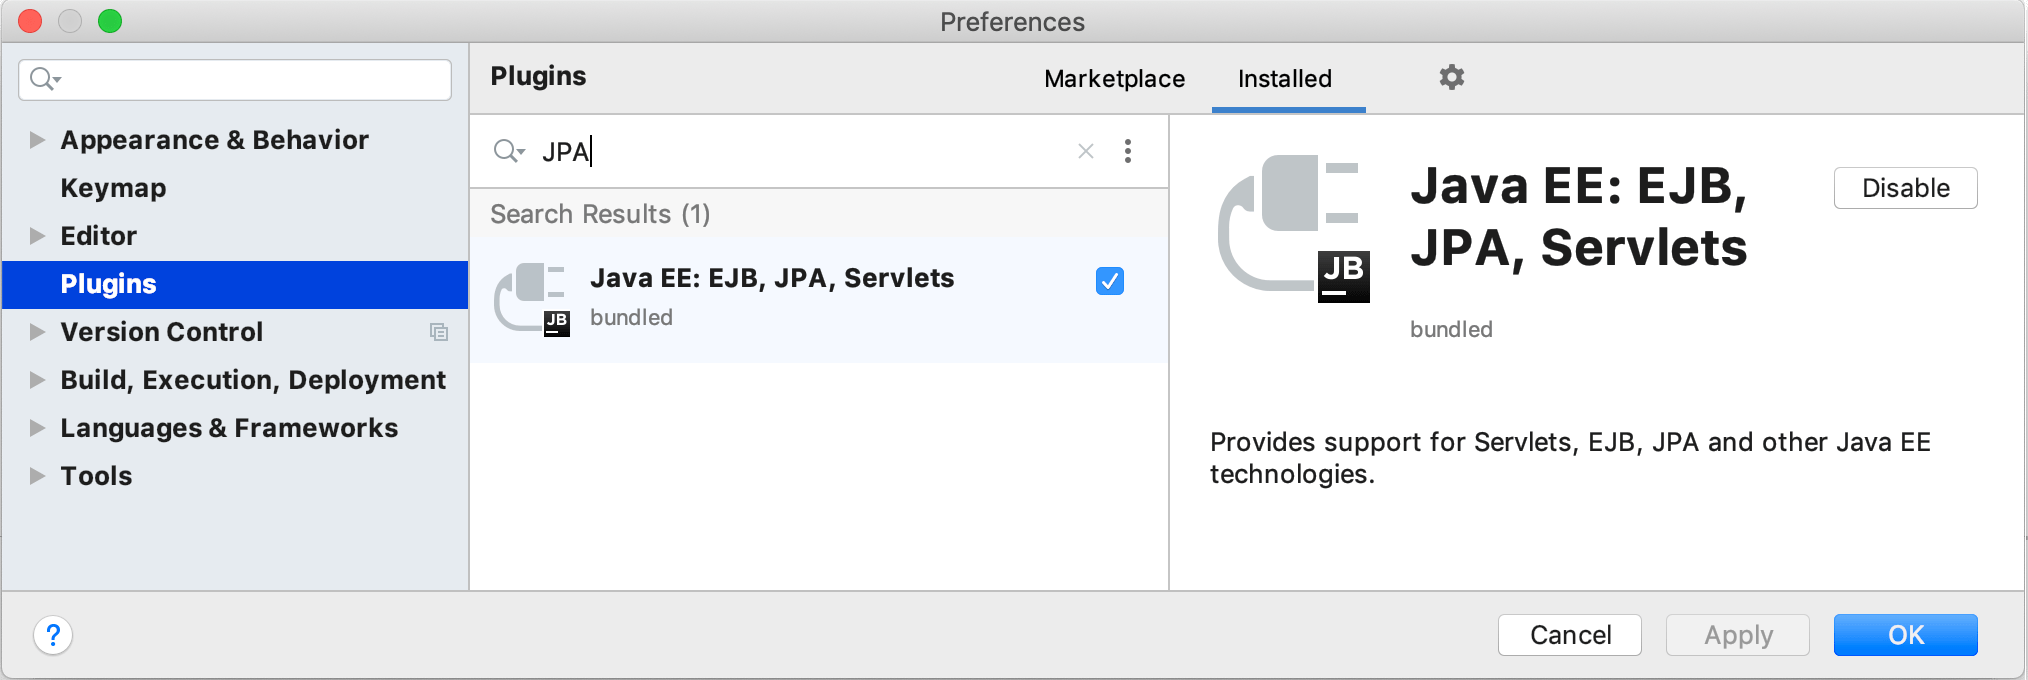
In the Settings/Preferences dialog Ctrl+Alt+S, select Plugins.
On the Plugins page, type
JPAin the search box. Locate the plugin in the list.If the checkbox next to the JPA plugin is not selected, select it.
Click OK. If suggested, restart IntelliJ IDEA.

Enable JPA support for a project or module
Launch IntelliJ IDEA.
If the Welcome screen opens, click Create New Project.
Otherwise, from the main menu, select or Module.
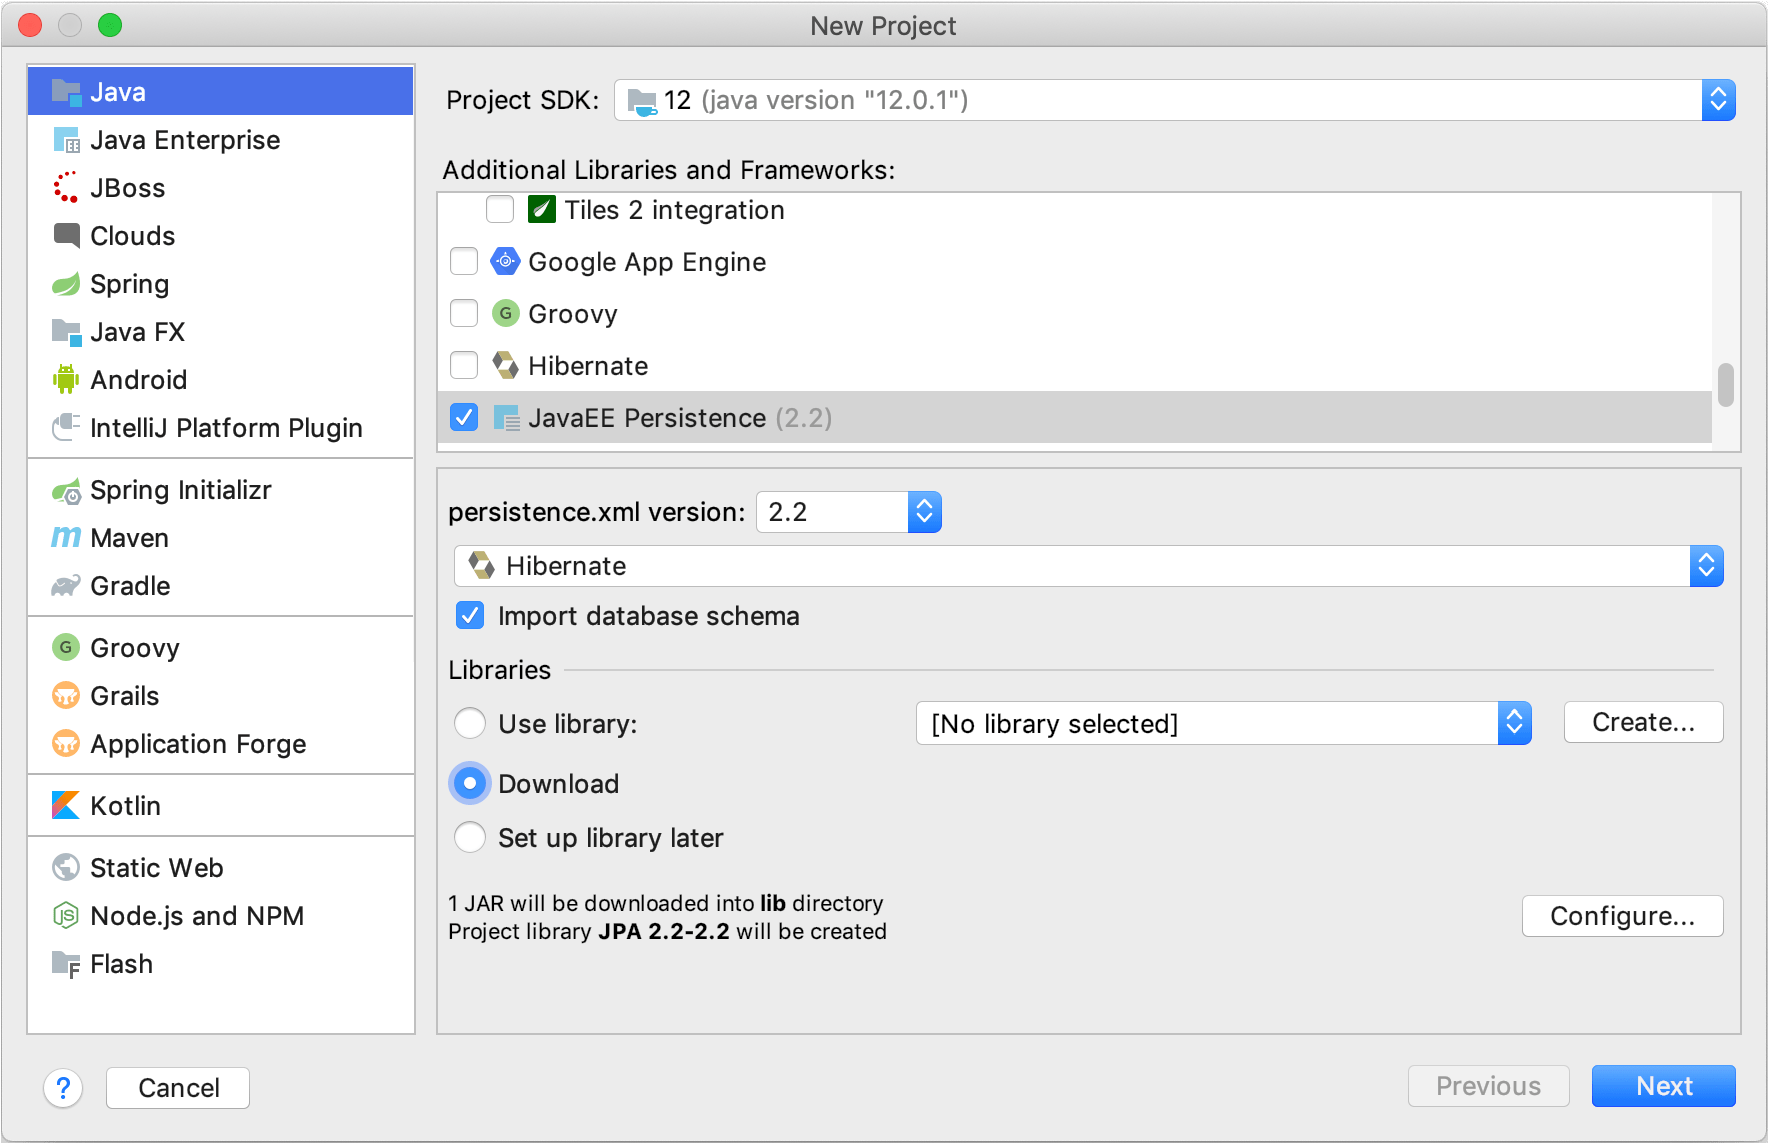
Select Java or Java Enterprise from the list on the left.
From the Project SDK list, select the JDK that you want to use in your project.
If the JDK is installed on your computer, but not defined in the IDE, select Add JDK and specify the path to the JDK home directory.
If you don't have the necessary JDK on your computer, select Download JDK.
(For Java Enterprise) Specify the necessary JavaEE version and select the server from the list. If the Application server list is empty, click New and configure a new server.
Under Additional Libraries and Frameworks, select the JavaEE Persistence checkbox.
Select the version of persistence.xml (JPA configuration file) that you want to create.
If necessary, select the Java persistence (implementation) provider.
This setting only affects the provider element in persistence.xml.
If there is a database defined in IntelliJ IDEA as a data source, you can select to import the database schema. This will result in creating the necessary JPA entity classes and object/relational mappings for them.
Select the required library option and click Next.

Specify the project name and location. Click Finish.
Enable JPA support for an existing module
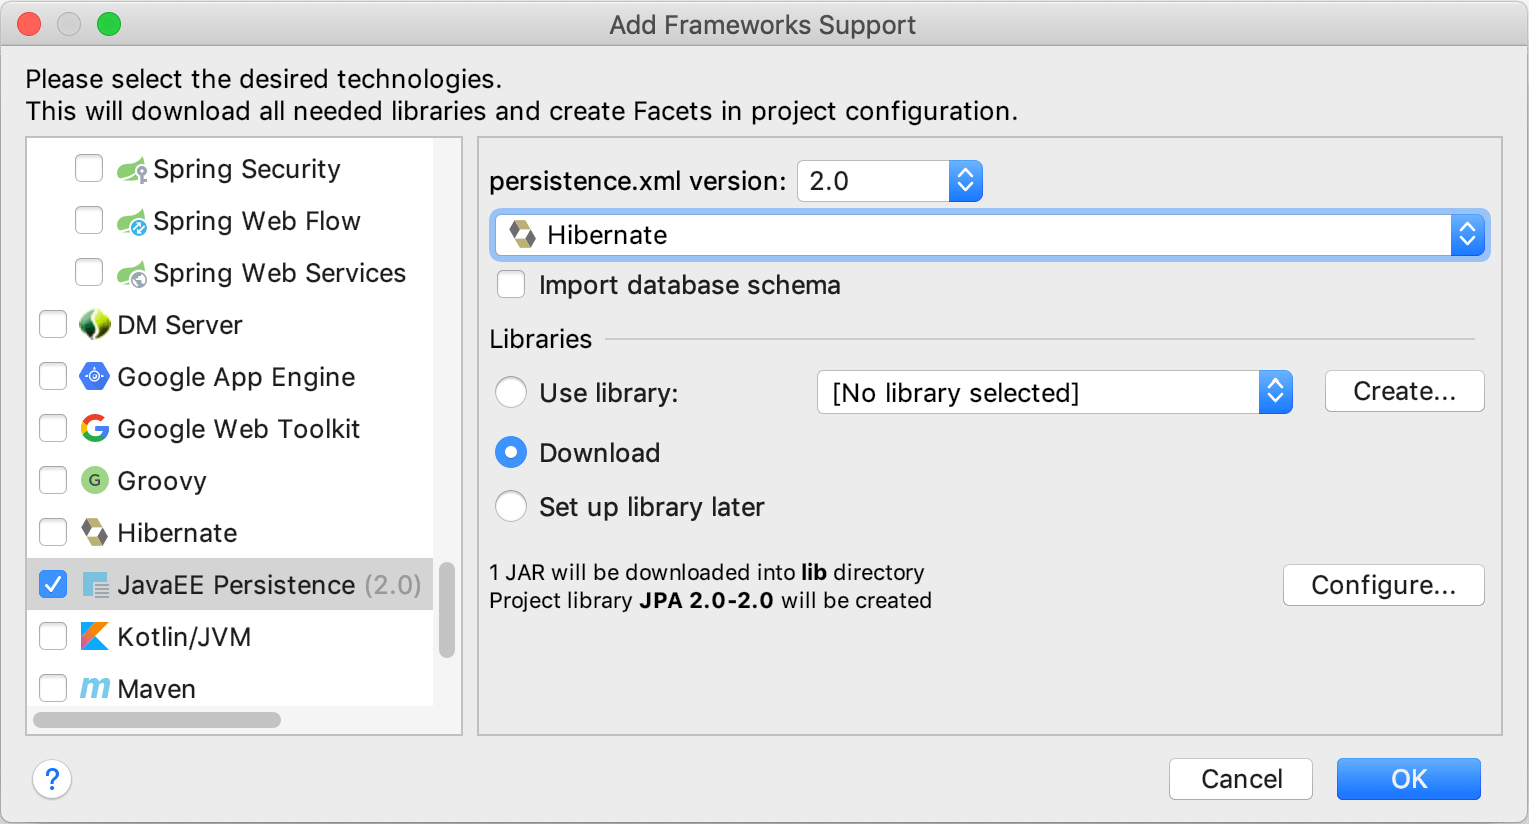
In the Project tool window, right-click the necessary module and select Add Frameworks Support.
In the left-hand pane of the Add Frameworks Support dialog that opens, select the JavaEE Persistence checkbox.
Select the version of persistence.xml (JPA configuration file) that you want to create.
If necessary, select the Java persistence (implementation) provider.
This setting only affects the provider element in persistence.xml.
If there is a database defined in IntelliJ IDEA as a data source, you can select to import the database schema. This will result in creating the necessary JPA entity classes and object/relational mappings for them.
Select the required library option and click OK.

Once the facet is added, from the main menu, select .