Gradle dependencies
IntelliJ IDEA lets you add and manage dependencies in your Gradle project. You can add dependencies and view them in the diagram.
Generate Gradle dependencies
Any dependency added to the project is managed by Gradle. The best way to add or manage a dependency is in the build.gradle file. Dependencies that you set up manually inside IntelliJ IDEA module settings will be discarded on the next Gradle project reload.
Add a Gradle dependency
Open the build.gradle file in the editor.
Press Alt+Insert to open the Generate context menu.
From the context menu, select Add Maven artifact dependency.

The Maven Artifact Search window opens.
In the Maven Artifact Search window, in the search field, start typing the name of your dependency. In the list of results select the one you need and click Add.

Reload your project.
IntelliJ IDEA adds a dependency to the build.gradle file.

IntelliJ IDEA also adds the dependency to the Dependencies node in the Gradle tool window and to the External Libraries in the Project tool window.

If the added dependency has its own transitive dependencies, IntelliJ IDEA displays them in both tool windows. Besides the transitive dependencies, IntelliJ IDEA also indicates cyclic dependencies in the Gradle tool window.

If you add a dependency configuration of the source set, it will be displayed in the Gradle tool window as well.

View dependencies as a diagram
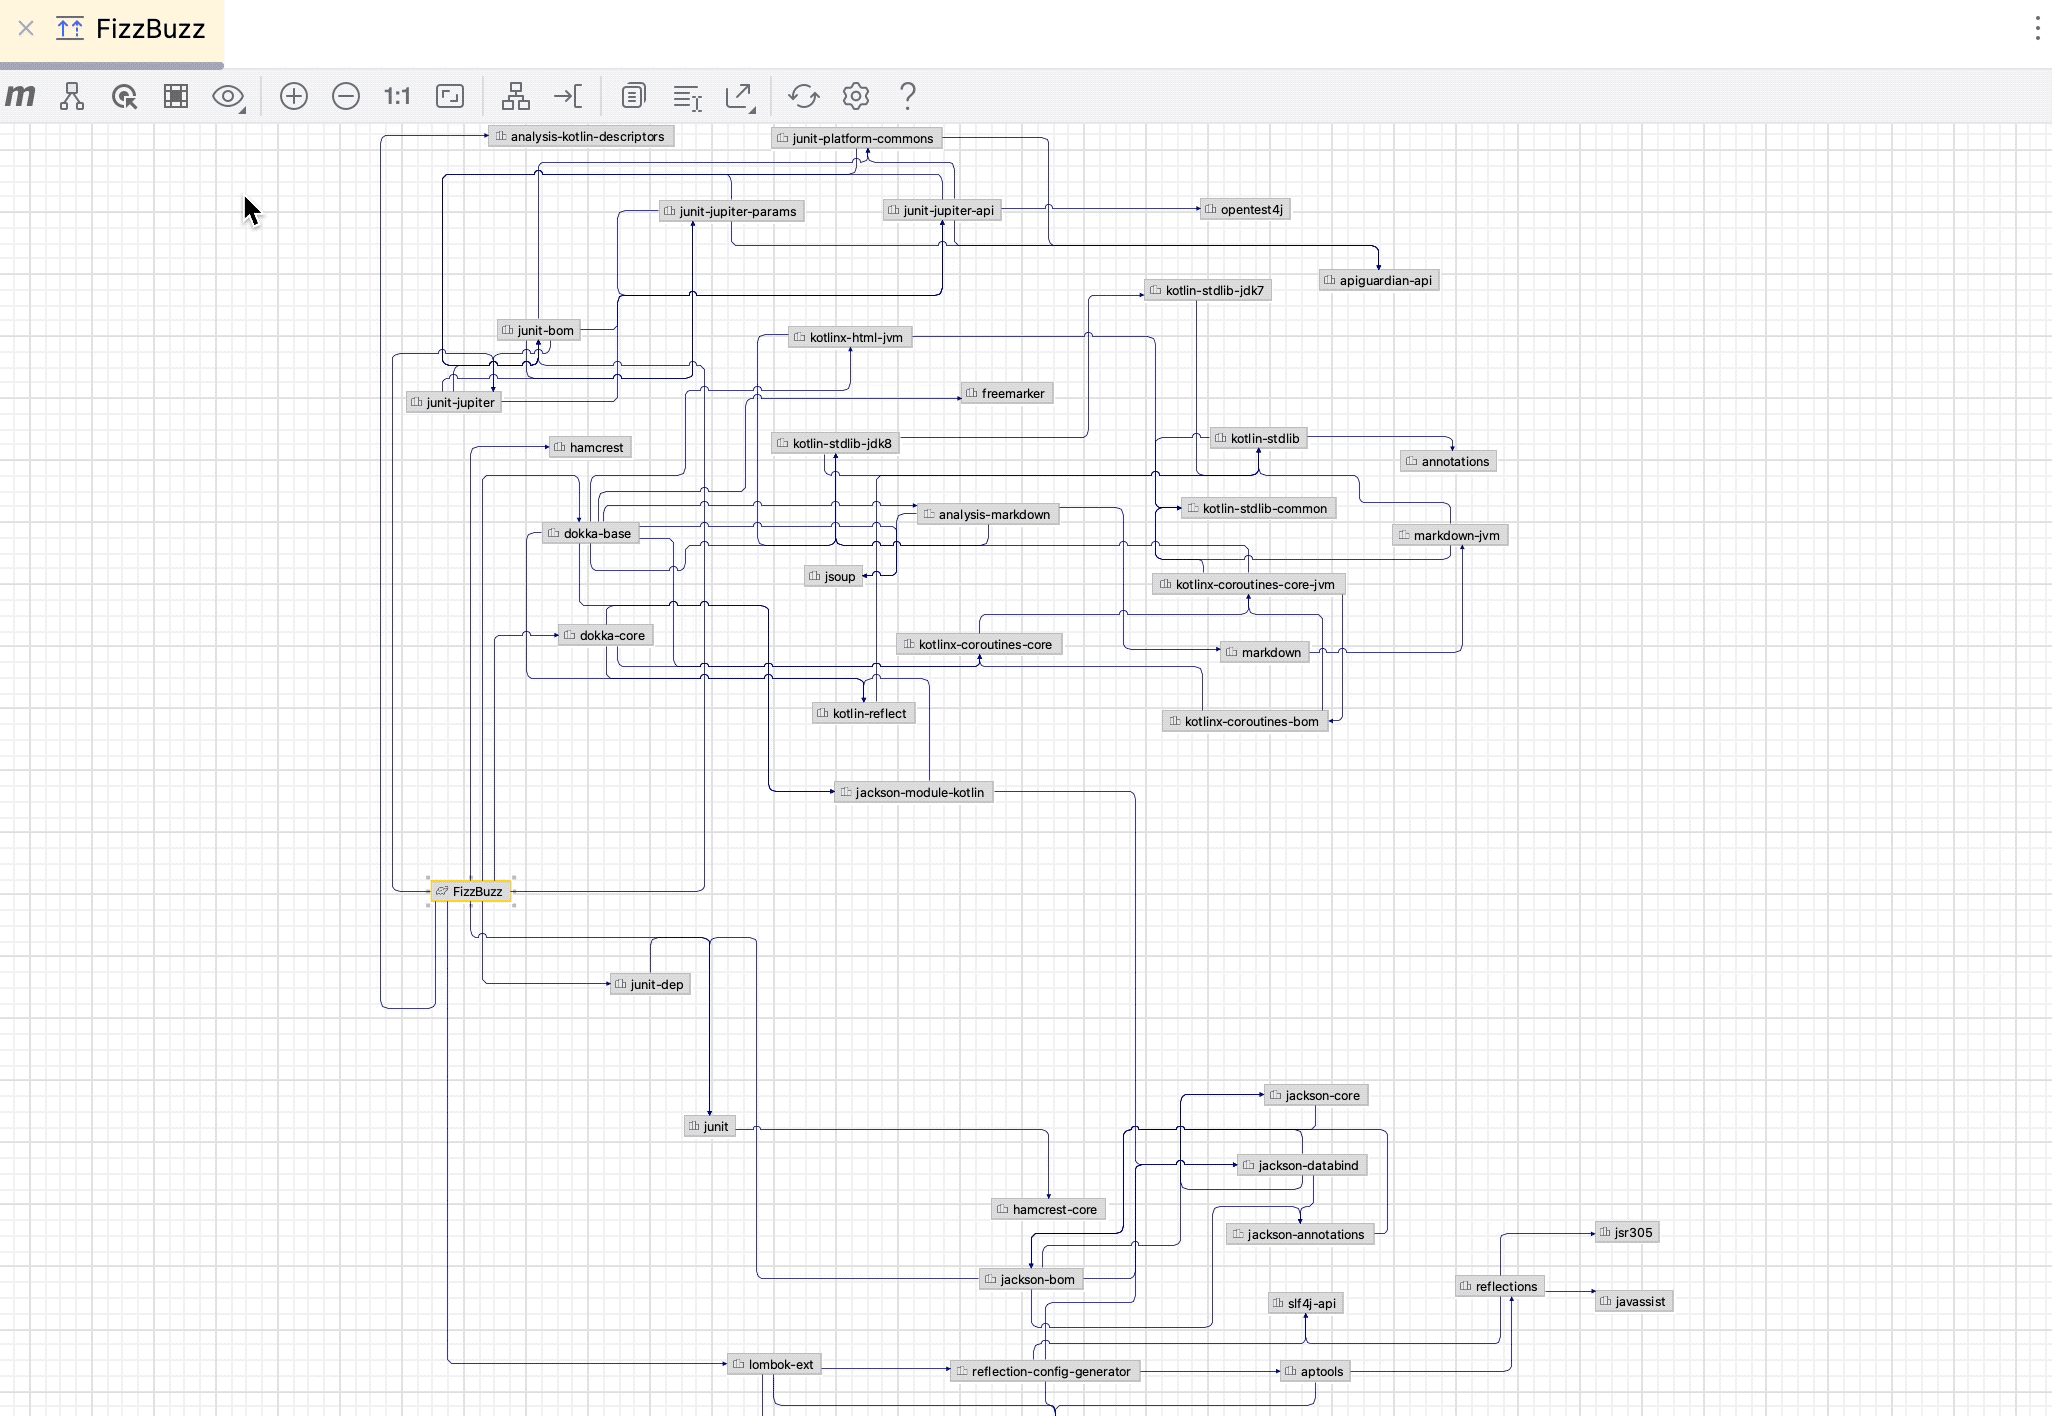
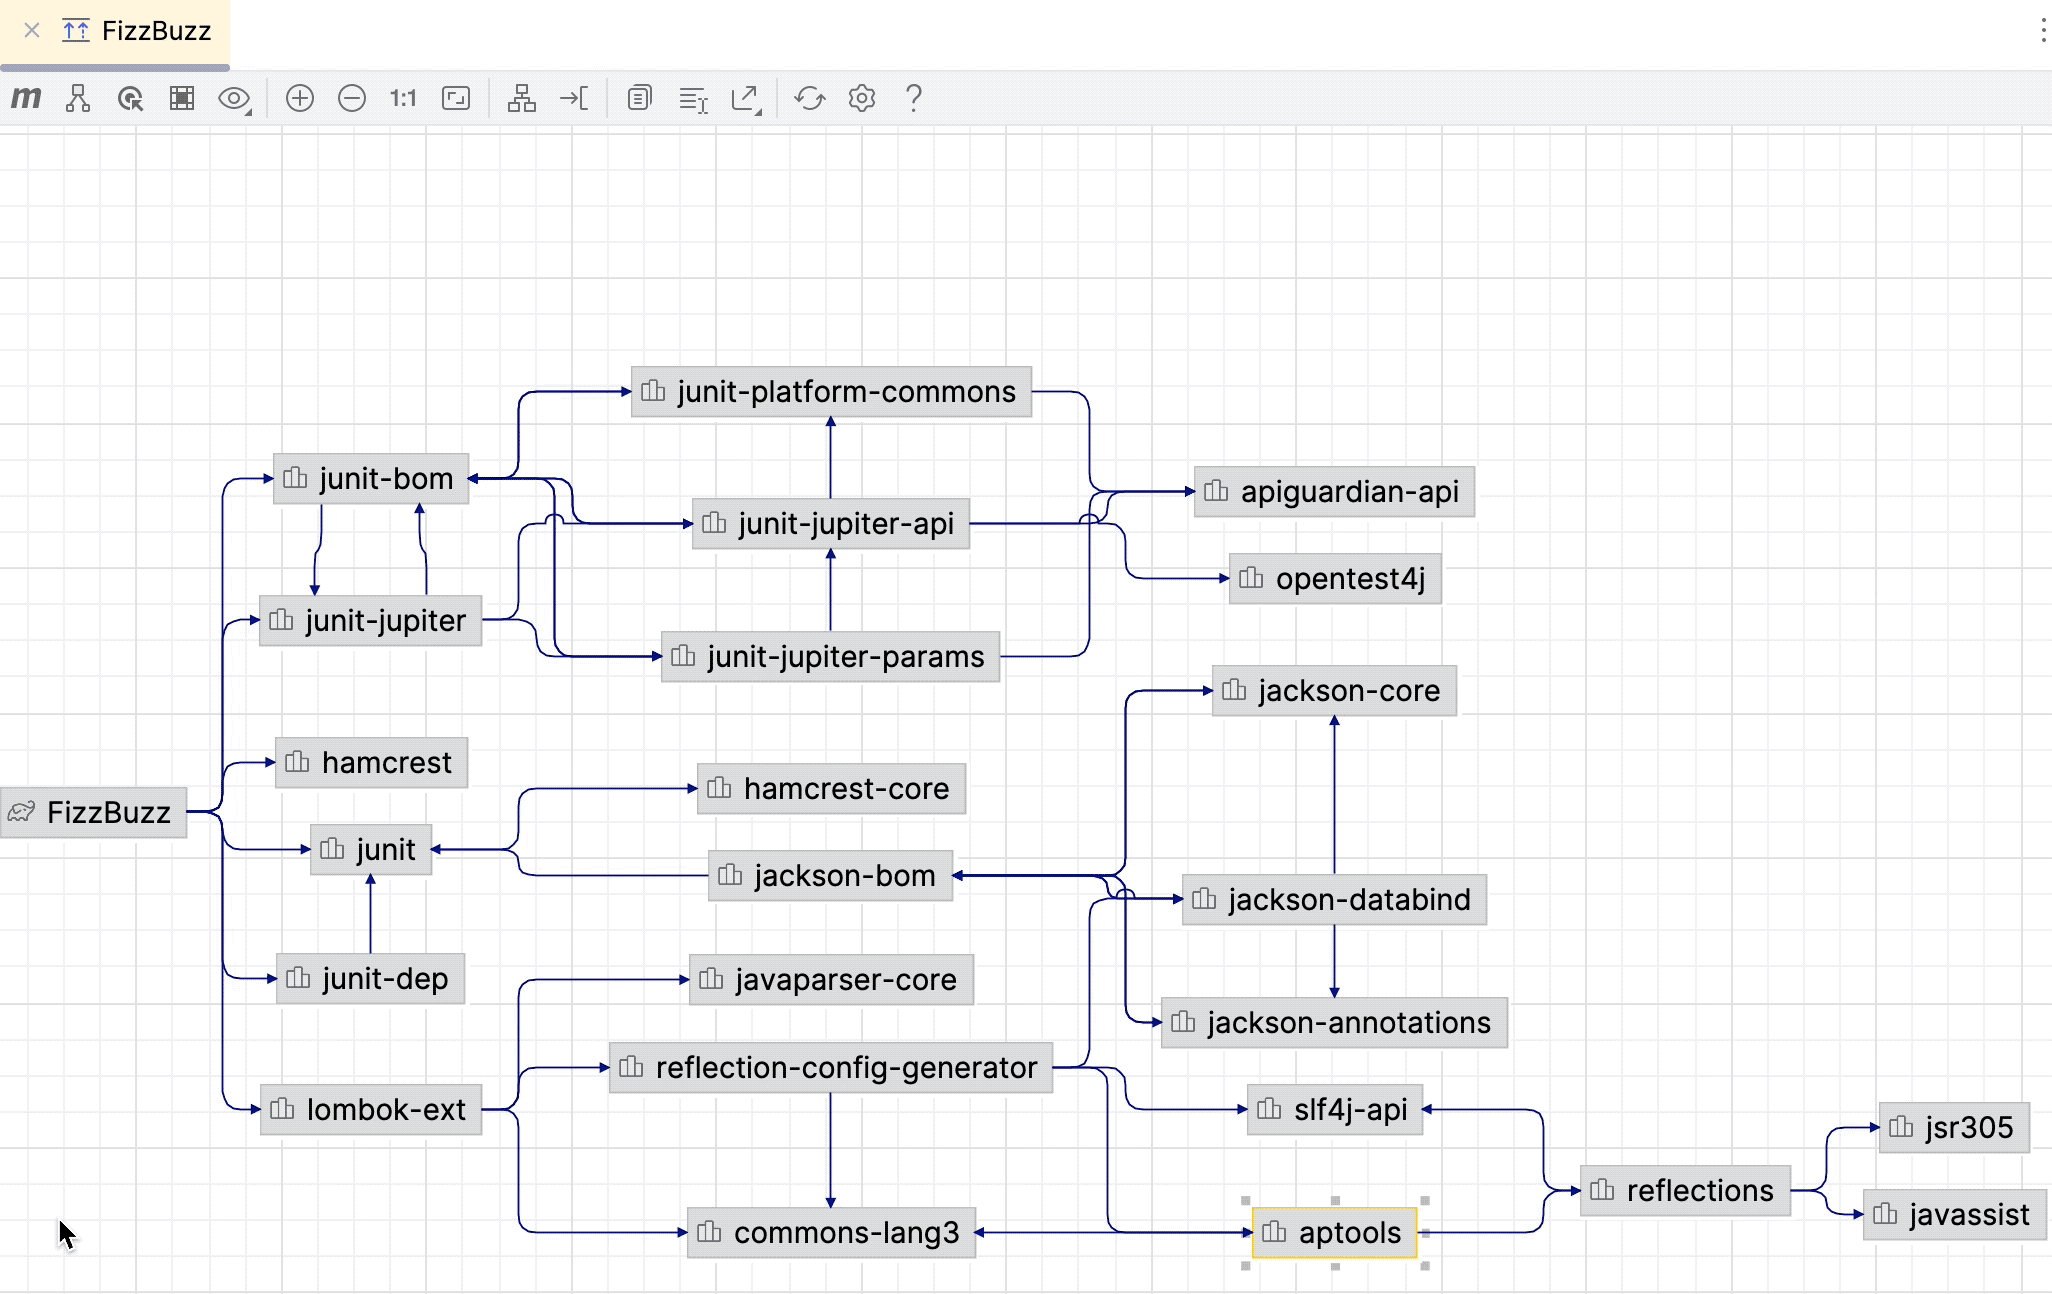
You can work with Gradle dependencies in the diagram format. It might be helpful when you have a large project and want to see the whole picture of how dependencies (including the transitive ones) are connected inside the project.
In the Gradle tool window, select a project, on the toolbar, click
 or select the Show Dependencies option from the context menu.
You can select the Show Dependencies Popup (Ctrl+Alt+U) option to open the graph in a separate window. To close the popup, press Escape.
In the diagram window, IntelliJ IDEA displays all project dependencies including the transitive ones.

When you navigate to a dependency in a graph, IntelliJ IDEA displays its version, group and artifact IDs.

Use the diagram window toolbar to manage the diagram. You can change the size of a diagram, export it to a file, see only a part of the diagram you are interested in, and so on.
Change the visibility level
You can change the visibility level and, for example, view dependencies that have a specific scope (compile, test, and so on).
In the diagram window, select the project and click
 .
.From the list, select the dependency scope you want to see. IntelliJ IDEA displays only the specified dependency scope.
Show path from selection to root
You can select dependencies and see how they are connected to the root.
In the diagram window, select a dependency for which you want to see the connection to a project. If you want to select several dependencies at once, hold down Shift and make the selection.
On the toolbar, click
 .
.
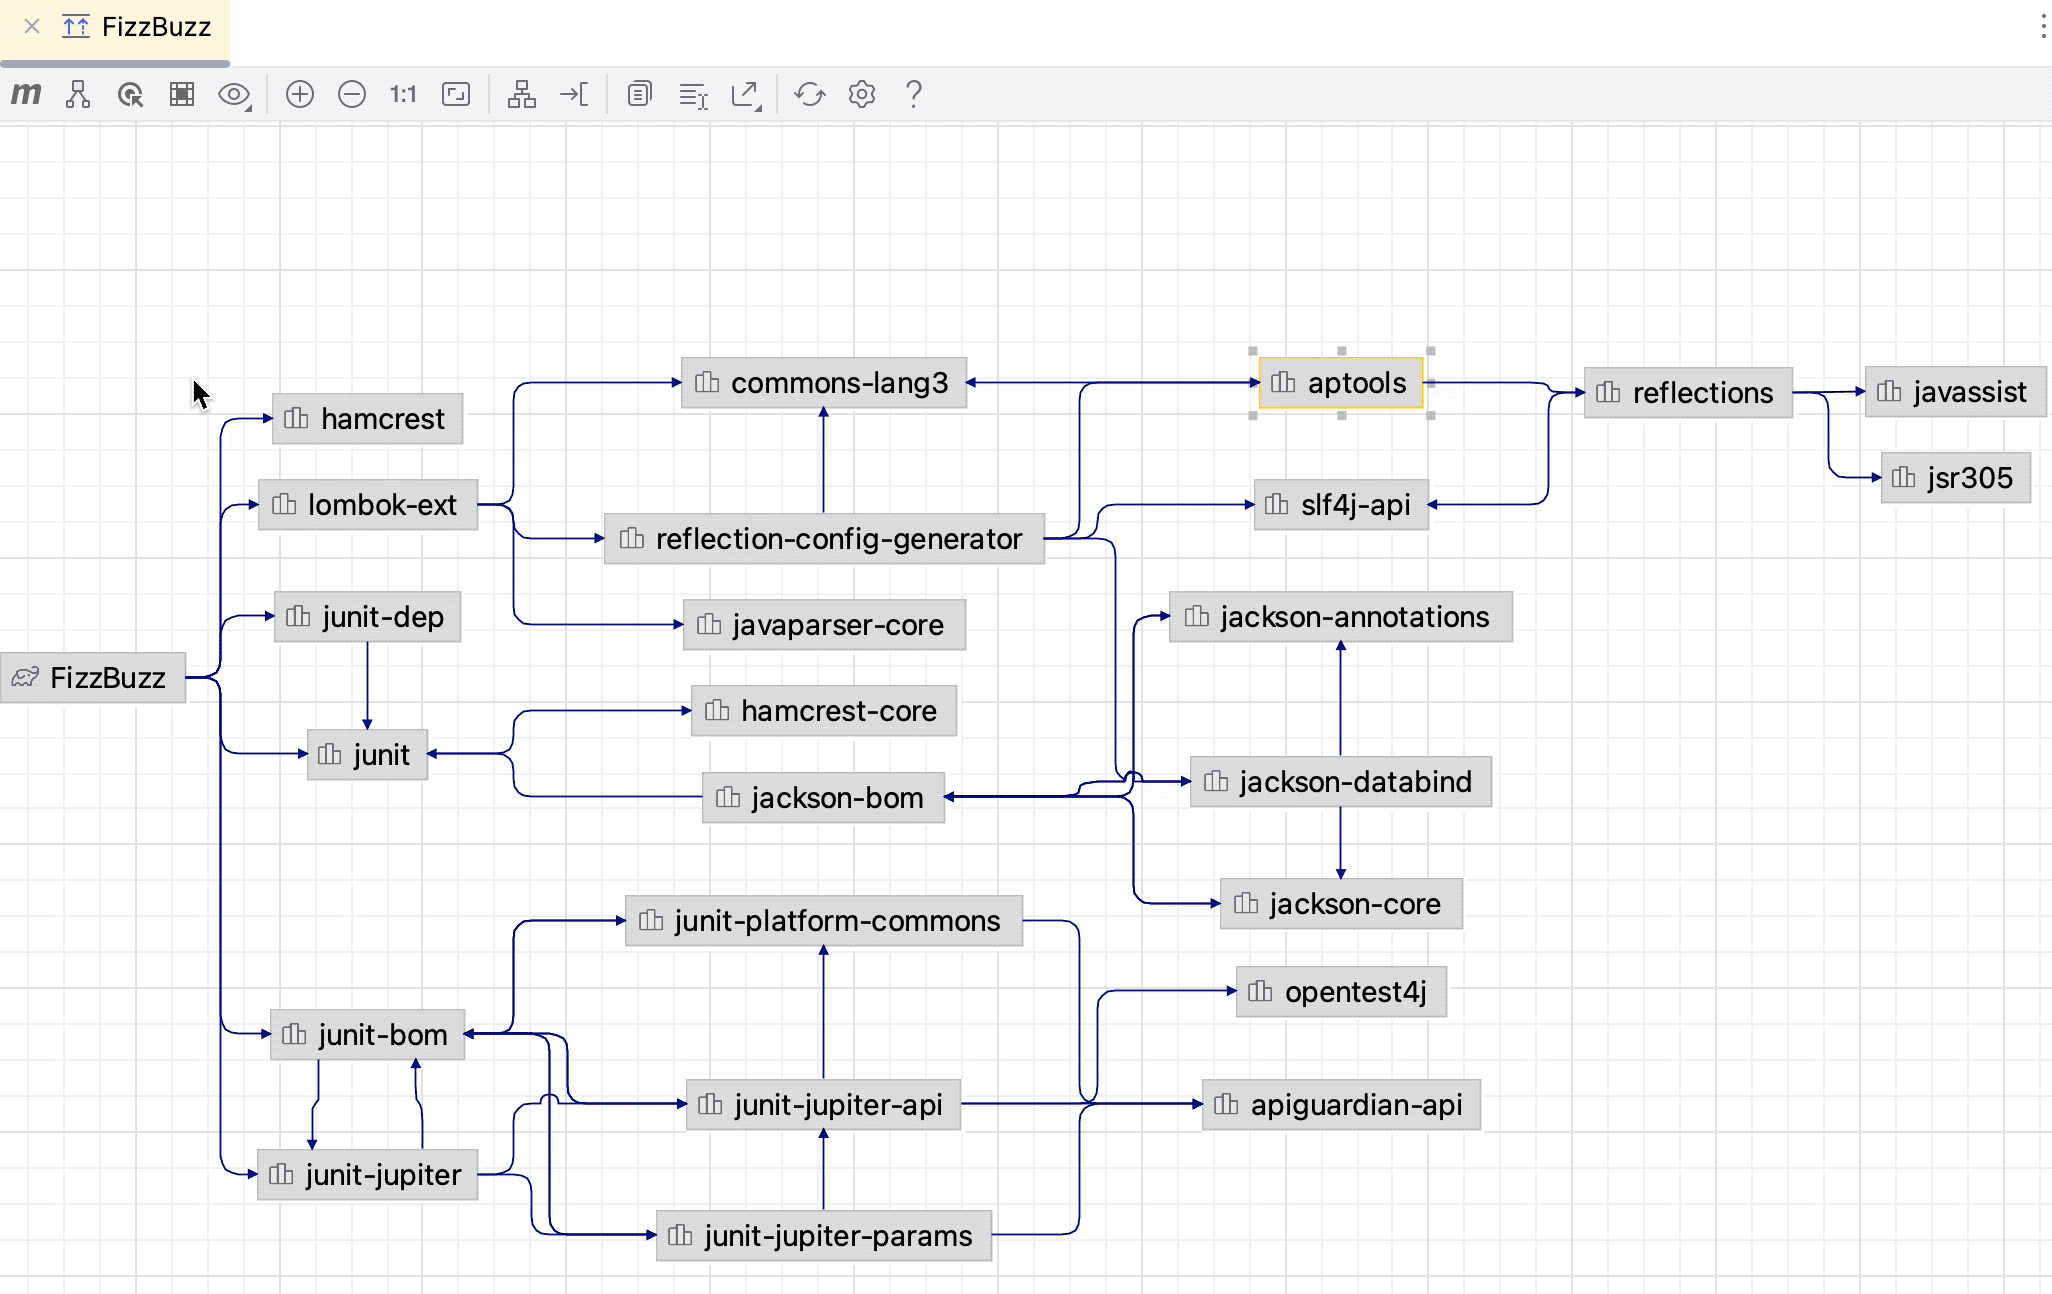
Show neighbors of the selected nodes
You can select dependencies and see what other dependencies are connected to the selected nodes. It might be helpful if you have a large diagram and want to focus on just a part of it.
In the diagram window, select a dependency you need. If you want to select several dependencies at once, hold down Shift and make the selection.
On the toolbar, click
 .
.
.
Search for a specific dependency in the graph
In the diagram window, press Ctrl+F to open the Diagram Elements popup.

Start typing a name of a dependency you want to find, select the one you need from the list of search results and press Enter. IntelliJ IDEA locates the needed dependency in the graph.

View the diagram structure
Generate a diagram.
Click Structure in the left toolbar. IntelliJ IDEA opens the Structure tool window that displays a map of your diagram with a small preview of the selected block and its neighbors.

Use the context menu to zoom in and out, move canvas, change layout, and export part of the diagram into an image.

Dependency analyzer
Gradle dependency analyzer lets you quickly see and analyze resolved dependencies, the unresolved ones, dependencies with conflicts, and transitive dependencies in your project and subprojects.
Analyze dependencies
On the toolbar in the Gradle tool window, click
 .
.Alternatively, in the Gradle tool window, right-click the necessary dependency and select Analyze Dependencies from the context menu. You can also right-click a module in the Project view and use the same action.

In the Dependency Analyzer window, you can narrow down your analysis scope, check only the conflicted dependencies, or check usages.
If you want to see the required dependency in the
build.gradlefile, right-click the dependency in the Usages part and select Go to Gradle Dependency. If you click Open Gradle Config on the project node, IntelliJ IDEA will open thebuild.gradlefile.If the duplicate dependency is found, it will be greyed out.
For more information about available options and icons in the Dependency Analyzer window, refer to the reference section.
Dependency analyzer tool window reference
Item | Description |
|---|---|
Scope | You can see scopes in which every dependency is used in the project. To narrow down the list of the dependencies based on their scope, select the appropriate option from the list of scopes.  |
Show Conflicts Only | Click  |
Show GroupId | Click |
Show as Tree | Toggle The tree view will help you quickly check the transitive dependencies. |
Expand / Collapse | Use |