JUnit 5
In this tutorial, you will learn how to set up JUnit for your projects, create tests, and run them to see if your code is operating correctly. It contains just the basic steps to get you started.
If you want to know more about JUnit, refer to the official documentation. To learn more about testing features of IntelliJ IDEA, refer to other topics in this section.
You can choose to follow the tutorial using either Maven or Gradle.
Create a project
From the main menu, select
Select MavenGradle. Click Next.
Specify the name for the project, for example,
junit-tutorial, then click Next.
Add dependencies
For our project to use JUnit features, we need to add JUnit as a dependency.
Open pom.xml build.gradle in the root directory of your project.
In build.gradle pom.xml, press Alt+Insert, select In the dialog that opens, enter
junitand selectorg.junit.jupiter:junit-jupiter.
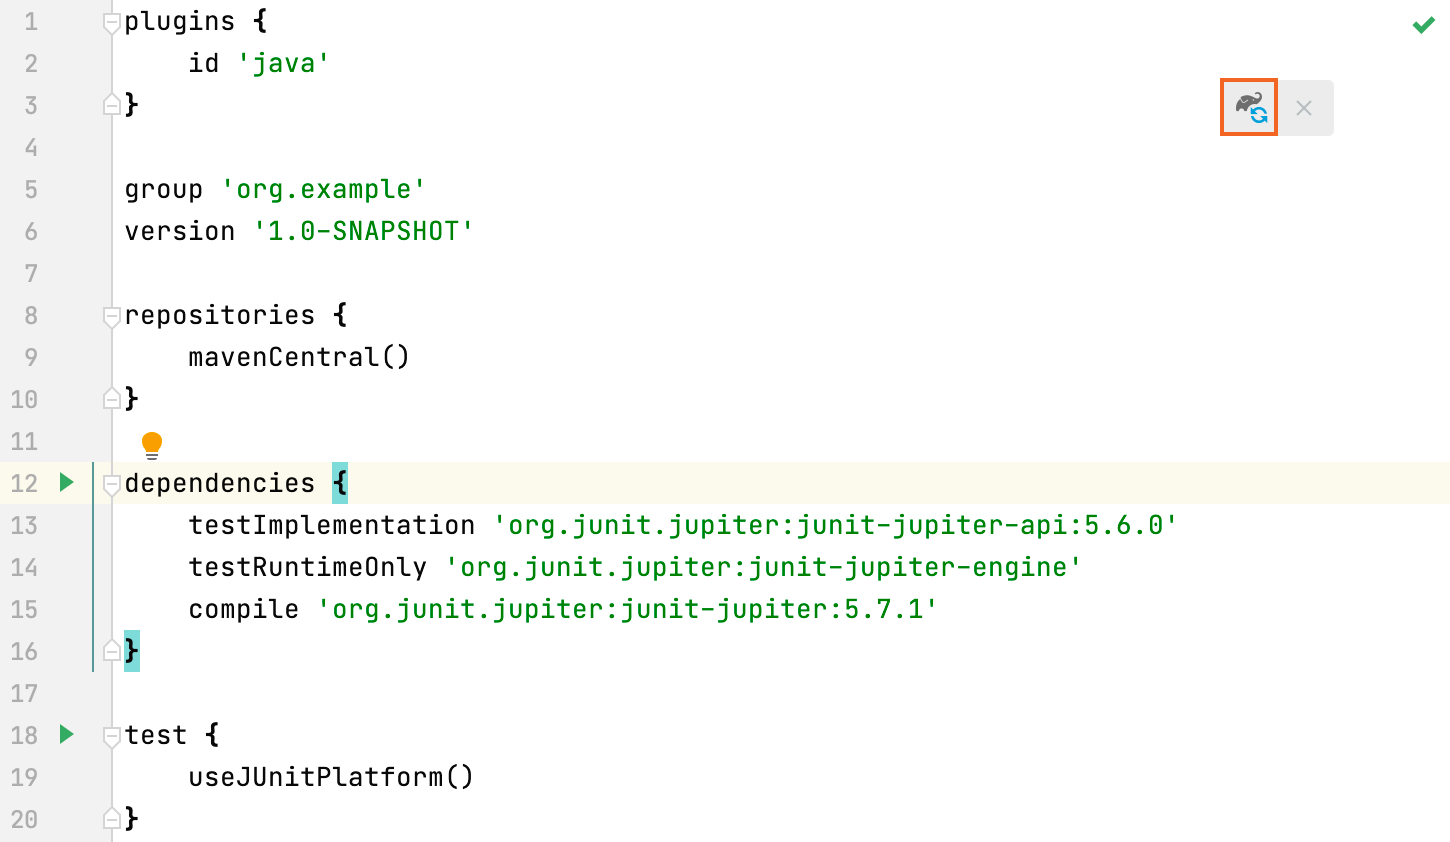
Now we need to apply the changes in the build script. Press Ctrl+Shift+O or click Load Gradle Changes in the notification that appears in the top-right corner of the editor.

Now we need to apply the changes in the build script. Press Ctrl+Shift+O or click Load Maven Changes in the notification that appears in the top-right corner of the editor.

Write application code
Let's add some code that we'll be testing.
In the Project tool window Alt+1, go to src/main/java and create a Java file called
Calculator.java.Paste the following code in the file:
import java.util.stream.DoubleStream; public class Calculator { static double add(double... operands) { return DoubleStream.of(operands) .sum(); } static double multiply(double... operands) { return DoubleStream.of(operands) .reduce(1, (a, b) -> a * b); } }
Create tests
Now let's create a test. A test is a piece of code whose function is to check if another piece of code is operating correctly. In order to do the check, it calls the tested method and compares the result with the predefined expected result. An expected result can be, for example, a specific return value or an exception.
Place the cursor at the
Calculatorclass declaration and press Alt+Enter. Alternatively, right-click it and select Show Context Actions. From the menu, select Create Test.
Select the two class methods that we are going to test.

The editor takes you to the newly created test class. Modify the
add()test as follows:@Test @DisplayName("Add two numbers") void add() { assertEquals(4, Calculator.add(2, 2)); }This simple test will check if our method correctly adds 2 and 2. The
@DisplayNameannotation specifies a more convenient and informative name for the test.Now what if you want to add multiple assertions in a single test and execute all of them regardless of whether some of them fail? Let's do it for the
multiply()method:@Test @DisplayName("Multiply two numbers") void multiply() { assertAll(() -> assertEquals(4, Calculator.multiply(2, 2)), () -> assertEquals(-4, Calculator.multiply(2, -2)), () -> assertEquals(4, Calculator.multiply(-2, -2)), () -> assertEquals(0, Calculator.multiply(1, 0))); }The
assertAll()method takes a series of assertions in form of lambda expressions and ensures all of them are checked. This is more convenient than having multiple single assertions because you will always see a granular result rather than the result of the entire test.
Run tests and view their results
After we have set up the code for the testing, we can run the tests and find out if the tested methods are working correctly.
To run an individual test, click
in the gutter and select Run.

To run all tests in a test class, click
against the test class declaration and select Run.
You can view test results in the Run tool window.
