AI Assistant
Install the AI Assistant plugin
This functionality relies on the AI Assistant plugin, which you need to install and enable.
Press Control+Alt+S to open the IDE settings and then select .
Open the Marketplace tab, find the AI Assistant plugin, and click Install (restart the IDE if prompted).
AI Assistant can explain code, answer questions about code fragments, generate documentation, commit messages, and much more.
Log in
To start working with AI Assistant, you need to log in first.
Click the AI Assistant icon on the right toolbar to open AI Assistant.

Click Log in to JetBrains AI service and follow the steps in the browser.
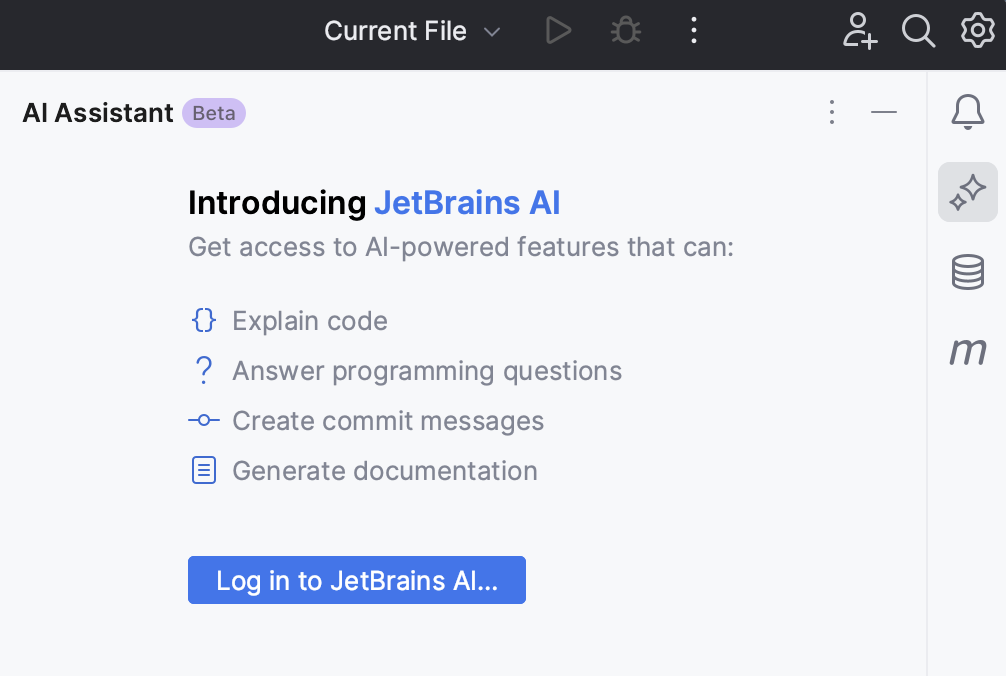
You can change your account on the Tools | AI Assistant page of the IDE settings Control+Alt+S. 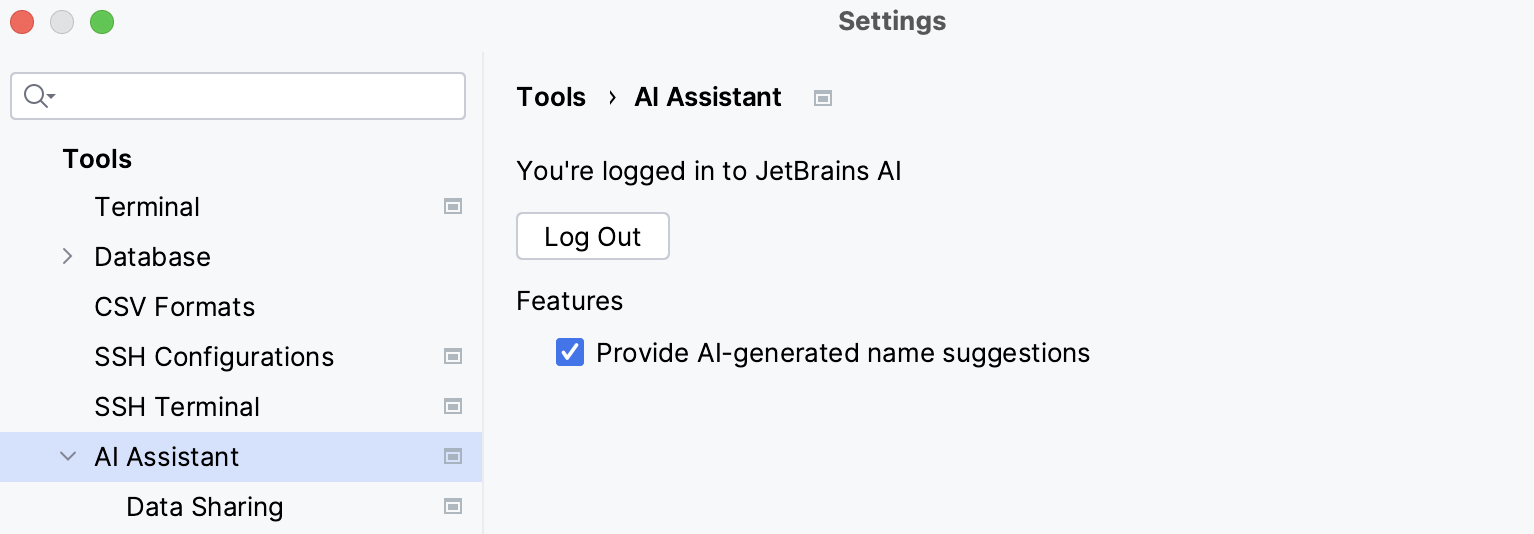
Chat with AI
Use the AI Assistant tool window to have a conversation with the LLM (Large Language Model), ask questions about programming-related topics, or iterate on a task. The AI Assistant takes into consideration the language and technologies used in your project.
Click the AI Assistant icon on the right toolbar to open AI Assistant.
In the input field, type your question and press Enter to submit your query.
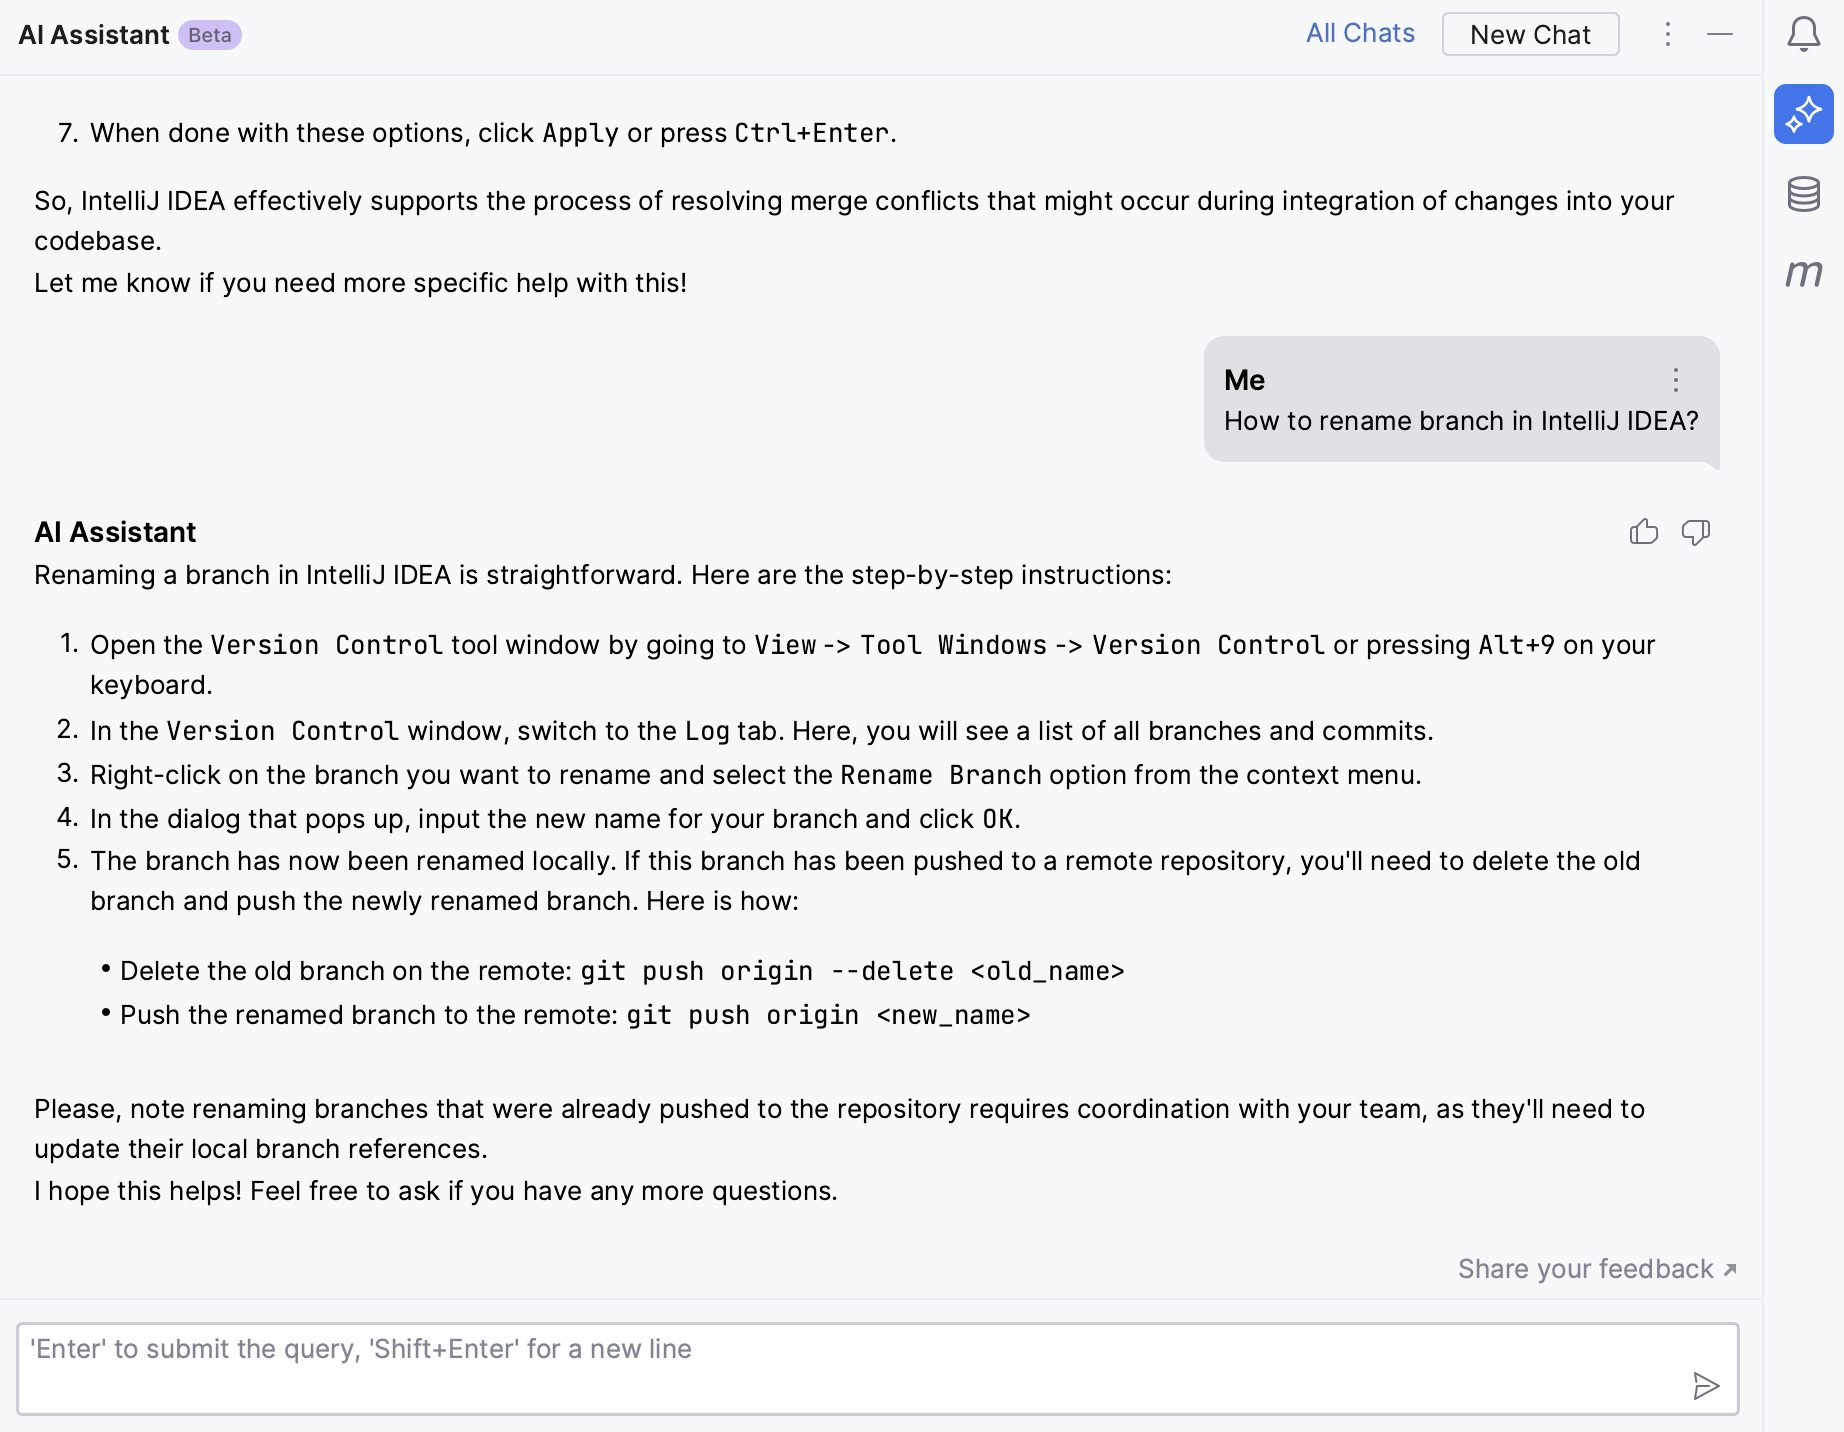
AI Assistant keeps the chats during one IDE session. You can find the saved chats in the All Chats list. 
Names of the chats are generated automatically and contain the summary of the initial query.
Use prompts to explain and refactor your code
Use pre-written prompts to explain code, find potential problems, and refactor your code. IntelliJ IDEA provides project-specific context, such as the languages and technologies used in your project.
You can also define your own custom prompts and add them to the AI Actions menu.
Explain code
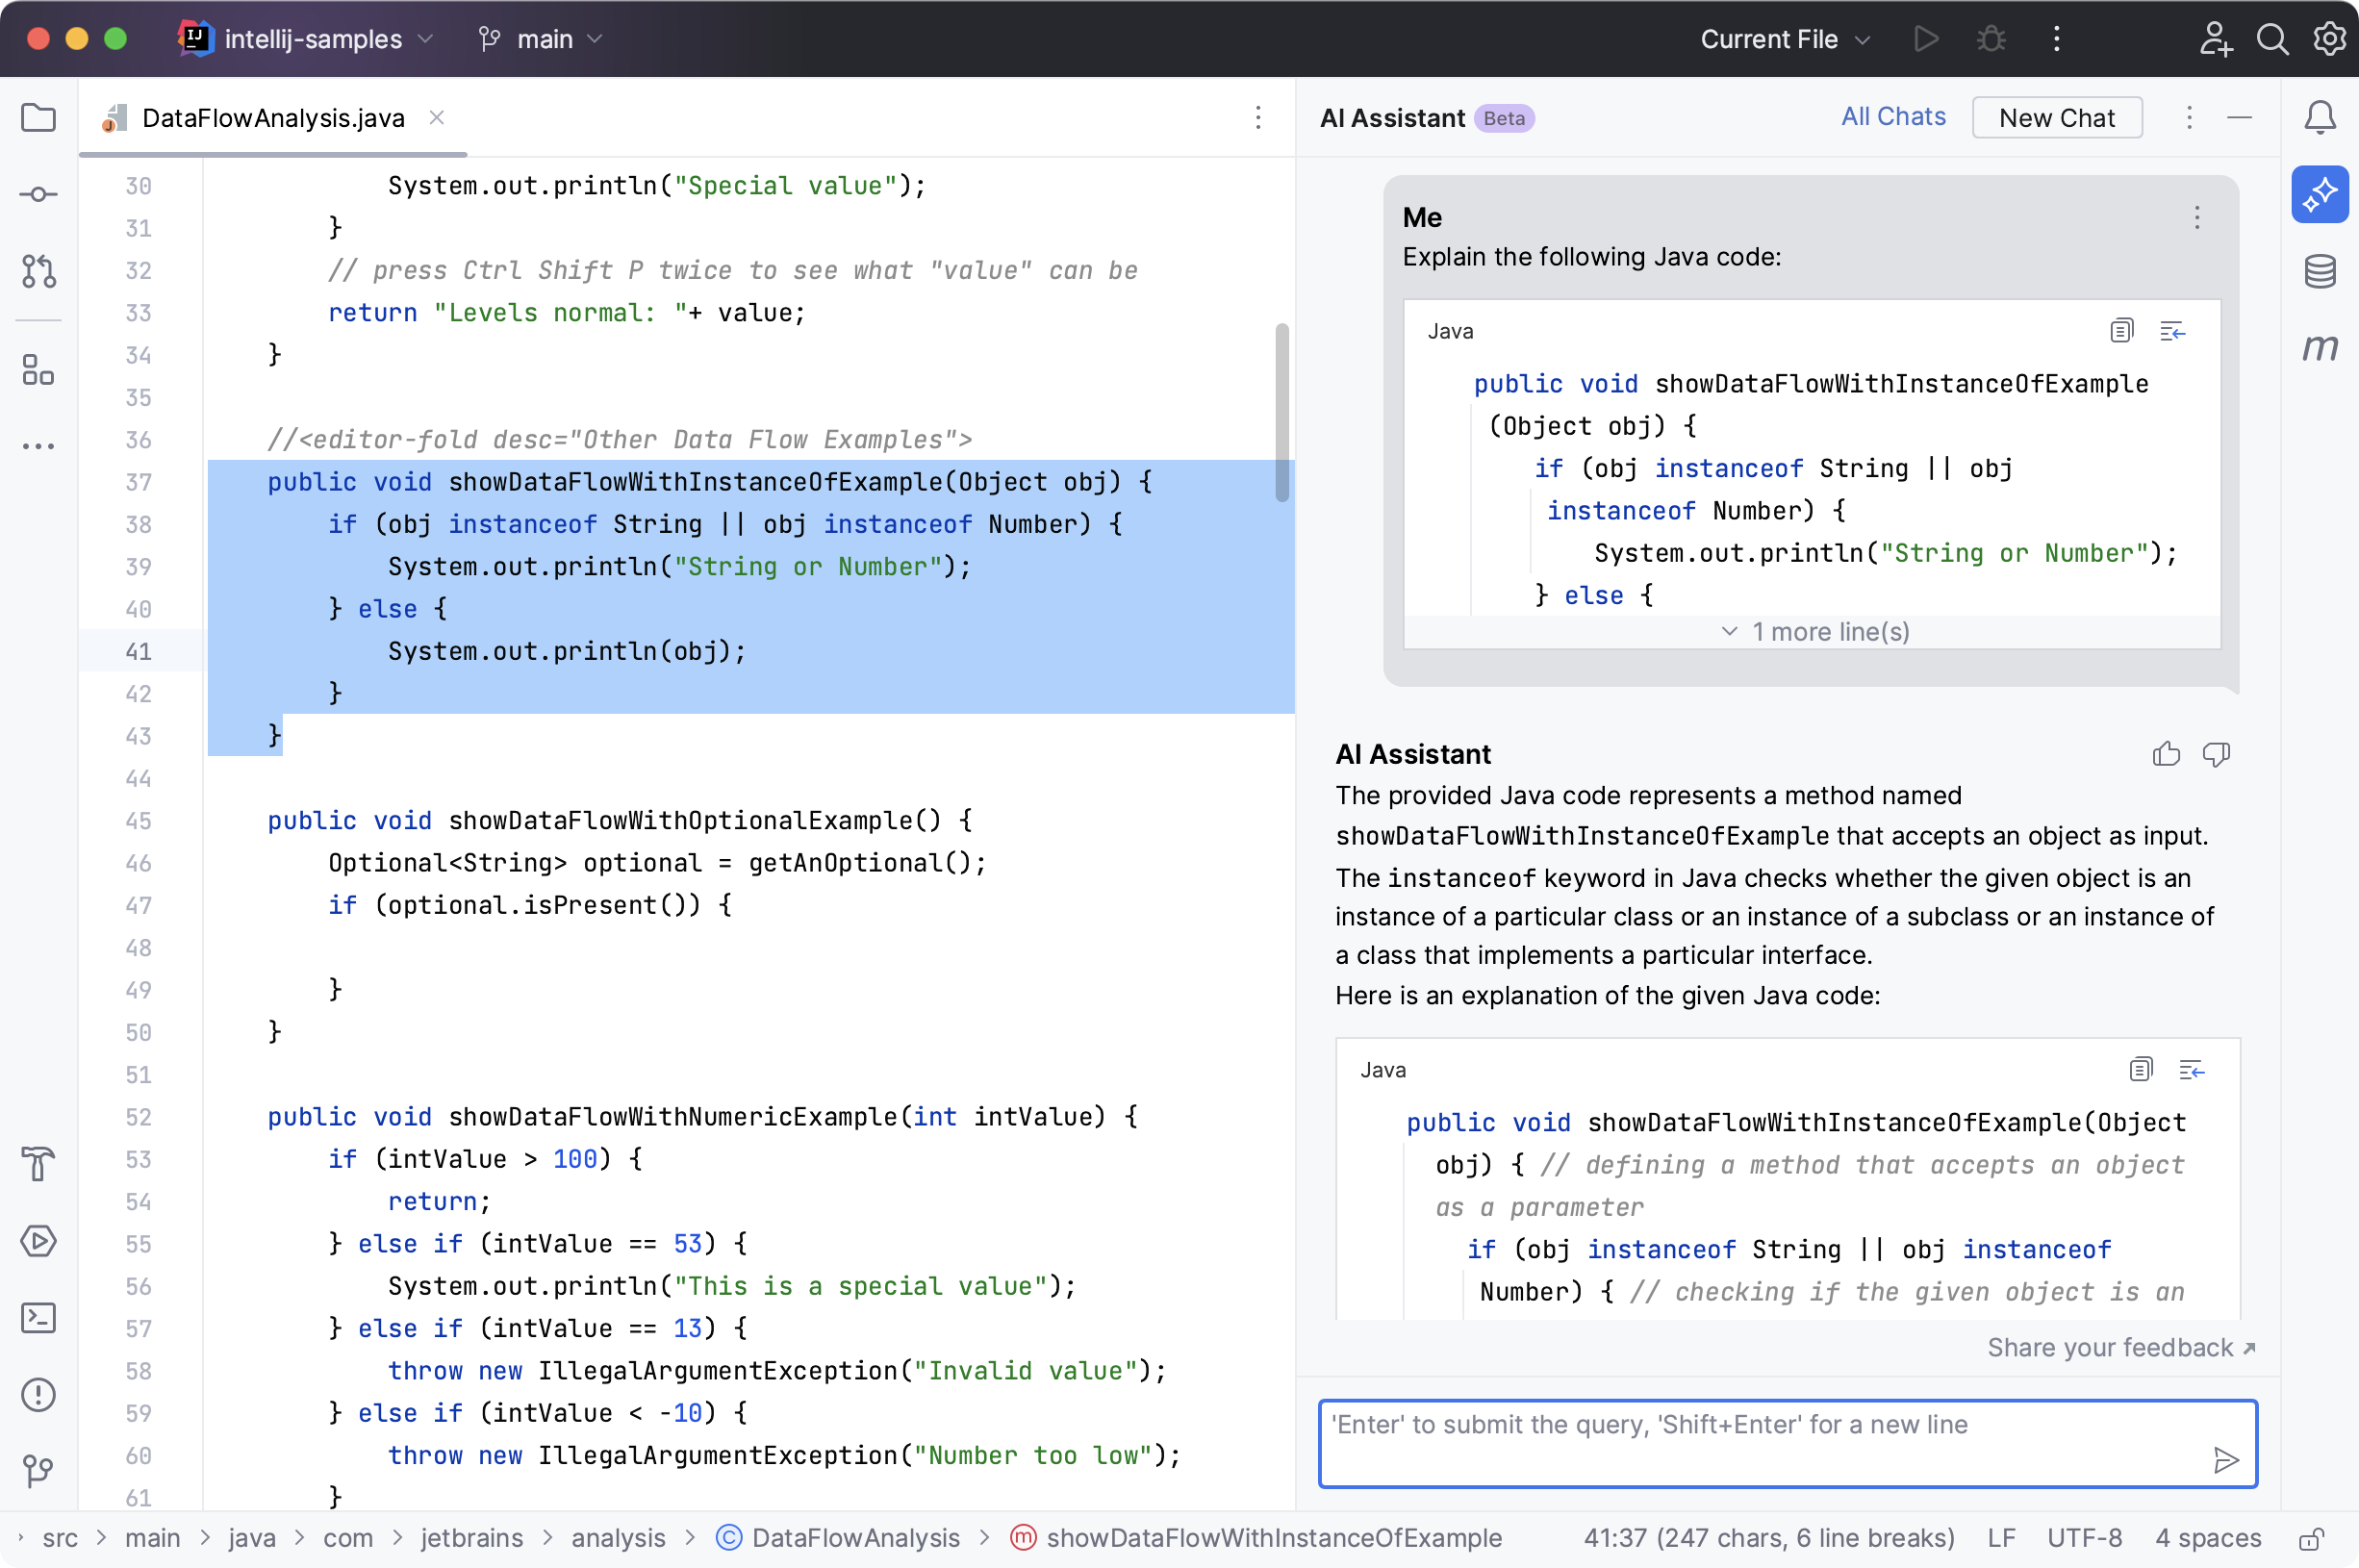
Select a code fragment and right-click it to open the context menu.
Alternatively, select a code fragment and press Alt+Enter.
Select AI actions and then Explain code.
The AI Assistant tool window will open to provide you with an explanation.
Explain regex, cron expressions, and SQL queries
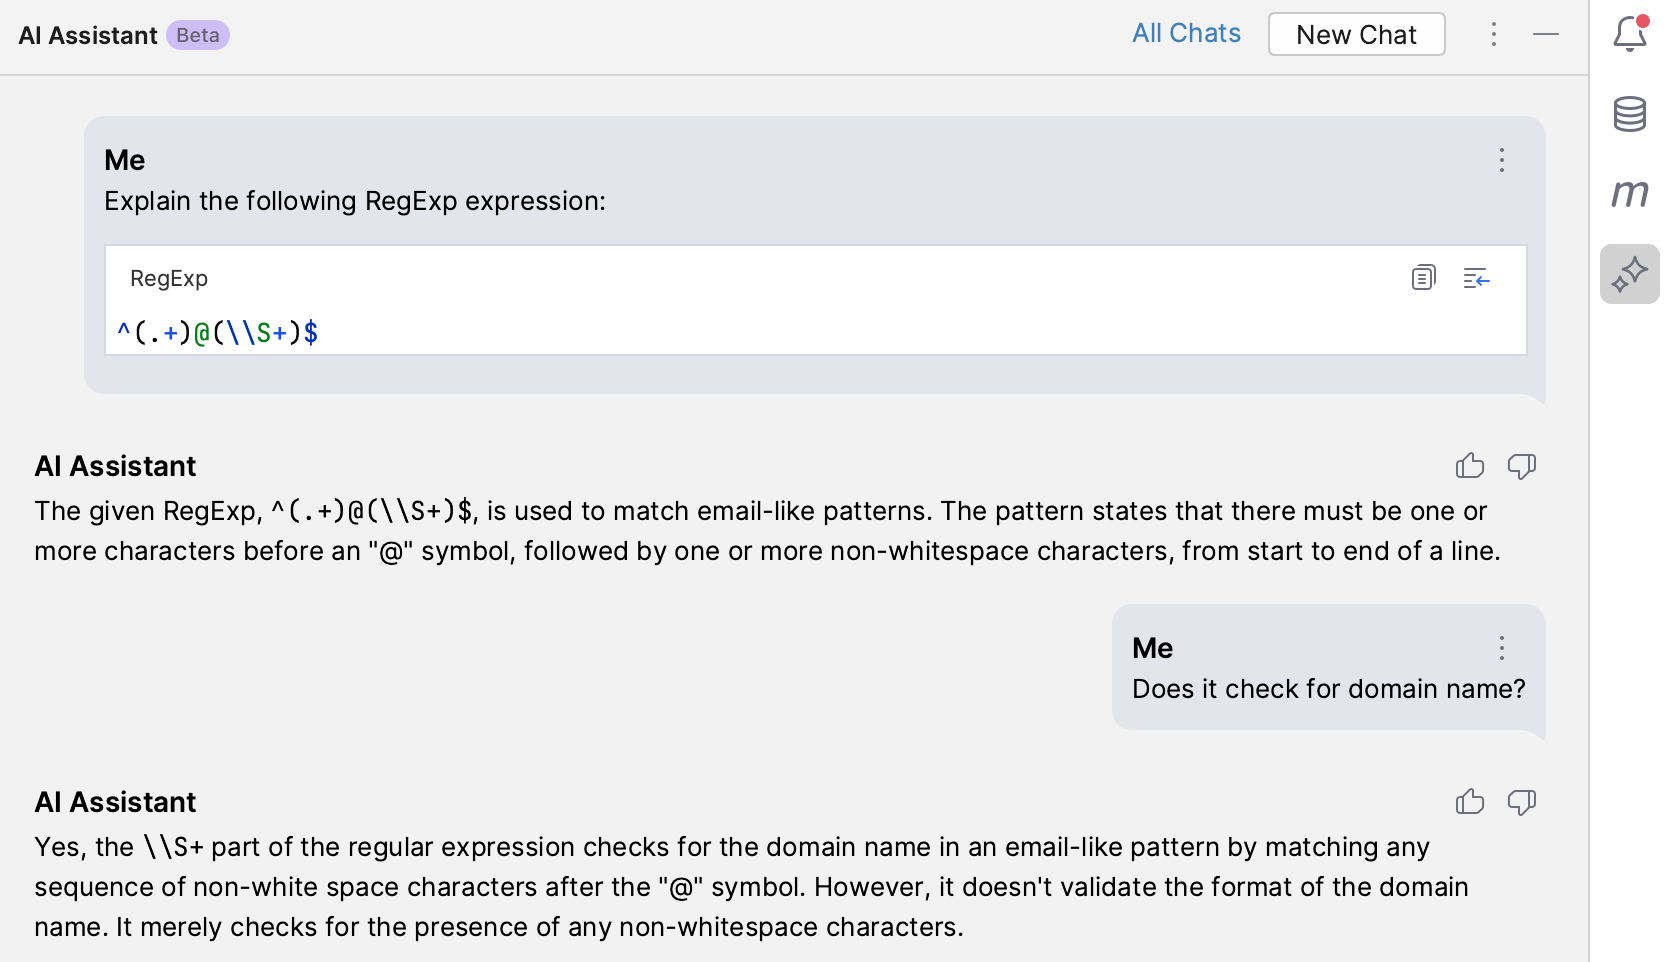
AI Assistant can explain regular expressions, SQL queries, cron expressions, and other injected fragments.
Select a code fragment and right-click it to open the context menu.
Alternatively, select a code fragment and press Alt+Enter.
Select AI actions and then Explain fragment.
AI Assistant automatically detects the type of injected fragment, so the context menu option for regular expressions will be Explain RegExp fragment and likewise for other fragments.
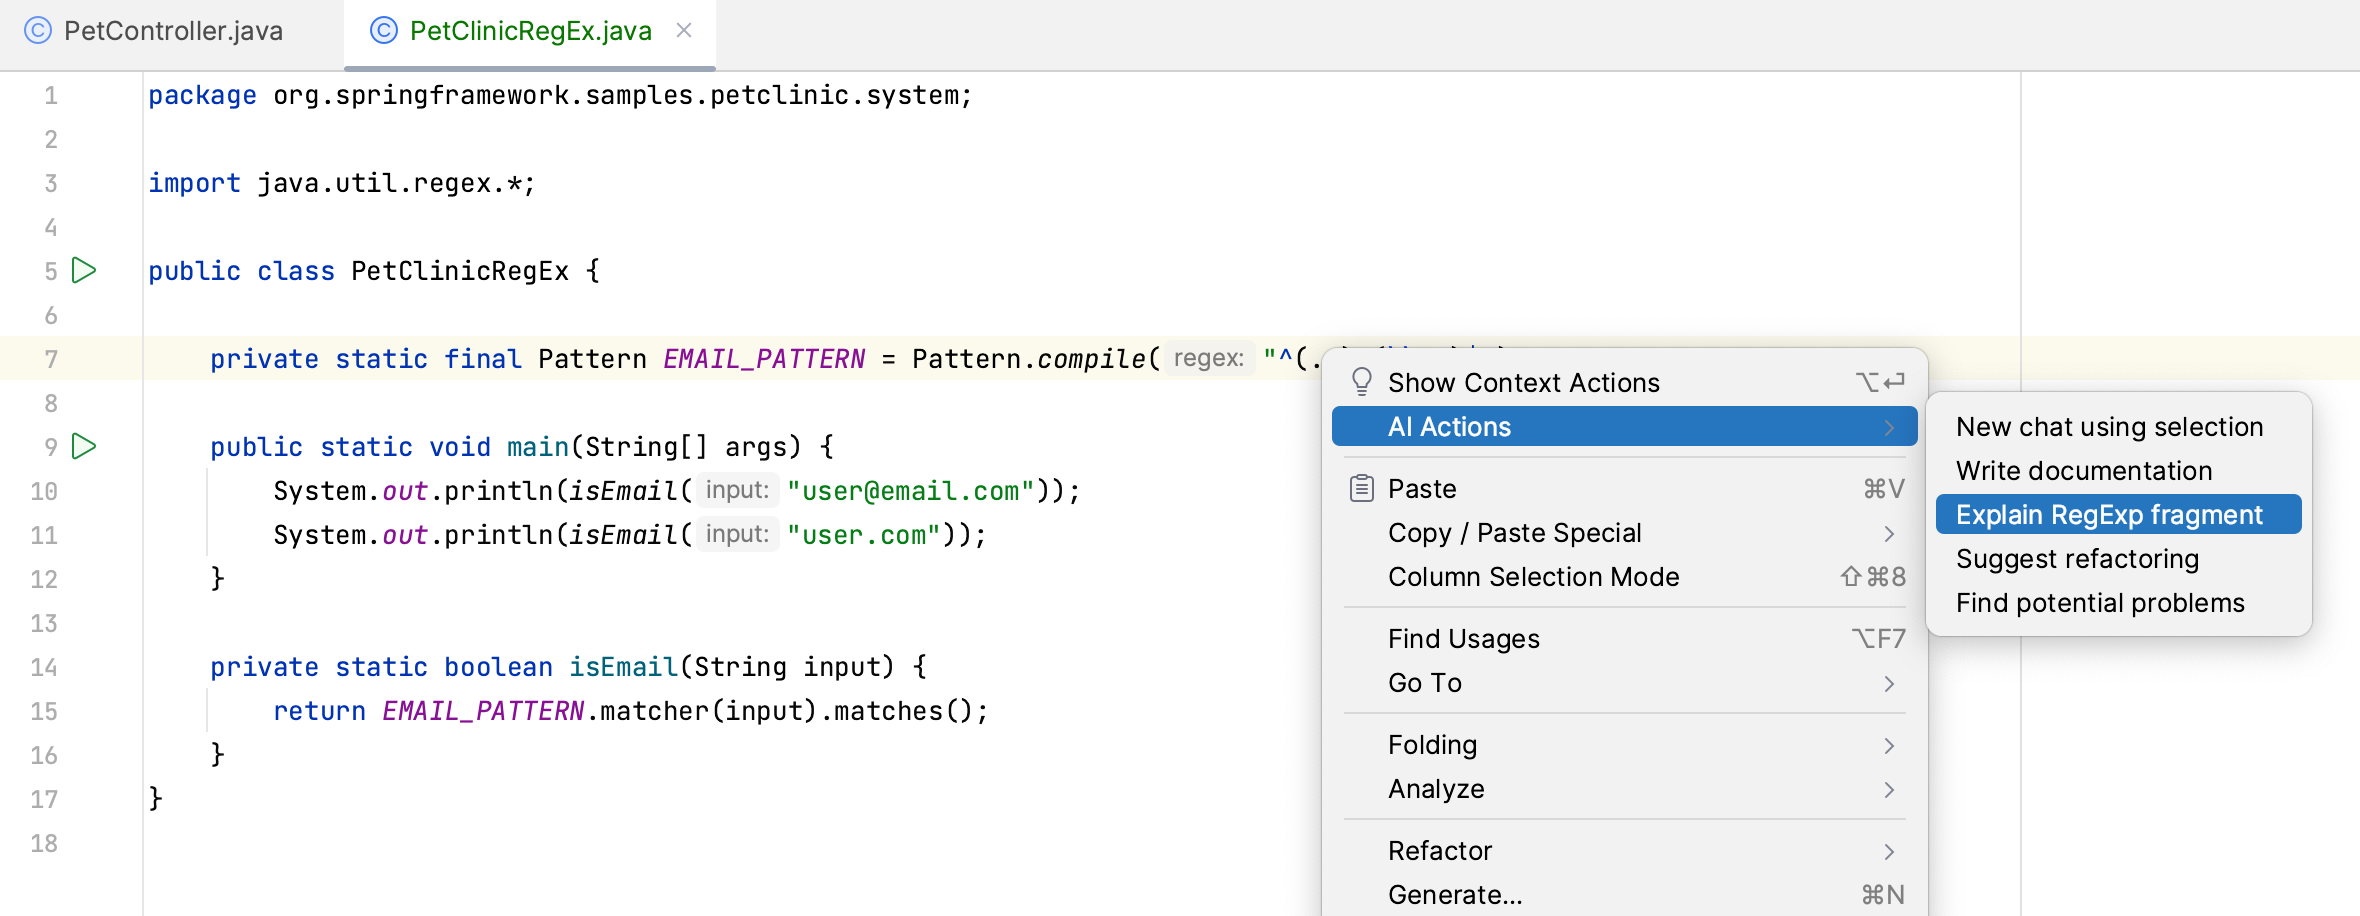
AI Assistant will analyze and explain the fragment.
Suggest refactoring
Select a code fragment and right-click it to open the context menu.
Alternatively, select a code fragment and press Alt+Enter.
Select AI actions and then Suggest refactoring.
The AI chat will open to offer you refactoring suggestions.
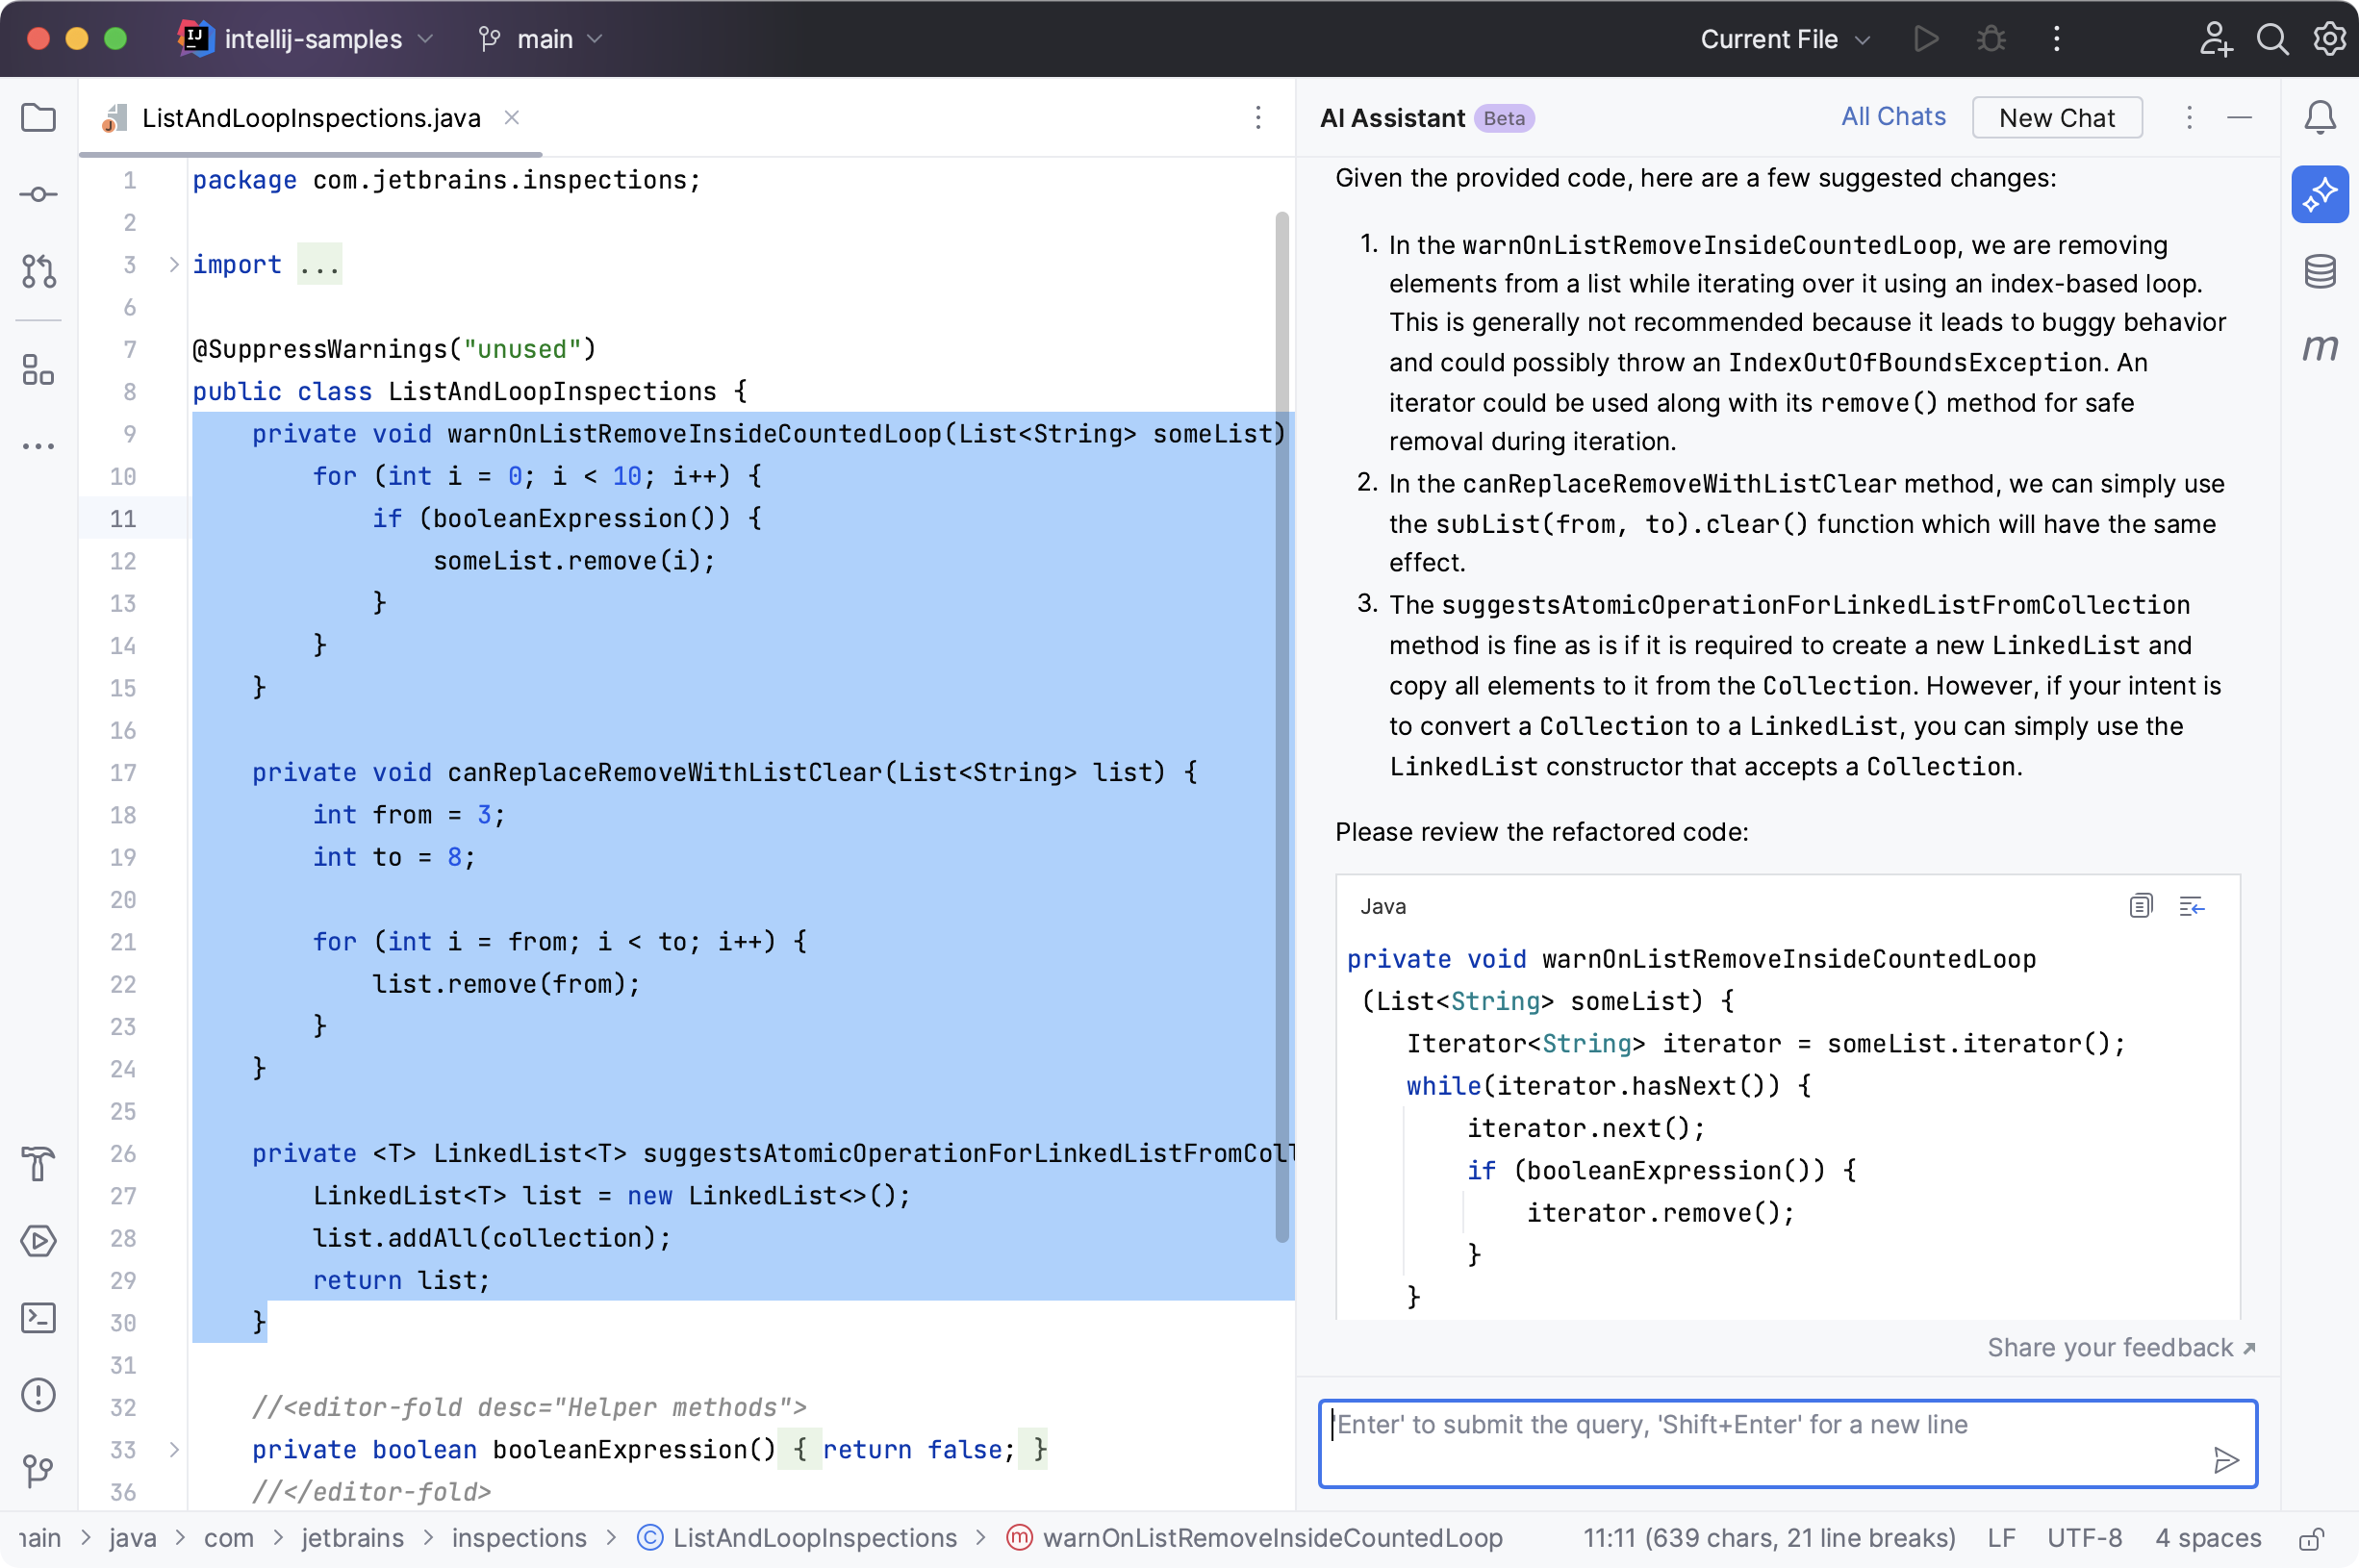
If you like the result, click
in the field with the refactored code to put the AI-generated code into the editor and replace the originally selected code fragment.
Find potential problems
Select a code fragment and right-click it to open the context menu.
Alternatively, select a code fragment and press Alt+Enter.
Select AI actions and then Find potential problems.
The AI chat will open to show the potential issues you may want to look into.
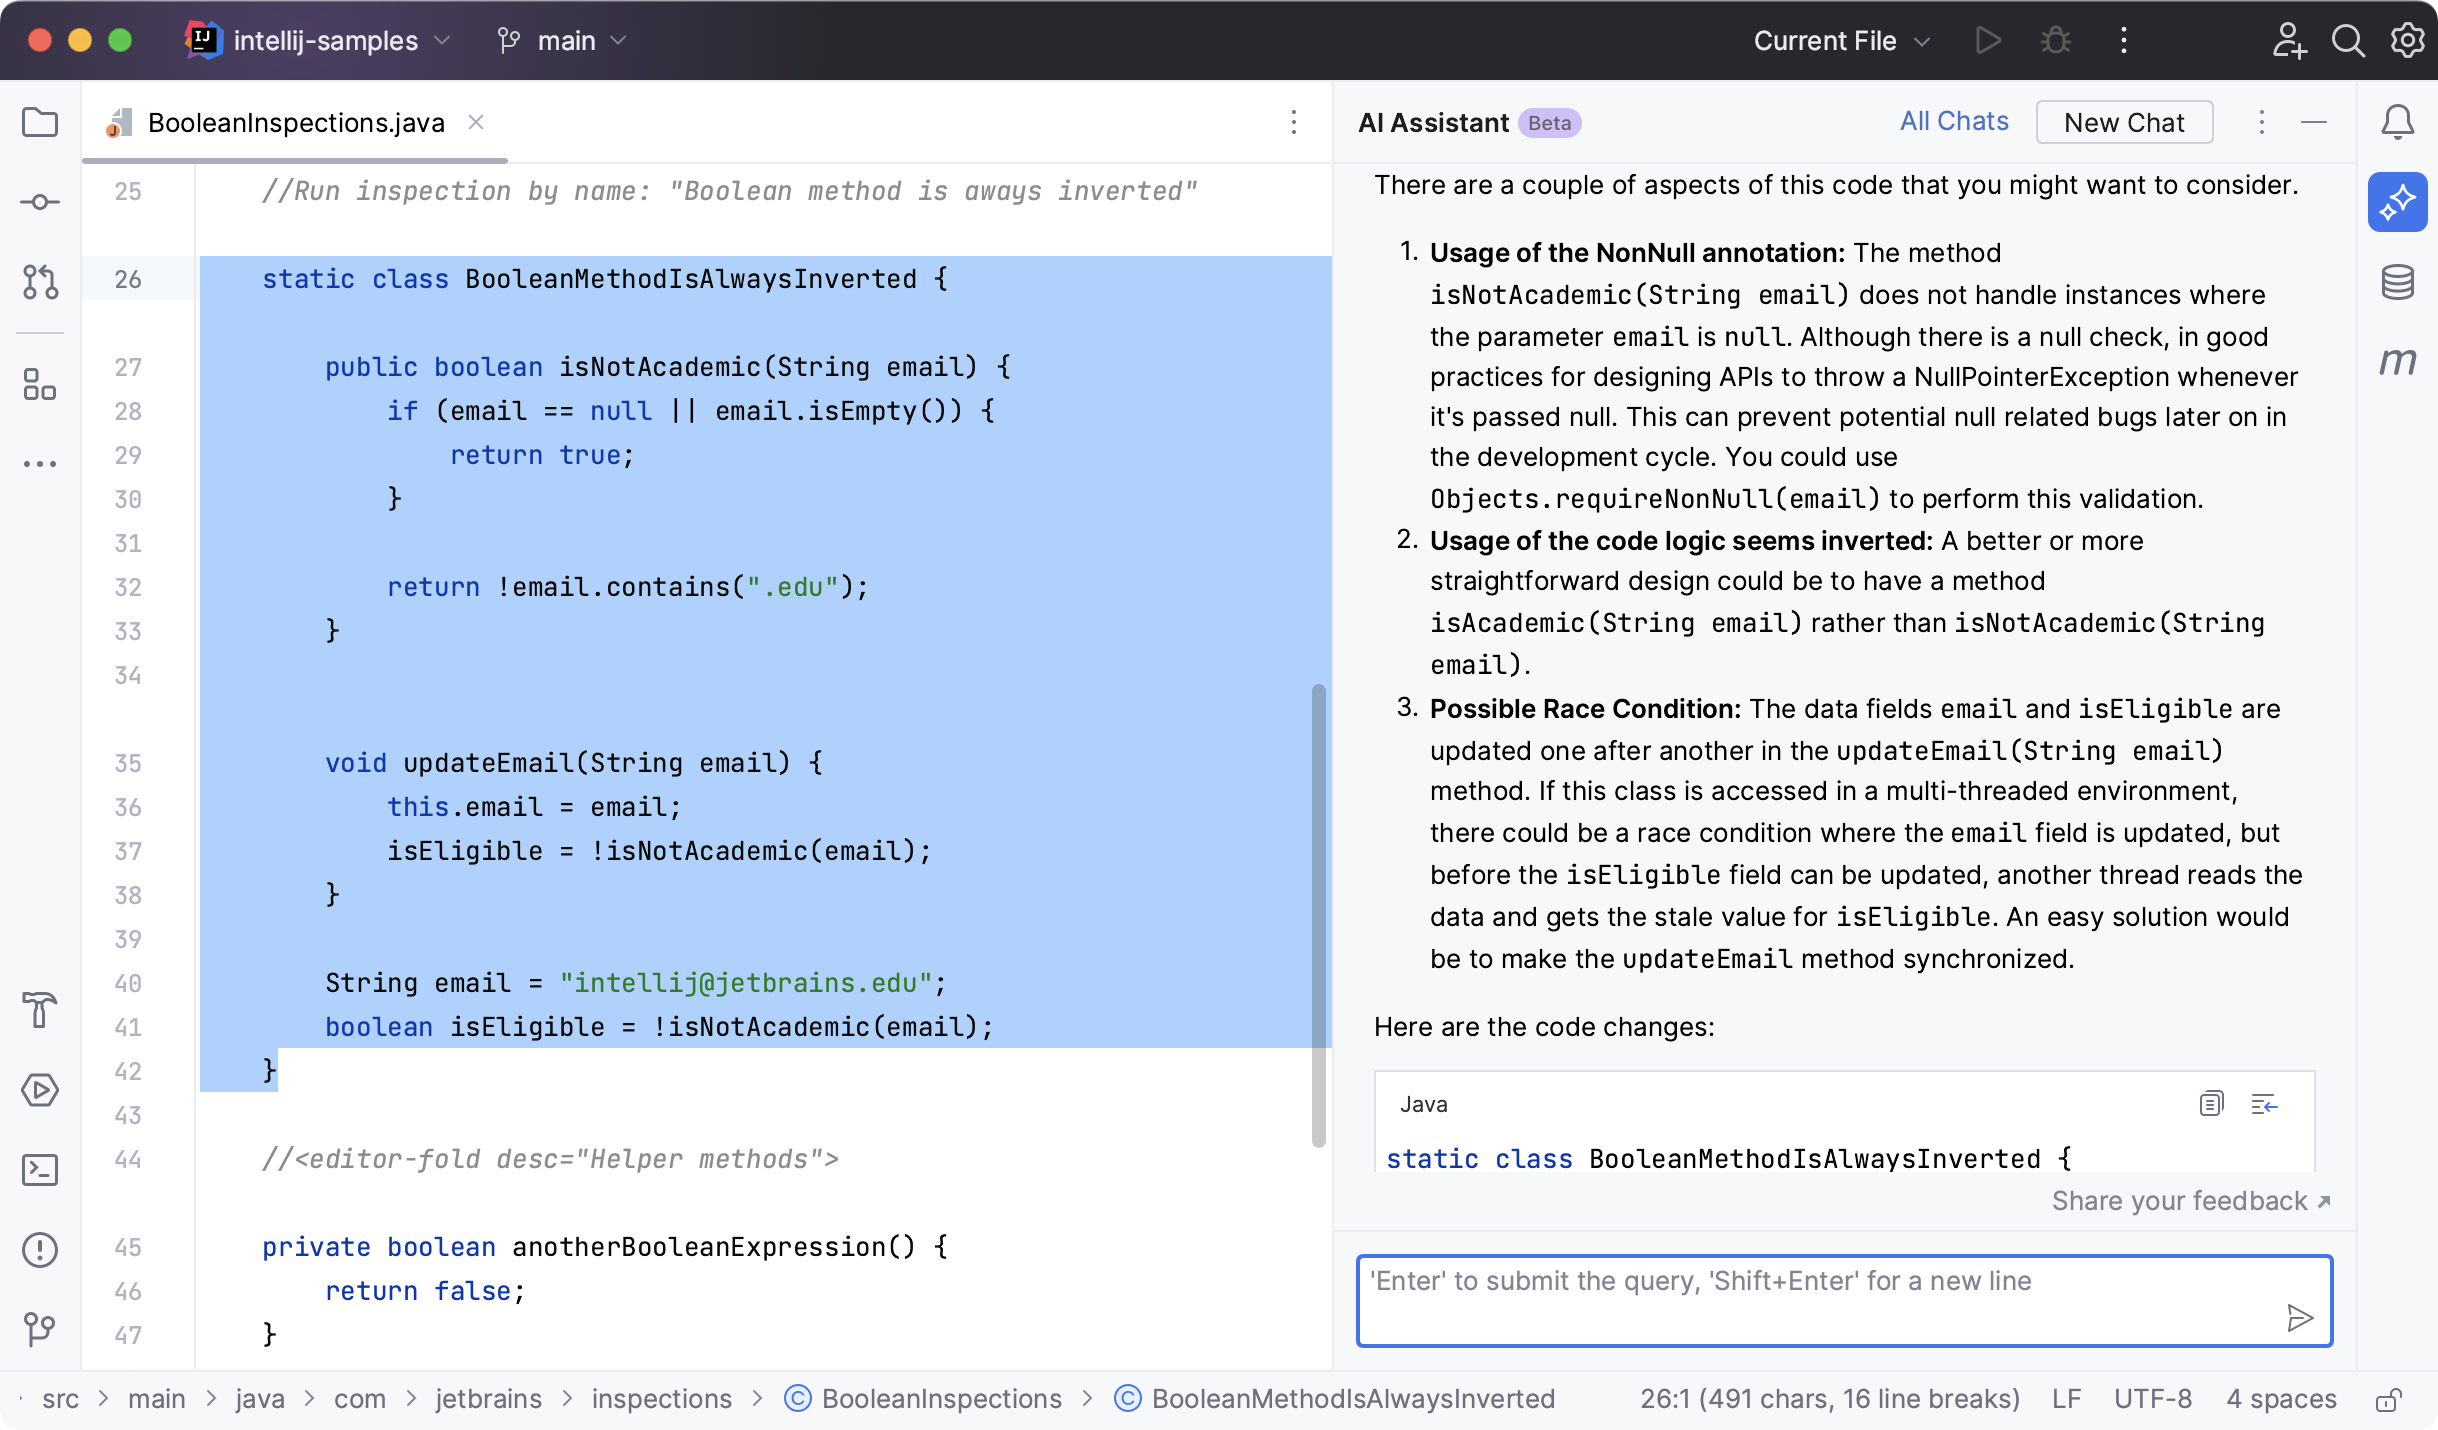
Explain runtime error
For Java runtime errors shown in the console, IntelliJ IDEA shows an inlay hint allowing you to get AI explanations for those errors.
Click Explain with AI in the console.

The AI Assistant tool window will open to give you an explanation of the error and suggest a fix.
If you want to use the suggested fix, click
in the field with the refactored code to put the AI-generated code into the editor.
Add your own prompts to prompts library
You can add your own prompts to the prompts library and use them via AI Actions menu.
Press Control+Alt+S to open the IDE settings and then select .
Click
to create a new prompt.
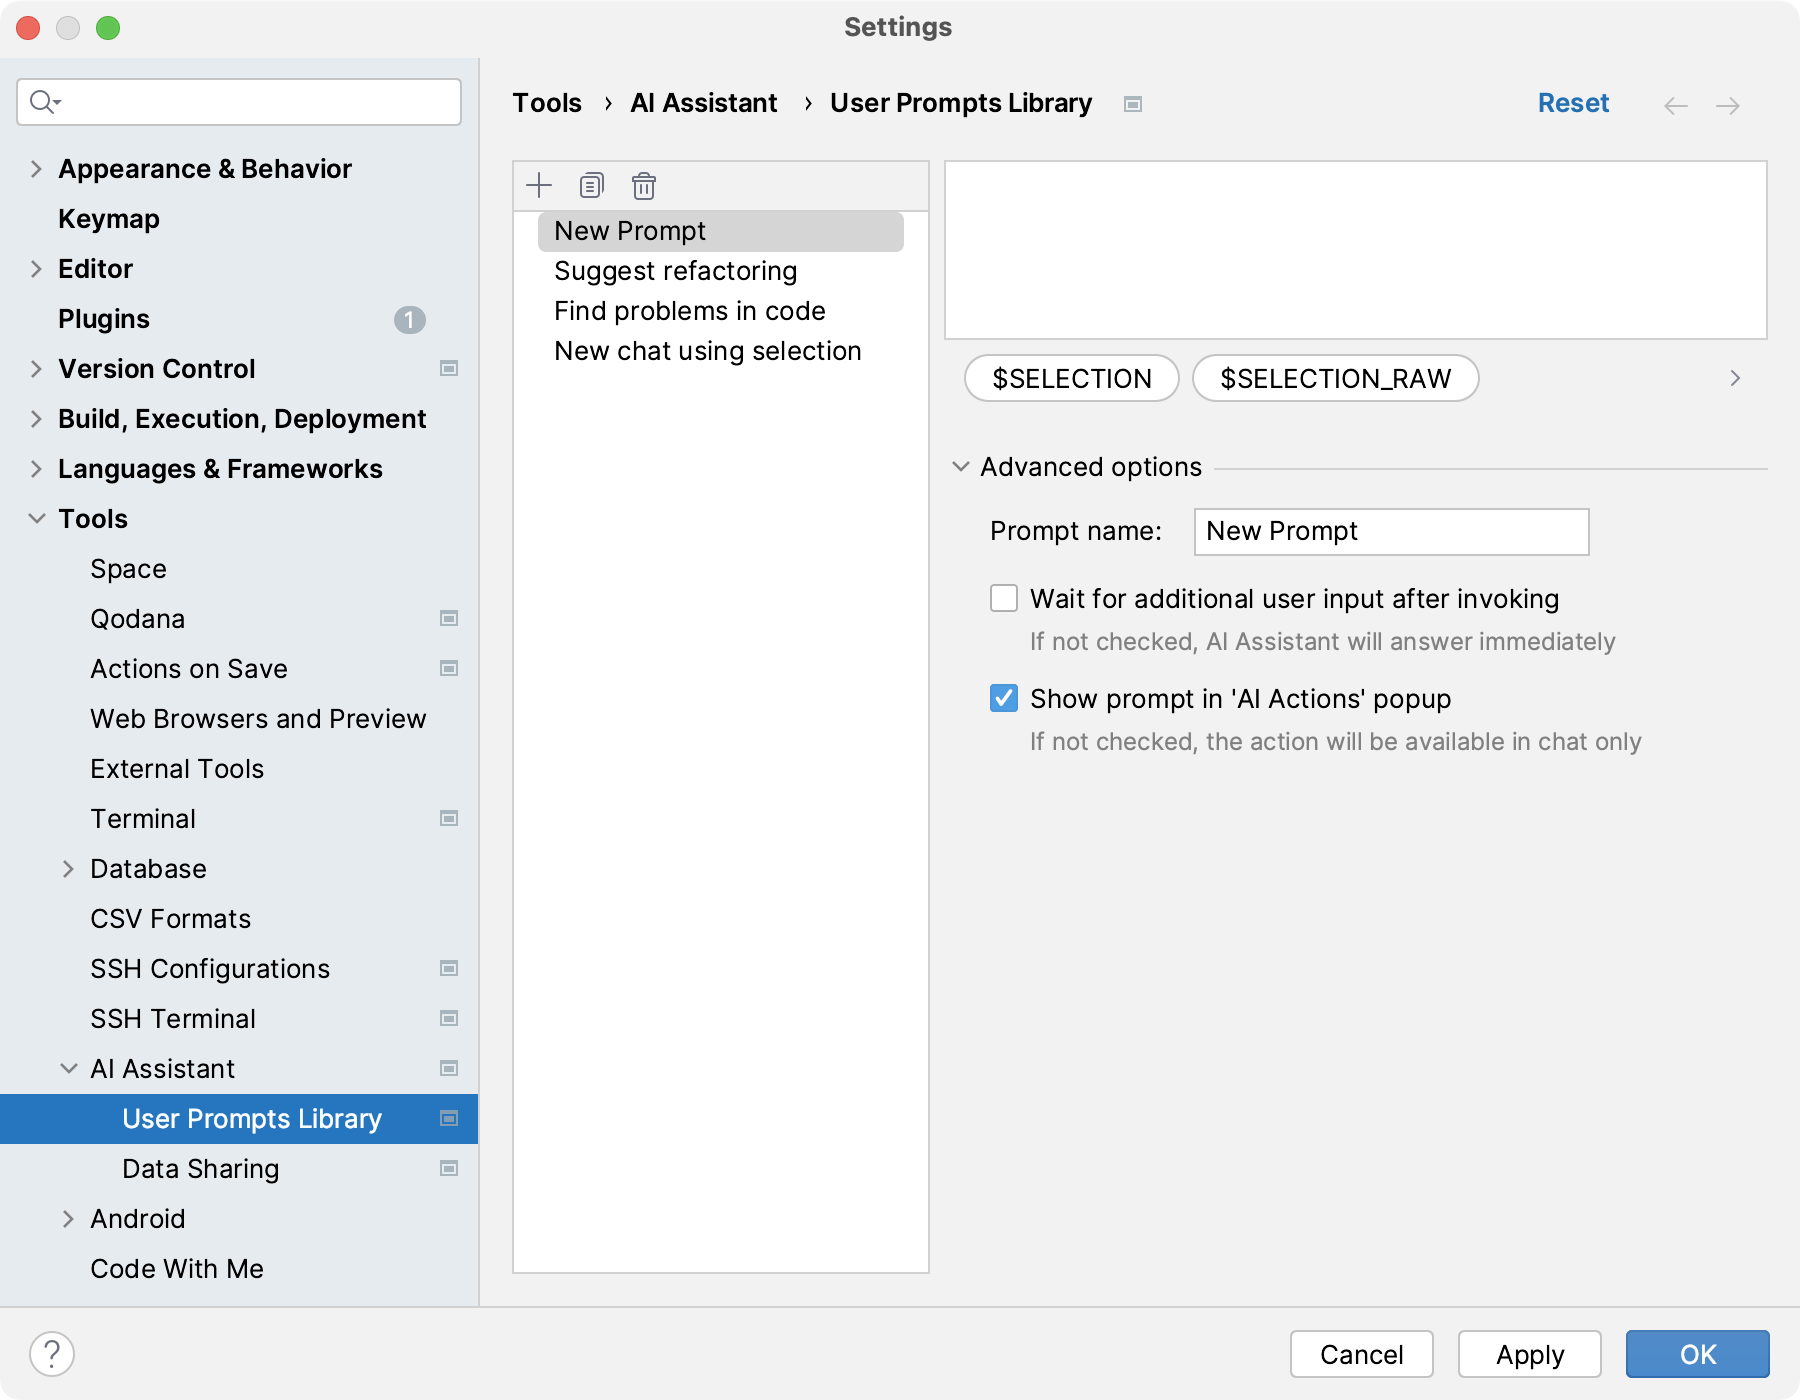
In the text field, write the prompt. If needed, use the following variables:
$SELECTION: a Markdown-formatted code block with current code selection and language name.$SELECTION_RAW: selected code fragment.$SELECTION_LANG: the language of the currently selected code fragment.$PRODUCT_NAME: the name of the product that is currently launched, for example, IntelliJ IDEA.
In the advanced options, edit the new prompt name.
Select the first checkbox if you want AI Assistant to wait for you to make additional input in the chat after invoking the prompt.
Keep the second checkbox if you want your new prompt to be listed in the AI Actions menu.
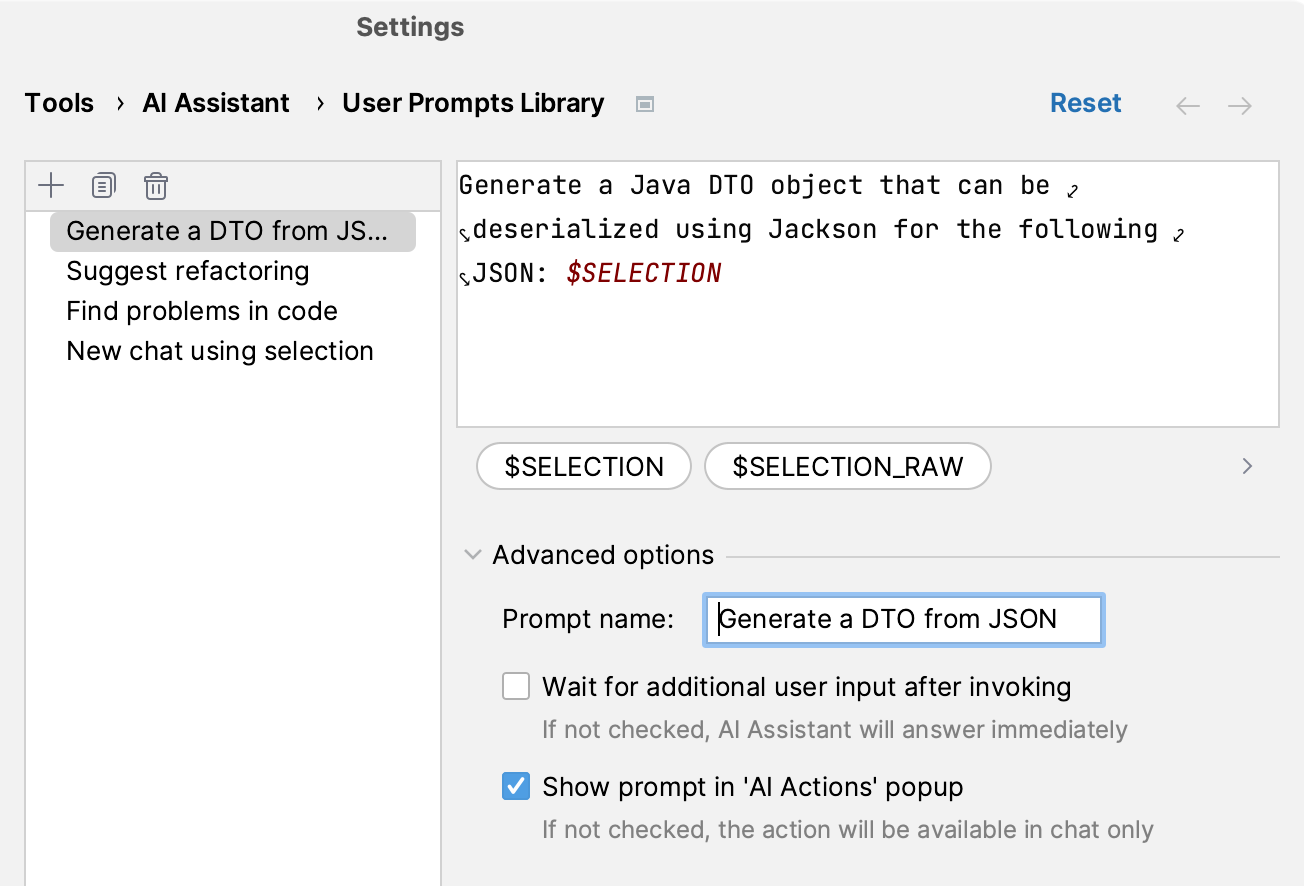
Click Apply.
After you created a prompt, you can always edit or delete it.
Work with commits
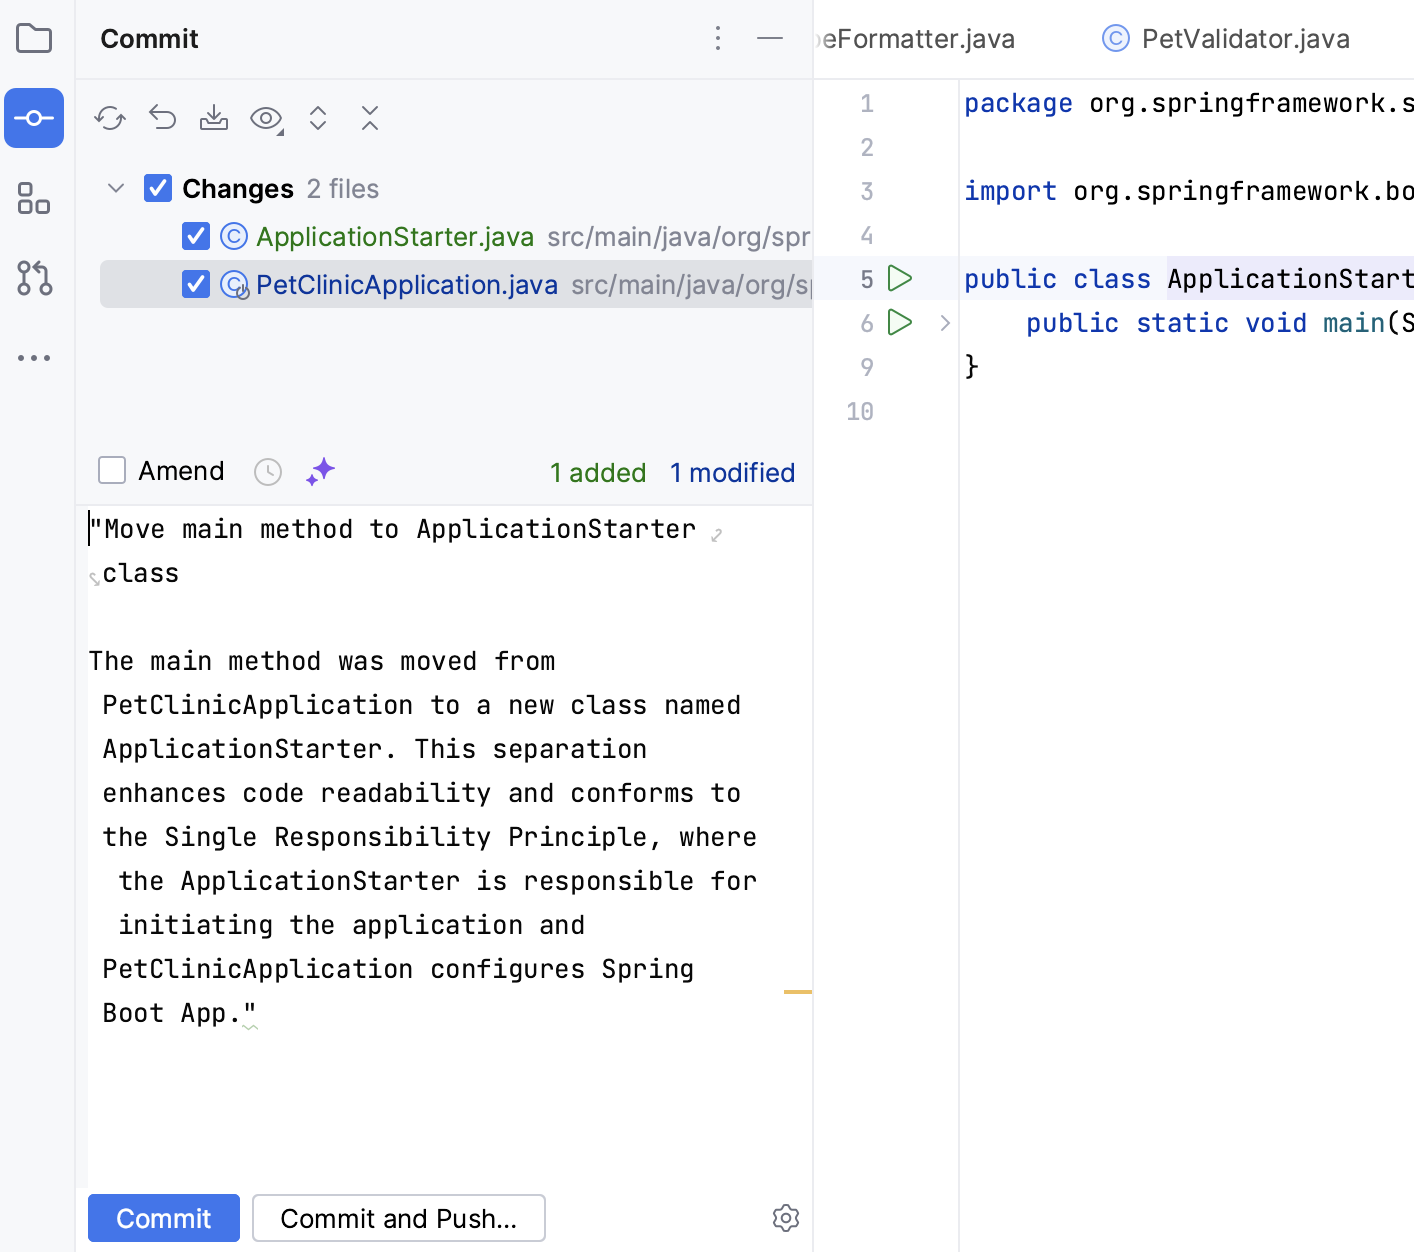
AI Assistant can send your diffs to the LLM, which will generate a commit message describing your changes.
Generate commit messages
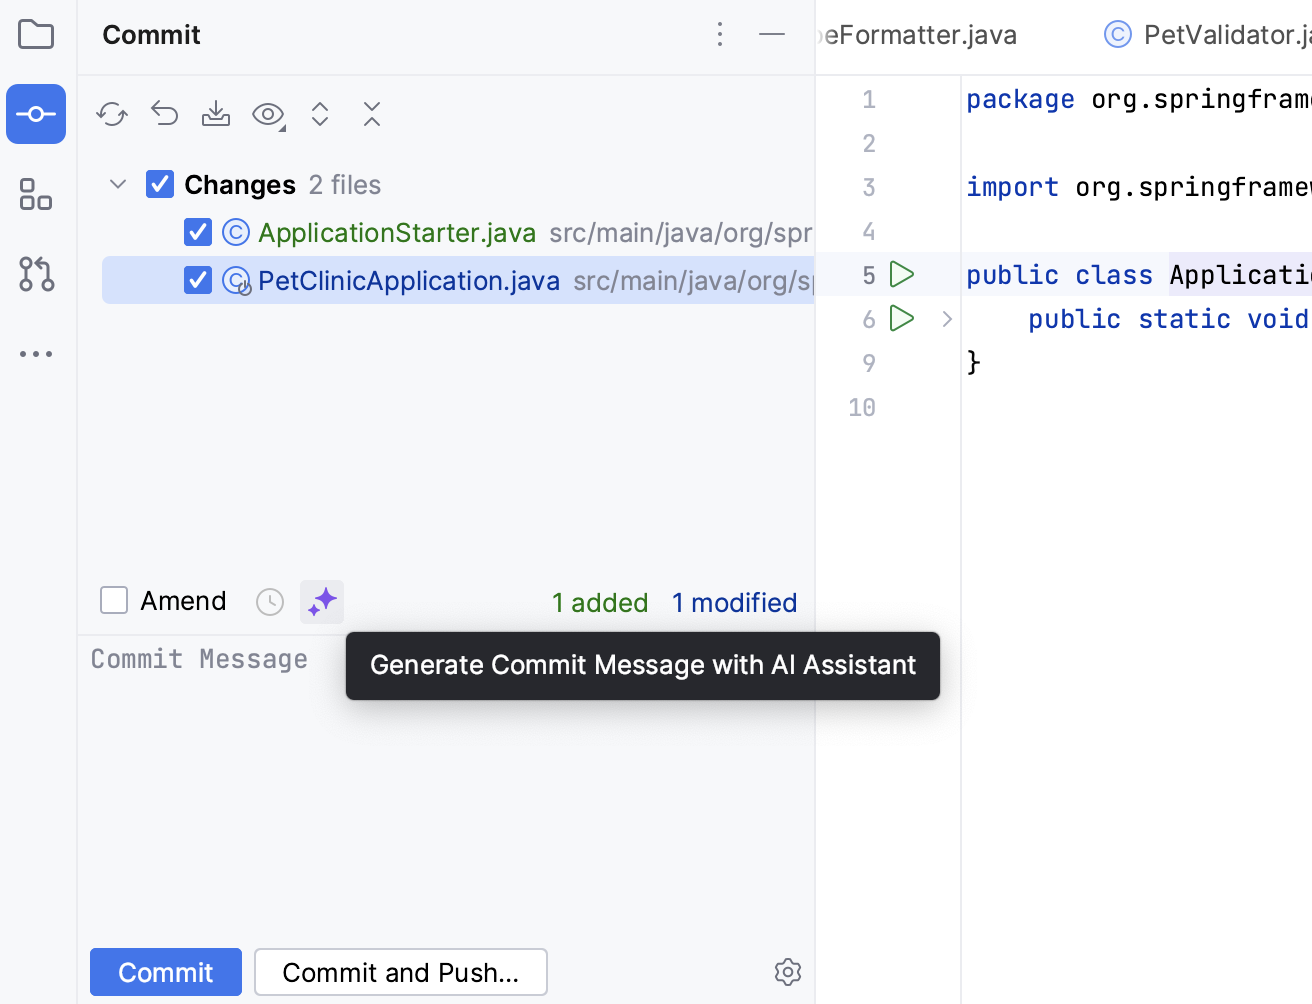
Press Alt+0 to open the Commit tool window.
Click the Generate Commit Message with AI Assistant icon.
Edit the message if necessary.
Explain commits
AI Assistant can summarize the changes made in one or several commits.
Click
in the bottom-left corner or press Alt+9 to open the version control tool window.
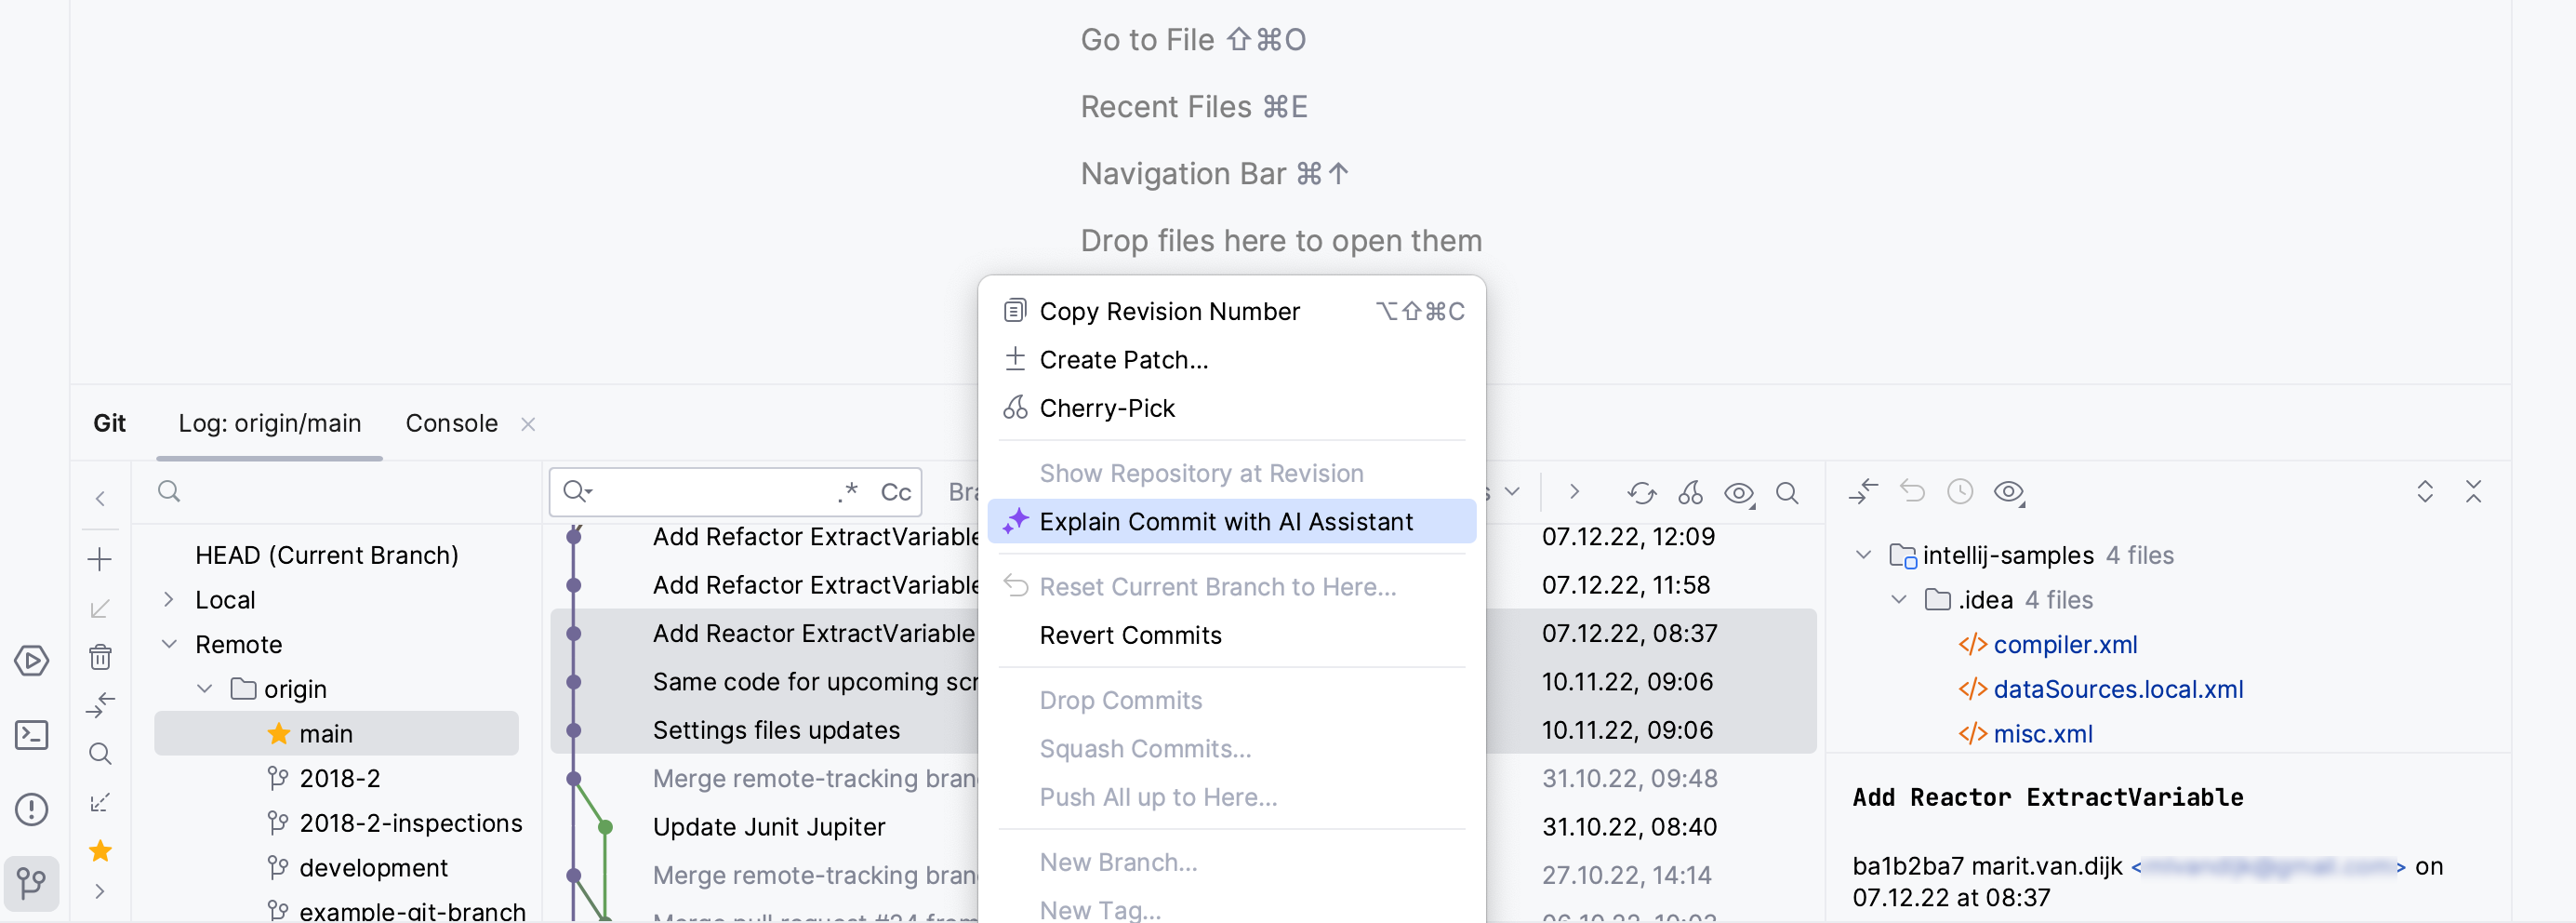
In the commits pane, select the commit or several commits you want to summarize, right-click them and select Explain Commit with AI Assistant in the context menu.
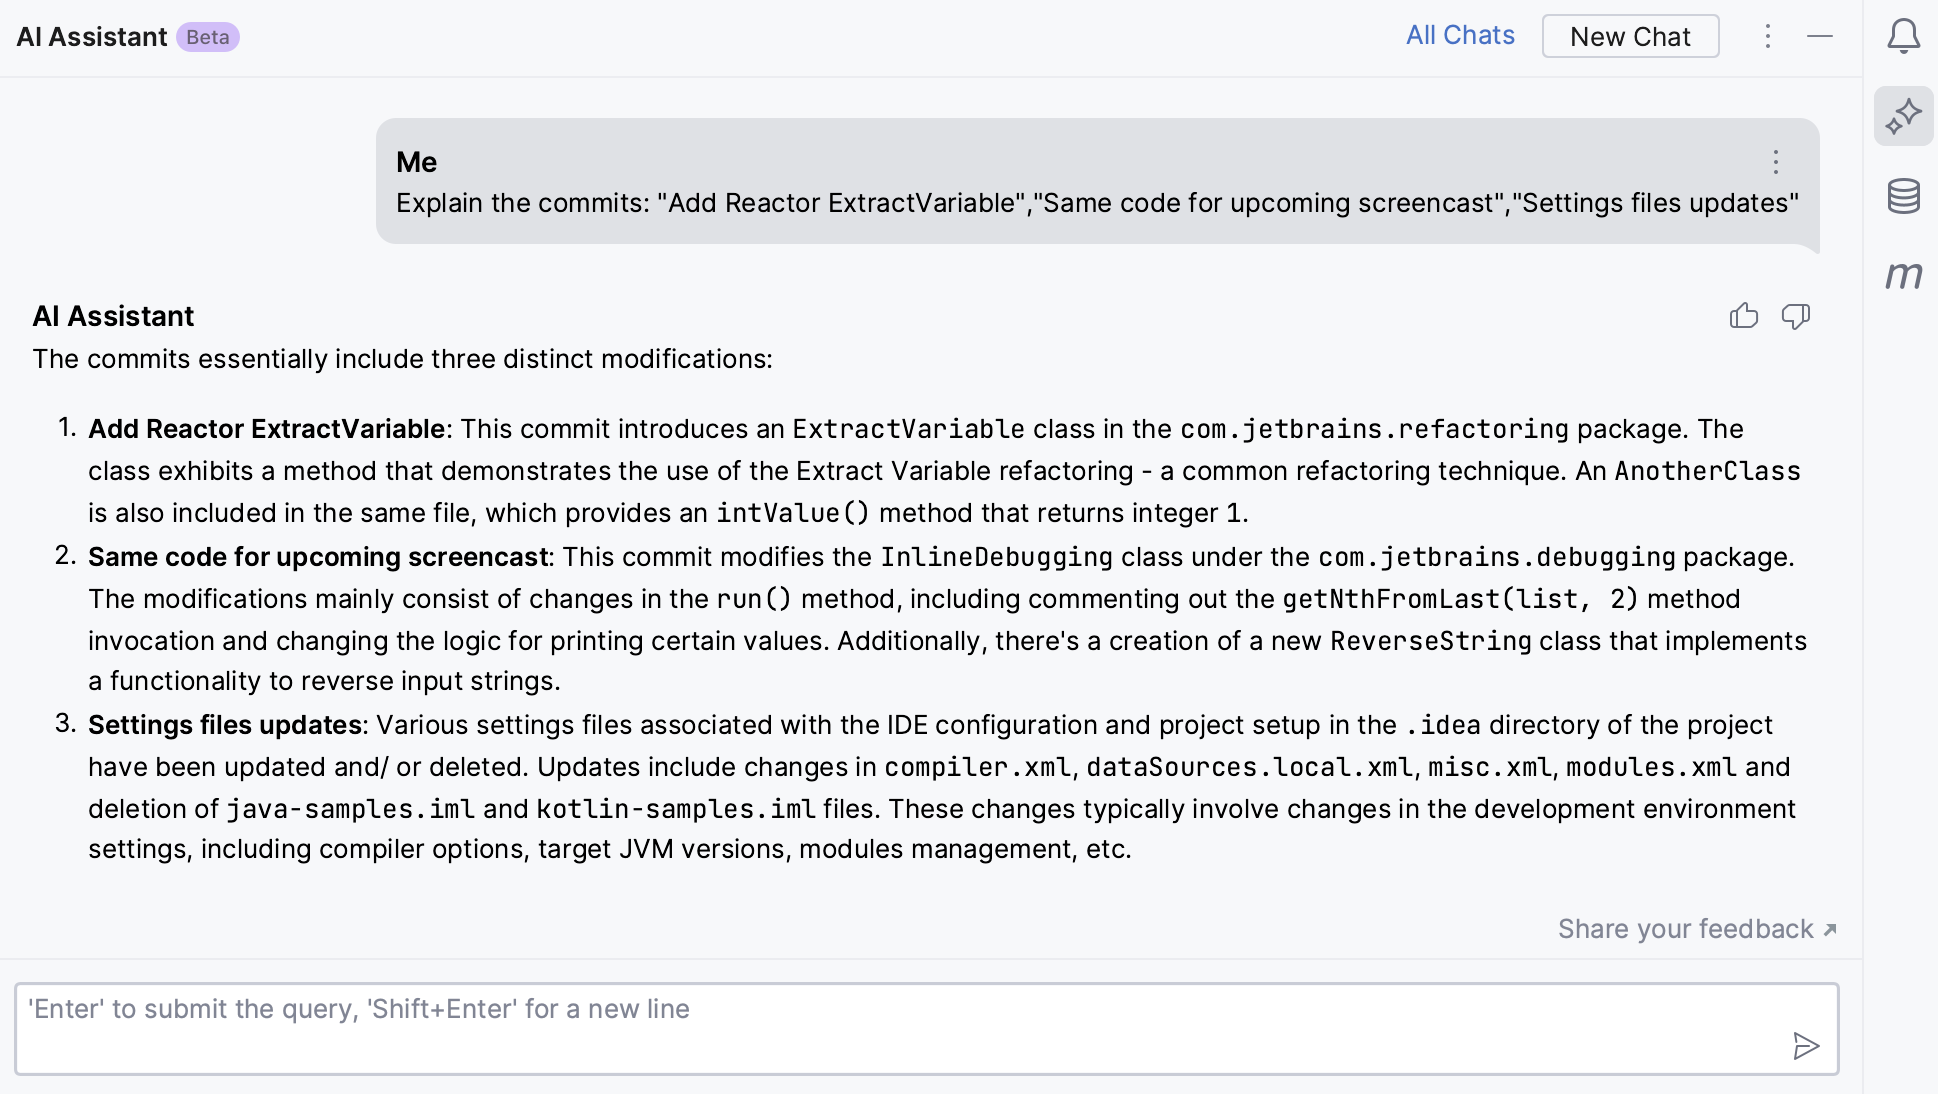
AI Assistant provides the summary of the selected commits.
Generate documentation
With AI Assistant, you can generate documentation for a declaration using the LLM.
Select a code fragment and right-click to open the context menu.
Press Alt+Enter. Select AI actions and then Write documentation.
AI Assistant will generate documentation for you.
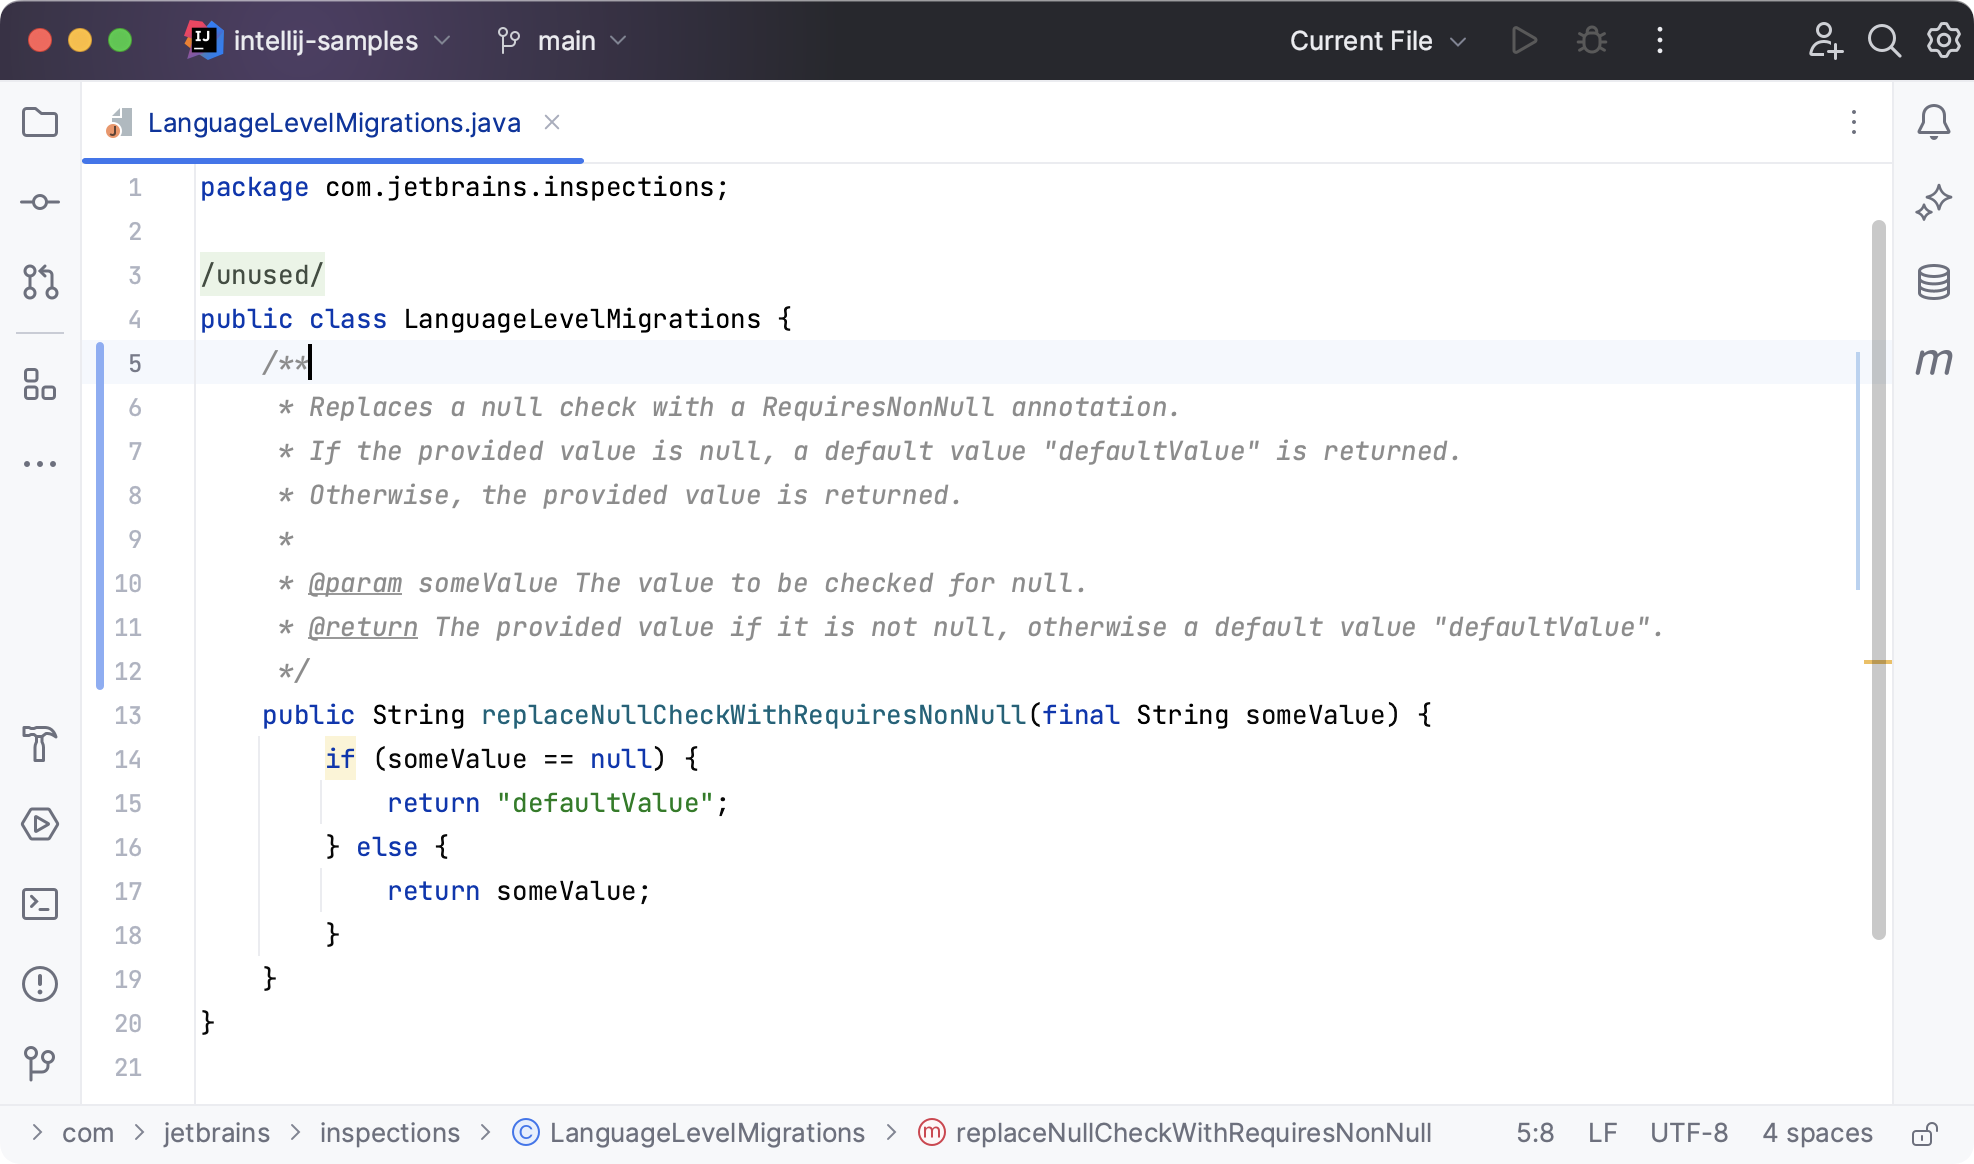
Alternatively, instead of using the context menu, type /**, press Enter and click Suggest documentation. 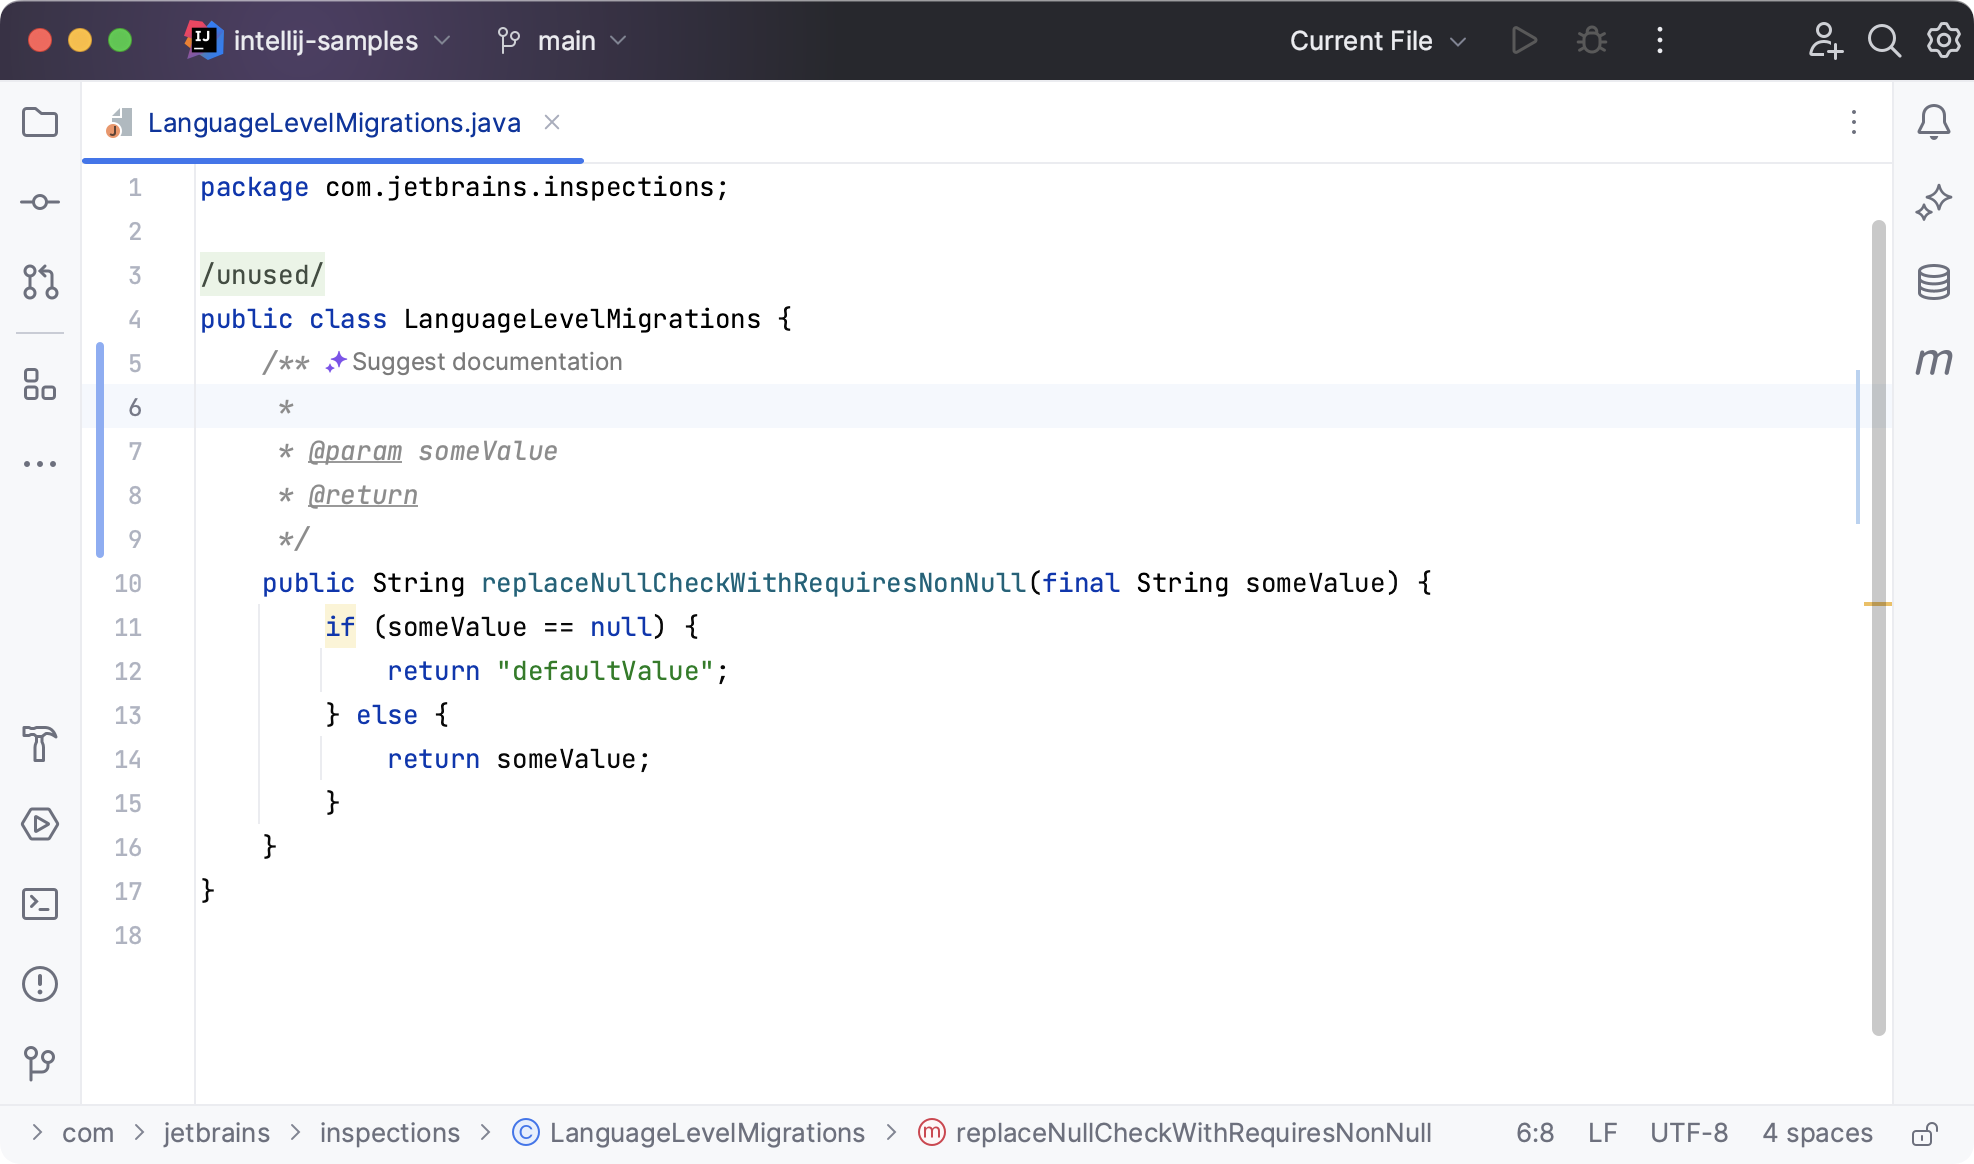
Use AI in the editor
When you rename (Shift+F6) a Java or Kotlin declaration, AI Assistant suggests name options for the declaration based on its contents.
This feature is enabled by default. To switch it on and off, check the AI Assistant settings.
Enable name suggestions
Press Control+Alt+S to open the IDE settings and then select .
Select the Provide AI-generated name suggestions checkbox.

How we handle your code and data
When you use AI features, IntelliJ IDEA needs to send your requests and pieces of your code to the LLM (Large Language Model) provider. Besides the prompts you type, it may send additional details, such as file types, frameworks used, and any other information that may be necessary for providing context to the LLM.
In addition, IntelliJ IDEA builds with the AI Assistant plugin perform opt-in collection of detailed data about the usage of AI features, including the full communication between you and the LLM (both text and code fragments). This data is kept strictly confidential and is used by JetBrains for product improvement purposes only. It is never shared with any external parties, and it will not be used for training any ML models that generate code or text, or revealed in any form to any other users. The option that controlls detailed data collection can be found in the IDE Settings under .
For more information about our data collection policies, refer to Data Collection and Use Policy.