Configuring JavaScript debugger
IntelliJ IDEA provides a built-in debugger for your client-side JavaScript code. The built-in debugger starts automatically when you launch a debugging session.
To ensure successful debugging, it is enough to specify the built-in web server port and accept the default settings that IntelliJ IDEA suggests for other debugger options.
Before you start
Make sure the JavaScript and TypeScript bundled plugin is enabled in the settings. Press Ctrl+Alt+S to open settings and then select . In the search field, type JavaScript and TypeScript. For more information about plugins, refer to Managing plugins.
Make sure the JavaScript Debugger bundled plugin is enabled in the settings. Press Ctrl+Alt+S to open settings and then select . In the search field, type JavaScript Debugger. For more information about plugins, refer to Managing plugins.
Set the built-in web server port
IntelliJ IDEA has a built-in web server that can be used to debug your application in a web browser or preview your code in the IntelliJ IDEA built-in browser. This server is always running and does not require any manual configuration. Learn more from Debug an application that is running on the built-in server.
Press Ctrl+Alt+S to open settings and then select .
In the Built-in server area, specify the port where the built-in web server runs. By default, this port is set to the default IntelliJ IDEA port 63342 through which IntelliJ IDEA accepts connections from services. You can set the port number to any other value starting from 1024.
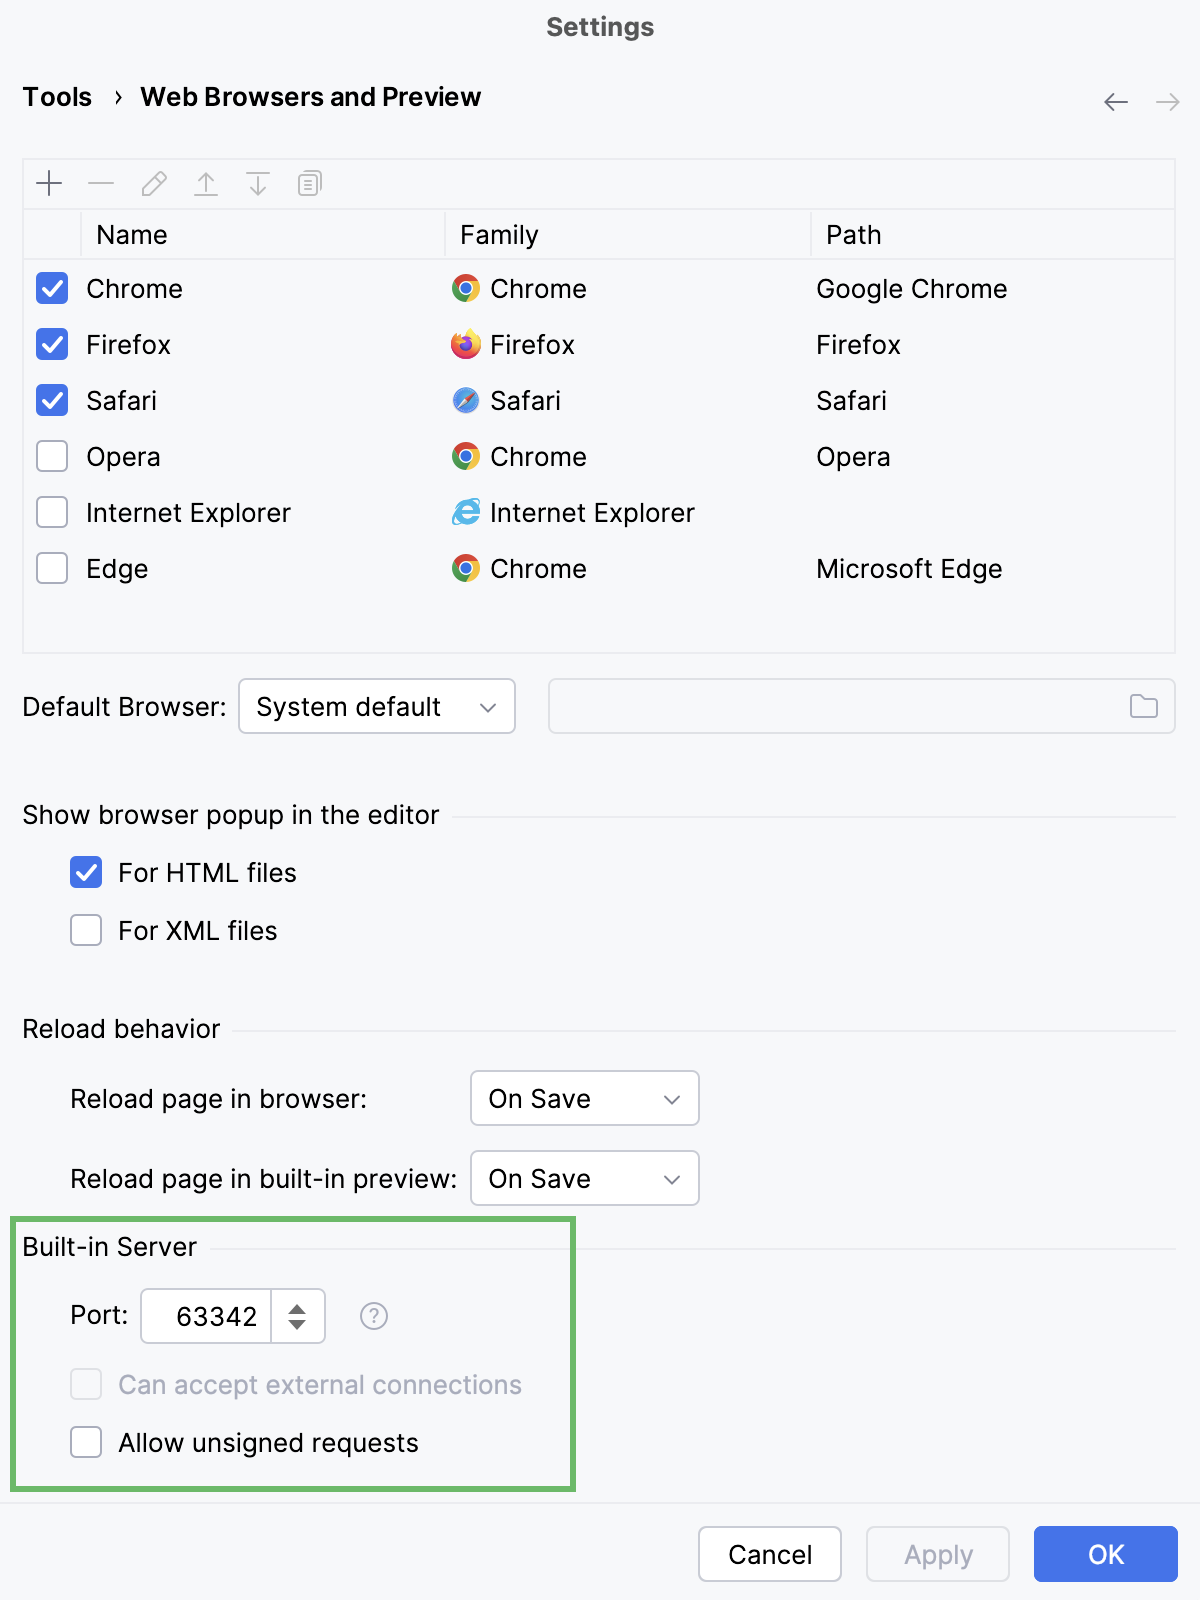
Customize the default debugger configuration
Suppress calls
Open settings by pressing Ctrl+Alt+S and navigate to .
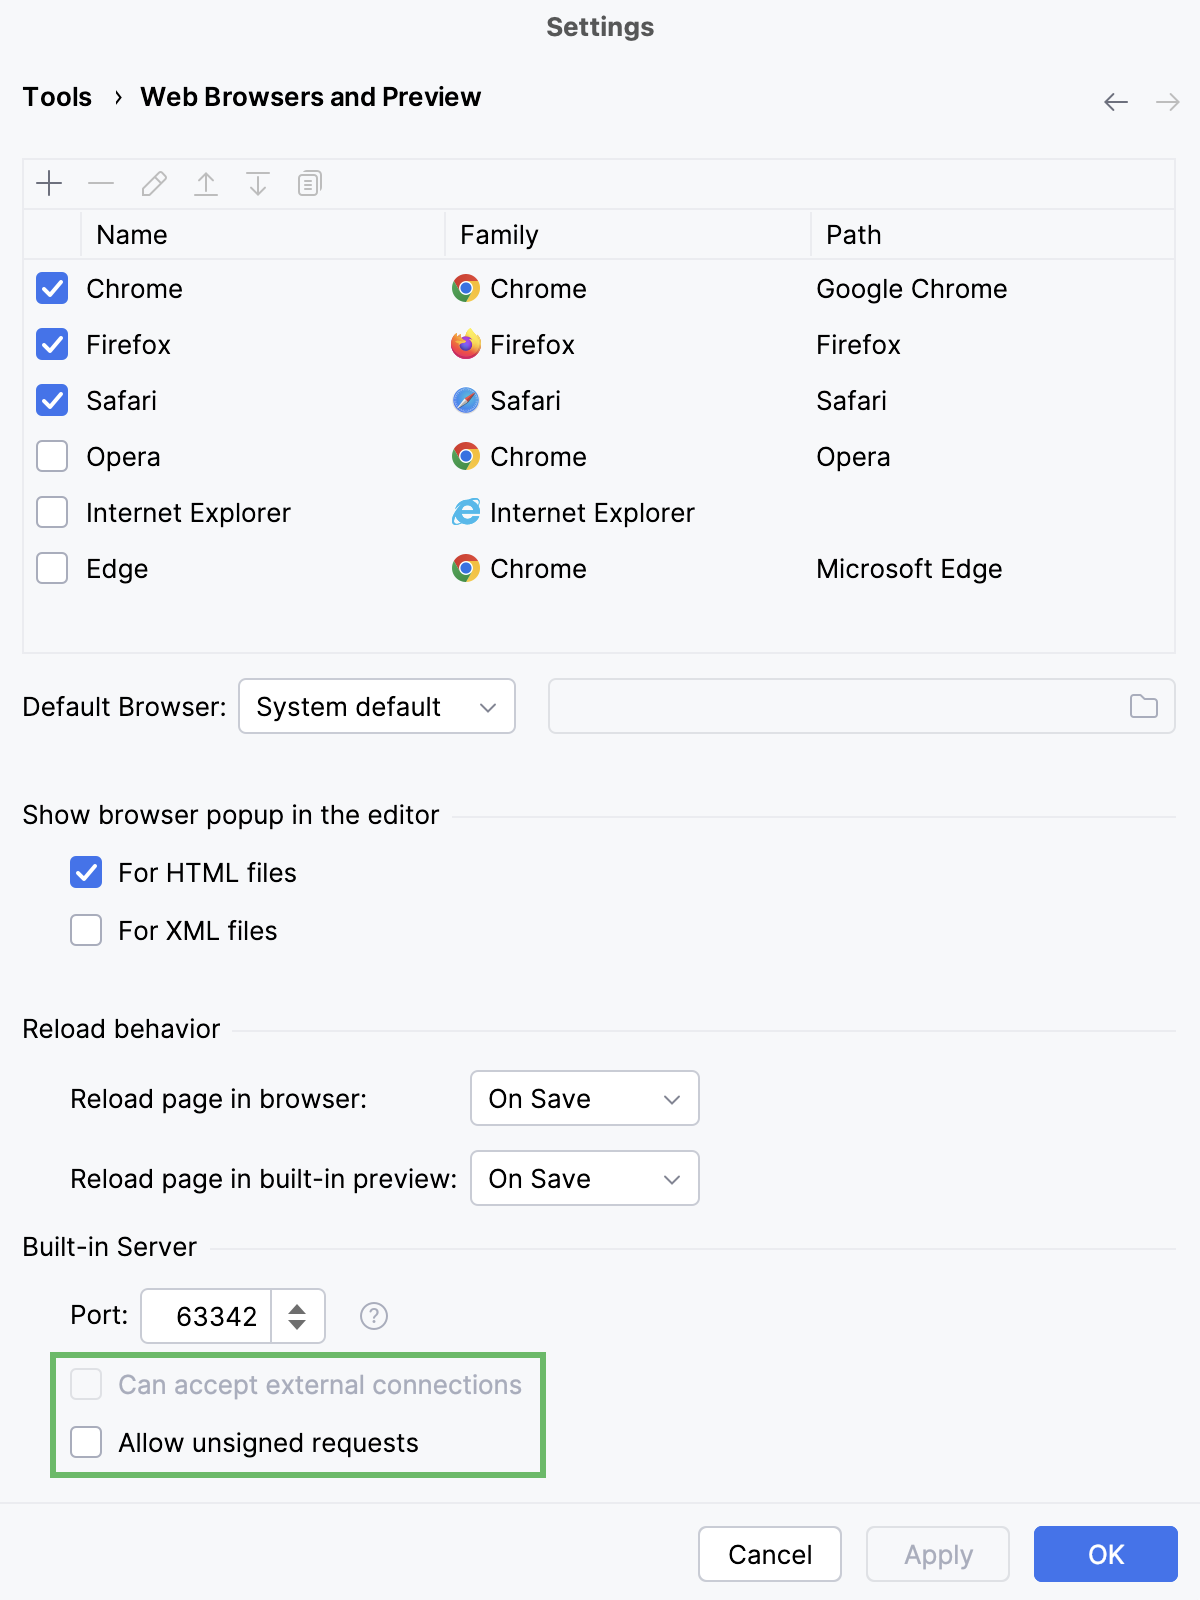
Suppress calls to the files on the built-in server from other computers or from outside IntelliJ IDEA by clearing the Can accept external connections or the Allow unsigned requests checkbox respectively.
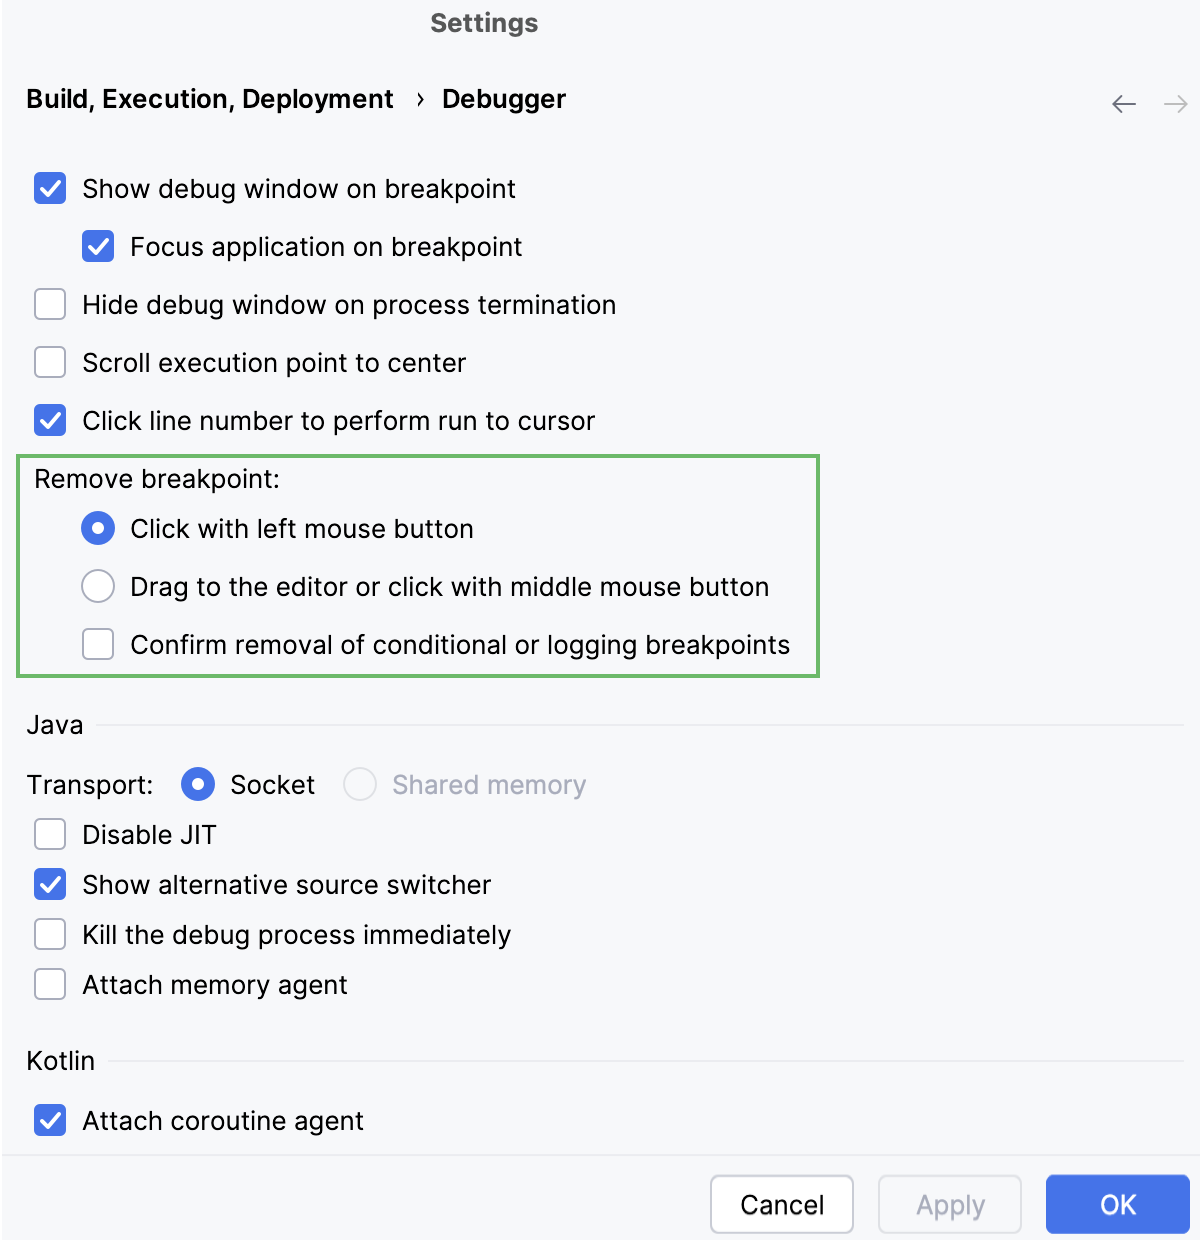
Choose the way to remove breakpoints
By default, you can toggle breakpoints by clicking the left mouse button. To change this behavior:
Open settings by pressing Ctrl+Alt+S and navigate to .
In the Remove breakpoint area, select the appropriate option.
Specify scripts to skip
Some scripts (for example, methods of standard Java classes like System) are skipped by Step into as you normally might not need to debug them. This list can be fine-tuned on the page of the Settings dialog (Ctrl+Alt+S) .
Open the run/debug configuration to launch a debugging session with and switch to the Stepping tab.
To suppress automatic Smart Step Into, clear the Always do smart step into checkbox.
To skip scripts from the
ignoreListfield of the sourcemaps, select the Ignore known third party scripts specified in source maps checkbox.The older Chrome-specific field name
x_google_ignoreListis deprecated but may still be recognized when theignoreListfield is absent. Learn more from the source map specification.To suppress stepping into custom scripts, select the Do not step into scripts with a URL matching the patterns below checkbox and expand the default list of such scripts below. Use
*,?,**and!.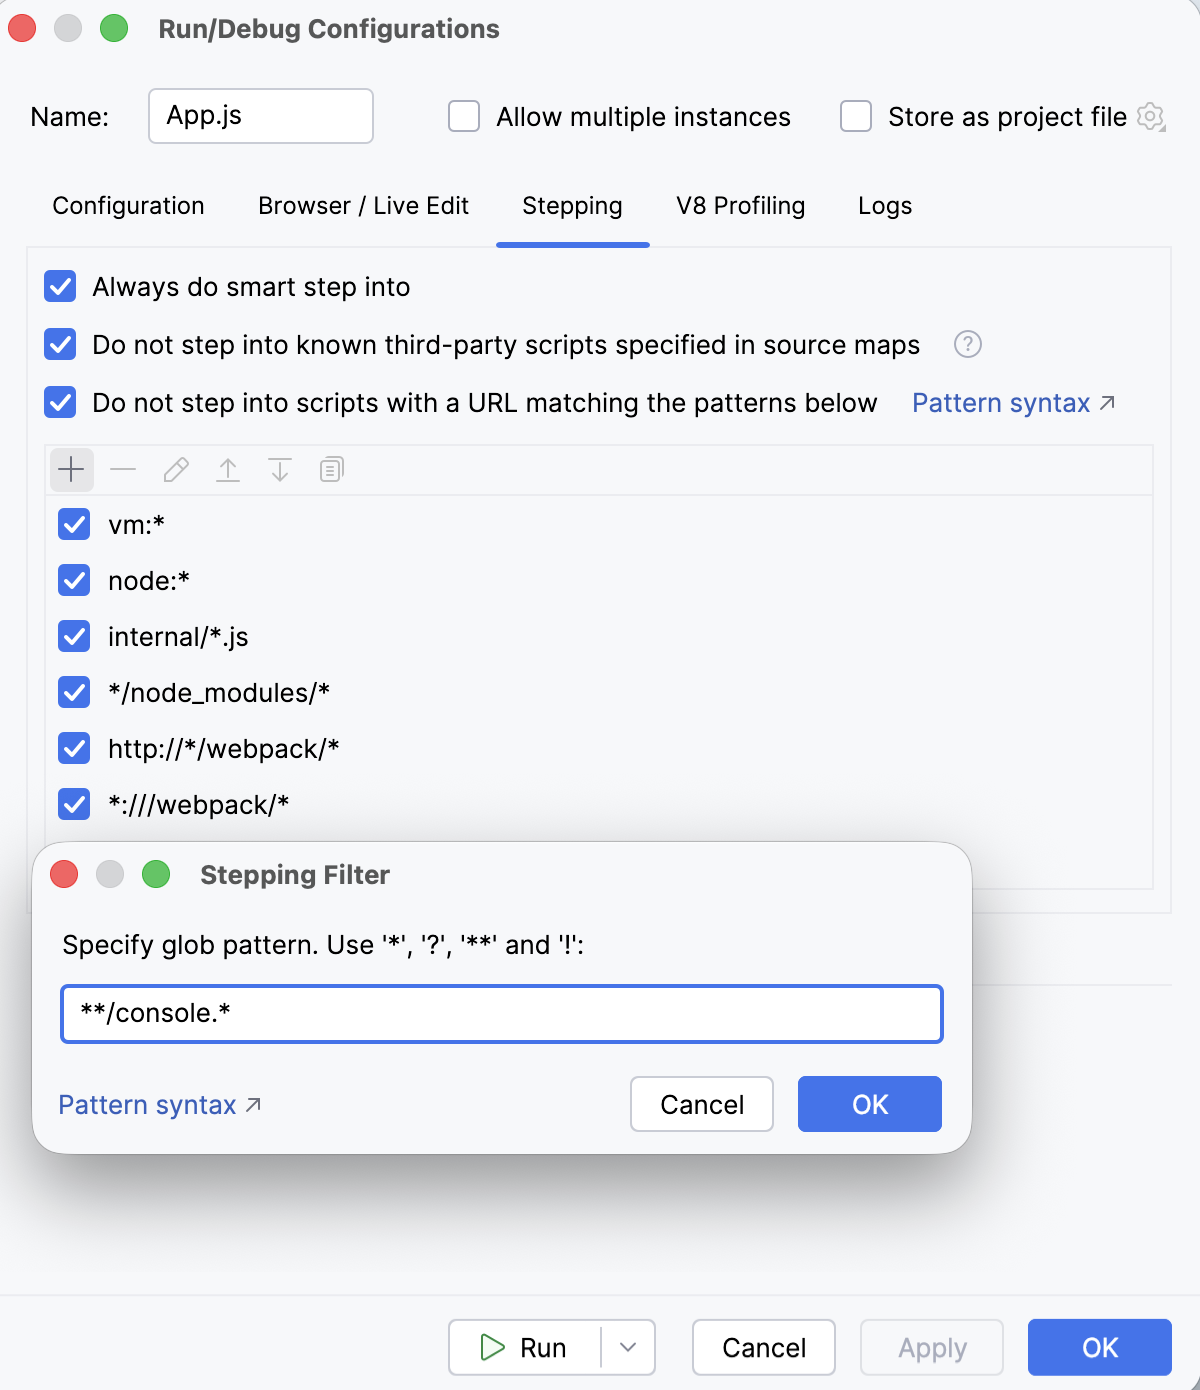
Pattern syntax
The following characters are supported in patterns:
An asterisk
*matches zero or more characters except a slash/. Use this character inside a single path part.A question mark
?matches exactly one character except a slash/.A double asterisk
**as a whole segment matches zero or more path segments. Its meaning depends on its position:As the first part, it matches any leading symbols.
As the last part, it matches any trailing symbols.
In the middle, it matches one or more parts. For example,
a/**/bmatchesa/x/banda/x/y/bbut nota/b.
A trailing double asterisk
**at the end of the last segment (not on its own a full segment, for example,foo**) matches any suffix after that segment. For example,foo**matchesfoo,foobar, andfoo/bar.A pattern that starts with and exclamation mark
!negates the given pattern and modifies the patterns added before it in the list. It does not add a new pattern of its own.
- Example 1
In the pattern list
["**/*.ts", "!**/*.test.ts"], the first glob matches every .ts file. The second pattern modifies the first glob to exclude every .test.ts file from match.- Example 2
A passed URL is split into parts by means of a slash
/. Accordingly,**/node_modules/**is split as follows::Double asterisk
**matches any path before thenode_modulessegment.node_modulesmatches against anode_modulesin the URL.Double asterisk
**matches anything trailing.
As a result, the pattern
**/node_modules/**matches any URL that containsnode_modules.Keep in mind that the URLs of the scripts are matched against the whole pattern. If we remove the second double asterisk
**, the pattern will match any URL that ends withnode_modulesof which there will likely be zero.- Example 3
Skip the second double asterisk
**to match against any pattern that ends with a particular filename.**/app.jsmatches all URLs that end withapp.js.The following pattern list will ignore all scripts in node_modules except those named app.js.
**/node_modules/** !**/app.js
Advanced options
Open settings by pressing Ctrl+Alt+S and navigate to .
Enable or disable Inline Debugging, specify when you want to see tooltips with object values and expressions evaluation results, and so on.
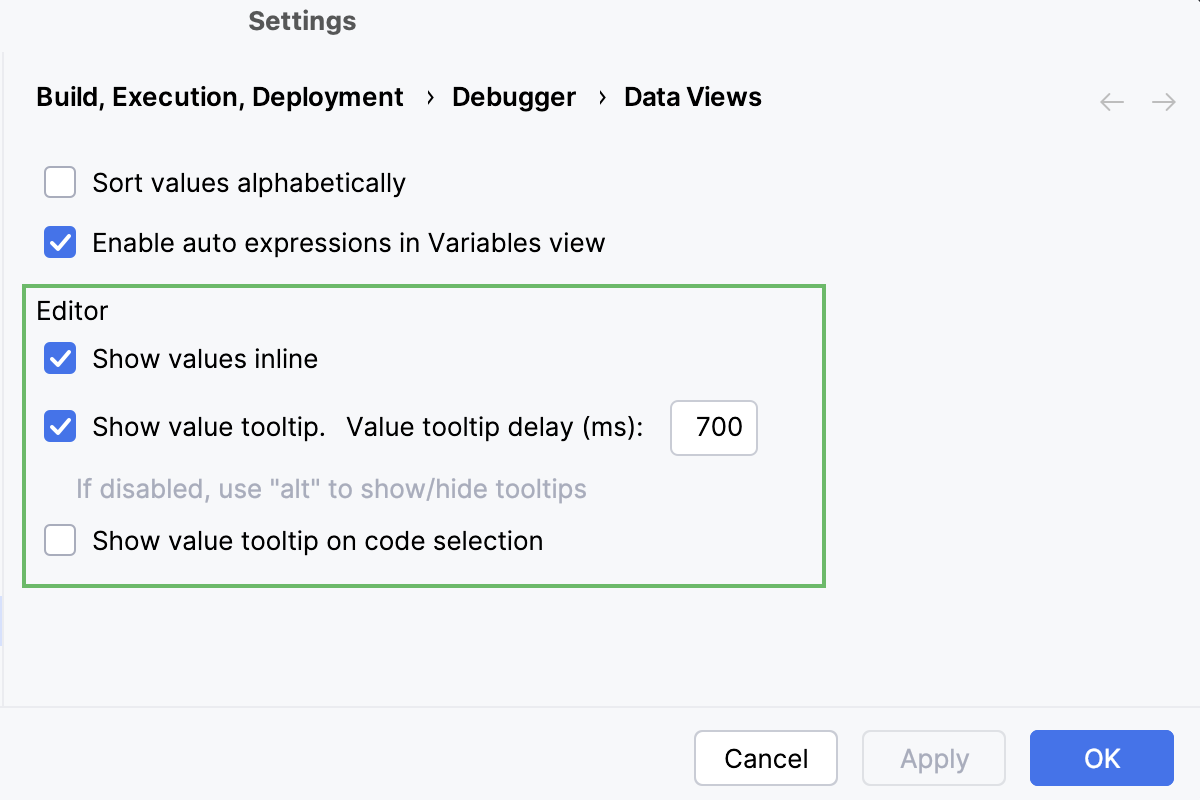
Open settings by pressing Ctrl+Alt+S and navigate to .
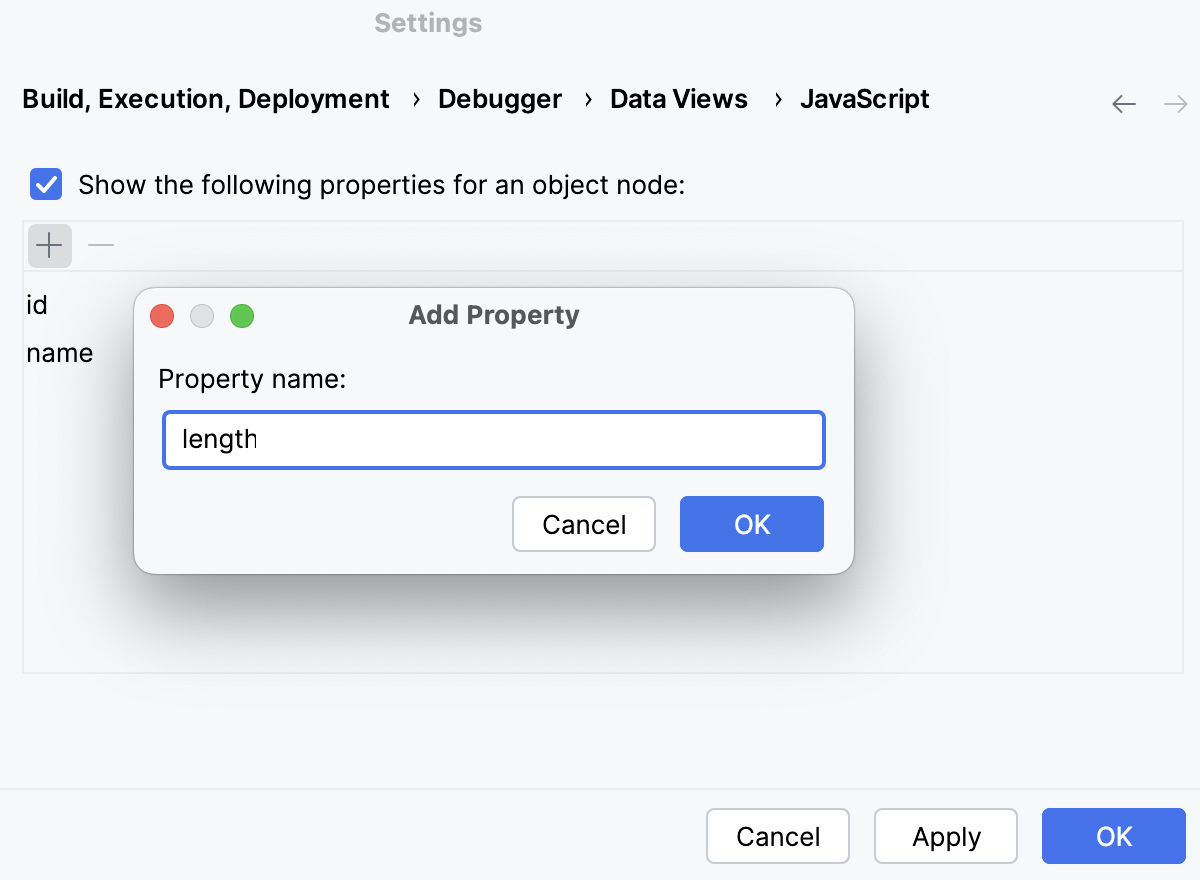
Specify whether you want object properties to be shown in object nodes. If so, specify the properties. Use
 and
 to manage the list of properties.
Start a debugging session with your preferred Chrome user data
You may notice that your debugging session starts in a new window with a custom Chrome user data instead of your own, habitual, one. As a result, the window looks unusual, for example, your bookmarks, the browser history, and the extensions are missing, which altogether breaks your development experience. That happens because IntelliJ IDEA uses the Chrome Debugging Protocol and runs Chrome with the --remote-debugging-port option. However, if Chrome is already started, a debugging port can't be opened for any new or existing Chrome instance that has the same user data directory. Therefore, IntelliJ IDEA always starts a debugging session in a new window with a custom user data directory.
To open a new Chrome instance with your familiar look-and-feel, configure Chrome in IntelliJ IDEA to start with your user data directory.
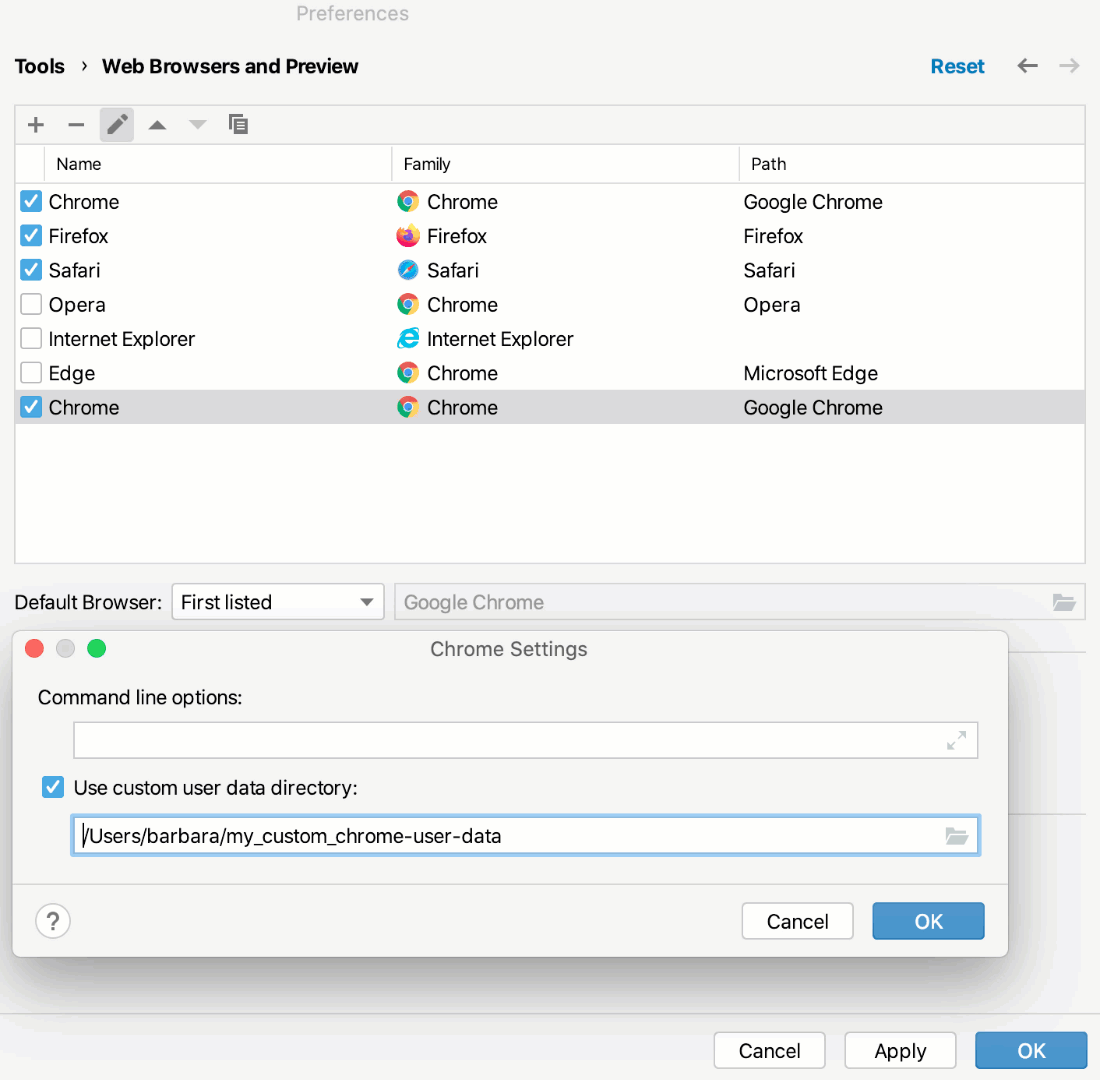
Configure Chrome in IntelliJ IDEA to start with your preferred Chrome user data
Save your preferred Chrome user data on your computer in a separate custom directory different from the Chrome default user data directory.
You need to save your preferred user data in a separate custom directory because Chrome 136 and later does not support debugging in the default user directory. Learn more from the Chrome official website.
Press Ctrl+Alt+S to open settings and then select .
To create a new Chrome configuration, click
. A new item appears in the list. In the Path field, specify the path to the Chrome installation folder.Select the new configuration and click the Edit button (
 ).
In the Chrome Settings dialog, select the Use custom user data directory checkbox and specify the path to the custom directory with your preferred user data.
If you have several user data profiles, each of them is stored in a separate subdirectory. To use a profile, specify it in the Command line options field as follows:
--profile-directory="<profile_to_use>"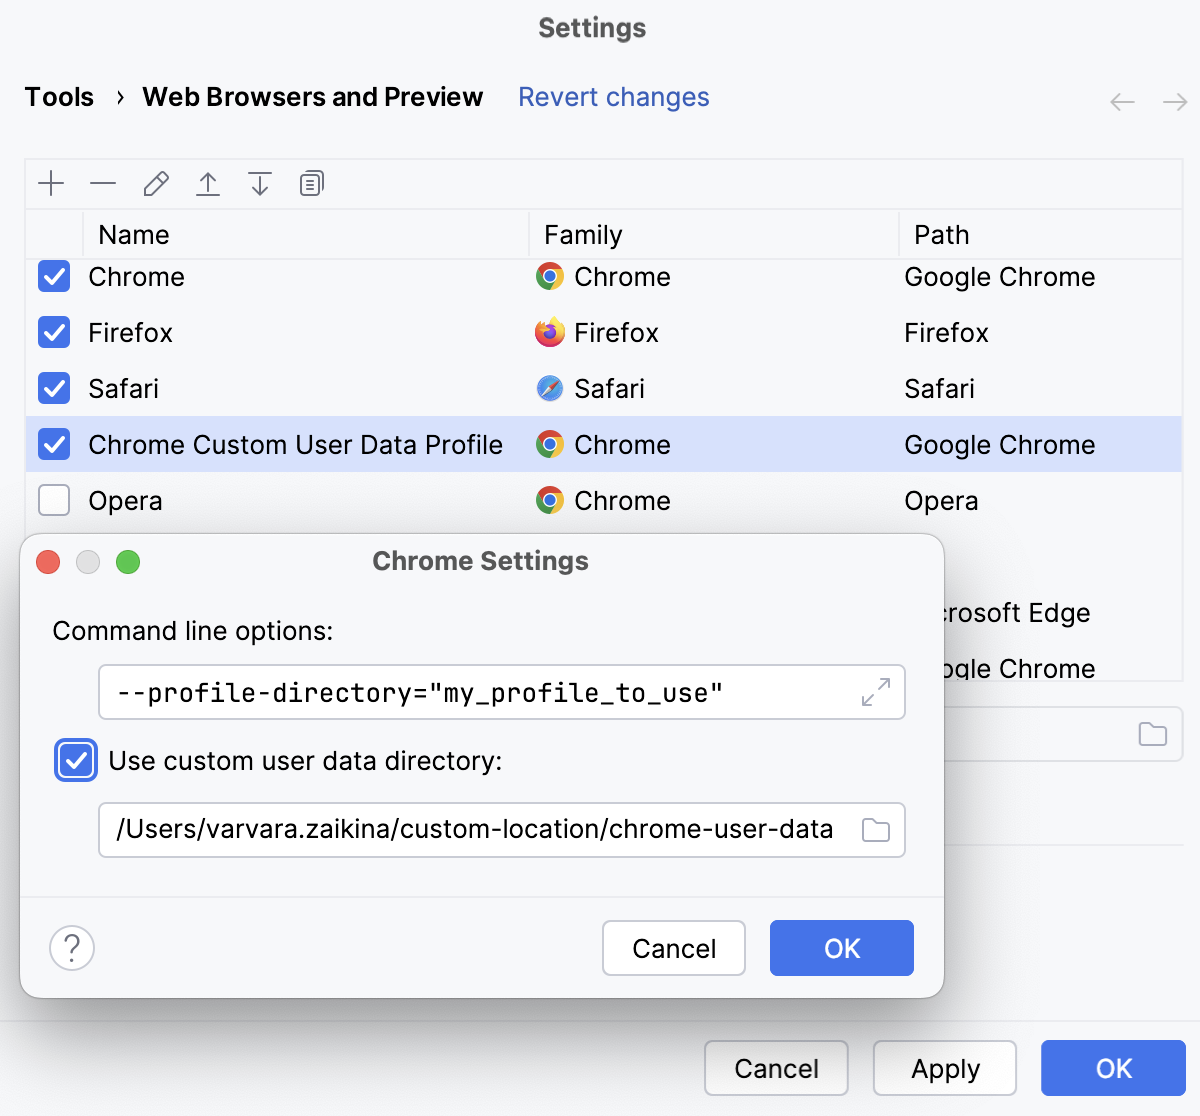
Mark your Chrome browser configuration default as described in Web Browsers. Do not forget to select the necessary browser from the Browser list when creating a run/debug configuration.