Tutorial: Getting Started with Dev Containers
In this tutorial, you create a Dev Container configuration for a local project, build the container, and open the project inside it. At the end, you have a running container and an IDE window connected to it.
Before you start
Docker is installed on your machine and the Docker daemon is running. IntelliJ IDEA builds the container through Docker, so the build fails if the daemon is stopped.
The Docker plugin is installed and enabled.
You have a local project open in IntelliJ IDEA.
For the complete list of requirements, including remote Dev Containers, refer to Prerequisites.
Step 1. Prepare a project
Since the devcontainer.json is a necessary configuration file for building Dev Containers, it should be present in the project. The file is placed in the .devcontainer folder in the project root; there could be some other folder in between, like .devcontainer/.../.../devcontainer.json.
There are two options to quickly start creating Dev Containers: create a simple file or use an in-IDE feature to create a configuration file from the template.
The minimal requirement for a Dev Container is the image from which it would be built.
In the project view, right-click the project name and select, New | File.
Enter .devcontainer/devcontainer.json to create the configuration in the .devcontainer directory under the project root.
Open the file in the editor and add the following code:
{ image: "ubuntu:latest" }
In the project view, right-click the project name and select, New | Dev Container Config.
In the dialog that opens, IntelliJ IDEA displays a default container configuration. The default template is enough to create a Dev Container, but any other language-specific template could be selected from the Dev Container Template dropdown if necessary.
Click OK to create a relatively simple (but full of comments)
devcontainer.json:// Default Ubuntu-based DevContainer Template. // For more customization options, see https://containers.dev/implementors/json_reference { name: "Default", image: "ubuntu:latest", customizations : { // Configure JetBrains IDE-specific properties jetbrains : { backend : "IntelliJ", settings : { // IDE settings can be added via “Show context actions”|“Add currently modified settings from IDE”. // A complete list of supported settings is also available through auto-completion }, plugins: [ // A set of plugin IDs. // Plugin ID can be found on the corresponding plugin’s page at https://plugins.jetbrains.com. ] } }, features: { "ghcr.io/devcontainers/features/git" : {}, // Add additional features to your project using auto-completion. }, // Comment out to connect as the root user. remoteUser: "ubuntu" }
Step 2. Prepare for a build process
Before you build a Dev Container, consider which Dev Container implementation will be used:
For the Remote Development old implementation, ensure that the Open devcontainer projects natively option in Settings | Advanced Settings is disabled.
If you use the native mode implementation, enable Open devcontainer projects natively option in Settings | Advanced Settings.
Additionally, when Remote Development implementation is used, we recommend setting up the IDE to provide an extended backend choice.
Select the specific IDE backend version for Dev Containers
Press Ctrl+Alt+S to open settings and then select .
From the options on the right, under the Dev Containers section, disable the Choose the backend version automatically and click OK to save the changes.
After disabling this option, several versions of the backends become available after the Dev Container is built.
To use the custom remote development backend (for example, to check problems in not-published IDE builds), do the following:
Download the IDE backend manually
Open the download page.
Select Linux as your operating system since only Linux-based images are currently supported for Dev Containers.
Download the archive for the architecture corresponding to the host where your Docker Engine is running.
In the main menu, go to or press Shift twice to open the search window.
Type
registryand select the Registry... option.In the window that opens, search for the
devcontainers.use.separate.project.panelkey and enable it. Click Close.Restart the IDE.
After the registry key is enabled, start the Dev Container build.
When the Choose IDE and Project window opens, click the Installation options link and select the Upload installer file action.
The IDE version field changes to the Select archive file.
Specify a path to the IDE backend archive that you downloaded.
Continue the Dev Container build process.
Step 3. Start a Dev Container build
Open .devcontainer/devcontainer.json. Click the Dev Containers icon in the gutter and select Create Dev Container and Mount Sources…. If prompted to select a backend IDE, select IntelliJ IDEA.
After the build starts, the Services view should be opened automatically to display the build process:
Depending on the implementation chosen (Remote Development vs native mode), the following flow differs a bit.
Select the backend version from the list and wait while it and the Client are downloaded:
In some cases, if the Dev Container build and backend deployment process takes more than 10 seconds, the Client will not be opened; instead, the notification with the Connect button will be shown in the IDE. Press the button.
Press the Trust Project button in the following window, and wait while Client opens:
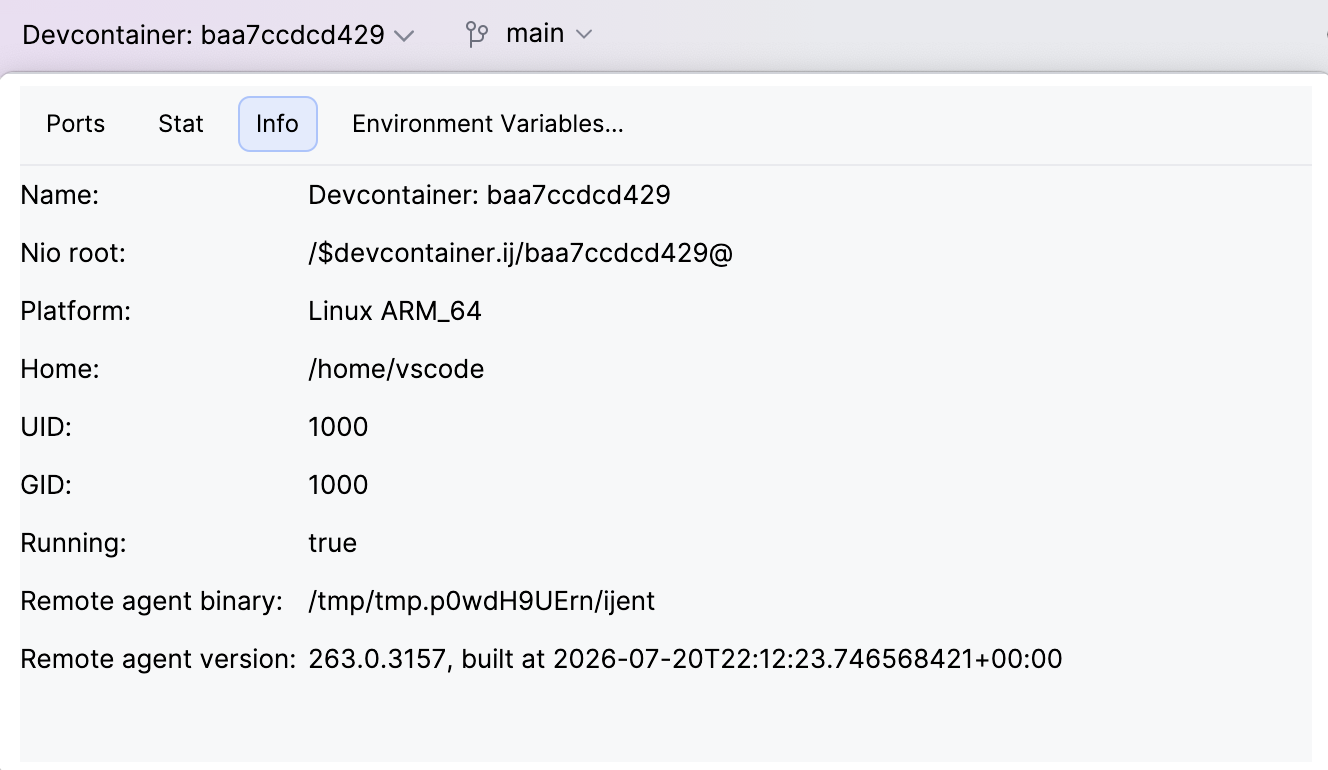
How to understand if it is already a project in the Dev Container opened? By the Backend Status Details widget on the top left.
Since there is no backend deployment step, the Dev Container project will be opened in the IDE instantly. If the Open project in option in Settings | Appearance & Behavior | System Settings is set up to Ask, the project will be opened after confirmation.
To understand if the project is opened in a Dev Container that uses a native mode, check the unusual project root path and a widget that displays the Dev Container information on the top left of your editor.