Rearrange code
Configure arrangement rules
You can rearrange your code according to the arrangement rules set in the Code Style page of the Settings dialog. You can also create groups (aliases) of rules and refer to them when you create a matching rule.
Configure grouping rules
Grouping rules let you keep related class methods together.
Press Ctrl+Alt+S to open settings and select Editor | Code Style | Java.
On the Arrangement tab, choose the grouping options in the Grouping rules area.
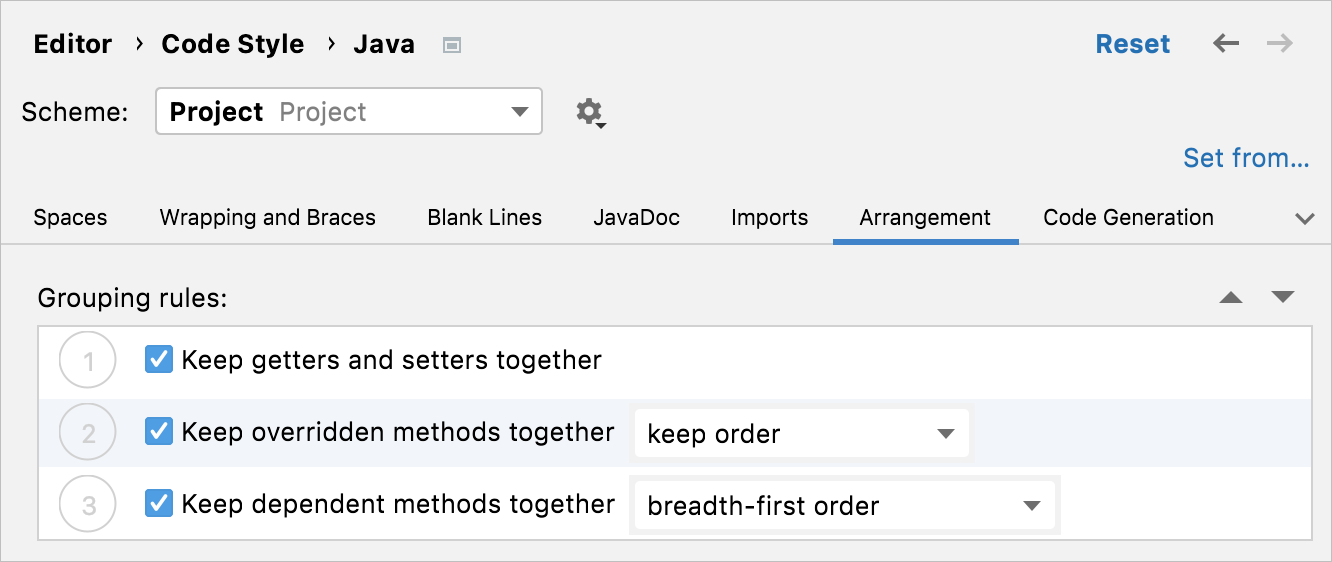
For the Keep dependent methods together option, you can select depth-first order or breadth-first order. The former will arrange the methods according to the nesting hierarchy; the latter will group together the sibling methods from the same nesting level.
Create matching rules
Matching rules let you define the order of elements as a list of rules, where every rule has a set of matching conditions, such as modifier or type.
Press Ctrl+Alt+S to open settings and select Editor | Code Style | Java.
On the Arrangement tab, click
 and provide the rule parameters in the Matching rules area.
Use the Type and Modifier filters to choose the code constructs and their visibility modifiers that should be regulated by the rule. Note that double-clicking a filter negates the condition.
Use the Name field to specify entry names the rule should affect.
This filter matches only entry names, such as property names, method names, class names, and so on. The filter supports regular expressions and uses the standard syntax. The match is performed against the entire name.
To sort code entries alphabetically, select the appropriate Matching rules entry and set the Order field to order by name.
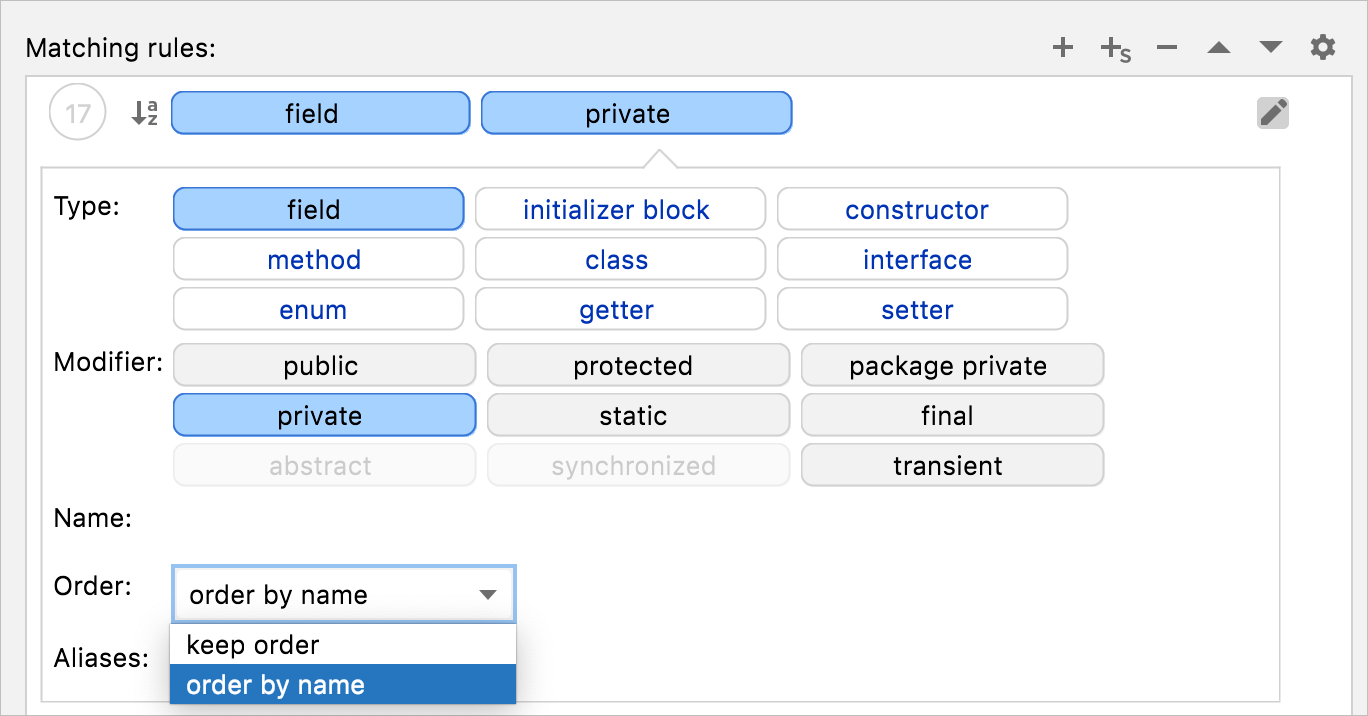
You can also create groups (aliases) of rules and refer to them when creating a new matching rule.
Create rule aliases
With aliases, you can group several arrangement rules into a single entity and refer to it when you are adding a new matching rule.
Press Ctrl+Alt+S to open settings and select Editor | Code Style | Java.
On the Arrangement tab, click
 .
In the Rules Alias Definitions dialog that opens, add a group name and its rules.
- : adds a new alias.
 : removes an existing alias from the list.
 : copies a specified rule sequence to the created alias.
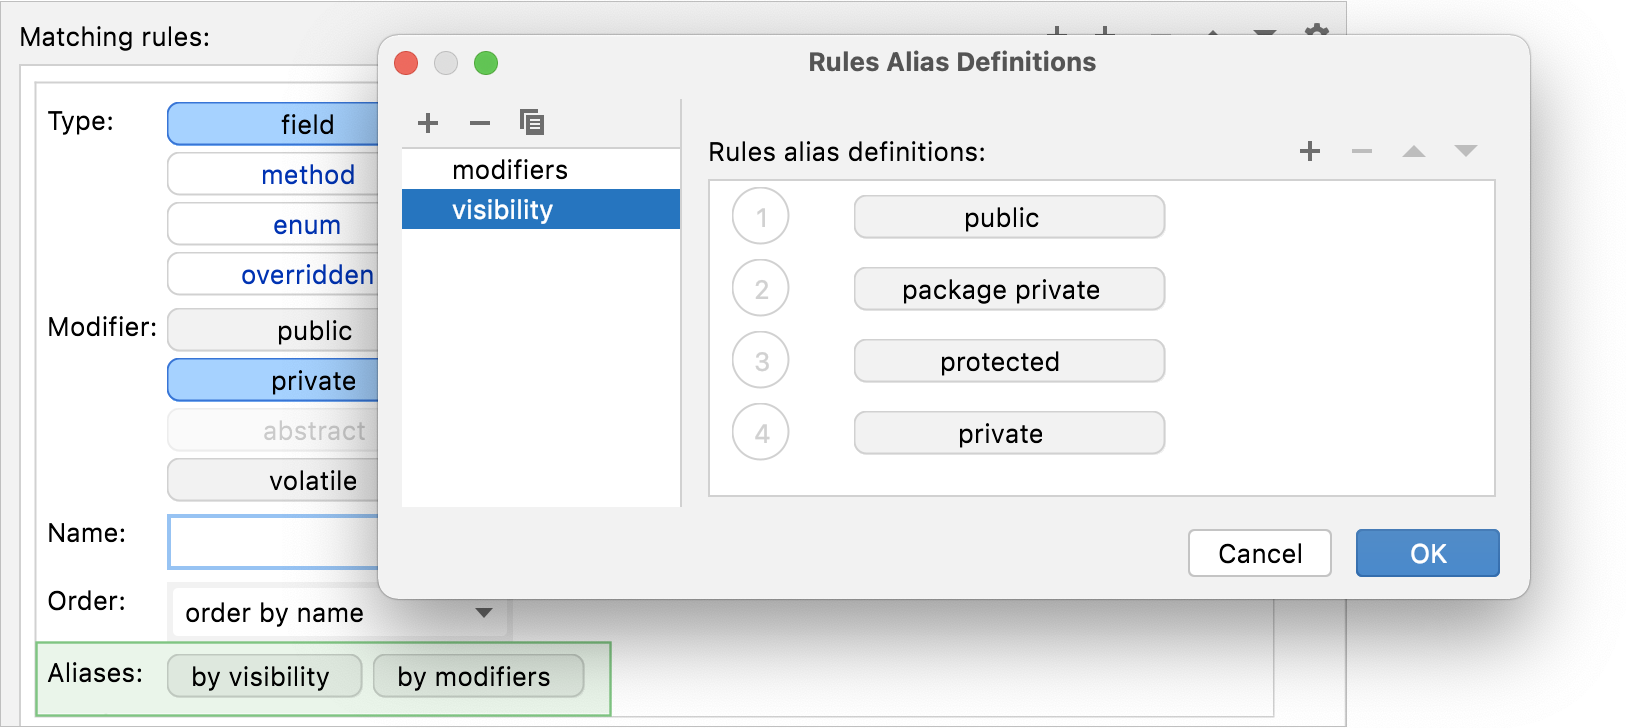
In the Rules alias definitions area, define the rule sequence for the created alias.
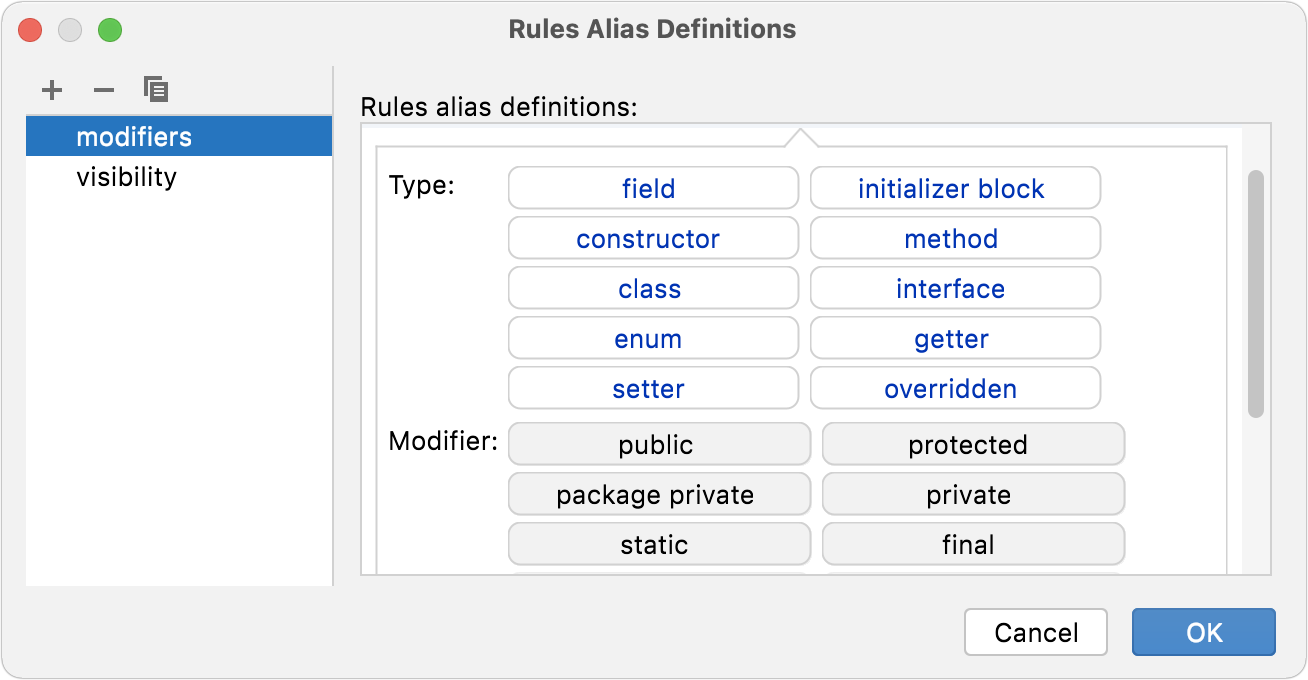
The created alias can now be referred to when adding a matching rule.
Create section rules
Section rules let you move methods or variables into the sections that you have defined.
Press Ctrl+Alt+S to open settings and select Editor | Code Style | Java.
On the Arrangement tab, click
 and provide the rule parameters in the Matching rules area.
After the arrangement, methods in the class will be rearranged as specified in the created section rule and will be surrounded by comments.
Rearrange code
Rearrange code in the editor
In the editor, select the code entries you want to rearrange and go to in the main menu.
Rearrange code in multiple files
In the Project tool window (Alt+1), select the files in which you want to rearrange code and go to in the main menu.
Automatically rearrange code on save
You can configure the IDE to rearrange code elements in modified files automatically when your changes are saved.
Press Ctrl+Alt+S to open settings and then select .
Enable the Rearrange code option.
Additionally, you can click Configure arrangement rules… to specify the rules for reordering code elements for the selected language.
Example: Group test methods into sections
Section rules let you organize methods and fields into sections based on their properties, such as visibility modifiers or names. You can define comments that mark the beginning and end of each section.
Suppose you have a Java test class with methods that test different operations, such as creating, updating, and deleting users:
You can configure arrangement rules to group these methods into separate sections based on their names.
Press Ctrl+Alt+S to open settings and then select .
Switch to the Arrangement tab.
In Grouping rules, clear Keep dependent methods together if it is selected.
In Matching rules, click Add section rule.
Configure the section for tests that create users:
Set the section start comment to
// Create user tests.Set the section end comment to
// End create user tests.
Add a matching rule for methods that test user creation between the section start and section end rules: click Add Rule and set Type to method and Name to
testCreate.*.Repeat steps 4–6 for the update and delete user tests:
For update user tests, set the section start comment to
// Update user tests, the section end comment to// End update user tests, and add a matching rule with Type set to method and Name set totestUpdate.*.For delete user tests, set the section start comment to
// Delete user tests, the section end comment to// End delete user tests, and add a matching rule with Type set to method and Name set totestDelete.*.
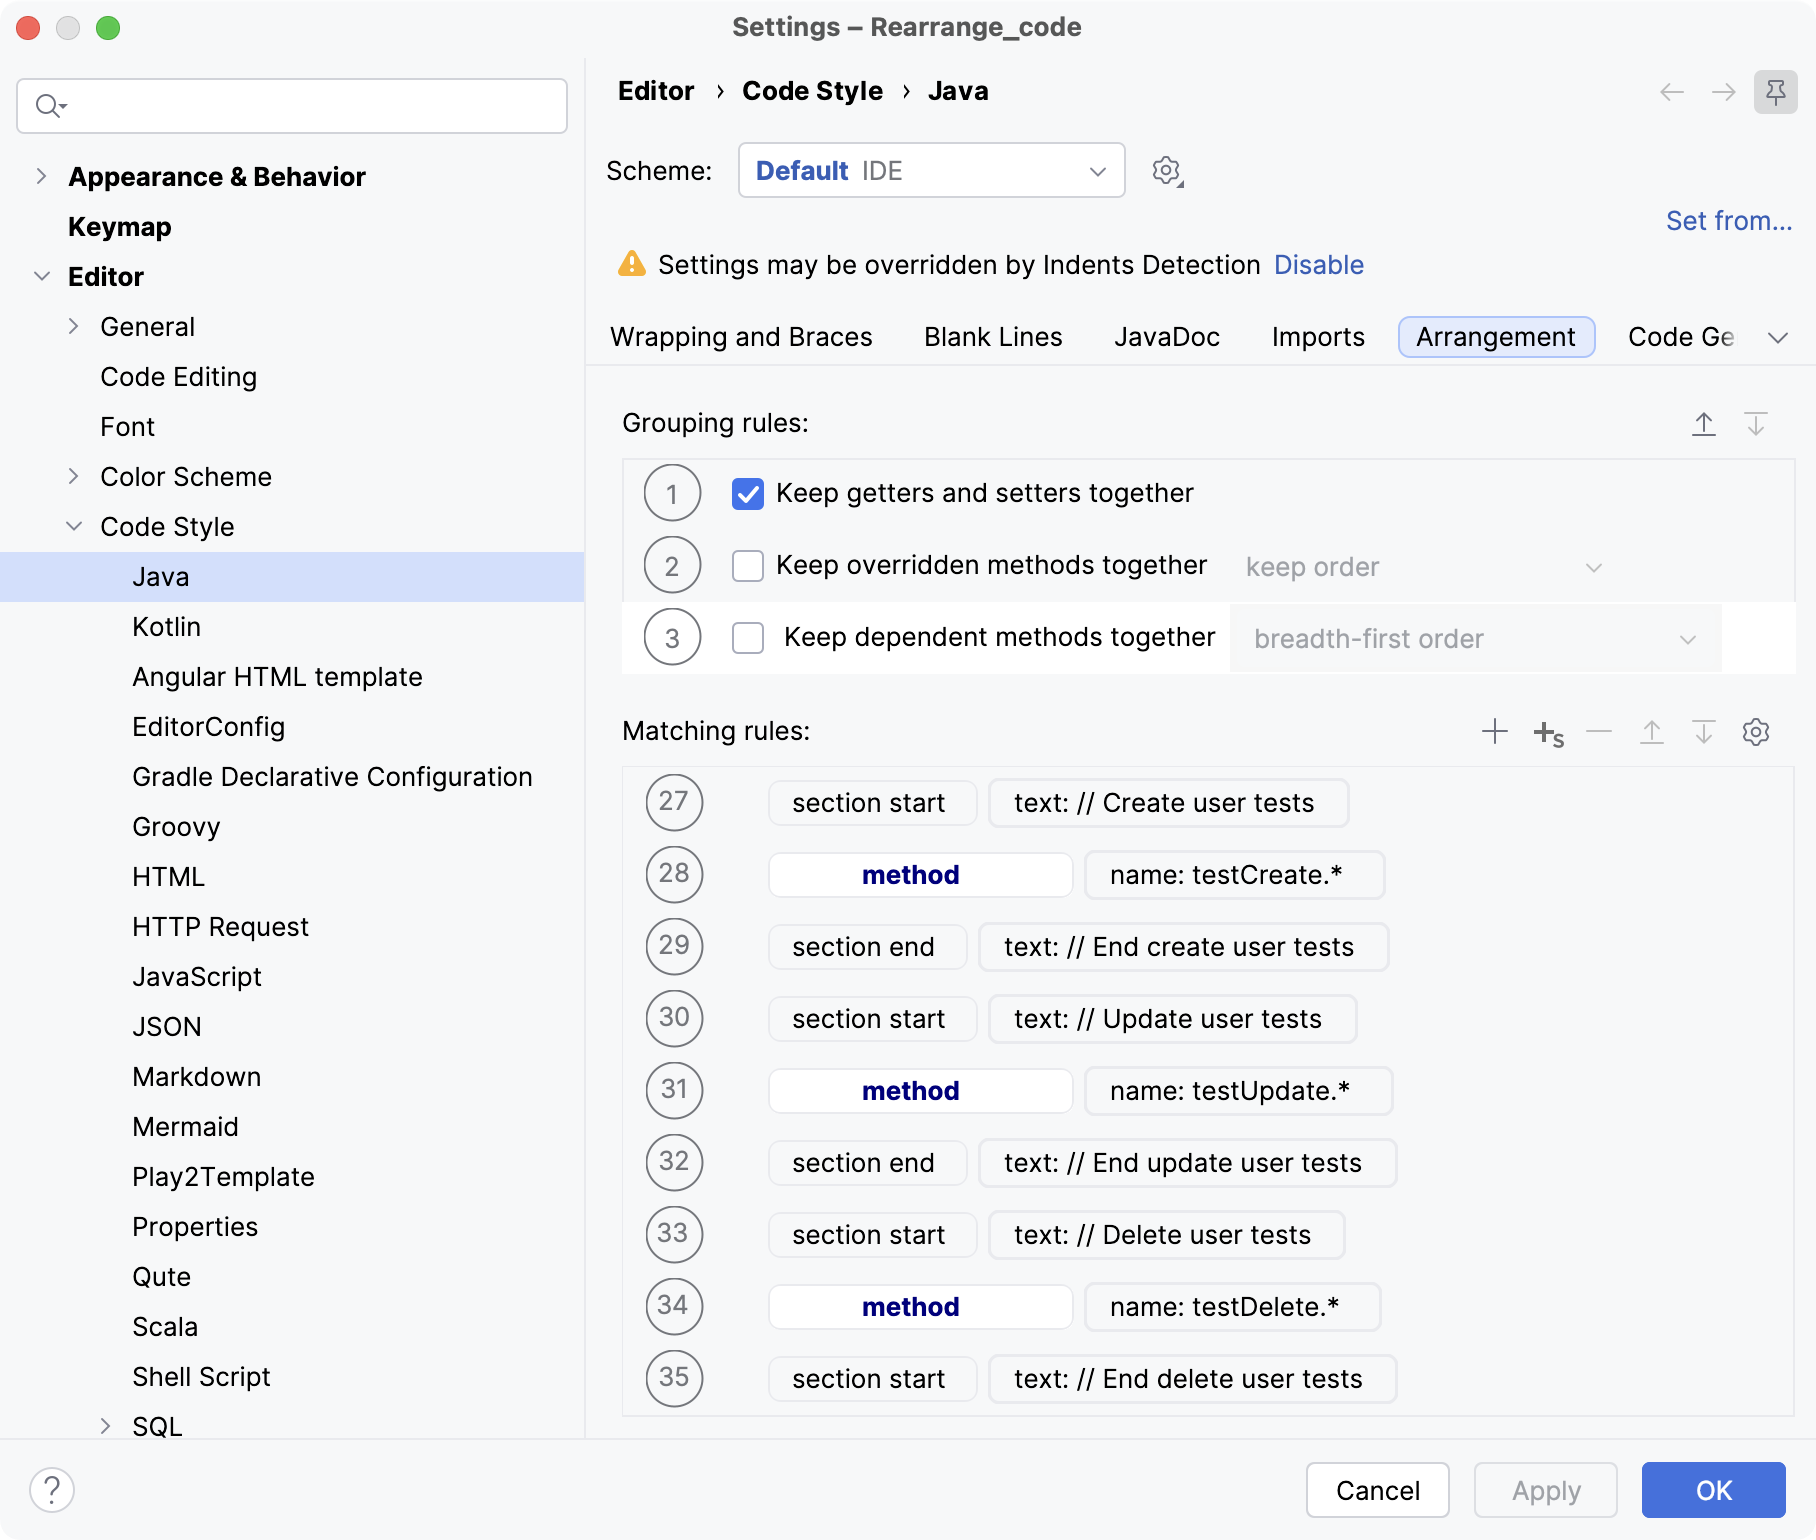
Apply the changes and close the dialog.
Select the code in the editor and go to in the main menu.
IntelliJ IDEA rearranges the test methods according to the configured rules and places them into the corresponding sections: