# Integration with application servers
By default, IntelliJ IDEA doesn't know what application servers you have installed and want to use. You need a local installation whether you want to run it locally or connect to a remotely running server.
Procedure: Enable the Jakarta EE: Application Servers plugin
This functionality relies on the Jakarta EE: Application Servers plugin, which is bundled and enabled in IntelliJ IDEA by default. If the relevant features are not available, make sure that you did not disable the plugin.
> **Note:**
> The Jakarta EE: Application Servers plugin is not available in IntelliJ IDEA without the Ultimate subscription.
1. Press `Ctrl+Alt+S` (Windows), `⌘ Comma` (macOS), `⌘ Comma` (IntelliJ IDEA Classic (macOS)), `⌘ Comma` (macOS System Shortcuts), `Ctrl+Alt+S` (XWin), `Ctrl+Alt+S` (GNOME), `Ctrl+Alt+S` (KDE), `Ctrl+Alt+S` (Emacs), `Ctrl+Alt+S` (Sublime Text), `⌘ Comma` (Sublime Text (macOS)), `Ctrl+Alt+S` (NetBeans), `Ctrl+Alt+S` (Visual Studio), `⌘ Comma` (Visual Studio (macOS)), `Ctrl+Alt+S` (Eclipse), `⌘ Comma` (Eclipse (macOS)) to open settings and then select `Plugins`.
2. Open the Installed tab, find the Jakarta EE: Application Servers plugin, and select the checkbox next to the plugin name.
Procedure: Define an application server
1. Press `Ctrl+Alt+S` (Windows), `⌘ Comma` (macOS), `⌘ Comma` (IntelliJ IDEA Classic (macOS)), `⌘ Comma` (macOS System Shortcuts), `Ctrl+Alt+S` (XWin), `Ctrl+Alt+S` (GNOME), `Ctrl+Alt+S` (KDE), `Ctrl+Alt+S` (Emacs), `Ctrl+Alt+S` (Sublime Text), `⌘ Comma` (Sublime Text (macOS)), `Ctrl+Alt+S` (NetBeans), `Ctrl+Alt+S` (Visual Studio), `⌘ Comma` (Visual Studio (macOS)), `Ctrl+Alt+S` (Eclipse), `⌘ Comma` (Eclipse (macOS)) to open settings and then select `Build, Execution, Deployment | Application Servers`.
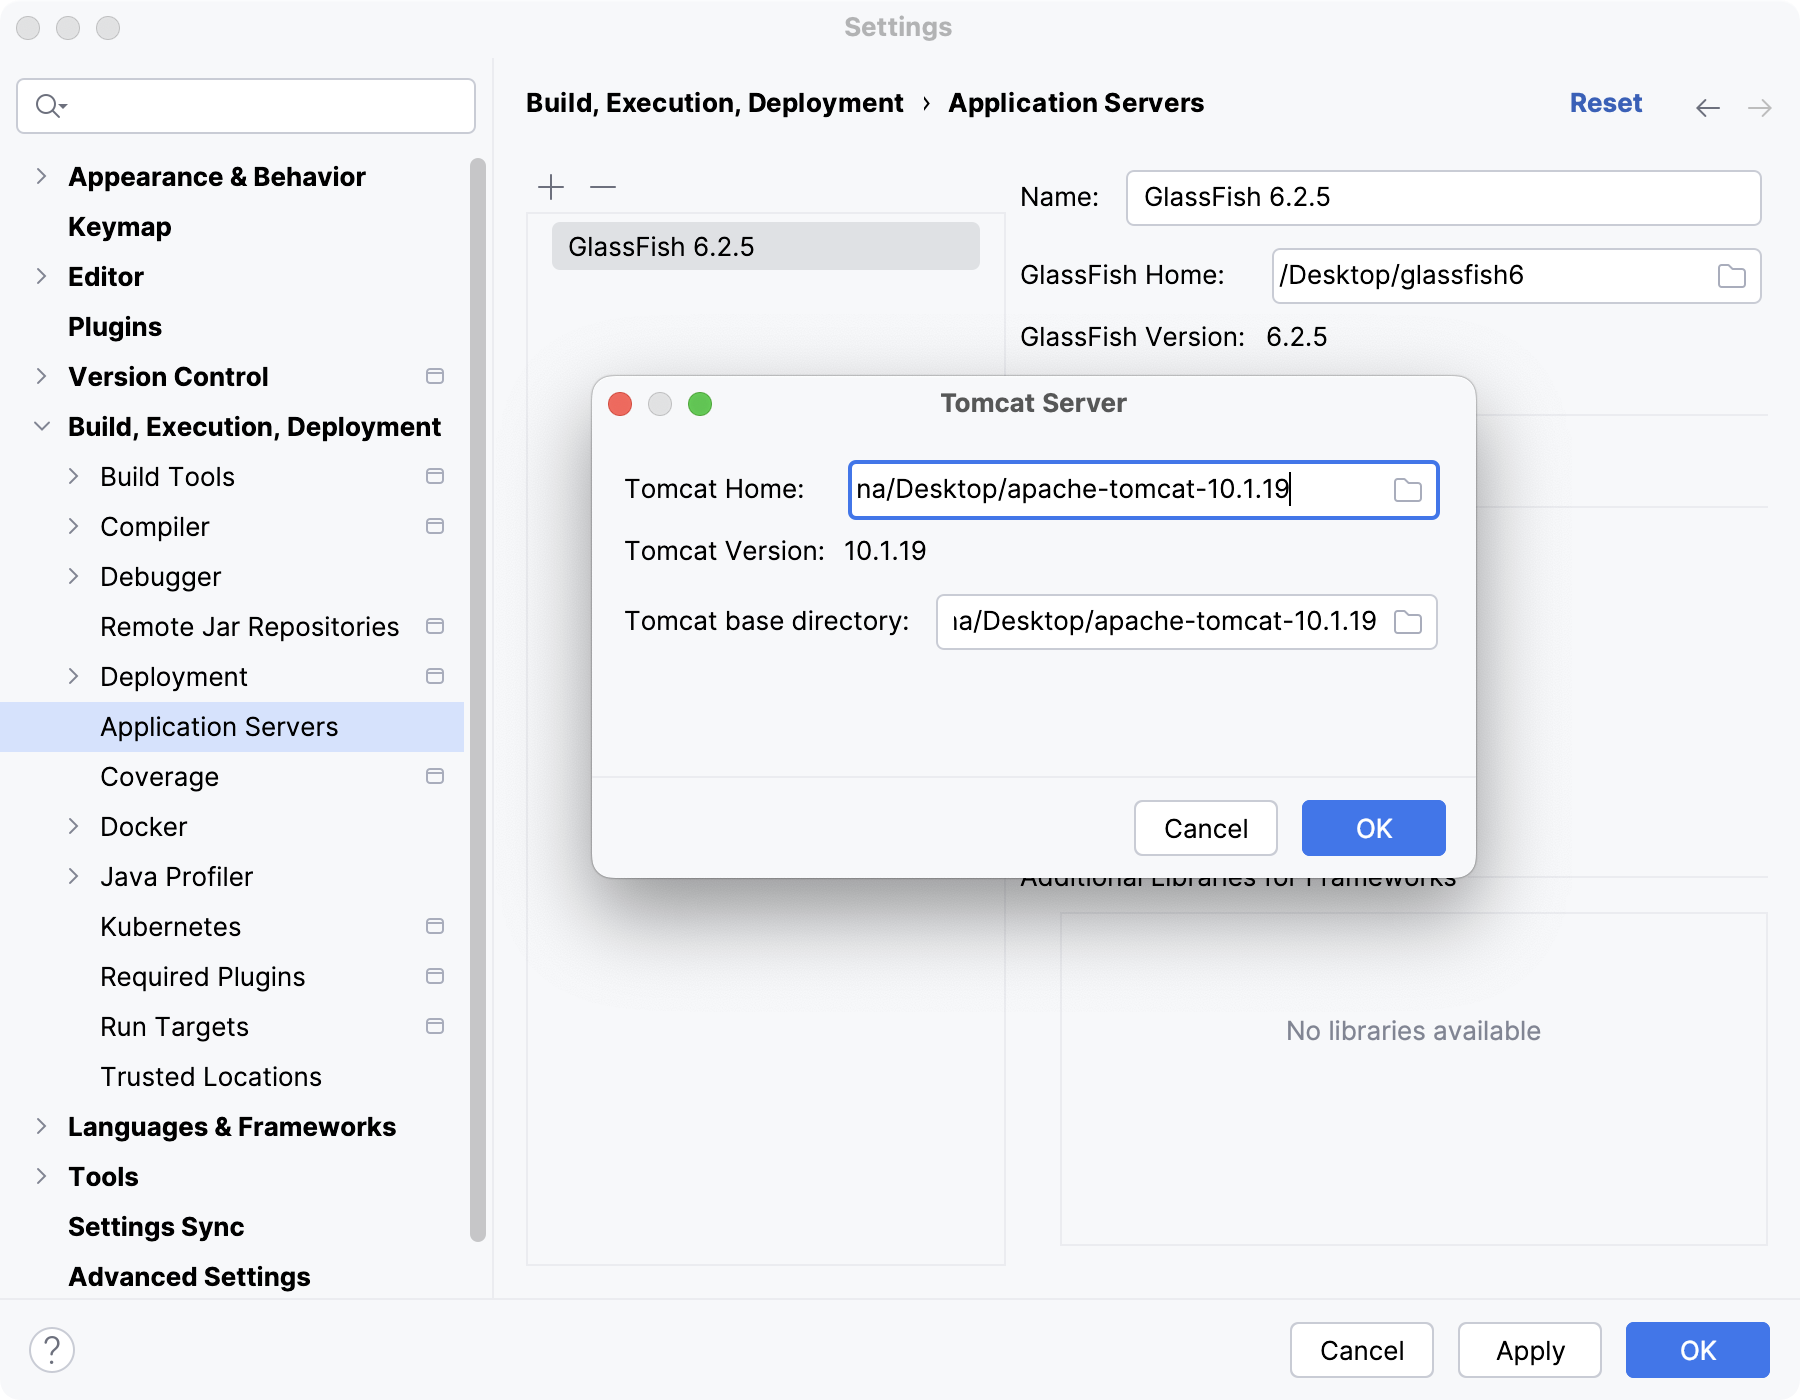
2. Click  and select the application server.
3. In the dialog that opens, specify the location of the installation directory and click OK.
If you specify the correct location, IntelliJ IDEA should detect the version and set everything up.
You can also define the application server from the [run configuration](creating-run-debug-configuration-for-application-server.html).
> **Note:**
> It is possible to add a Tomcat application server located inside [WSL](how-to-use-wsl-development-environment-in-product.html). Make sure that the `JAVA_HOME` environment variable is properly defined in either `/etc/environment` or `~/.bashrc` and set the path to the server starting with `\\wsl$`, for example:
>
>
>
>
>
>
> ```PLAINTEXT
> \\wsl$\Ubuntu\home\jsmith\apache-tomcat
> ```