# Code style schemes
The IDE comes with two pre-defined schemes: the Project scheme and the Default scheme.
* In the Project scheme, the settings that you configure apply only to your current project. These settings are stored in the `codeStyles` folder under `.idea` and are shared through VCS together with the project. The IDE creates the folder after you modify code style settings for your project.
* In the Default scheme (IDE-level scheme), the settings that you configure apply to all existing projects that have the Default code style scheme selected. These settings are stored in the `codestyles` folder under the IntelliJ IDEA [configuration directory](directories-used-by-the-ide-to-store-settings-caches-plugins-and-logs.html) and are not shared through VCS.
If you want to use the project code style scheme as your default scheme, you can copy it to the IDE level. The other way around is also possible: you can overwrite your current project settings with the settings from an IDE-level scheme and share them with other members of your team.
> **Note:**
> There can be only one Project code style scheme. On the IDE level, you can have multiple schemes. Several projects can refer to the same IDE-level code style scheme.
## Configure schemes
In IntelliJ IDEA, code style settings are language-specific, so you need to configure them for every language that you use in your project separately. You can also copy the settings from one language and apply them to another language.
Procedure: Create a new code style scheme
To create a new code style scheme, duplicate an existing IDE-level scheme and then configure the duplicate according to your needs.
1. Press `Ctrl+Alt+S` (Windows), `⌘ Comma` (macOS), `⌘ Comma` (IntelliJ IDEA Classic (macOS)), `⌘ Comma` (macOS System Shortcuts), `Ctrl+Alt+S` (XWin), `Ctrl+Alt+S` (GNOME), `Ctrl+Alt+S` (KDE), `Ctrl+Alt+S` (Emacs), `Ctrl+Alt+S` (Sublime Text), `⌘ Comma` (Sublime Text (macOS)), `Ctrl+Alt+S` (NetBeans), `Ctrl+Alt+S` (Visual Studio), `⌘ Comma` (Visual Studio (macOS)), `Ctrl+Alt+S` (Eclipse), `⌘ Comma` (Eclipse (macOS)) to open settings and then select `Editor | Code Style`.
Here you can configure general code style settings.
If you want to create a code style for a specific language, select this language from the list.
2. Select of the existing schemes stored in the IDE and click  Show Scheme Actions.
3. From the list, select Duplicate to create a copy of the scheme.
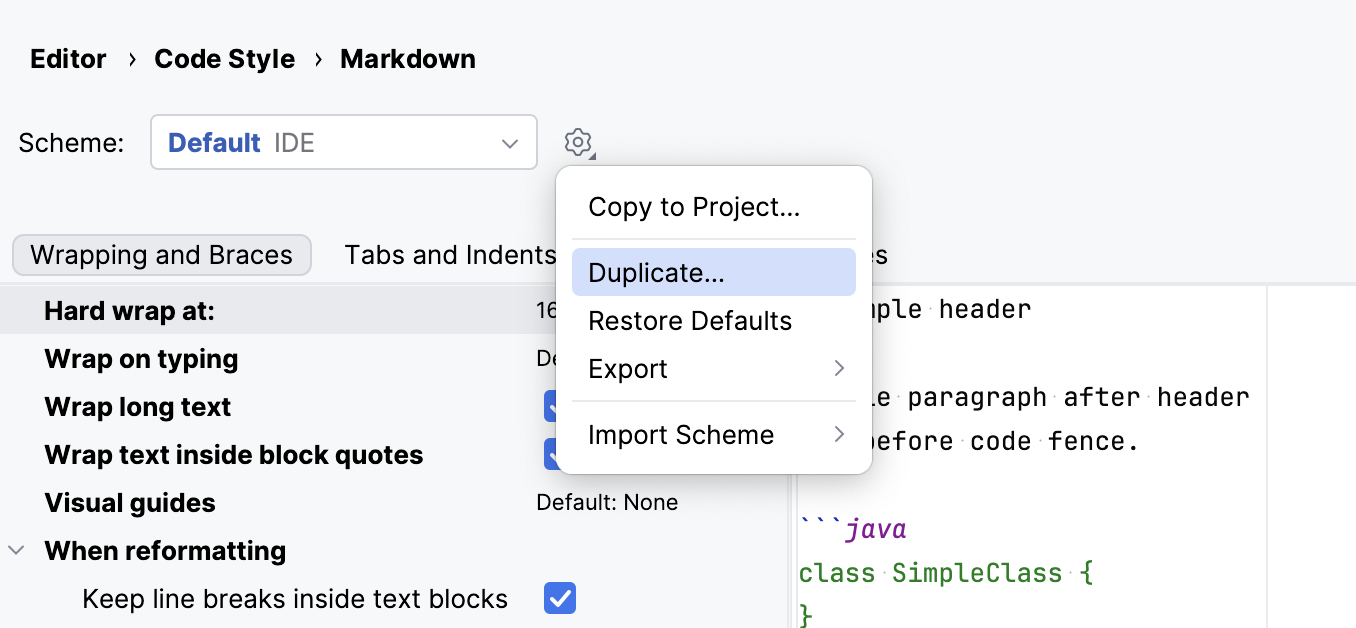
4. Name the new scheme and press `Enter` (Windows), `⏎` (macOS), `⏎` (IntelliJ IDEA Classic (macOS)), `⏎` (macOS System Shortcuts), `Enter` (XWin), `Enter` (GNOME), `Enter` (KDE), `Enter` (Emacs), `Enter` (Sublime Text), `⏎` (Sublime Text (macOS)), `Enter` (NetBeans), `Enter` (Visual Studio), `⏎` (Visual Studio (macOS)), `Enter` (Eclipse), `⏎` (Eclipse (macOS)) to save it.
After that, you can configure the settings in the new scheme.
Procedure: Configure a code style scheme
1. Press `Ctrl+Alt+S` (Windows), `⌘ Comma` (macOS), `⌘ Comma` (IntelliJ IDEA Classic (macOS)), `⌘ Comma` (macOS System Shortcuts), `Ctrl+Alt+S` (XWin), `Ctrl+Alt+S` (GNOME), `Ctrl+Alt+S` (KDE), `Ctrl+Alt+S` (Emacs), `Ctrl+Alt+S` (Sublime Text), `⌘ Comma` (Sublime Text (macOS)), `Ctrl+Alt+S` (NetBeans), `Ctrl+Alt+S` (Visual Studio), `⌘ Comma` (Visual Studio (macOS)), `Ctrl+Alt+S` (Eclipse), `⌘ Comma` (Eclipse (macOS)) to open settings and then select `Editor | Code Style`.
To configure a scheme [for new projects](configure-project-settings.html#new-default-settings), go to `File | New Projects Setup | Settings for New Projects | Editor | Code Style`.
2. Select the language for which you want to configure the code style.
3. Select the code style Scheme that you want to configure: the [Project](#project-scheme) scheme or one of the [IDE-level scheme](#default-scheme).
> **Tip:**
> Click  Show Scheme Actions next to the Default scheme and select Duplicate to create a copy of the scheme.
4. Browse through the tabs and configure code style preferences.
For a detailed description of each setting for Java, refer to [Code Style. Java](code-style-java.html).
Use the right section of the dialog to preview the changes. When you change a setting, one or several blinking areas appear in the preview area emphasizing the changes.
[Video](https://resources.jetbrains.com/help/img/idea/2026.2/code-style-settings-preview.mp4)
Procedure: Apply a predefined code style
In some languages, for example, in PHP, there are predefined coding standards that you can upload to the IDE and apply to your code.
1. Press `Ctrl+Alt+S` (Windows), `⌘ Comma` (macOS), `⌘ Comma` (IntelliJ IDEA Classic (macOS)), `⌘ Comma` (macOS System Shortcuts), `Ctrl+Alt+S` (XWin), `Ctrl+Alt+S` (GNOME), `Ctrl+Alt+S` (KDE), `Ctrl+Alt+S` (Emacs), `Ctrl+Alt+S` (Sublime Text), `⌘ Comma` (Sublime Text (macOS)), `Ctrl+Alt+S` (NetBeans), `Ctrl+Alt+S` (Visual Studio), `⌘ Comma` (Visual Studio (macOS)), `Ctrl+Alt+S` (Eclipse), `⌘ Comma` (Eclipse (macOS)) to open settings and then select `Editor | Code Style`.
To configure a scheme [for new projects](configure-project-settings.html#new-default-settings), go to `File | New Projects Setup | Settings for New Projects | Editor | Code Style`.
2. Select the language for which you want to configure the code style.
3. Select the code style Scheme that you want to modify: the [Project](#project-scheme) scheme or one of the [IDE-level scheme](#default-scheme).
4. Click the Set from link, select Predefined, and select one of the pre-configured standard from the list.
Procedure: Apply code style from another language
For most of the supported languages, you can copy code style settings from other languages or frameworks.
> **Note:**
> Copying styles between languages is not supported for C#, Visual Basic, and other .NET-specific languages.
1. Press `Ctrl+Alt+S` (Windows), `⌘ Comma` (macOS), `⌘ Comma` (IntelliJ IDEA Classic (macOS)), `⌘ Comma` (macOS System Shortcuts), `Ctrl+Alt+S` (XWin), `Ctrl+Alt+S` (GNOME), `Ctrl+Alt+S` (KDE), `Ctrl+Alt+S` (Emacs), `Ctrl+Alt+S` (Sublime Text), `⌘ Comma` (Sublime Text (macOS)), `Ctrl+Alt+S` (NetBeans), `Ctrl+Alt+S` (Visual Studio), `⌘ Comma` (Visual Studio (macOS)), `Ctrl+Alt+S` (Eclipse), `⌘ Comma` (Eclipse (macOS)) to open settings and then select `Editor | Code Style`.
To configure a scheme [for new projects](configure-project-settings.html#new-default-settings), go to `File | New Projects Setup | Settings for New Projects | Editor | Code Style` in the main menu.
2. Select the language for which you want to configure the code style.
3. Select the code style Scheme that you want to modify: the [Project](#project-scheme) scheme or one of the [IDE-level scheme](#default-scheme).
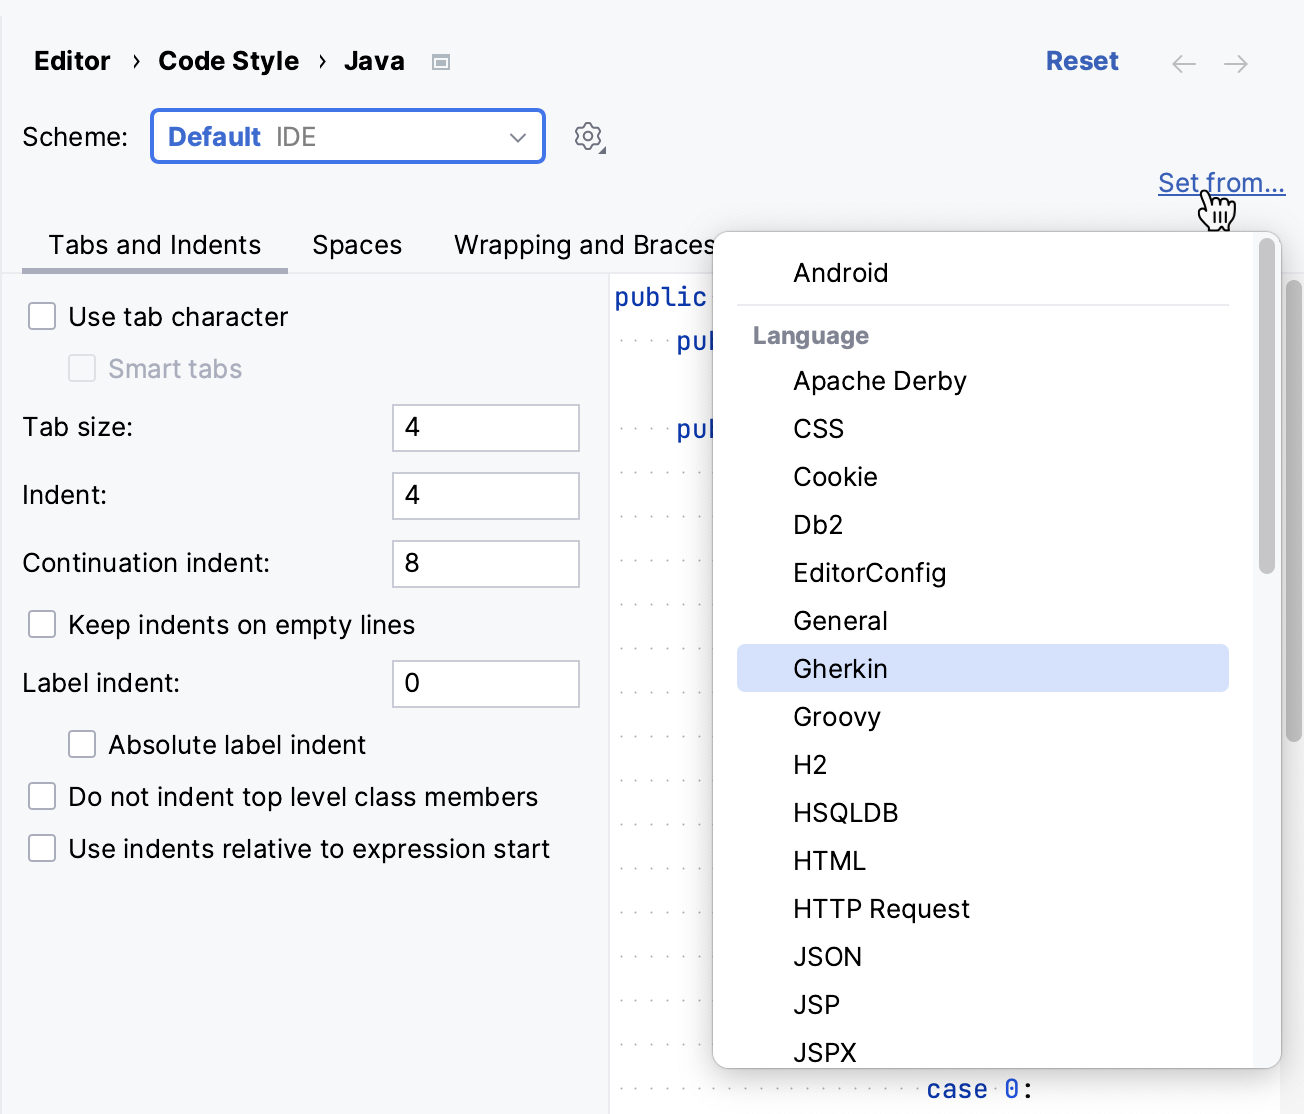
4. Click Set from in the upper-right corner.
The link is shown only if it is possible to apply code style settings from another language.
5. From the list that appears, select the language to copy the code style from.
> **Note:**
> Only applicable settings are copied from another language, other settings are left intact.
## Copy code style settings
Procedure:
1. Press `Ctrl+Alt+S` (Windows), `⌘ Comma` (macOS), `⌘ Comma` (IntelliJ IDEA Classic (macOS)), `⌘ Comma` (macOS System Shortcuts), `Ctrl+Alt+S` (XWin), `Ctrl+Alt+S` (GNOME), `Ctrl+Alt+S` (KDE), `Ctrl+Alt+S` (Emacs), `Ctrl+Alt+S` (Sublime Text), `⌘ Comma` (Sublime Text (macOS)), `Ctrl+Alt+S` (NetBeans), `Ctrl+Alt+S` (Visual Studio), `⌘ Comma` (Visual Studio (macOS)), `Ctrl+Alt+S` (Eclipse), `⌘ Comma` (Eclipse (macOS)) to open settings and then select `Editor | Code Style`.
To configure a scheme [for new projects](configure-project-settings.html#new-default-settings), go to `File | New Projects Setup | Settings for New Projects | Editor | Code Style` in the main menu.
2. Select the code style Scheme that you want to copy: the [Project](#project-scheme) scheme or one of the [IDE-level scheme](#default-scheme).
3. Click the  Show Scheme Actions icon and select one of the following options:
* Copy to IDE… (for the Project scheme): copy the selected scheme to the IDE level. IntelliJ IDEA saves the new code style with the specified name to the IntelliJ IDEA home directory.
* Copy to Project… (for IDE-level schemes): overwrite your current project settings with the settings from the selected IDE-level profile.
* Duplicate (for IDE-level schemes): create a copy of the selected IDE scheme on the same level.
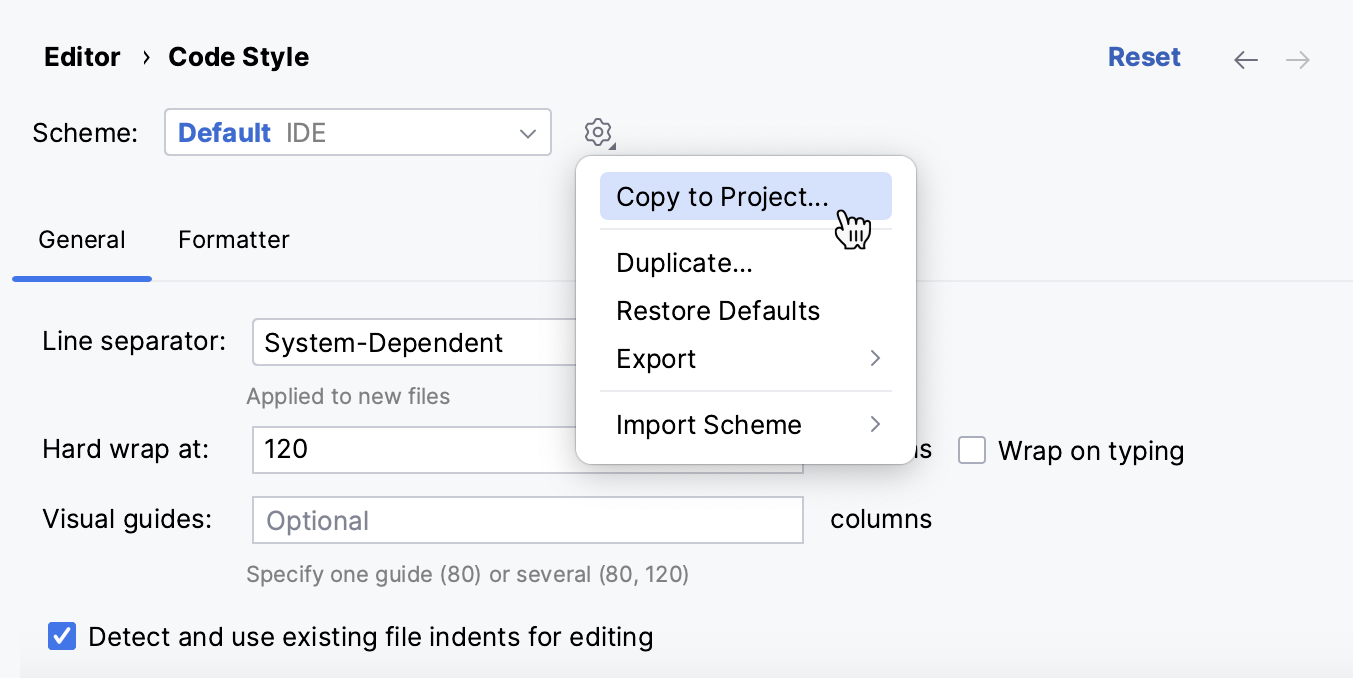
4. In the Scheme field, type the name of the new scheme and press `Enter` (Windows), `⏎` (macOS), `⏎` (IntelliJ IDEA Classic (macOS)), `⏎` (macOS System Shortcuts), `Enter` (XWin), `Enter` (GNOME), `Enter` (KDE), `Enter` (Emacs), `Enter` (Sublime Text), `⏎` (Sublime Text (macOS)), `Enter` (NetBeans), `Enter` (Visual Studio), `⏎` (Visual Studio (macOS)), `Enter` (Eclipse), `⏎` (Eclipse (macOS)) to save the changes.
## Import and export schemes
Procedure: Import a scheme
Out of the box, IntelliJ IDEA allows you to import settings in the IntelliJ IDEA code style XML or Eclipse XML Profile format.
1. Press `Ctrl+Alt+S` (Windows), `⌘ Comma` (macOS), `⌘ Comma` (IntelliJ IDEA Classic (macOS)), `⌘ Comma` (macOS System Shortcuts), `Ctrl+Alt+S` (XWin), `Ctrl+Alt+S` (GNOME), `Ctrl+Alt+S` (KDE), `Ctrl+Alt+S` (Emacs), `Ctrl+Alt+S` (Sublime Text), `⌘ Comma` (Sublime Text (macOS)), `Ctrl+Alt+S` (NetBeans), `Ctrl+Alt+S` (Visual Studio), `⌘ Comma` (Visual Studio (macOS)), `Ctrl+Alt+S` (Eclipse), `⌘ Comma` (Eclipse (macOS)) to open settings and then select `Editor | Code Style`.
2. Click  Show Scheme Actions and select Import Scheme. Then select the necessary format.
3. In the dialog that opens, select the file with the settings and click Open.
4. Rename the scheme if necessary and select Current scheme to apply the settings from the scheme to your code.
Procedure: Export a scheme
You can export both project-level and IDE-level schemes in the IntelliJ IDEA code style XML , Eclipse XML Profile, or EditorConfig format (if the [EditorConfig](editorconfig.html) plugin is enabled).
1. Press `Ctrl+Alt+S` (Windows), `⌘ Comma` (macOS), `⌘ Comma` (IntelliJ IDEA Classic (macOS)), `⌘ Comma` (macOS System Shortcuts), `Ctrl+Alt+S` (XWin), `Ctrl+Alt+S` (GNOME), `Ctrl+Alt+S` (KDE), `Ctrl+Alt+S` (Emacs), `Ctrl+Alt+S` (Sublime Text), `⌘ Comma` (Sublime Text (macOS)), `Ctrl+Alt+S` (NetBeans), `Ctrl+Alt+S` (Visual Studio), `⌘ Comma` (Visual Studio (macOS)), `Ctrl+Alt+S` (Eclipse), `⌘ Comma` (Eclipse (macOS)) to open settings and then select `Editor | Code Style`.
2. Select the code style Scheme that you want to export: the [Project](#project-scheme) scheme or one of the [IDE-level scheme](#default-scheme).
3. Click  Show Scheme Actions, select Export, select the necessary format, and select the directory to which you want to export your code style settings.
## Delete schemes
In IntelliJ IDEA, you cannot delete the bundled Project (project level) and Default (IDE level) code style schemes. You can delete [copies](#create-copy) of the schemes if you have any. These copies are always IDE-level since you cannot have multiple project schemes.
Procedure:
1. Press `Ctrl+Alt+S` (Windows), `⌘ Comma` (macOS), `⌘ Comma` (IntelliJ IDEA Classic (macOS)), `⌘ Comma` (macOS System Shortcuts), `Ctrl+Alt+S` (XWin), `Ctrl+Alt+S` (GNOME), `Ctrl+Alt+S` (KDE), `Ctrl+Alt+S` (Emacs), `Ctrl+Alt+S` (Sublime Text), `⌘ Comma` (Sublime Text (macOS)), `Ctrl+Alt+S` (NetBeans), `Ctrl+Alt+S` (Visual Studio), `⌘ Comma` (Visual Studio (macOS)), `Ctrl+Alt+S` (Eclipse), `⌘ Comma` (Eclipse (macOS)) to open settings and then select `Editor | Code Style`.
2. From the Scheme list, select the scheme that you want to delete.
3. Click  Show Scheme Actions and select Delete.
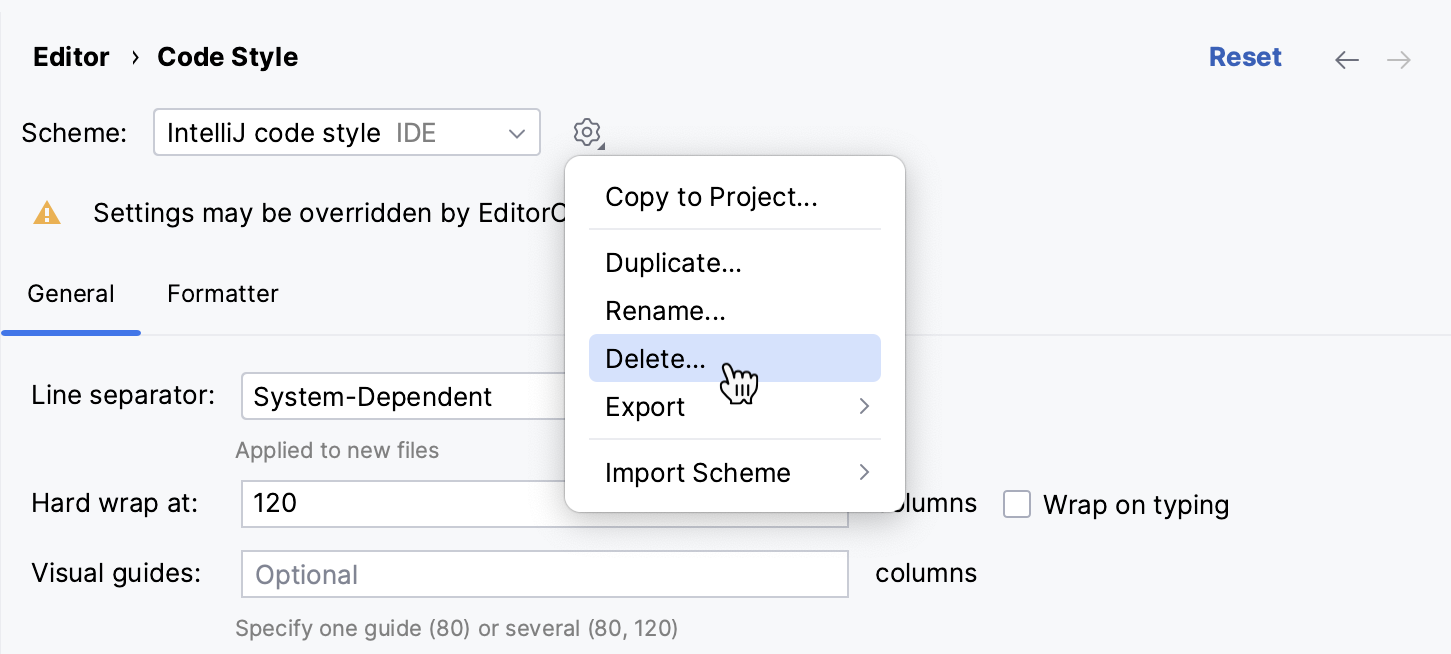
4. In the popup that opens, confirm the action by clicking Delete.
## See also
### Procedures
[EditorConfig](editorconfig.html) [Write and edit source code](working-with-source-code.html) [Reformat code](reformat-and-rearrange-code.html)
### Reference
[Code Style](settings-code-style.html) [Settings | Code Style | Java](code-style-java.html)